Advertisement
- 1 FEATURES AND TECHNICAL SPECS
- 2 Attention Points
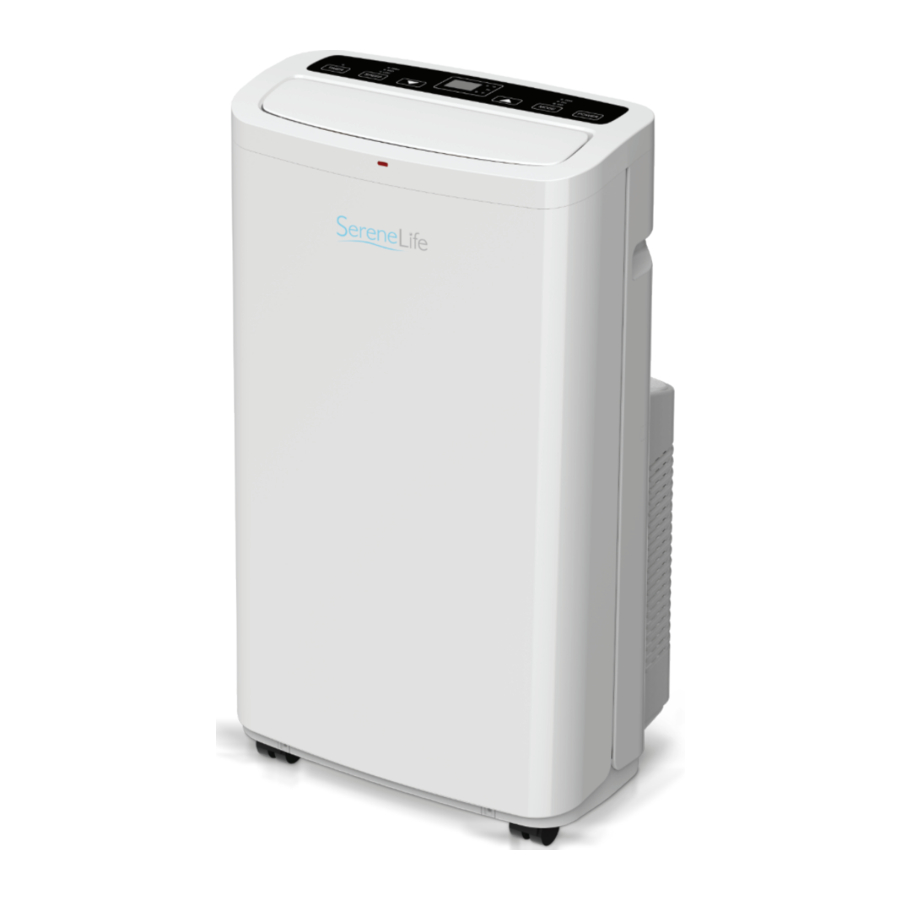
- 3 Parts
- 4 Control Panel
- 5 Operation Method
- 6 Installation
- 7 Drainage Operation
- 8 Maintenance
- 9 WiFi Operation Instruction
- 10 Troubleshooting Guide
- 11 Register Product
- 12 Documents / Resources
FEATURES AND TECHNICAL SPECS
Features
- Dehumidification: Removes up to 50 pints of moisture per 24 hours, with a Continuous Drain Option for extended, unattended use.
- Self-Evaporation Technology: Helps reduce water drainage requirements.
- Safety: Metal control box to prevent fire or explosion risks.
- Compressor: Rotary compressor for efficient cooling.
- Portability: Universal castors allow easy movement.
- Wifi Function: Supports remote control for convenient operation.
- Modes: 3 operational modes — Cooling, Dehumidifier, and Fan.
- Energy-Efficient: Low power consumption and low noise motor (57 dBA).
- User-Friendly: Features push-button controls with an LED display for easy adjustments of temperature, fan speed, and timer settings.
What's in the Box
- AC Unit
- Exhaust Hose
- Window Installation Plate
- Remote Control
Technical Specs
- Power Supply: 115V/60Hz
- Rated Power: 1220W
- Refrigerant Type: R32
- Cooling Capacity:
- ASHRAE: 14,000 Btu/h
- DOE: 10,000 Btu/h
- Coverage Area: Up to 500 sq. ft.
- Air Flow: 400 cubic meters per hour
- Moisture Removal (Dehumidifier): 1.5 liters per hour
- Fan Speed: Low, Medium, and High settings
- Temperature Display: Switchable between °C/°F
- Timer: Adjustable up to 24 hours
- Noise Level: 57 dBA
- Exhaust Hose Max Length: 59 inches
- Window Kit: Adjustable from 26.6 to 49.7 inches
- Product Dimensions: L x W x H: 32'' x 18.5'' x 15.4''
Your safety and the safety of others are very important. We have provided many important safety messages in this manual and on your appliance.
Always read and follow all safety messages.
 | This symbol indicates that this appliance uses a flammable refrigerant. If the refrigerant leaks and comes into contact with an external ignition source, there is a risk of fire. |
 | This symbol indicates that the operation manual should be read carefully. |
 | This symbol indicates that service personnel should handle this equipment with reference to the installation manual. |
 | This symbol indicates that information is available, such as the operating manual or installation manual. |

![]() FIRE HAZARD
FIRE HAZARD
READ THIS MANUAL CAREFULLY BEFORE USING THE APPLIANCE
R32 refrigerant gas complies with European environmental directives.
This appliance contains approximately 11.3 oz of refrigerant gas.
The appliance must be installed, operated, and stored in a room with a floor area larger than 43 square feet.
Attention Points
For your health and safety, please read the following instructions carefully before using the unit.
Requirements:
- Place the unit on a at, dry surface.
- Keep the air conditioner at least 20 inches (50 cm) away from surrounding objects.
- Ensure the power supply complies with safety specifications, includes proper grounding, and is securely connected.
- After installation, ensure the plug is intact and firmly inserted into the socket.
- Keep the air inlet and outlet unobstructed.
- If the power cord is damaged, it must be replaced by qualified personnel from the manufacturer's maintenance department or a similar authorized service center.
- Keep the unit away from flammable materials such as gasoline, stoves, or other heat sources.
- Arrange wires neatly to avoid tripping hazards or accidental disconnection.
- Turn off the unit and unplug it immediately if the power cord is damaged. Seek professional maintenance assistance promptly.
- This appliance can be operated by children aged 8 years and above, or individuals with reduced physical, sensory, or mental capabilities, only under proper supervision or instruction regarding safe usage and potential hazards.
- Children must not play with the appliance. Cleaning and maintenance must not be performed by children without supervision.
Prohibitions:
- This air conditioner is for household use only and should not be used for other purposes.
- Do not install the unit in damp areas, such as laundry rooms or locations with excessive moisture.
- Avoid turning the unit on or off by plugging or unplugging the power cord.
- Do not place objects on the unit or insert items into the air inlet or outlet.
- Do not use insecticides, flammable sprays, or other hazardous substances near the air conditioner.
- Do not allow oil or water to come into contact with the unit.
- Clean the unit with a semi-damp, soft cloth only. Do not use water, benzene, gasoline, alcohol, or chemical solvents. If cleaning is needed, use a neutral detergent.
Suggestions:
For optimal operation:
- Cooling mode: Do not use the unit if the ambient temperature exceeds 104°F (40°C).
- Heating mode: Do not use the unit if the ambient temperature is below 44.6°F (7°C).
Parts


Parts Name:
- Control Panel
- Wind Guide Bar
- Exhaust Hose Assembly
- Casters
- Handle
- Air Intake Grille
- Power Cord
- Filter
- Air Outlet
- Power Cord Buckle
- Drainage Outlet
Control Panel

Notes: After shutting down the unit in cooling or heating mode, wait at least 3 minutes before restarting.
Panel Description
- Buttons and Display
- POWER: Turns the unit ON or OFF.
- MODE: Selects Cool, Fan, or Dry mode. Indicator lights display the selected mode.
- UP/DOWN:
- Adjusts the temperature in Cool mode.
- Adjusts the timer in Timing mode.
- Press UP and DOWN simultaneously to switch between Fahrenheit (°F) and Celsius (°C).
- SPEED: Adjusts fan speed (Low, Medium, High).
The corresponding indicator light will illuminate. - TIMER: Activates the timer setting mode.
- 88 DISPLAY:
- In Cool mode: Displays the set temperature.
- In Fan and Dry modes: Displays the room temperature.
- "°C" indicates Celsius, and "°F" indicates Fahrenheit.
Remote Control Instructions

- POWER: Turns the unit ON or OFF.
- MODE: Selects Cool, Fan, or Dry mode.
- UP/DOWN: Adjusts temperature and timer settings.
- FAN: Adjusts fan speed (Low, Medium, High).
- TIMER: Sets the timer.
- SWING: Controls the air outlet's oscillation.
- °C/°F: Toggles between Celsius and Fahrenheit.
Multiple Protection Functions
- Frost Protection Function:
In Cool, Dry, or Energy-Saving modes, the unit will enter protection mode if the exhaust pipe temperature drops too low. It will resume normal operation once the temperature stabilizes. - Full Water Protection Function:
- If water in the tray exceeds the warning level, the unit will sound an alarm, and the display will show "FL".
- To resolve this, connect a drainage pipe to the outlet and empty the water into a drainage area. Once emptied, the unit will resume normal operation.
- Compressor Protection Function:
To protect the compressor's lifespan, there is a 3-minute delay before restarting after the compressor is shut down.
Operation Method
Time Setting
- Setting the Timer for Shutdown
- While the machine is running, press the Timer key. The timer LED will light up, and the "88" display will ash "0" for ve seconds.
- During this time, press the Up or Down keys to adjust the shutdown time from 1 hour to 24 hours. Each press increases or decreases the time by 1 hour.
- Once the set time is reached, the machine will shut down automatically.
- Setting the Timer for Start-Up
- While the machine is in standby mode, press the Timer key. The timer LED will light up, and the "88" display will ash "0" for ve seconds.
- Use the Up or Down keys to adjust the start-up time, following the same procedure as for the shutdown timer.
- You can also select the working mode (cooling, heating, etc.) and adjust the temperature if applicable. Once the set time is reached, the machine will start automatically and operate in the selected mode.
- Changing the Timer Setting
- While the timer is active, press the Timer key to display the remaining time. The "88" display will ash.
- During this time, press the Up or Down keys to adjust the remaining time.
- If you press the Timer key again while the display is ashing, the timer setting will be canceled.
Operation Modes
- Cool Mode
- Press the Mode key to select Cool Mode while the machine is running or set to start-up mode. The corresponding LED will light up.
- Adjust the temperature using the Up or Down keys. The temperature can be set between 60°F and 86°F (16°C and 30°C), increasing or decreasing by 1°F or 1°C with each press.
- Use the Fan Speed key to select the desired fan speed (Low, Medium, or High).
- To enable Sleep Mode, press and hold the Up and Timer keys simultaneously. This forces both fans to operate at low speed. Press the same key combination again or change the mode to cancel Sleep Mode.
- Dry Mode
Press the Mode key to select Dry Mode while the machine is running or set to start-up mode. The corresponding indicator light will turn on.
Note: The temperature and fan speed cannot be adjusted in Dry Mode. - Fan Mode
- Press the Mode key to select Fan Mode while the machine is running or set to start-up mode. The corresponding indicator light will turn on.
- Use the Fan Speed key to select the desired fan speed (Low, Medium, or High).
Note: The temperature cannot be adjusted in Fan Mode.

- If the Full Water indicator is displayed, the machine will stop working. Drain the water before restarting the machine.
- The exhaust duct is not required when using Dry Mode or Fan Mode.
- If your room is exposed to direct sunlight, close the curtains for optimal cooling performance.
Installation
- Selecting the Installation Location

- Install the machine on a at, dry surface.
- Ensure at least 20 inches (50 cm) of clearance around the machine for proper air ow.
- The optimal installation distance is:
- 20 inches (50 cm) from the back of the machine to the wall.
- 36 inches (90 cm) from the air outlet to the floor.

Refer to Figure 5 for an illustration of the recommended installation setup.
- Assembly Method of Exhaust Pipe
- Connect the Exhaust Pipe Assembly:
Attach the exhaust pipe to the round joint as shown in Figure 6.

- Attach to the Machine:
Fix the circular end of the exhaust pipe assembly to the air outlet of the machine, ensuring alignment with the direction shown in Figure 7.

- Connect to the Window Sealing Plate:
Secure one end of the oblate joint on the exhaust pipe assembly to the window sealing plate. - Install the Window Seal:
Fit the window seal to the nearest window. Ensure there are no obstacles within 20 inches (50 cm) outside the window to allow smooth exhaust ow.
![]()
- The length of the exhaust duct should be between 24 inches (60 cm) and 67 inches (170 cm), including the adapter.
- It is recommended to use the shortest possible length to optimize energy efficiency.
- The exhaust duct is specifically designed for this air conditioner model. Do not use exhaust pipes of di erent lengths or materials, as this may cause operational failure.
- Connect the Exhaust Pipe Assembly:


Note: The exhaust pipe and installation method described above are part of the standard configuration provided by the company. Actual components may vary slightly.
- Installation of Window Sealing Plate
The window sealing panels are designed to t most horizontal or vertical windows. Follow these steps to install the plate:- Measure the Window Size: Accurately measure the width or height of your window.
- Adjust the Window Sealing Plate: Extend or shorten the sealing plate to match the measured window size.
- Secure the Sealing Plate: Once the length is adjusted, secure the sealing plate using the provided screws to x it in place.

- Secure the Sealing Plate to the Window: Install the adjusted and fixed window sealing plate onto the window frame. Ensure it is positioned firmly and securely.
- Attach the Exhaust Pipe Assembly:
- Connect the at end of the exhaust nozzle to the window sealing plate assembly.
- Use screws to x the exhaust pipe assembly securely to the sealing plate for a tight connection.
- Installation Diagram
Ensure all components are aligned as shown in the diagram for efficient operation.


Drainage Operation
- Condensation in Wet Weather
- During refrigeration or drying mode in humid conditions, the unit may produce excess condensed water.
- When the water level in the water tray reaches a certain limit, the unit will activate a full water alarm, stop the compressor, and display a "Full Water" indicator on the control panel.
- An alarm will sound until the water level drops below the warning threshold or the water is manually drained. Once drained, the unit will resume normal operation.
- How to Drain Water
- When the full water alarm is triggered, promptly drain the water:
- Move the unit to an area where you can safely drain water (e.g., a toilet or sewer).
- Unscrew the nut on the drainage outlet and remove the water plug.
- Allow the water to fully drain.
- Reinstall the water plug and nut securely before using the unit again.
- When the full water alarm is triggered, promptly drain the water:
Note:
When moving the machine to drain water, handle it carefully to prevent water spillage from inside the unit.

Maintenance
Cleaning
Before cleaning, ensure the unit is turned off and unplugged from the power source.
- Cleaning the Surface: Wipe the exterior of the unit with a duster or a soft, damp cloth. Avoid using harsh chemical agents such as benzene, alcohol, or gasoline, as these can damage the surface or compromise the machine's overall integrity.
- Cleaning the Filter Screen:
- A blocked filter can impede air circulation and reduce the efficiency of the air conditioner.
- For optimal performance, it is recommended to clean the filter every two weeks during longterm use.
Steps to Clean the Filter:
- Remove the Filter: Pull out the filter in the direction indicated in Figure 13.
![]()
- Clean the Filter:
- Submerge the filter in warm water (approximately 40°C/104°F) mixed with a neutral detergent.
- Gently clean the filter to remove dust and debris.
- Dry the Filter: Allow the filter to dry completely in a shaded area. Avoid direct sunlight to prevent damage.

Note: Regular maintenance of the filter ensures better air circulation and prolongs the life of your air conditioner.
Post-Season Preservation
When the air conditioner will not be used for an extended period, such as after the cooling season, follow these maintenance steps to ensure its longevity:
- Drain Water
- Fully drain the water from the internal water tray through the drain outlet.
- During drainage, tilt the unit backward slowly to ensure all water is removed.
- Dry the Unit
- Set the air conditioner to Air Supply Mode.
- Press and hold the Wind Speed button for 5 seconds until the downdraft fan begins working.
- Let the unit operate in this mode for 2–3 hours to dry the internal components and prevent mildew growth.
- Power Off and Store Components
- Turn off the unit and unplug the power cord.
- Wrap the cord neatly and secure it in place.
- Detach the exhaust pipe and store it safely.
- Protect and Store the Unit
- Cover the air conditioner with a plastic bag to protect it from dust.
- Place the unit in a dry location.
- Remove the Remote Control Batteries: Remove the batteries from the remote control to prevent leakage. Store them in a cool, dry place.
WiFi Operation Instruction
Download and Install the App
Use your phone to scan the QR code below or search for "Smart Life" in your device's application store to download and install the app.


Registration
- Creating an Account:
- If you don't have an account, you can register a new one or log in with a verification code sent via SMS.
- Follow these steps to complete the registration process:
- Steps to Register:
- Open the app and tap to navigate to the Registration Page.
- The system will automatically detect your country/area. You can also manually select your country code.
- Enter your mobile phone number or email address and tap Next (refer to Picture 1).
![]()
- Verification Process:
- For Mobile Number: Enter the verification code sent to your phone via SMS (see Picture 2). Set a password, then tap Con rm to complete the registration.
![]()
- For Email: Enter a password (refer to Picture 4) and tap Con rm to finish registration.
![]()
- For Mobile Number: Enter the verification code sent to your phone via SMS (see Picture 2). Set a password, then tap Con rm to complete the registration.


SIGN IN INSTRUCTIONS
Sign In with Username and Password
- The system will automatically detect your country/area. You can also manually select your country code.
- Enter your registered mobile number or email address and tap Next.
- Enter your registered password and tap Login to sign in.
Sign In with Social Media Account
If you have Facebook or Twitter installed on your smartphone, tap the corresponding icon to sign in through social network authentication.
Sign In with Verification Code via SMS
- Tap "Sign in with SMS verification" to go to the new page.
- The system will automatically detect your country/area.
You can also manually select your country code. - Enter your mobile number and tap Get to receive a verification message.
- Enter the verification code from the message and tap Login to access the app.
Forgot Password
To recover your password, follow these steps:
- Tap "Forgot Password" (refer to Picture 1).
![]()
- The system will automatically detect your country/area. You can also manually select your country code. Enter your mobile number or email address, then tap Next.
![]()
- Enter the verification code sent to your mobile number or email (refer to Picture 3), create a new password, and tap Confirm to finish.
![]()


Connect Device
- Plug in the PAC (Portable Air Conditioner); it will enter Standby Mode.
![]()
Do not turn on the unit until the Wi-Fi connection is successful.
![]()
- Press and hold the SPEED button for 3 seconds to enter Wi-Fi connection mode.
Note: The SPEED button also serves as the reset button.
![]()
- Open the app, tap the "+" icon in the upper-right corner to enter the network connection page (see image below).
![]()
- There are two network connection methods: Normal Mode (default) and AP Mode.
![]()
- To switch to AP Mode, tap the top-right corner of the page.
- Note: The indicator light will ash rapidly in Normal Mode or slowly in AP Mode.


For Normal Mode
- Ensure that the device's indicator light is ashing rapidly (2 times per second). If it is, tap to proceed to the next step.
![]()
- If the indicator light is not ashing rapidly, tap "How to set the indicator light to ash rapidly" to view the operation instructions.
- Select the Wi-Fi network that the device will connect to, enter the password, and tap Con rm to initiate the network connection process.
![]()
- If you choose Normal Mode to connect the device to the network, the app will follow the steps shown in Picture 3.
![]()
- Once the network connection is successful, the app will display the screen shown in Picture 4.
![]()


For AP Mode
- Ensure the device's indicator light is ashing slowly (1 time every 3 seconds). If it is, tap to proceed to the next step.
![]()
- If the indicator light is not ashing slowly, tap "How to set the indicator light to ash slowly" to view the operation instructions.
- Select the Wi-Fi network the device will connect to, enter the password, and tap Con rm to start the network connection process.
![]()
- After connecting with the hotspot, return to the network connection page to continue the connection process. The app will follow the steps shown in Picture 3.
![]()
- Once the network connection is successful, the app will display the screen shown in Picture 4.
![]()


Note:
If your app interface appears as shown in Picture 5, it means the network connection failed. You can try connecting again or view help for troubleshooting.

CONTROL DEVICE
After successfully configuring the devices, the smart device will appear on the home page. Tap to enter its control page.

Note:
- When the device is online, it supports shortcut operations.
- When the device is offline, it will display "Offline" and can still be controlled.
Smart Life Scenario
The Smart Life scenario allows devices to perform corresponding actions based on various conditions.

The main conditions include:
- Temperature
- Humidity
- Weather
- PM2.5
- Air quality
- Sunrise & sunset times
- Device actions (e.g., turn on/off)
Personal Profile
The Profile page allows users to manage personal information. Key features include:

- Personal information
- Smart Life scenarios
- Device Sharing: Displays information about shared devices
- Message Center
- FAQs
- Option to submit feedback
- About
Profile
The Profile page displays personal account information. Here, you can:

- Change your login password
- Bind your mobile number
- Set a pattern unlock for the app
Profile Pattern Unlock
Tap "Pattern Unlock" to set your pattern. After setup, you will need to enter your pattern to use the app.

Profile - Device Sharing
Add Sharing:
As shown in the left picture, users can input a new member's mobile number to share the device with them. The new member can then control the shared device.

Sharing Sent List:
This list shows all the members who have been added by your account. You can delete a member or remove sharing by swiping left.

Sharing Received:
This list displays all devices shared with your account. You can delete the sharing by swiping left.

Message Center
Includes notifications for new devices and new sharing.

Feedback
This entry allows users to submit their feedback.

App's Other Related Information Includes:

- Rate Us: Tap "Rate Us" to be redirected to the corresponding app store where you can rate the app.
- App Version Number:
The version number of the app is displayed here.
Note:
- The pictures used in this Wi-Fi section are based on the iOS app interface. The Android version may di er slightly.
- Product and software updates occur periodically. The app version and interface displayed in this manual are for example purposes only. Further changes may occur without notification.
Amazon Echo Operation Instructions
What You Need to Get Started
Before using Echo to control your smart devices, ensure the following conditions are met:
- A stable Wi-Fi network that can access Amazon's server.
- An Echo device (e.g., Echo, Echo Tap, or Echo Dot).
- An Amazon account.
- Smart Life app and an associated account.
- Smart devices.
Add Devices in Smart Life App
(Refer to App Instructions)
Skip this part if you've already added devices to your Smart Life account, and the device names are easily recognizable.
- Download Smart Life App (Refer to App Instructions)
Scan the QR code below to download the Smart Life app. You can also search for "Smart Life" in the App Store or Google Play to install the app.

- Register a Smart Life Account and Sign In
Open the Smart Life App, tap "Register" to create an account, then sign in. - Add Device and Change Device Name (Refer to App Instructions)
Sign in to your Smart Life account, add the device, then change the device name to something easily recognizable (e.g., "Bedroom Air Conditioner").
Set Up Amazon Echo and Enable Smart Life Skill
You can configure Echo through the web or the Alexa app. We will take the app configuration as an example; web configuration is similar.
- Set Up Echo with Alexa App
You can skip this part if your Echo is already set up.- Make sure your Echo device is powered on.
- Open the Alexa app by tapping the app icon on your mobile device.
- Sign in with your Amazon account credentials and tap "SIGN IN."
![]()
- Tap the hamburger menu in the top left corner, select "Settings," then tap "SET UP A NEW DEVICE."
![]()
- Select your Echo model, choose the appropriate language, and tap "CONNECT TO WI-FI."
![]()
- Press and hold the dot button on the top of your Echo device until the orange light appears, then tap "CONTINUE." Once your phone is connected to Echo, tap "CONTINUE."
![]()
- Select a Wi-Fi network for Echo to access the internet. Enter the Wi-Fi password and tap "CONNECT." It may take several minutes for Echo to connect.
![]()
- After the connection, tap "CONTINUE" and follow the introduction video. Tap "CONTINUE" again to finish the setup.
![]()
- Link Smart Life Account to Alexa
- Tap "Skills" in the hamburger menu, then search for "Smart Life."
- Select "Smart Life" and tap "ENABLE" to enable the skill.
![]()
- You will be redirected to the account link page. Enter your Smart Life account and password, ensuring the country/region matches the one set in Step 2 in the "Add Devices in Smart Life App". Tap "Link Now" to complete the linking.
![]()


Control Your Smart Devices Through Echo
- Discover Devices
Echo needs to discover your smart devices before it can control them. Say, "Alexa, discover devices" to Echo. Echo will then discover devices that have already been added in the Smart Life app. You can also tap "DISCOVER" in the app to nd the devices. Discovered devices will appear in the list.
![]()
Note: Every time you change a device's name in the Smart Life app, Echo must re-discover the device before you can control it. - Control Devices by Voice Commands
Once devices are discovered, you can control them through Echo using voice commands such as:- "Alexa, turn on/o bedroom air conditioner."
- "Alexa, set bedroom air conditioner to 70°C (158°F)."
- "Alexa, increase/decrease the temperature."

Troubleshooting Guide
Before contacting a professional electrician, check the following:
| TROUBLE | CAUSE | SOLUTION |
| The air conditioner doesn't work | Is the power off? Is the plug not inserted? Is the fuse blown or closed? Is the time setting appropriate? Is there a full water warning? | Normal phenomenon. Plug in the power plug. Replace the fuse or turn on the power. Change the time setting. Pour out the water. |
| The air conditioner is not cooling | Is the air inlet and outlet blocked? Is there any other heating source in the room? Is the filter too dirty? Is the temperature setting appropriate? Is the fan speed set to the lowest gear? | Remove the blockage. Remove other heat sources. Clean the filter screen. Change the temperature. Choose the right wind speed. |
| The air conditioner is not standing securely, too much noise, and shaking while running | Is the fuselage tilted? Is the ground uneven? | Put it on the ground. Ensure it's placed on an even surface. |
Note:
In case of the following abnormal conditions, turn off the air conditioner and pull out the plug, then contact a professional electrician:
- The fuse often breaks.
- The power cord is damaged or the skin of the cord is exposed.
- The body produces an abnormal odor.
Intelligent Detection Function
| Error-detecting code | Multi-functional defection |
| E1 | Coil sensor sensing abnormal |
| E2 | Abnormal perception of room temperature sensor |
| E4 | Anti-freezing protection |
| FL | The machine is in full water alarm state |
Register Product
Thank you for choosing SereneLife. By registering your product, you ensure that you receive the full bene ts of our exclusive warranty and personalized customer support.
Complete the form to access expert support and to keep your SereneLife purchase in perfect condition.
Start Here
Serenelifehome.com/pages/register

Questions or Comments?
We are here to help!
Phone: 1.718.535.1800
Serenelifehome.com/ContactUs
www.SereneLifeHome.com

Documents / Resources
References
![www.apple.com]() App Store - Apple
App Store - Apple![play.google.com]() Google Play
Google Play![serenelifehome.com]() Register – SereneLife Home
Register – SereneLife Home![serenelifehome.com]() Contact Us|SereneLife|We want to hear from you, always. – SereneLife Home
Contact Us|SereneLife|We want to hear from you, always. – SereneLife Home![www.serenelifehome.com]() Innovative Lifestyle Products Just For You | SereneLife – SereneLife Home
Innovative Lifestyle Products Just For You | SereneLife – SereneLife Home
Download manual
Here you can download full pdf version of manual, it may contain additional safety instructions, warranty information, FCC rules, etc.
Advertisement


Need help?
Do you have a question about the SLPAC14 and is the answer not in the manual?
Questions and answers