Table of Contents
Advertisement
Quick Links
Advertisement
Table of Contents

Subscribe to Our Youtube Channel
Related Manuals for Supero AOC-SIMLC


Summary of Contents for Supero AOC-SIMLC
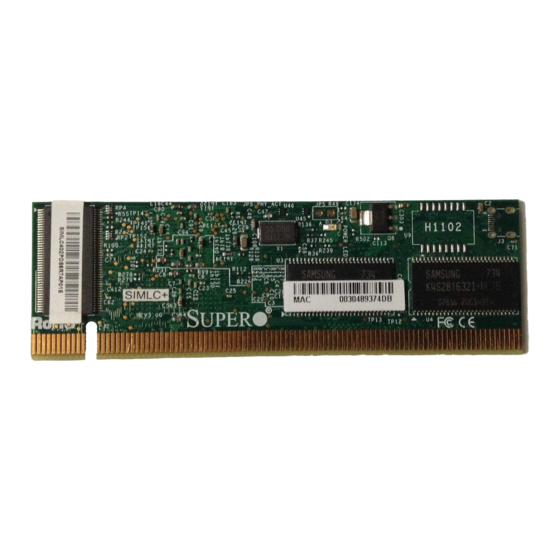
- Page 1 UPER ® AOC-SIMLC AOC-SIMLC+ SIMLC USER'S GUIDE Rev. 1.1a...
- Page 2 Please Note: For the most up-to-date version of this manual, please see our web site at www.supermicro.com. Super Micro Computer, Inc. ("Supermicro") reserves the right to make changes to the product described in this manual at any time and without notice. This product, including software, if any, and documentation may not, in whole or in part, be copied, photocopied, reproduced, translated or reduced to any medium or machine without prior written consent.
-
Page 3: Table Of Contents
1.7 Returning Merchandise for Service ............1-7 Chapter 2: Technical Specifications and Hardware Installation ..2-1 2.1 AOC-SIMLC/SIMLC+ Connector and Jumper Locations ......2-1 2.1.1 Front Component and LED Descriptions ..........2-1 2.1.2 Rear Component and LED Locations ............. 2-2 2.1.3 Rear LED Descriptions and Pin Definitions .......... -
Page 4: Chapter I: Introduction
PC users who intend to integrate Supermicro's unique IPMI 2.0 Management Utility with support of KVM-over-LAN into their systems. It provides detailed information for the application and use of the AOC-SIMLC/SIMLC+ that sup- ports remote access for system monitoring, diagnosis and management. With the most advanced technologies built-in, the AOC-SIMLC/SIMLC+ offers a complete, ef- fi... -
Page 5: Product Features
White Box with Correct Barcode Label (showing AOC-SIMLC/SIMLC+). 1.5 Important Notes to the User Note 1: KVM-over-LAN is available on the AOC-SIMLC+ only. All features and options related to the functionality of KVM-over-LAN are supported by the AOC- SIMLC+ only. In addition, KVM-over-LAN is not supported by the X7DA8/X7DAE, and the X7DVL-3/X7DVL-i models. -
Page 6: Contacting Supermicro
AOC-SIMLC/SIMLC+ User's Guide AOC-SIMLC/SIMLC+ User's Guide AOC-SIMLC/SIMLC+ User's Guide AOC-SIMLC/SIMLC+ User's Guide AOC-SIMLC/SIMLC+ User's Guide AOC-SIMLC/SIMLC+ User's Guide AOC-SIMLC/SIMLC+ User's Guide AOC-SIMLC/SIMLC+ User's Guide AOC-SIMLC/SIMLC+ User's Guide AOC-SIMLC/SIMLC+ User's Guide AOC-SIMLC/SIMLC+ User's Guide AOC-SIMLC/SIMLC+ User's Guide AOC-SIMLC/SIMLC+ User's Guide AOC-SIMLC/SIMLC+ User's Guide... -
Page 7: Returning Merchandise For Service
For faster service, RMA authorizations may be requested online (http:// www.supermicro.com/support/rma/). Whenever possible, repack the add-on card in the original Supermicro box, using the original packaging materials. If these are no longer available, be sure to pack the add-on card in an anti-static bag and inside the box. Make sure that there is enough packaging material surrounding the add-on card so that it does not become damaged during shipping. - Page 8 AOC-SIMLC/SIMLC+ User's Guide AOC-SIMLC/SIMLC+ User's Guide AOC-SIMLC/SIMLC+ User's Guide AOC-SIMLC/SIMLC+ User's Guide AOC-SIMLC/SIMLC+ User's Guide AOC-SIMLC/SIMLC+ User's Guide AOC-SIMLC/SIMLC+ User's Guide AOC-SIMLC/SIMLC+ User's Guide AOC-SIMLC/SIMLC+ User's Guide AOC-SIMLC/SIMLC+ User's Guide AOC-SIMLC/SIMLC+ User's Guide AOC-SIMLC/SIMLC+ User's Guide AOC-SIMLC/SIMLC+ User's Guide AOC-SIMLC/SIMLC+ User's Guide...
-
Page 9: Chapter 2: Technical Specifications And Hardware Installation
Chapter 2: Technical Specifications and Installation Chapter 2 Technical Specifications and Hardware Installation 2.1 AOC-SIMLC/SIMLC+ Component and Jumper Locations Front View SIMLC... -
Page 10: Rear Component And Led Locations
Loading Firmware minute) ing of the Heartbeat LED indicates that Off (Continu- SIMLC(+) is not the AOC-SIMLC(+) is active. However, ously) active when the Linux OS and the drivers are being loaded after each AC power-on or reset, the Heartbeat LED is off for about a minute. -
Page 11: Block Diagram
Chapter 2: Technical Specifications and Installation 2.2 Block Diagram UART Interface USB Interface LPC Interface KIRA100 FML Interface DVO interface RMII Mother Board SMDATA Mother Board SMCLK Mother Board SMALT#... -
Page 12: Installing The Aoc-Simlc/Simlc+ Add-On Card
SIMLC/SIMLC+ slot to prevent damage to the system due to power shortage. For SIMLC/SIMLC+ slot locations, please refer to Section 2.4.2. SMC Motherboards with SIMLC/SIMLC+ support The following Supermicro's motherboards support the AOC-SIMLC/SIMLC+. 1. The X7DB8/X7DBE/X7DB8+/X7DBE+/X7DB8-X/X7DBE-X/X7DB3 Series 2. The X7DA8/X7DAE/X7DVA-8/X7DVA-E/X7DVL-3/X7DVL-i Series (Note) 3. -
Page 13: Simlc/Simlc+ Slot Locations
Chapter 2: Technical Specifications and Installation 2.3.2 SIMLC/SIMLC+ Slot Locations To properly use the AOC-SIMLC/SIMLC+, be sure to install it in the right slot. Refer to the MB layouts below for SIMLC/SIMLC+ slot locations. 1. The X7DB8/X7DBE/X7DB8+/X7DBE+/X7DB8-X/X7DBE-X/X7DB3 Series SIMLC(+) Slot (Slot 7) 2. - Page 14 AOC-SIMLC/SIMLC+ User's Guide AOC-SIMLC/SIMLC+ User's Guide AOC-SIMLC/SIMLC+ User's Guide AOC-SIMLC/SIMLC+ User's Guide AOC-SIMLC/SIMLC+ User's Guide AOC-SIMLC/SIMLC+ User's Guide AOC-SIMLC/SIMLC+ User's Guide AOC-SIMLC/SIMLC+ User's Guide AOC-SIMLC/SIMLC+ User's Guide AOC-SIMLC/SIMLC+ User's Guide AOC-SIMLC/SIMLC+ User's Guide AOC-SIMLC/SIMLC+ User's Guide AOC-SIMLC/SIMLC+ User's Guide AOC-SIMLC/SIMLC+ User's Guide...
-
Page 15: Chapter 3: Software Application And Usage
Note on Page 3-2.) The necessary utilities for the access and configuration of the add-on card are included on the Supermicro bootable CDs that came with your card. This section provides information on the configuration and the access of the IPMI card on the network. - Page 16 (Note: The default username is ADMIN. The default password is ADMIN.) 3. The Home Page will display as follows: Note: KVM-over-LAN is available on the AOC-SIMLC+ only. All features and options related to the functionality of KVM-over-LAN are supported by the AOC-SIMLC+ only.
-
Page 17: Home Page
Chapter 3: Software Application and Usage 3.1 Home Page Home Remote Console Screen Logout Console 3.1.1 Buttons from the Home Page Home: Click this icon to return to the Home Page. Console: Click this icon to go to the Remote Console Screen. Remote Console Screen: Displayed in the window is Remote Console Screen. - Page 18 AOC-SIMLC/SIMLC+ User's Guide AOC-SIMLC/SIMLC+ User's Guide AOC-SIMLC/SIMLC+ User's Guide AOC-SIMLC/SIMLC+ User's Guide AOC-SIMLC/SIMLC+ User's Guide AOC-SIMLC/SIMLC+ User's Guide AOC-SIMLC/SIMLC+ User's Guide AOC-SIMLC/SIMLC+ User's Guide AOC-SIMLC/SIMLC+ User's Guide AOC-SIMLC/SIMLC+ User's Guide AOC-SIMLC/SIMLC+ User's Guide AOC-SIMLC/SIMLC+ User's Guide AOC-SIMLC/SIMLC+ User's Guide AOC-SIMLC/SIMLC+ User's Guide AOC-SIMLC/SIMLC+ User's Guide 3.1.2 Function Keys from the Home Page...
-
Page 19: Functions Listed On The Home Page
Chapter 3: Software Application and Usage 3.2 Functions Listed on the Home Page 3.2.1. Remote Control Click on the icon of Remote Control to activate its submenus-KVM Console and Remote Power as listed below. a. KVM Console (See the note on Page 3-1) Click on this item to configure keyboard, mouse or video settings for the remote host. - Page 20 AOC-SIMLC/SIMLC+ User's Guide AOC-SIMLC/SIMLC+ User's Guide AOC-SIMLC/SIMLC+ User's Guide AOC-SIMLC/SIMLC+ User's Guide AOC-SIMLC/SIMLC+ User's Guide AOC-SIMLC/SIMLC+ User's Guide AOC-SIMLC/SIMLC+ User's Guide AOC-SIMLC/SIMLC+ User's Guide AOC-SIMLC/SIMLC+ User's Guide AOC-SIMLC/SIMLC+ User's Guide AOC-SIMLC/SIMLC+ User's Guide AOC-SIMLC/SIMLC+ User's Guide AOC-SIMLC/SIMLC+ User's Guide AOC-SIMLC/SIMLC+ User's Guide AOC-SIMLC/SIMLC+ User's Guide b.
-
Page 21: Virtual Media
The floppy image uploaded shall be in the binary format with a maximum size of 1.44MB. It will be loaded to the Supermicro SIMLC/SIMLC+ card and will be emulated to the host as a USB device. Virtual Drive: Select a drive in the remote host as a desti- nation drive for you to upload your image data. - Page 22 AOC-SIMLC/SIMLC+ User's Guide AOC-SIMLC/SIMLC+ User's Guide AOC-SIMLC/SIMLC+ User's Guide AOC-SIMLC/SIMLC+ User's Guide AOC-SIMLC/SIMLC+ User's Guide AOC-SIMLC/SIMLC+ User's Guide AOC-SIMLC/SIMLC+ User's Guide AOC-SIMLC/SIMLC+ User's Guide AOC-SIMLC/SIMLC+ User's Guide AOC-SIMLC/SIMLC+ User's Guide AOC-SIMLC/SIMLC+ User's Guide AOC-SIMLC/SIMLC+ User's Guide AOC-SIMLC/SIMLC+ User's Guide AOC-SIMLC/SIMLC+ User's Guide...
- Page 23 Chapter 3: Software Application and Usage...
- Page 24 AOC-SIMLC/SIMLC+ User's Guide AOC-SIMLC/SIMLC+ User's Guide AOC-SIMLC/SIMLC+ User's Guide AOC-SIMLC/SIMLC+ User's Guide AOC-SIMLC/SIMLC+ User's Guide AOC-SIMLC/SIMLC+ User's Guide AOC-SIMLC/SIMLC+ User's Guide AOC-SIMLC/SIMLC+ User's Guide AOC-SIMLC/SIMLC+ User's Guide AOC-SIMLC/SIMLC+ User's Guide AOC-SIMLC/SIMLC+ User's Guide AOC-SIMLC/SIMLC+ User's Guide AOC-SIMLC/SIMLC+ User's Guide AOC-SIMLC/SIMLC+ User's Guide...
- Page 25 Chapter 3: Software Application and Usage 3-11...
- Page 26 AOC-SIMLC/SIMLC+ User's Guide AOC-SIMLC/SIMLC+ User's Guide AOC-SIMLC/SIMLC+ User's Guide AOC-SIMLC/SIMLC+ User's Guide AOC-SIMLC/SIMLC+ User's Guide AOC-SIMLC/SIMLC+ User's Guide AOC-SIMLC/SIMLC+ User's Guide AOC-SIMLC/SIMLC+ User's Guide AOC-SIMLC/SIMLC+ User's Guide AOC-SIMLC/SIMLC+ User's Guide AOC-SIMLC/SIMLC+ User's Guide AOC-SIMLC/SIMLC+ User's Guide AOC-SIMLC/SIMLC+ User's Guide AOC-SIMLC/SIMLC+ User's Guide...
- Page 27 Chapter 3: Software Application and Usage Home Home Console Logout Remote Control KVM Console Remote Power Monitoring Sensors Sensor Type Sensor Name Sensor Status Sensor Reading Virtual Media Temperature CPU1 Temp A No reading Floppy Disk Temperature CPU2 Temp A 47 degrees C CD-ROM Image Temperature...
- Page 28 AOC-SIMLC/SIMLC+ User's Guide AOC-SIMLC/SIMLC+ User's Guide AOC-SIMLC/SIMLC+ User's Guide AOC-SIMLC/SIMLC+ User's Guide AOC-SIMLC/SIMLC+ User's Guide AOC-SIMLC/SIMLC+ User's Guide AOC-SIMLC/SIMLC+ User's Guide AOC-SIMLC/SIMLC+ User's Guide AOC-SIMLC/SIMLC+ User's Guide AOC-SIMLC/SIMLC+ User's Guide AOC-SIMLC/SIMLC+ User's Guide AOC-SIMLC/SIMLC+ User's Guide AOC-SIMLC/SIMLC+ User's Guide AOC-SIMLC/SIMLC+ User's Guide...
- Page 29 Chapter 3: Software Application and Usage c. System Event Log System Event Log Screen Home Home Console Logout Remote Control KVM Console Remote Power System Event Log Event Type Date Time Source Description Direction Virtual Media SEL record 02 Pre-Init 00:01:04 Fan6 Lower Non-recoverable going low Assertion Event Floppy Disk...
-
Page 30: System Health
AOC-SIMLC/SIMLC+ User's Guide AOC-SIMLC/SIMLC+ User's Guide AOC-SIMLC/SIMLC+ User's Guide AOC-SIMLC/SIMLC+ User's Guide AOC-SIMLC/SIMLC+ User's Guide AOC-SIMLC/SIMLC+ User's Guide AOC-SIMLC/SIMLC+ User's Guide AOC-SIMLC/SIMLC+ User's Guide AOC-SIMLC/SIMLC+ User's Guide AOC-SIMLC/SIMLC+ User's Guide AOC-SIMLC/SIMLC+ User's Guide AOC-SIMLC/SIMLC+ User's Guide AOC-SIMLC/SIMLC+ User's Guide AOC-SIMLC/SIMLC+ User's Guide AOC-SIMLC/SIMLC+ User's Guide d. - Page 31 Chapter 3: Software Application and Usage 3-17...
- Page 32 AOC-SIMLC/SIMLC+ User's Guide AOC-SIMLC/SIMLC+ User's Guide AOC-SIMLC/SIMLC+ User's Guide AOC-SIMLC/SIMLC+ User's Guide AOC-SIMLC/SIMLC+ User's Guide AOC-SIMLC/SIMLC+ User's Guide AOC-SIMLC/SIMLC+ User's Guide AOC-SIMLC/SIMLC+ User's Guide AOC-SIMLC/SIMLC+ User's Guide AOC-SIMLC/SIMLC+ User's Guide AOC-SIMLC/SIMLC+ User's Guide AOC-SIMLC/SIMLC+ User's Guide AOC-SIMLC/SIMLC+ User's Guide AOC-SIMLC/SIMLC+ User's Guide...
-
Page 33: User Management
Chapter 3: Software Application and Usage IPMI Privilege Level: Click on the arrow key on the right to activate the Privilege Selection menu. The IPMI Privilege Level contains five categories: No Access, User, Operator, Administrator and OEM. Create: Click on this button to enter a new user's or group information in the User/ Group Management fields. - Page 34 AOC-SIMLC/SIMLC+ User's Guide AOC-SIMLC/SIMLC+ User's Guide AOC-SIMLC/SIMLC+ User's Guide AOC-SIMLC/SIMLC+ User's Guide AOC-SIMLC/SIMLC+ User's Guide AOC-SIMLC/SIMLC+ User's Guide AOC-SIMLC/SIMLC+ User's Guide AOC-SIMLC/SIMLC+ User's Guide AOC-SIMLC/SIMLC+ User's Guide AOC-SIMLC/SIMLC+ User's Guide AOC-SIMLC/SIMLC+ User's Guide AOC-SIMLC/SIMLC+ User's Guide AOC-SIMLC/SIMLC+ User's Guide AOC-SIMLC/SIMLC+ User's Guide...
- Page 35 Chapter 3: Software Application and Usage Home Home Console Browser has no Java! Logout Remote Control KVM Console Remote Power Remote Console Settings for User The settings on this page are user specific. Changes Virtual Media you make here will affect the selected user only. Floppy Disk CD-ROM Image ADMIN...
- Page 36 AOC-SIMLC/SIMLC+ User's Guide AOC-SIMLC/SIMLC+ User's Guide AOC-SIMLC/SIMLC+ User's Guide AOC-SIMLC/SIMLC+ User's Guide AOC-SIMLC/SIMLC+ User's Guide AOC-SIMLC/SIMLC+ User's Guide AOC-SIMLC/SIMLC+ User's Guide AOC-SIMLC/SIMLC+ User's Guide AOC-SIMLC/SIMLC+ User's Guide AOC-SIMLC/SIMLC+ User's Guide AOC-SIMLC/SIMLC+ User's Guide AOC-SIMLC/SIMLC+ User's Guide AOC-SIMLC/SIMLC+ User's Guide AOC-SIMLC/SIMLC+ User's Guide AOC-SIMLC/SIMLC+ User's Guide a.
- Page 37 Chapter 3: Software Application and Usage 14. Miscellaneous Remote Console Settings: This window allows you to specify the following Remote Console Settings. 15. Start in Monitor Mode: Check this box to enable the Start in Monitor Mode which will allow data to be displayed in the remote monitor as soon as Remote Con- sole is activated.
- Page 38 AOC-SIMLC/SIMLC+ User's Guide AOC-SIMLC/SIMLC+ User's Guide AOC-SIMLC/SIMLC+ User's Guide AOC-SIMLC/SIMLC+ User's Guide AOC-SIMLC/SIMLC+ User's Guide AOC-SIMLC/SIMLC+ User's Guide AOC-SIMLC/SIMLC+ User's Guide AOC-SIMLC/SIMLC+ User's Guide AOC-SIMLC/SIMLC+ User's Guide AOC-SIMLC/SIMLC+ User's Guide AOC-SIMLC/SIMLC+ User's Guide AOC-SIMLC/SIMLC+ User's Guide AOC-SIMLC/SIMLC+ User's Guide AOC-SIMLC/SIMLC+ User's Guide AOC-SIMLC/SIMLC+ User's Guide b.
- Page 39 Chapter 3: Software Application and Usage Home Home Console Logout Remote Control KVM Console Remote Power Network Basic Settings IP auto configuration Virtual Media None Preferred host name (DHCP only) Floppy Disk CD-ROM Image IP address 192.168.1.200 Drive Redirection Options Subnet mask 255.255.255.0 System Health...
- Page 40 AOC-SIMLC/SIMLC+ User's Guide AOC-SIMLC/SIMLC+ User's Guide AOC-SIMLC/SIMLC+ User's Guide AOC-SIMLC/SIMLC+ User's Guide AOC-SIMLC/SIMLC+ User's Guide AOC-SIMLC/SIMLC+ User's Guide AOC-SIMLC/SIMLC+ User's Guide AOC-SIMLC/SIMLC+ User's Guide AOC-SIMLC/SIMLC+ User's Guide AOC-SIMLC/SIMLC+ User's Guide AOC-SIMLC/SIMLC+ User's Guide AOC-SIMLC/SIMLC+ User's Guide AOC-SIMLC/SIMLC+ User's Guide AOC-SIMLC/SIMLC+ User's Guide AOC-SIMLC/SIMLC+ User's Guide 3.
- Page 41 Chapter 3: Software Application and Usage b. Dynamic DNS Device Settings: Dynamic DNS Home Home Console Logout Remote Control KVM Console Remote Power Dynamic DNS Settings Enable Dynamic DNS Virtual Media Dynamic DNS server www.dyndns.org Floppy Disk CD-ROM Image DNS System Drive Redirection Hostname (eg.
- Page 42 AOC-SIMLC/SIMLC+ User's Guide AOC-SIMLC/SIMLC+ User's Guide AOC-SIMLC/SIMLC+ User's Guide AOC-SIMLC/SIMLC+ User's Guide AOC-SIMLC/SIMLC+ User's Guide AOC-SIMLC/SIMLC+ User's Guide AOC-SIMLC/SIMLC+ User's Guide AOC-SIMLC/SIMLC+ User's Guide AOC-SIMLC/SIMLC+ User's Guide AOC-SIMLC/SIMLC+ User's Guide AOC-SIMLC/SIMLC+ User's Guide AOC-SIMLC/SIMLC+ User's Guide AOC-SIMLC/SIMLC+ User's Guide AOC-SIMLC/SIMLC+ User's Guide AOC-SIMLC/SIMLC+ User's Guide 9.
- Page 43 Chapter 3: Software Application and Usage c. Security Device Settings: Security Home Home Console Logout Remote Control KVM Console Remote Power Encryption Settings Force HTTPS for Web access Virtual Media KVM Encryption Force Floppy Disk CD-ROM Image Drive Redirection IP Access Control Options Please note: "Apply"...
- Page 44 AOC-SIMLC/SIMLC+ User's Guide AOC-SIMLC/SIMLC+ User's Guide AOC-SIMLC/SIMLC+ User's Guide AOC-SIMLC/SIMLC+ User's Guide AOC-SIMLC/SIMLC+ User's Guide AOC-SIMLC/SIMLC+ User's Guide AOC-SIMLC/SIMLC+ User's Guide AOC-SIMLC/SIMLC+ User's Guide AOC-SIMLC/SIMLC+ User's Guide AOC-SIMLC/SIMLC+ User's Guide AOC-SIMLC/SIMLC+ User's Guide AOC-SIMLC/SIMLC+ User's Guide AOC-SIMLC/SIMLC+ User's Guide AOC-SIMLC/SIMLC+ User's Guide AOC-SIMLC/SIMLC+ User's Guide 6.
-
Page 45: Kvm Settings
Chapter 3: Software Application and Usage d. Certificate Device Settings: Certificate Home Home Console Logout Remote Control KVM Console Remote Power Certificate Signing Request (CSR) Virtual Media Common name Floppy Disk Organizational unit CD-ROM Image Organization Drive Redirection Options Locality/City System Health State/Province Chassis Control... - Page 46 AOC-SIMLC/SIMLC+ User's Guide AOC-SIMLC/SIMLC+ User's Guide AOC-SIMLC/SIMLC+ User's Guide AOC-SIMLC/SIMLC+ User's Guide AOC-SIMLC/SIMLC+ User's Guide AOC-SIMLC/SIMLC+ User's Guide AOC-SIMLC/SIMLC+ User's Guide AOC-SIMLC/SIMLC+ User's Guide AOC-SIMLC/SIMLC+ User's Guide AOC-SIMLC/SIMLC+ User's Guide AOC-SIMLC/SIMLC+ User's Guide AOC-SIMLC/SIMLC+ User's Guide AOC-SIMLC/SIMLC+ User's Guide AOC-SIMLC/SIMLC+ User's Guide AOC-SIMLC/SIMLC+ User's Guide 3.
-
Page 47: Device Settings
Chapter 3: Software Application and Usage e. Date/Time Device Settings: Date/Time Home Home Console Logout Remote Control KVM Console Remote Power Date/Time Settings UTC Offset Virtual Media +/- 0 h User specified time Floppy Disk CD-ROM Image Date 1970 Drive Redirection (mm/dd/yyyy) Options Time... -
Page 48: Maintenance
Sender Email Address User Console SNMP Logging Enabled Keyboard/Mouse Destination IP Device Settings Community Network Dynamic DNS Click here to view the Supermicro Daughter Card SNMP MIB Security Certificate Date/Time Event Log Assignments Event Log Event List NFS SMTP SNMP SNMP Settings Board Message ✔... - Page 49 16. Community: Enter the name of the community if the receiver requires a com- munity string. 17. Click here to view the Supermicro Daughter Card SNMP MIB: Click this link to see the SMLP card SNMP MIB. 18. Event Log Assignments: This window allows you to specify the types and the destination for the event logging.
- Page 50 AOC-SIMLC/SIMLC+ User's Guide AOC-SIMLC/SIMLC+ User's Guide AOC-SIMLC/SIMLC+ User's Guide AOC-SIMLC/SIMLC+ User's Guide AOC-SIMLC/SIMLC+ User's Guide AOC-SIMLC/SIMLC+ User's Guide AOC-SIMLC/SIMLC+ User's Guide AOC-SIMLC/SIMLC+ User's Guide AOC-SIMLC/SIMLC+ User's Guide AOC-SIMLC/SIMLC+ User's Guide AOC-SIMLC/SIMLC+ User's Guide AOC-SIMLC/SIMLC+ User's Guide AOC-SIMLC/SIMLC+ User's Guide AOC-SIMLC/SIMLC+ User's Guide AOC-SIMLC/SIMLC+ User's Guide g.
- Page 51 Chapter 3: Software Application and Usage 5. System Location: Enter the physical location of the SNMP host server. This loca- tion will be used in response to the SNMP request as "sysLocation0." 6. System Contact: Enter the name of the contact person for the SNMP host server. This value will be referred to as "sysContact0."...
- Page 52 Maintenance: Device Information Home Home Console Logout Remote Control KVM Console Remote Power Device Information Product Name: Supermicro Daughter Card Virtual Media Serial Number: 05729801DE4375A1 Floppy Disk Device IP Address: 192.168.1.200 CD-ROM Image Device MAC Address: 00:30:48:30:0c:76 Drive Redirection Firmware Version: 00.05.00...
- Page 53 Chapter 3: Software Application and Usage b. Event Log Maintenance: Event Log Home Home Console Logout Remote Control KVM Console Remote Power Event Log [ Prev ][ Next ] Virtual Media Date Event Description Floppy Disk User 'ADMIN' CD-ROM Image logged in from IP 01/01/1970 02:10:19 Authentication Drive Redirection...
- Page 54 AOC-SIMLC/SIMLC+ User's Guide AOC-SIMLC/SIMLC+ User's Guide AOC-SIMLC/SIMLC+ User's Guide AOC-SIMLC/SIMLC+ User's Guide AOC-SIMLC/SIMLC+ User's Guide AOC-SIMLC/SIMLC+ User's Guide AOC-SIMLC/SIMLC+ User's Guide AOC-SIMLC/SIMLC+ User's Guide AOC-SIMLC/SIMLC+ User's Guide AOC-SIMLC/SIMLC+ User's Guide AOC-SIMLC/SIMLC+ User's Guide AOC-SIMLC/SIMLC+ User's Guide AOC-SIMLC/SIMLC+ User's Guide AOC-SIMLC/SIMLC+ User's Guide AOC-SIMLC/SIMLC+ User's Guide c.
- Page 55 Chapter 3: Software Application and Usage d. Unit Reset Maintenance: Unit Reset Home Home Console Logout Remote Control KVM Console Remote Power Reset Keyboard/Mouse (USB) Virtual Media Floppy Disk CD-ROM Image Drive Redirection Reset USB Options System Health Chassis Control Reset Video Engine Monitor Sensors System Event Log...
-
Page 56: Remote Console Main Page
AOC-SIMLC/SIMLC+ User's Guide AOC-SIMLC/SIMLC+ User's Guide AOC-SIMLC/SIMLC+ User's Guide AOC-SIMLC/SIMLC+ User's Guide AOC-SIMLC/SIMLC+ User's Guide AOC-SIMLC/SIMLC+ User's Guide AOC-SIMLC/SIMLC+ User's Guide AOC-SIMLC/SIMLC+ User's Guide AOC-SIMLC/SIMLC+ User's Guide AOC-SIMLC/SIMLC+ User's Guide AOC-SIMLC/SIMLC+ User's Guide AOC-SIMLC/SIMLC+ User's Guide AOC-SIMLC/SIMLC+ User's Guide AOC-SIMLC/SIMLC+ User's Guide AOC-SIMLC/SIMLC+ User's Guide 3.3 Remote Console Main Page... -
Page 57: Remote Console Options
Chapter 3: Software Application and Usage 3.3.1 Remote Console Options After the remote console screen appears, click on the button "Option" on the very upper right corner to display the Options Menu as shown below. Options a. Options Menu Items The following items are included in the Options Menus: 1. - Page 58 AOC-SIMLC/SIMLC+ User's Guide AOC-SIMLC/SIMLC+ User's Guide AOC-SIMLC/SIMLC+ User's Guide AOC-SIMLC/SIMLC+ User's Guide AOC-SIMLC/SIMLC+ User's Guide AOC-SIMLC/SIMLC+ User's Guide AOC-SIMLC/SIMLC+ User's Guide AOC-SIMLC/SIMLC+ User's Guide AOC-SIMLC/SIMLC+ User's Guide AOC-SIMLC/SIMLC+ User's Guide AOC-SIMLC/SIMLC+ User's Guide AOC-SIMLC/SIMLC+ User's Guide AOC-SIMLC/SIMLC+ User's Guide AOC-SIMLC/SIMLC+ User's Guide AOC-SIMLC/SIMLC+ User's Guide 6.
- Page 59 Chapter 3: Software Application and Usage 7. Video Settings: This item allows the user to set the monitor display settings by clicking on the Video Settings button (marked "1" below.) After you've clicked the Video Settings button, the submenu displays as shown below. Video Settings Button Use your cursor pointer to click on the triangles (marked 2 and 3) to adjust the setting...
- Page 60 AOC-SIMLC/SIMLC+ User's Guide AOC-SIMLC/SIMLC+ User's Guide AOC-SIMLC/SIMLC+ User's Guide AOC-SIMLC/SIMLC+ User's Guide AOC-SIMLC/SIMLC+ User's Guide AOC-SIMLC/SIMLC+ User's Guide AOC-SIMLC/SIMLC+ User's Guide AOC-SIMLC/SIMLC+ User's Guide AOC-SIMLC/SIMLC+ User's Guide AOC-SIMLC/SIMLC+ User's Guide AOC-SIMLC/SIMLC+ User's Guide AOC-SIMLC/SIMLC+ User's Guide AOC-SIMLC/SIMLC+ User's Guide AOC-SIMLC/SIMLC+ User's Guide AOC-SIMLC/SIMLC+ User's Guide 8.
- Page 61 Chapter 3: Software Application and Usage 9. Local Keyboard: This item allows the user to manually change the local keyboard setting for interaction with a remote host. Use this function to change the language mapping of your browser machine running the remote console host. After you have clicked Local Keyboard button, the submenu displays as shown below.
- Page 62 AOC-SIMLC/SIMLC+ User's Guide AOC-SIMLC/SIMLC+ User's Guide AOC-SIMLC/SIMLC+ User's Guide AOC-SIMLC/SIMLC+ User's Guide AOC-SIMLC/SIMLC+ User's Guide AOC-SIMLC/SIMLC+ User's Guide AOC-SIMLC/SIMLC+ User's Guide AOC-SIMLC/SIMLC+ User's Guide AOC-SIMLC/SIMLC+ User's Guide AOC-SIMLC/SIMLC+ User's Guide AOC-SIMLC/SIMLC+ User's Guide AOC-SIMLC/SIMLC+ User's Guide AOC-SIMLC/SIMLC+ User's Guide AOC-SIMLC/SIMLC+ User's Guide AOC-SIMLC/SIMLC+ User's Guide 10.
- Page 63 Chapter 3: Software Application and Usage 11. Remote Console Interface Window: This item allows the local host to interact with a remote server. Through the Remote Console Interface Window, the user can share files stored in the local drive with a user connected to the remote server, down- load data from a local drive to the remote server, issue commands to manage the remote server, or allow the remote server be controlled and managed by a local user logged in the remote server.
- Page 64 AOC-SIMLC/SIMLC+ User's Guide AOC-SIMLC/SIMLC+ User's Guide AOC-SIMLC/SIMLC+ User's Guide AOC-SIMLC/SIMLC+ User's Guide AOC-SIMLC/SIMLC+ User's Guide AOC-SIMLC/SIMLC+ User's Guide AOC-SIMLC/SIMLC+ User's Guide AOC-SIMLC/SIMLC+ User's Guide AOC-SIMLC/SIMLC+ User's Guide AOC-SIMLC/SIMLC+ User's Guide AOC-SIMLC/SIMLC+ User's Guide AOC-SIMLC/SIMLC+ User's Guide AOC-SIMLC/SIMLC+ User's Guide AOC-SIMLC/SIMLC+ User's Guide...
- Page 65 Chapter 3: Software Application and Usage 3-51...
- Page 66 AOC-SIMLC/SIMLC+ User's Guide AOC-SIMLC/SIMLC+ User's Guide AOC-SIMLC/SIMLC+ User's Guide AOC-SIMLC/SIMLC+ User's Guide AOC-SIMLC/SIMLC+ User's Guide AOC-SIMLC/SIMLC+ User's Guide AOC-SIMLC/SIMLC+ User's Guide AOC-SIMLC/SIMLC+ User's Guide AOC-SIMLC/SIMLC+ User's Guide AOC-SIMLC/SIMLC+ User's Guide AOC-SIMLC/SIMLC+ User's Guide AOC-SIMLC/SIMLC+ User's Guide AOC-SIMLC/SIMLC+ User's Guide AOC-SIMLC/SIMLC+ User's Guide...
-
Page 67: Chapter 4: Frequently Asked Questions
• 3. Follow the prompts to setup the IP Address and MAC address for the AOC- SIMLC/SIMLC+. Contacting Supermicro's Technical Support: If you still have problems after trying out all the recommended solutions, please contact our Tech. Support @ (408)503-8000 or visit our web site @ www. - Page 68 AOC-SIMLC/SIMLC+ User's Guide AOC-SIMLC/SIMLC+ User's Guide AOC-SIMLC/SIMLC+ User's Guide AOC-SIMLC/SIMLC+ User's Guide AOC-SIMLC/SIMLC+ User's Guide AOC-SIMLC/SIMLC+ User's Guide AOC-SIMLC/SIMLC+ User's Guide AOC-SIMLC/SIMLC+ User's Guide AOC-SIMLC/SIMLC+ User's Guide AOC-SIMLC/SIMLC+ User's Guide AOC-SIMLC/SIMLC+ User's Guide AOC-SIMLC/SIMLC+ User's Guide AOC-SIMLC/SIMLC+ User's Guide AOC-SIMLC/SIMLC+ User's Guide...
Need help?
Do you have a question about the AOC-SIMLC and is the answer not in the manual?
Questions and answers