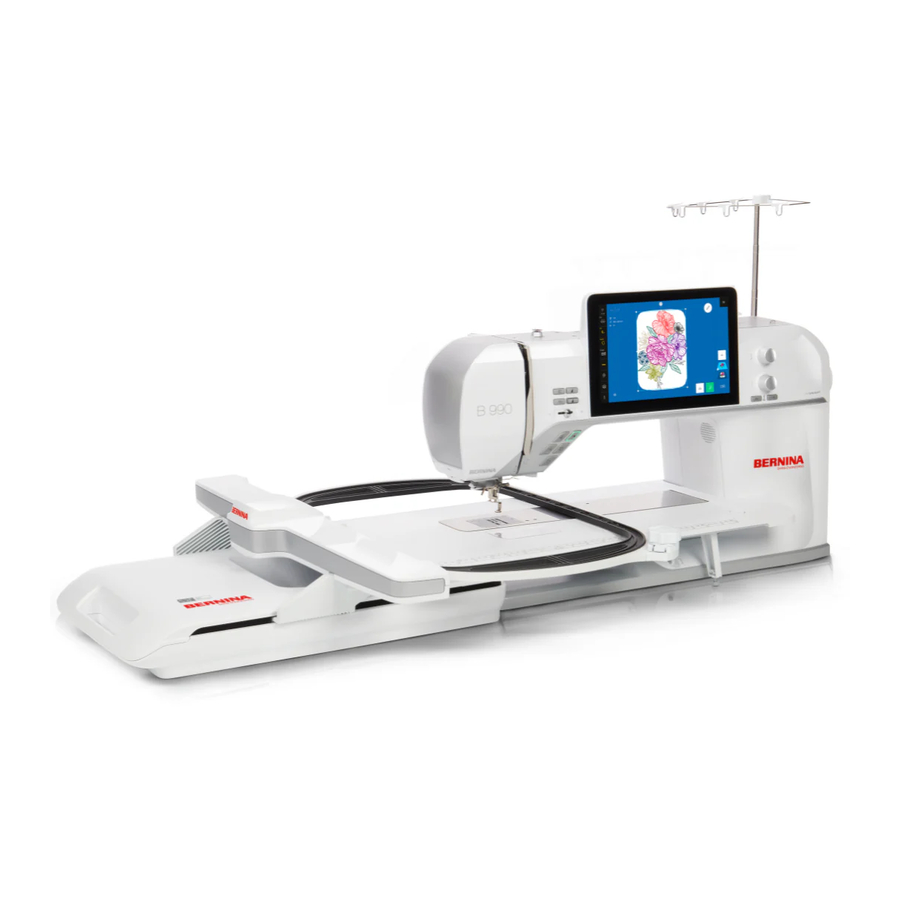
Bernina 990 Manual
- Service manual (250 pages) ,
- User manual (220 pages) ,
- Workbook (42 pages)
Advertisement
- 1 INTRODUCTION
- 2 PREPARING TO STITCH
- 3 BASIC STITCHING
- 4 EDIT MENU
- 5 SAVING STITCHES
- 6 COMBI MODE
- 7 SIDEWAYS MOTION AND MORE
- 8 STITCH DESIGNER
- 9 BUTTONHOLES
- 10 TAPER STITCHES
- 11 Documents / Resources
INTRODUCTION
Welcome to the BERNINA 990 Sewing workbook Designed to complement your machine's manual, this workbook will lead you on a step-by-step journey to uncover your machine's full potential with a series of simple exercises designed to enhance your creative sewing skills The workbook can be used as a reference guide once it's finished
The lessons are directed toward learning the features most valuable to different sewing techniques You will learn the best and maximize your experience by working through each exercise
Sew at your own pace and follow along with the BERNINA 990 Skill Hub online course for helpful videos and unique learning tools In addition to the workbook, online courses, and classes from your BERNINA dealer, there are many instructional videos and tutorials built directly into the machine
Instructional video tutorials are available on the bernina com website and the BERNINA InternationalYouTube channel too You will also find inspiring sewing projects and eBooks on the BERNINA website at bernina com in the Learn & Create section
PREPARING TO STITCH
MATERIALS
Fabric & Stabilizer
- Cut (10) 8" x 6" woven fabric Fold each in half, wrong sides together, to 4" x 6"
- Cut (2) 8" x 6" jersey knit or French terry fabric Fold each in half, wrong sides together, to 4" x 6"
- Cut 12 strips of tear-away stabilizer to 4" x 6" Place one strip between the wrong sides of each woven fabric fold
Notions
- Cotton or polyester thread
- 80/12 Universal needle
- (1) button
- Buttonhole cord (optional)
Feet
- Reverse Pattern Foot #1C
- Reverse Pattern Foot #1D
- Open Embroidery Foot #20C
- Sideways-motion Foot #40C
- Buttonhole Foot with Slide #3A
- Buttonhole Foot #3C
MACHINE SET UP REFERENCES
Before beginning the exercises, set up your machine for sewing Please refer to your manual and/or the following video references to learn how to set up your machine
Set Up for Sewing

In this video, learn how to change your presser foot and stitch plate, activate Dual Feed, add the Slide-on table, and set up the Foot Control and Free Hand System Lever
Thread the Machine

Learn how to thread your bobbin and needle in this tutorial
BASIC STITCHING
Now that your machine is threaded, learn how to select your stitch and use key BERNINA features for maneuvering fabric with the machine, activate the Pinpoint Laser, and discover some basic machine settings such as stitch length and stitch width adjustments
STITCH SELECTION
You can select and manage stitch patterns from the File Manager Stitches are grouped into categorized folders, including Practical Stitches, Decorative Stitches, Alphabets, Buttonholes, and Quilting Stitches You can also search for a stitch by tapping the Search icon and entering the stitch number
PRESSER FOOT SELECTION
The Presser Foot icon shows the recommended or selected presser foot for your stitch pattern Tap the icon to select a different presser foot or display details about the selected presser foot
MAIN MENU

From the Main Menu, use the shortcut icons to set the machine function to Sewing, BERNINA Integrated Stitch Regulator, or Embroidery From this menu, you can also open the Home Screen (Fig 1) to access the same areas In addition, there are shortcut icons for the machine settings and Help Center, as well as the clear and on-screen help function To learn more about these functions, refer to your user manual

Fig. 1
BASIC SECURING STITCHES
Choose your preferred method to use for securing stitches while working through the exercises in the workbook
Main Menu » Settings » Sewing » Securing Stitches
You can turn on Securing Stitches in Settings with the toggle (Fig 2) This will remain on until you turn it off Use this method if you prefer the machine to make several small stitches in place after using the needle threader or thread cutter

Fig. 2
External Buttons
Settings » Sewing » External Buttons

In the External Buttons settings (Fig 3), you can also program the Pattern End, Securing, or Thread Cutter functions to do a securing stitch Select from the dropdown menu to choose your preferred style of securing stitch These options allow for securing stitches in place or 2-6 running stitches The running stitch will sew with a short stitch length Another option is to program the Back-kick function on the BERNINA Foot Control This allows you a variety of options to suit your specific needs, including securing your thread at the beginning and end of sewing

Fig. 3
Quick Reverse

By pressing the Quick Reverse button on the front of your machine, the machine will sew in reverse, securing with a backstitch You will learn how to program this button for Backstepping when sewing a patterned stitch in reverse later in this workbook
Exercise 1 NEEDLE STOP DOWN & FREE HAND SYSTEM
Materials & Machine Settings

 (1) 4" x 6" folded woven fabric with (1) 4" x 6" tear-away stabilizer sandwiched in the middle
 Needle: 80/12 Universal
 Needle Position: Center
 Foot: Reverse Pattern Foot #1C
Part One: Lower the Presser Foot
There are several options for lowering the presser foot on the B 990 and you may have already noticed that it does not have a lever at the back of the machine Instead, use the Presser Foot Up/Down button on the front of the machine, press on the Foot Control, or use the Free Hand System to lower the presser foot
- Select stitch #1
- Place the fabric under the presser foot and use the Presser Foot Up/Down button to lower the presser foot
![]()
- Use the same button to raise the presser foot
- Now try lowering the presser foot by pressing slowly on the Foot Control
- Sew a straight stitch down the length of your fabric
- Cut the thread by pressing the Thread Cutter button Notice that the foot raises automatically after using the thread cutter

How does it look? The bobbin thread and top thread should meet just on the back side Your B 990 has an Adaptive Thread Tension feature that automatically adjusts the top tension to create a perfect stitch! Of course, you always have the option to change the top tension based on the thread/needle/fabric you are using, and the tension will adjust internally for perfect stitches
Part Two: Needle Stop Down and Pivot
- In the Status Bar, select the Needle Stop Up/Down icon The needle will now stop down into the fabric and the icon is yellow
![]()
- Insert the BERNINA Free Hand System (FHS) Knee Lifter and use it to raise and lower the presser foot by pushing it to the right with your knee
- Place the fabric under the foot and lower the foot using the FHS
- Begin to sew with a straight stitch again
- Stop sewing and lift the foot with the FHS, pivot the fabric, and sew in a new direction
- Continue to turn the fabric and sew Notice how the FHS allows you to focus on where your fabric is versus focusing on lowering/raising the presser foot
- Cut the thread by pressing the Thread Cutter button

The FHS not only raises the foot, it also lowers the feed dog to allow more space under the foot
Hover
The B 990 also has a feature called Hover When you need the presser foot to raise automatically during a sewing technique, like machine appliqué, you may prefer to use the Hover feature The default setting is not to Hover (Low), so to use this feature, you will need to set it up in your machine settings
Select the Main Menu » Settings » Sewing » Presser Foot Hover Position » Medium
- Set the Hover Position to Medium This will raise the presser foot slightly, only several millimeters up from the fabric High will raise the presser foot to the highest position
- Hover is only activated if you have selected Needle Stop Down on the Status Bar
- Use the Main Menu, then select Sewing to return to the sewing screen
- Sew a few more stitches on your sample piece using Hover
BERNINA Foot Control with Back-kick
The BERNINA Foot Control provides a lot of flexibility with a Back-kick option To activate it, simply press the back portion of the Foot Control with your heel The default setting is to raise and lower the needle
- Sew a few stitches, then engage the Back-kick
- Lower the presser foot again by pressing the front of the Foot Control
- Sew a few more stitches and then engage the Back-kick again to see how it feels to use
The Foot Control can also be programmed to do other things, such as cutting the thread or securing stitches (Fig 4) To program your Foot Control, go into Settings

Main Menu » Settings » Sewing » Foot Control
- Turn off the Needle Up/Down Notice you can now toggle other items: Securing, Cut Upper and Lower Thread, and Raise Presser Foot
- Return settings to Needle Up/Down
Total Stitch Control
You can easily adjust the width and length settings for any stitch by turning the Multi-function Knobs on the front of the machine The upper knob controls the Stitch Width and the lower knob controls the Stitch Length
Using the Pinpoint Laser, you can see exactly where your needle is going to land In addition, you can also move your needle position to the right or left depending on the stitch pattern and technique you are doing
Exercise 2 ALTERED STITCHES & PINPOINT LASER
Materials & Machine Settings

(1) 4" x 6" folded woven fabric with (1) 4" x 6" tear-away stabilizer sandwiched in the middle
Needle: 80/12 Universal
Needle Position: Center
Foot: Reverse Pattern Foot #1C
- Select stitch #2
- Change the stitch width by turning the upper Multi-function Knob to the desired width You can also select the Stitch Width icon (Fig 5), which opens a window with additional ways to change the stitch width

- Repeat this same process for stitch length by using the lower Multi-function Knob
- Sew your altered stitch on a new fabric swatch
- Cut the thread with the automatic thread cutter
- Now turn on the Pinpoint Laser by pressing the icon in the Status Bar
![]()
- Sew a second row of stitching, adjusting your stitch width and length while you sew Notice that the laser moves with the needle position no matter the width you moved to
- Cut the thread with the automatic thread cutter
- Select a different stitch, then return to stitch #2 Your stitch settings remain as you left them, shown in yellow
- Turn off the Pinpoint Laser


Temporary Altered Stitch Memory
The Temporary Altered Stitch Memory means you can move between stitches and the machine will remember any stitch alteration you made the last time you used that stitch The width and/or length will turn yellow, so you will always know when you have altered a stitch When you turn off your machine, all stitches return to factory default
History Stitches

You can also retrieve the last 24 stitches you have sewn in History Stitches The icon is located at the top of the File Manager (Fig 6)

Needle Position
You can set your needle position to any of the eleven available positions on the B 990 This is especially helpful for zippers, edge stitching, and appliqué Try the following directions on your machine touchscreen
Status Bar » Presser Foot Selection » Search
- Select Stitch #1
- Select Zipper Foot #4D using the Search function and typing "4" (Fig 7)

- Select #4D from the filtered list to the left The Stitch Altering Area now shows the correct presser foot and the stitch in red (Fig 8)

- Move the Needle Position to the Left, then Right Notice that the stitch changes to white when it clears the foot (Fig 9)


EDIT MENU
The B 990 enables you to adjust, alter, and optimize any stitch, easily accessed by tapping the Edit icon This chapter will summarize these options so you can practice and become familiar with the navigation Then, you will have the chance to put it to the test with exercises later on
EDIT SUBMENU

In the Edit submenu, you can change your stitch orientation with mirror, program stitch repeats, turn single run stitches into triple stitch patterns, create a Jumbo Stitch, and more
Repeat

Use this function to program a specific number of repeats for a stitch or combination of stitches
- Select Foot #1C with the Presser Foot Selection Menu
- Select folder 101 from the Decorative Stitches Folder
- Select stitch #104
- Select the Edit Menu
- Select the Repeat icon
- Set Repeat to 3 and tap the green check
The machine now shows three stitches (Fig 10), with both Repeat and Edit icons highlighted in yellow

Fig. 10
Mirror Image

You can change the direction of the stitch either left/right, up/down, or both
- With stitch #104 still open, select the Mirror Image Left/Right icon
- Close the Edit Menu
Notice the stitch pattern has changed directions (Fig 11)

Fig. 11
Triple Stitch

To create a bolder look in your decorative stitches, use the Triple Stitch function This is great for hemming jeans or sewing more pronounced topstitching when you do not have topstitch thread on hand This function is not applicable for satin and some decorative stitch patterns that already have multiple needle penetrations Once selected, the function is highlighted yellow and the stitch pattern appears slightly bolder on the screen
Jumbo Stitch

With the B 990, you can resize your stitch, making it as small as 25% or large as 500% of the original size The machine will recalculate the stitch length so the pattern has even stitches If you increase the stitch to over 9 mm in width, it becomes a Sideways Motion pattern and requires the Sideways-motion Foot #40C
- Use Search to select stitch #130
- Select the Edit Menu
- Select Jumbo Stitch
- Adjust the size of the stitch by individual percentages using the plus/minus icons
- Adjust the size of the stitch using the Multi-function Knobs
- Tap the +100 icon to quickly rescale by 100% (Fig 12)

- Tap the percentage settings (width and length) to return to the original size
- Now scale the pattern down to 5 5 mm using whichever method for rescaling that you prefer (Fig 13)


Notice how the machine recalculates the stitches for the optimal stitch result; no long or tiny stitches created from the dramatic rescaling
Long Stitch

This feature enables the machine to stitch every other needle penetration Practically, this creates a great basting stitch when applied to a simple straight stitch If you increase the stitch length to 6 mm, Long Stitch will transform it into a 12 mm stitch length It can also create interesting options when using a decorative stitch
Directional Sewing

Your B 990 will sew in any direction! This is especially helpful when you are sewing something that will not easily pivot like sewing on a patch or down a pant leg You could also use this to sew an "X" in a bag strap without pivoting all the bag layers under the presser foot You can even change directions with the Multi-function Knobs while sewing
- In the Edit Menu, select the Directional Sewing icon
- Spend a few moments choosing different directions on the compass or Multi-function Knobs (Fig 14)

Fig. 14 - Return to Edit with the back arrow

Stitch Counter

The Stitch Counter is a tool that records a seam length and allows you to stitch the exact same seam length repeatedly until overwritten or cleared This tool is particularly useful when chain-piecing repetitive seams
Distort

Distort is a creative tool for decorative stitches, enabling you to sew in multiple directions and skew or distort the pattern
- Select stitch #113
- Tap Edit
- In the Edit Menu, tap Distort
- Turn the upper Multi-function Knobs to distort the stitch horizontally and vertically
- Tap the yellow windows to set the stitch back to default
- Return to Edit with the back arrow
Reverse & Backstep

You are familiar with the Quick Reverse button for backstitching, but did you know that you can also sew in reverse without pressing and holding the Quick Reverse button? Backstep is a function that you can program in the Edit submenu and when activated, you will sew in reverse precisely over the stitches sewn forward This is a great option for making a stitch look more pronounced or for simply adding stitches as a way to secure the stitch In the following exercise, you will try this out with a decorative stitch pattern so you can see how it could be useful in certain applications
Exercise 3 REVERSE & BACKSTEPPING
Materials & Machine Settings

(1) 4" x 6" folded woven fabric with (1) 4" x 6" tear-away stabilizer sandwiched in the middle
Needle: 80/12 Universal
Needle Position: Center
Foot: Reverse Pattern Foot #1C
Part One: Reverse
- Select stitch #113, and sew forward as usual about 2-3 inches
- From the Edit Submenu, select Reverse and sew in reverse through an entire stitch pattern Notice that the machine sews backward but not in the pattern of the decorative stitch
![]()
- Tap Reverse to deactivate the feature Cut the thread with the automatic thread cutter

Part Two: Backstep
- Again, with stitch #113, sew forward about 2-3 inches
- Tap Backstep to engage this feature and sew with backstep through an entire stitch pattern Notice how, this time, the pattern matches what was sewn in the forward direction
![]()
- Tap Backstep to deactivate the feature Cut the thread with the automatic thread cutter

OPTIMIZATION TOOLS
There is also an Optimize submenu, which allows for adjusting Balance, changing Stitch Density, and finetuning Dual Feed Balance
Exercise 4 BALANCE
Materials & Machine Settings

(1) 4" x 6" folded woven fabric with (1) 4" x 6" tear-away stabilizer sandwiched in the middle
Needle: 80/12 Universal
Needle Position: Center
Foot: Reverse Pattern Foot #1C and Reverse Pattern Foot #1D
Part One: Balance
There are a wide variety of factors that affect your stitchout, such as fabric thickness, thread, or the complexity of the pattern This tool is used to correct your fabric feeding if a decorative stitch pattern is not sewing out exactly right
- Select stitch #653 (Honeycomb Stitch)
- Sew the stitch on stretch fabric
- Cut the thread
- Open the Edit Menu » Optimization submenu » select Balance
![]()
- Using the Multi-function Knobs, change the display in the Stitch Preview section to match what you see on your fabric
- Now stitch again; your B 990 will make the appropriate adjustments to correct your stitch

Part Two: Dual Feed Balance
Dual Feed Balance is a valuable tool to help with even feeding of the fabric Because fabric stretches and the presser foot pushes down on the top layer of fabric, you can experience an uneven feed or shift of the different fabric layers
BERNINA Dual Feed can only be used with presser feet compatible with this feature Presser feet with the label "D" are designed to be used with Dual Feed
- Attach Reverse Pattern Foot #1D
- Engage the Dual Feed
- Select Foot #1D from the Presser Foot Selection Menu
- Select stitch #1
- Sew down the fabric and watch to see how the fabric feeds
- Cut the thread
- Open the Edit Menu » Optimization submenu » select Dual Feed
![]()
- Sew a second seam, increasing the value to up to 2 0 as you sew until the fabrics feed evenly

The basic rules are:
If the upper layer of fabric is becoming longer than the lower layer of fabric, then increase the Dual Feed Balance
If the upper fabric is becoming shorter than the lower fabric, then decrease the Dual Feed Balance
Presser Foot Pressure
Another option for controlling how evenly a fabric feeds through the machine is to adjust Presser Foot Pressure This setting is permanently available on the screen in the Status Bar You may consider a combination of Presser Foot Pressure and Dual Feed Balance to perfect seams in challenging fabrics
- Return your Dual Feed Balance to normal
- Tap the Presser Foot Pressure icon in Status Bar and decrease the value to 25 (Fig 15) Sew to test the fabric feed
- If you wish, sew the seam a third time and evaluate the result The seam should be flat and even, and the edges of the fabric should match perfectly
- Close the Presser Foot Pressure window

Fig. 15

Exercise 5 STITCH DENSITY
Materials & Machine Settings

(1) 4" x 6" folded woven fabric with (1) 4" x 6" tear-away stabilizer sandwiched in the middle
Needle: 80/12 Universal
Needle Position: Center
Foot: Reverse Pattern Foot #1D
The Stitch Density tool is only available on stitches with satin stitching—not just ones that are exclusively satin stitches, but even stitch patterns that include segments or areas of satin stitches You can adjust the distance between passes of satin stitching in measurements of 05 mm Decreasing this number will make the stitch more dense Increasing the value will create more open stitching
This is a great feature to use when you need the satin stitching to suit the thread weight Using a heavyweight thread might require a more open satin stitch, whereas a finer thread may look better with denser stitching
- Select stitch #117
- Sew the stitch and cut the thread
- Open the Edit Menu » Optimi zation submenu » select Stitch Density The default is 0 35 mm
![]()

- Next, increase the Stitch Density to 85 mm and sew (Fig 16)

- Compare the two results
- Return the Stitch Density to normal

SAVING STITCHES

In this chapter, you will learn a variety of ways to save your stitches Each option has advantages for different sewing applications As you work through this workbook, think about your needs and when you might like to use each option and why You've learned about Temporary Altered Stitch Memory and History Stitches, which are useful when you need to go back to a stitch that you used recently Saving stitches to the machine's memory means all your personalized settings will be kept in the machine long term without having to reprogram it each time If you have taken the time to edit or refine your stitch, you will probably want to use it again in the future
SAVE TO PERSONAL FOLDER
You can save any stitch, including all the customized stitch settings you created, by saving it to the machine in the Personal Folder
- Select #130
- Open the Edit Menu » select Jumbo Stitch » and adjust as desired (200%)
- Select the Save icon at the bottom of the screen
- Tap New Stitch to save
- Name the stitch as desired using the keyboard (Jumbo Flower) and confirm twice with the green checkmark
To retrieve your stitch, select the Personal Folder heart icon You can scroll through your saved designs in the folder or by each design

SAVE/OPEN FROM USB
You can also save a stitch to a USB stick for software or another machine
- Insert a USB stick into the machine
- Select the Save icon at the bottom of the screen
- Tap New Stitch and name it; confirm once
- This time, select the USB icon at top of the screen This icon will only appear if a USB is inserted Confirm with green checkmark
![]()

To retrieve your stitch from a USB, select the USB icon from the Quick Access Bar to the right in the File Manager (Fig 17)

Fig. 17
SAVE AS NEW DEFAULT
Use this option to save your stitch modifications as the default on the machine It may be a stitch that you use frequently with specific settings
- Select stitch #2 and adjust as desired
- Tap Save icon » New Default
- You will find the new stitch in the same location as the original stitch
- Select the Reset icon next to the Save icon to return the stitch to the default settings
![]()

COMBI MODE
In this chapter, you will learn how to combine decorative stitches and letters There are several additional edit options in Combi Mode that allow you to get creative with your stitches or personalize your sewing
You can create decorative combinations using Move, Automatic Stop, and Tie-Off to connect stitches while also providing securing stitches along the way Drag and drop in the Combination Bar to re-arrange your stitches, or edit each individual stitch with the Edit tool The combinations (and fun) are endless!

Exercise 6 COMBI MODE DECORATIVE STITCHES
Materials & Machine Settings

(1) 4" x 6" folded woven fabric with (1) 4" x 6" tear-away stabilizer sandwiched in the middle
Needle: 80/12 Universal
Needle Position: Center
Foot: Open Embroidery Foot #20C

To activate Combi Mode on your B 990, tap the icon at the bottom of the Stitch Altering Area You will notice a new area that appears on the screen, the Combination Bar Here is where you will see the stitches, letters, and/or actions you add to your combination
- Select stitch #412 two times
- Select stitch #413 two times
- Using a single finger touch gesture, drag and drop the stitch patterns into alternating order: flower, heart, flower, heart (Fig 18)

- Now touch and drag (to the left) to remove the final heart stitch from the combination (Fig 19)

- With the last flower selected, tap Edit Menu » Edit Submenu » Mirror Up/Down (Fig 20)

- Select All (the stitches) from the Selection Options at the bottom of the Combination Bar (Fig 21)

- Set the Pattern Repeat to 1 and sew
- Using the skills you learned about Saving Stitches, save this combination in Personal Folder
- Select all the stitches and delete to start a new combination


Combination Options
In the Edit Menu, you will see a new submenu available when you are working in Combi Mode, offering more edit options (Fig 22) You can move, duplicate, and unify width and length All these allow you to use the various design sizes with more flexibility In addition, you can add in stops, stitch tie-offs, and thread cuts

The Unify Width and Length features are only available when the entire combination is selected It is also easy to Delete and start a new Combi with all stitches selected
Close Combi Mode by selecting the Combi Mode icon again
Tips:
- Long press on a stitch in the Combination Bar to drag it to the desired position This might be useful if you misspelled a word
- Delete stitches by selecting them in the Combination Bar and selecting Delete in Edit Menu
- Use the thread cut to begin a new row of text or change the thread color
SIDEWAYS MOTION AND MORE
Experience the excitement of Sideways Motion patterns in this chapter This is a creative tool to enhance your projects by allowing for stitches wider than 9 mm Some stitches are designed to be Sideways Motion, but you can create your own Sideways Motion stitches by using Jumbo Stitch or adding a move stitch in a stitch combination Always use the Sideways-motion Foot #40C with sideways motion stitches

Pattern End

Pattern End is one of the external machine buttons that can be activated at any time When sewing decorative stitches, pressing the button will signal the machine to sew to the end of the entire stitch sequence and then stop automatically It is a great button to use when you are unsure how many stitch repeats to program Using the camera will help you determine when to press the button
Remember, the Pattern End is one of the buttons you can program in your machine settings It can also be used to secure, cut threads, and/or raise the presser foot
Exercise 7 SIDEWAYS MOTION STITCHES
Materials & Machine Settings

(1) 4" x 6" folded woven fabric with (1) 4" x 6" tear-away stabilizer sandwiched in the middle
Needle: 80/12 Universal
Needle Position: Center
Foot: Sideways Motion Foot #40C
The Sideways Motion Stitch Folders are in the Decorative Stitches Menu, and indicated with a small crosshair on the bottom right corner of the folder The feed dog will move the fabric in 360 degrees to create the stitch, and all you need to do is keep the fabric parallel to the presser foot
File Manager » Decorative Stitches » Folder 201
- Select stitch #253
- Select Sideways-motion Foot #40C from the Status Bar
- Turn on the Pinpoint Laser
- Activate the Camera
- From the View Toolbar, turn on the Grid View (Fig 23)
![]()

- Sew the stitch down the length of fabric; use the tools to sew straight along your drawn line
- When only one more stitch will fit to the fabric, press the Pattern End button on the front of the machine
![]()
- Cut the thread with the automatic thread cutter
- Turn off the Pinpoint Laser, Camera, and Grid View


Tips:
To align Sideways Motion stitches, consider marking your fabric with a guideline At any point, you can turn on the camera in the Status Bar to see exactly where your stitch will sew out or whether it will fit on the end of your fabric
Exercise 8 JUMBO STITCHES
Materials & Machine Settings

(1) 4" x 6" folded woven fabric with (1) 4" x 6" tear-away stabilizer sandwiched in the middle
Needle: 80/12 Universal
Needle Position: Center
Foot: Sideways Motion Foot #40C
Resize any decorative stitch pattern with the versatile Jumbo Stitch tool and do so without comprising stitch quality You can make small stitches dramatically bigger or make large ones more delicate by sizing them down
- Select stitch #130
- If your stitch is still set at a different size than default, select the Main Menu, then Clear (CLR)
- Select the Edit Menu, then choose Repeat and enter 2
![]()
- Sew the stitch at the standard size down the middle of the fabric
- Tap Jumbo Stitch and then +100 once to increase size to 200% (locked proportions)
![]()
- Sew the stitch to the side of first stitch (use the camera to preview) Repeat 1 time
- Use the Multi-function Knobs or plus (+) or minus (-) icons to reduce the stitch size to about 61% (making the stitch 5 5 mm) (Fig 24)

- Sew the stitch with a Repeat of 4


Exercise 9 DIRECTIONAL SEWING
Materials & Machine Settings

(1) 4" x 6" folded woven fabric with (1) 4" x 6" tear-away stabilizer sandwiched in the middle
Needle: 80/12 Universal
Needle Position: Center
Foot: Sideways-Motion Foot #40C

Sew any decorative stitch pattern or combination at 360 degrees, from any angle, without moving or pivoting the fabric around It is perfect for applications such as:
- Sewing on a bag strap using the "X in a Box" technique
- Creating crazy quilting, because you can use almost any stitch with this feature
- Sewing on patches and labels by just changing the direction of the stitch
- For creative embellishments, because you can change the stitch direction as you sew
File Manager » Decorative Stitches » Folder 1101
- Select stitch #1103
- Select the Edit Menu » Directional Sewing
- Sew the stitch pattern for a couple of repeats to begin (Fig 25)


- Using the touchscreen, select 135 degree and sew diagonally (Fig 26), then try 225 degree

- Now try using the Multi-function Knobs to change the stitch direction while you sew
- Select Pattern End to finish a stitch pattern and then cut

STITCH DESIGNER

With Stitch Designer, you can create your own decorative stitch patterns or alter designs already built-in to the B 990 sewing machine You already know BERNINA offers you Total Stitch Control, but Stitch Designer takes this to a new level
Touch Gestures
Using Stitch Designer is a great time to take full advantage of the Touch Gestures on the B 990 This makes zooming and panning on your touchscreen effortless

Undo/Redo
It is easy to accidentally add extra points to a stitch pattern Don't forget about the Undo/Redo icons on the top left of the screen This makes it easy to get to the place you need
Exercise 10 EDIT AN EXISTING STITCH
Materials & Machine Settings

(1) 4" x 6" folded woven fabric with (1) 4" x 6" tear-away stabilizer sandwiched in the middle
Needle: 80/12 Universal
Needle Position: Center
Foot: Reverse Pattern Foot #1D
File Manager » Decorative Stitches » Folder 601
- Select stitch #621
- Tap the Stitch Designer icon at bottom right of the Quick Access Bar
![]()
- Explore the Stitch Designer screen and tap View Toolbar
![]()


- Toggle on/off the 9 mm stitch limitation here (when turned off, there is no shaded area on screen) Leave 9 mm limitation off
![]()
- Toggle Rotate to view the stitch horizontally (turn back to vertical)
![]()


- Close the View toolbar
- There are three icons on the left of the Stitch Design Area These are the tools you will use to adjust the decorative stitch (Fig 27) Use the Selection Options icon at the top and choose Single Point


- Select the Move icon
- Locate point 7 and drag up to new position


- Find point 11 and drag to a new position
- Tap point 15 and move to reflect point 7 (Fig 29)

Fig. 29 - Edit Menu » Tap the Sew Virtually icon and watch to see how the stitch will sew out
- Confirm the new stitch pattern (save and name if you like)
- Sew the stitch

Tip:
Working in Stitch Designer is a place to practice using two finger gestures to zoom in/out and pan to the top area of the stitch When doing this, make sure that you are using the Move tool instead of Draw
Draw Tool
Explore creating your own unique stitch from scratch using the Draw Tool; begin by writing your name in cursive
- Select New
![]()
- Change your view to Horizontal for easy writing Close the View Menu
- Select the Draw Tool from the left
![]()
- Write your name or simply draw a stitch by using your finger or stylus directly on the screen Adjust the stitch with Undo/Redo and Add Stitch options until you reach the desired look
- Confirm and Save if desired


Snap to Grid

There are other helpful Edit Tools in the Stitch Designer, like Snap to Grid This will make the stitch points land on the grid intersections The grid helps you create symmetrical patterns or maintain uniform spacing
BUTTONHOLES
The BERNINA Buttonhole is a hallmark of the quality of BERNINA sewing machines In this chapter, learn several ways to create a perfect buttonhole, while fine-tuning each to fit different applications
Help Center

The Help Center (Fig 30) is where you look up quick resources directly on your machine There is a Quick Start section that is full of on-screen animations for doing things like threading the machine You will also find a digital version of the instruction manual in the Help Center The last tool is the Consultant This tool will help you get started with the right settings and some instructions for your sewing needs

Fig. 30
Consultant

The Consultant in the Help Center has tutorials and tips on how to sew various techniques that you may encounter If you are unsure about how to do a special technique like buttonholes, the Consultant is a great place to start The best part is that you can connect these tutorials to an external device like a tablet to give you the directions while you are working on the machine
Tip:

If your machine is connected to WiFi, you will notice a QR Code that appears If you have a tablet or device connected to the same WiFi network, you can tap the QR Code and scan it to see the Consultant information on your mobile device
Main Menu » Help » Consultant » Sewing » Buttonholes
- Scroll through the entirety of the Preparation section On the left, you can select your type of fabric for the technique
- Select Denim; notice the stitch has changed as well as some of the recommendations
- Back at the top, toggle to the Tutorial Section (Fig 31)

- Next, select Medium-weight Woven and confirm the settings It will take you straight to your sewing screen with those settings applied (Fig 32)


Exercise 11 BUTTONHOLES
Materials & Machine Settings

(1) 4" x 6" folded woven fabric with (1) 4" x 6" tear-away stabilizer sandwiched in the middle, button, and buttonhole cord (optional)
Needle: 80/12 Universal
Needle Position: Center
Foot: Buttonhole Foot #3A
Part One
Option One: Automatic Buttonholes
Automatic buttonholes are easy and fast to create With the Automatic Buttonhole Foot #3A, your buttonholes can be up to 29 mm in length for a 27 mm button
- Attach Automatic Buttonhole Foot #3A and set your Press Foot selection in the Status Bar
- Change your Bobbin case to the High Thread Tension Bobbin Case (Gold)
- If you followed the directions above, you will already be at stitch #51 If not, select the stitch from the Buttonholes folder
- Select the Edit Menu » Buttonhole Options
- Tap Length, and then Auto Length; hold your button up to the measuring circle on the screen, then turn the Multi-function Knob until the circle and the button match in size (Fig 33)
![]()

- Touch the Back Arrow » select Slit Width
![]()


Tip:
The High Thread Tension Bobbin Case places more tension on the bobbin thread, which will pull the top thread to the back and make the side beads of the buttonhole pronounced and crisp You do not have to use this to get a good buttonhole, but remember the Consultant did recommend it
- Adjust the slit width with the Multi-function Knob to 0 9 mm
- Sew the buttonhole
These settings will stay in your machine's Temporary Altered Stitch Memory until you reset the stitch or shut the machine off
You can also change the width of the Buttonhole
Stitches to be more robust or increase or decrease the length of the stitches of the satin stitch Do this by turning the Multi-function Knobs
Buttonholes may be saved into the Personal Folder For example, if you make a lot of button-down shirts with the same size button, it would be helpful to have the saved version ready to go whenever you are
Option Two: Manual Buttonholes
You can create longer buttonholes by using the manual function and the Buttonhole Foot #3C presser foot that comes with your machine Longer buttonholes are great for home decor projects like curtains or pillows
- Attach Buttonhole Foot #3C and select it in the Presser Foot Selection Menu
- Select buttonhole stitch #51
- Edit Menu » Length icon » select Sew Manually
![]()
- Mark a buttonhole length on your fabric
- Each segment of the buttonhole is displayed in the Buttonhole bar (Fig 34) To move through each segment, touch the Quick Reverse button on the front of the machine

Fig. 34 - Sew the buttonhole, being careful to follow your marked length


Tip:
To check the right side of the stitch with the laser, open the Edit Menu and Mirror the stitch The laser will move The Button Sew-on
Program secures the stitch both at the beginning and at the end
Part Two: Attaching Buttons
In the Buttonhole Stitches folder, you will also find a stitch for sewing an eyelet and a stitch for attaching a button This is stitch #60 Your B 990 also comes with the Button Sew-on Foot #18
- Attach Button Sew-on Foot #18 and select it from the Status Bar
- Select Buttonhole Menu and stitch #60 The machine will lower the feed dog when this stitch is selected
- Align the front holes (if there are four holes) under the presser foot between the pin
- Use the laser or the handwheel to ensure that the needle position will not hit the button
- Sew the button on, using the Start/Stop button or Foot Control
- The machine will stop automatically at the end of the stitch sequence If sewing a 4-hole button, start by stitching the two holes closest to you and then move the button slightly forward on the pin to sew the back two holes
Corded Buttonholes
For projects needing a durable buttonhole that might experience increased pressure or disappear in a lofty fabric, corded buttonholes are the way to go The cord adds both stamina and beauty to the buttonhole Try creating a corded buttonhole from the settings you programmed in the previous exercise, adjusting the width of the buttonhole to accommodate the size of the cord (you don't want to stitch through it!)
For projects needing a durable buttonhole that might experience increased pressure or disappear in a lofty fabric, corded buttonholes are the way to go The cord adds both stamina and beauty to the buttonhole Try creating a corded buttonhole from the settings you programmed in the previous exercise, adjusting the width of the buttonhole to accommodate the size of the cord (you don't want to stitch through it!)
Help Center » Creative Consultant » Sewing » Corded Buttonholes
- Review the Tutorial
- Select Buttonhole #51 and activate laser to assist with placement
- In the Edit Menu, under Buttonholes >> Length, choose Auto Length Set the length to 15
- Loop the cord on the bottom of the Buttonhole Foot #3A according to tutorial directions (Fig 35)

- Sew the buttonhole

TAPER STITCHES
Taper stitches are unique because they are decorative stitches which taper to a point at both ends of the stitch They are like a buttonhole in that the stitch is segmented, but here, into Tips and Length These stitches can be used as embellishment or as a precise application for machine appliqué As you sew one repeat, stop with needle down and turn the fabric 90 degrees to match the edges of the tips for a perfect appliqué

Fig. 36
Exercise 12 TAPERS
Materials & Machine Settings

(1) 4" x 6" folded woven fabric with (1) 4" x 6" tear-away stabilizer sandwiched in the middle
Needle: 80/12 Universal
Needle Position: Center
Foot: Buttonhole Foot #3A
Decorative Stitches » Folder 1401
- Attach Open Embroidery Presser Foot #20C
- Select stitch #1449 (it opens similarly to the Manual Buttonhole) (Fig 36 on previous page)
- Sew the Tip of this stitch After completing this section, it will immediately move on to the Length
- Press the Quick Reverse once the machine begins stitching the length section This will cue the machine to move on to the Tip as soon as the current length section is completed
- The machine will stop automatically at the end of the Tip and return to the beginning of the tapering stitch
- Using the same stitch, select the Edit Menu » Tapering Option (Fig 37) » Tips
![]()
- Change the direction of the points (Tips) » Select 2
![]()


- Use the Back Arrow and Select Length Notice here that the length is adjusted by the full length of the body stitch pattern
- Sew the stitch again
Tip:
Like the Buttonhole Stitches, you can also use the Sew Manually icon to fine tune the stitch to your desired length Use the Quick Reverse button to move through the stitch sequence
Documents / Resources
References
Download manual
Here you can download full pdf version of manual, it may contain additional safety instructions, warranty information, FCC rules, etc.
Advertisement


Need help?
Do you have a question about the 990 and is the answer not in the manual?
Questions and answers