Bernina Record 930 Service Manual
Hide thumbs
Also See for Record 930:
- Service manual (65 pages) ,
- Manual (53 pages) ,
- At-a-glance reference manual (84 pages)

Related Manuals for Bernina Record 930


Summary of Contents for Bernina Record 930
- Page 1 All manuals and user guides at all-guides.com Service Guide Model 930 Sewconsult.com 2002 Div. Sewing Educational Warehouse...
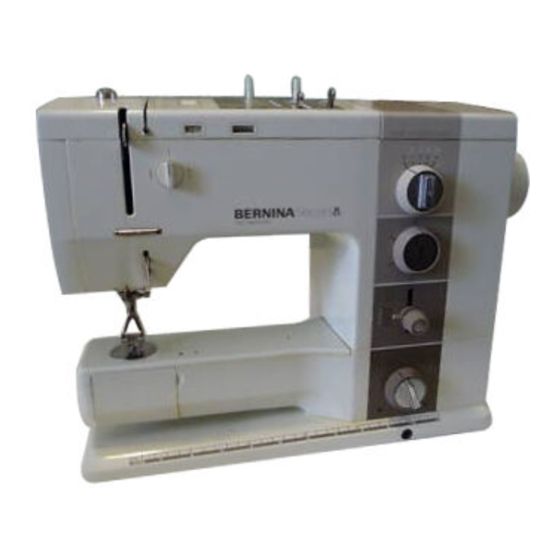
- Page 2 All manuals and user guides at all-guides.com Table of Contents Parts of your machine Page 1 Removing covers page 2 – 4 Cleaning and lubrication page 5 – 6 Adjusting bobbin tension page 7 Adjusting top tension page 8 Hook timing page 9 –...
- Page 3 All manuals and user guides at all-guides.com...
- Page 4 All manuals and user guides at all-guides.com...
- Page 5 All manuals and user guides at all-guides.com Tuning up your machine There are three main points to a tune-up on a sewing machine. -Cleaning and oiling -Hook and feed timing -Internal tension adjustment Start by removing the covers on your machine. DO NOT START ANY REPAIRS WITH OUT UNPLUGGING THE MACHINE FROM THE WALL OUTLET...
- Page 6 All manuals and user guides at all-guides.com...
- Page 7 All manuals and user guides at all-guides.com...
- Page 8 All manuals and user guides at all-guides.com Cleaning and lubrication The best way to remove lint from the machine is with compressed air. Blow all the lint from the machine. Remove all lint from the gears and again from the bobbin area and feed dogs.
- Page 9 All manuals and user guides at all-guides.com...
- Page 10 All manuals and user guides at all-guides.com Adjusting Tensions To check the bobbin tension, insert a bobbin wound with medium weight thread into the bobbin case. Remove the hook from the machine. Snap the bobbin case onto the hook. Hold the hook and bobbin case by the bobbin thread and jerk the thread once or twice.
- Page 11 All manuals and user guides at all-guides.com Top Tension The top tension is controlled with the tension dial. Normal tension is when the indicator is centered. After the bobbin tension is set the tensions should balance in the center of the fabric as shown.
- Page 12 Hook Timing and Position All manuals and user guides at all-guides.com With the hook in the race but the race cover not closed, set the needle position to the far left. Bring the needle to its lowest position. The tip of the hook should be 2.3 – 2.5mm to the left of the needle.
- Page 13 All manuals and user guides at all-guides.com Hook Timing and Position Continued Set your machine to far right needle position. From the lowest position bring the needle up until the hook and needle meet. The tip of the hook should be just above the eye of the needle.
- Page 14 All manuals and user guides at all-guides.com...
- Page 15 All manuals and user guides at all-guides.com...
- Page 16 All manuals and user guides at all-guides.com...
- Page 17 All manuals and user guides at all-guides.com...
- Page 18 All manuals and user guides at all-guides.com...
- Page 19 All manuals and user guides at all-guides.com...
- Page 20 All manuals and user guides at all-guides.com...
- Page 21 All manuals and user guides at all-guides.com...
- Page 22 All manuals and user guides at all-guides.com...
- Page 23 All manuals and user guides at all-guides.com...
- Page 24 All manuals and user guides at all-guides.com...
- Page 25 All manuals and user guides at all-guides.com...
- Page 26 All manuals and user guides at all-guides.com...
- Page 27 All manuals and user guides at all-guides.com...
- Page 28 All manuals and user guides at all-guides.com...
- Page 29 All manuals and user guides at all-guides.com...
- Page 30 All manuals and user guides at all-guides.com...
- Page 31 All manuals and user guides at all-guides.com...
- Page 32 All manuals and user guides at all-guides.com...
- Page 33 All manuals and user guides at all-guides.com...
- Page 34 All manuals and user guides at all-guides.com...
- Page 35 All manuals and user guides at all-guides.com...
- Page 36 All manuals and user guides at all-guides.com...
- Page 37 All manuals and user guides at all-guides.com...
- Page 38 All manuals and user guides at all-guides.com...
- Page 39 All manuals and user guides at all-guides.com...
- Page 40 All manuals and user guides at all-guides.com...
- Page 41 All manuals and user guides at all-guides.com...
- Page 42 All manuals and user guides at all-guides.com...
- Page 43 All manuals and user guides at all-guides.com...
- Page 44 All manuals and user guides at all-guides.com...
- Page 45 All manuals and user guides at all-guides.com...
- Page 46 All manuals and user guides at all-guides.com...
- Page 47 All manuals and user guides at all-guides.com...
- Page 48 All manuals and user guides at all-guides.com...
- Page 49 All manuals and user guides at all-guides.com...
- Page 50 All manuals and user guides at all-guides.com...
- Page 51 All manuals and user guides at all-guides.com...
- Page 52 All manuals and user guides at all-guides.com...
- Page 53 All manuals and user guides at all-guides.com...
- Page 54 All manuals and user guides at all-guides.com...
- Page 55 All manuals and user guides at all-guides.com...
- Page 56 All manuals and user guides at all-guides.com...
- Page 57 All manuals and user guides at all-guides.com...
- Page 58 All manuals and user guides at all-guides.com...
- Page 59 All manuals and user guides at all-guides.com SEWING MACHINE TROUBLESHOOTING GUIDE In most cases poor sewing results and breakdowns are caused by three main factors: 1. The condition of the needle. 2. Threading and the quality of thread being used. 3.
- Page 60 All manuals and user guides at all-guides.com If you start with a new needle (inserted properly) and the machine is threaded as per instructions, sewing problems may be mechanical breakdown or damaged parts. For best results your machine should be serviced before every large project.
-
Page 61: Upper Thread Breaks
All manuals and user guides at all-guides.com 4. Type of thread being used can cause problems. Always use good quality thread. When using heavy thread in the top you will have to use a larger needle. The groove in the needle must fit the thread. UPPER THREAD BREAKS 1. -
Page 62: Lower Thread Breaks
All manuals and user guides at all-guides.com LOWER THREAD BREAKS 1. Make sure the bobbin is inserted correctly and the right bobbin for your machine is being used. Generic bobbins should not be used in your machine. 2. Check that the thread is in the bobbin tension and the tension is not too tight. -
Page 63: Skipping Stitches
All manuals and user guides at all-guides.com pressure adjustment and should be ok. Some pressure adjustment can be done under the top cover. 3. Check for lint caught in the feed dogs. 4. Is the pressure foot tight on the pressure bar? Make sure the foot is pushed up all the way and tight. - Page 64 All manuals and user guides at all-guides.com Notes...
Need help?
Do you have a question about the Record 930 and is the answer not in the manual?
Questions and answers