Sign In
Upload
Manuals
Brands
Bernina Manuals
Sewing Machine
990
Bernina 990 Manuals
Manuals and User Guides for Bernina 990. We have
5
Bernina 990 manuals available for free PDF download: Service Manual, User Manual, Workbook
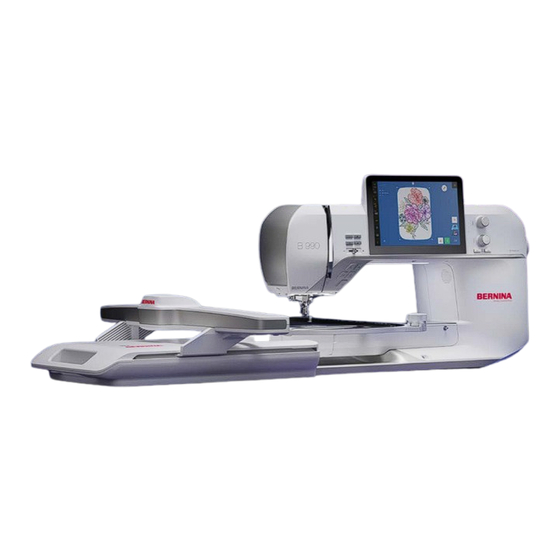
Bernina 990 Manual
Brand:
Bernina
| Category:
Sewing Machine
| Size: 8 MB
Table of Contents
INTRODUCTION
PREPARING TO STITCH
MACHINE SET UP REFERENCES
BASIC STITCHING
STITCH SELECTION
PRESSER FOOT SELECTION
MAIN MENU
BASIC SECURING STITCHES
Exercise 1 NEEDLE STOP DOWN & FREE HAND SYSTEM
Hover
BERNINA Foot Control with Back-kick
Total Stitch Control
Exercise 2 ALTERED STITCHES & PINPOINT LASER
Temporary Altered Stitch Memory
History Stitches
Needle Position
EDIT MENU
EDIT SUBMENU
Exercise 3 REVERSE & BACKSTEPPING
OPTIMIZATION TOOLS
Exercise 4 BALANCE
Presser Foot Pressure
Exercise 5 STITCH DENSITY
SAVING STITCHES
SAVE TO PERSONAL FOLDER
SAVE/OPEN FROM USB
SAVE AS NEW DEFAULT
COMBI MODE
Exercise 6 COMBI MODE DECORATIVE STITCHES
Combination Options
SIDEWAYS MOTION AND MORE
Pattern End
Exercise 7 SIDEWAYS MOTION STITCHES
Exercise 8 JUMBO STITCHES
Exercise 9 DIRECTIONAL SEWING
STITCH DESIGNER
Touch Gestures
Exercise 10 EDIT AN EXISTING STITCH
Draw Tool
Snap to Grid
BUTTONHOLES
Help Center
Consultant
Exercise 11 BUTTONHOLES
Corded Buttonholes
TAPER STITCHES
Exercise 12 TAPERS
Documents / Resources
References
Advertisement
Bernina 990 Service Manual (250 pages)
Brand:
Bernina
| Category:
Sewing Machine
| Size: 75 MB
Table of Contents
Table of Contents
2
Safety
3
Safety Instructions
3
Safety Signs on the Machine
7
General Information
8
Explanation of Symbols
9
Security in Service
10
Safety Regulations
10
Electronics and Wiring
15
Handle Electronic Components
15
Receiving and Sending Electronic Components
15
Repairing/Replacing Electronic Components
15
Printed Circuit Boards Assembled (PCBA)
16
PCBA Base
16
PCBA CPU Module (ARM9)
17
PCBA Cover Left
17
PCBA Cover Right
18
PCB Power Supply Unit
19
PCBA Threader
19
PCBA Dual Feed
20
PCBA Position
20
PCBA Head Buttons
21
Pcba Bsr
21
PCBA Presser Foot Height Sensor
22
PCBA Presser Foot Detection Sensor
22
PCBA Free Hand System (FHS)
23
PCBA Camera
23
PCBA Stitch Plate Detection
24
PCBA Multi-Media
25
Cable Harness of the Motors
26
Cable Harness of the Sensors
28
Block Diagram
30
Troubleshooting
31
Firmware Update
32
Update Has Failed
32
The Boot Loader Is out of Date
32
The Machine Asks for the Firmware
32
Machine Repeatedly Requests the Firmware
33
Incorrect Firmware on the PCBA CPU Module
34
Customer Data Recovery Failed
34
Error Messages
35
The EEPROM Is Not Recognised by the Machine
35
Maintenance Messages
38
Message on Cleaning/Oiling the Machine
38
Message about Cleaning the Thread Cutter
38
Service/Maintenance Message
38
When Starting up the Machine
39
Machine Does Not Start up
39
The Machine Is Mechanically Blocked
41
Display Does Not Work Correctly
42
Black Screen Is Permanently Displayed
42
Touch Screen Does Not Respond Correctly - Calibration Via Cross-Entry
42
When Sewing
43
Upper Thread Observer Reacts Improperly
43
Lower Thread Observer Reacts Improperly
43
Noise Is Audible
44
Main Motor Does Not Work
45
Thread Cutter Does Not Cut All Threads
46
The Thread Cut Causes Sewing Malfunction
46
Troubleshooting
47
Threader Does Not Work or Only Works Occasionally
47
Sewing Stop - "Fabric too Thick
47
Speed Control Unit (SSU) Is Not Working Correctly
47
When Connecting Devices
48
Embroidery Module Is Not Recognised
48
Removal and Refitting of Components
49
Covers
51
Removing and Refitting the Head Cover
51
Removing and Refitting the Upper Cover
52
Removing and Refitting the Rear Cover
53
Removing and Refitting the Thread Spool Holder Cover
54
Multi-Media Module
55
Removing and Refitting the RET Cover
56
Removing and Refitting the
57
Removing and Refitting the Base Panel
58
Removing and Refitting the Freearm Cover
59
Removing and Refitting the Freearm Cover Right
60
Removing and Refitting the Center Cover
61
Removing and Refitting the Handwheel Cover
62
Removing and Refitting the Base Plate Cover
63
Removing and Refitting the Left Front Panel
64
Removing and Refitting the Right Front Panel
65
Removing and Refitting the Display Housing
66
Electronics and Sensors
67
Removing and Refitting the PCBA Cover Right/Left
67
Removing and Refitting the Bobbin Winder Unit
69
Removing and Refitting the PCBA Power Supply
69
Removing and Refitting the Fan
70
Removing and Refitting the PCBA Cover Left
70
Removing and Refitting the PCBA Cover Right
71
Removing and Refitting the PCBA Multi-Media
71
Removing and Refitting the PCBA FHS (Free Hand System)
72
Removing and Refitting the LED Sewing Light Including Camera on the Head Frame
73
Removing and Refitting the PCBA CPU Module
74
Removing and Refitting the PCBA Base
75
Removing and Refitting the PCBA Stitch Plate Detection
76
Removing and Refitting the EEPROM
76
Removing and Refitting the Loudspeaker
77
Removing and Refitting the Microphone
77
Removing and Refitting the Battery Holder
78
Removing and Refitting the PCBA Head Buttons
78
Removing and Refitting the PCBA LED Sewing Light on the Freearm
79
Removing and Refitting the LED Sewing Light Including Camera on the Head Frame
79
Removing and Refitting the Presser Foot Height Sensor
80
Removing and Refitting the PCBA Threader
81
Removing and Refitting the PCBA Presser Foot Detection Sensor
82
Removing and Refitting the PCBA Dual Feed
83
Removing and Refitting the PCBA BSR with Accessories Connector
84
Removing and Refitting the PCBA EMB with Connector
85
Removing and Refitting the Lower Thread Observer (LTO)
86
Removing and Refitting the PCBA Hall Position
87
Stepper Motors
88
Removing and Refitting the Main Motor
88
Removing and Refitting the Stepper Motor of the Stitch Length Transmission
89
Removing and Refitting the Stepper Motor of the Thread Tension Unit
90
Removing and Refitting the Stepper Motor of the Presser Foot Pressure
91
Removing and Refitting the Stepper Motor of the Stitch Width
92
Removing and Refitting the Stepper Motor of Feed Dog down
94
Removing and Refitting the Stepper Motor of the Electronic Balance Adjustment
95
Mechanical Components
96
Removing and Refitting the Hook Driver
96
Removing and Refitting the Hook Guideway
98
Removing and Refitting the Thread Cutter Unit on the Stitch Plate Carrier
99
Replacing the Blade with the Thread Cutter Unit Installed
102
Replacing the Blade with Removed Thread Cutter Unit
103
Removing and Refitting the Clutch Carriage
104
Removing and Refitting the Belt Pulley of the Hook Driver
106
Removing and Refitting the Needle Bar
107
Removing and Refitting the Needle Holder
108
Removing and Refitting the Threader Mechanism
109
Removing and Refitting the Dual Feed
111
Removing and Refitting the Thread Take-Up and the Joint Piece
113
Removing and Refitting the Thrust Link
115
Removing and Refitting the Sideways-Motion
117
Removing and Refitting the Toothed Rack Bearing for the Pressure Foot Pressure
118
Removing and Refitting the Upper Crank Shaft and the Dual Feed Stepper Motor
119
Removing and Refitting the Threader Head
121
Removing and Refitting the Thread Presenter
122
Removing and Refitting the Thread Clamp
123
Removing and Refitting the Camera
123
Removing and Refitting the Crank Shaft and the Stitch Length Transmission
124
Settings
125
Basics - General Testing and Adjustment Information
126
Belt
127
Adjusting the Belt Tension of the Upper Shaft - Base Shaft
127
Adjusting the Belt Tension of the Main Motor
128
Adjusting the Belt Tension of the Hook Driver Drive
129
Head Section
130
Aligning the Head Frame Plate with the
130
Stitch Plate in Y-Direction
130
Aligning the Head Frame Plate with the Stitch Plate in X-Direction
131
Adjusting the Height of the Embroidery Foot
132
Adjusting the Height of the Presser Foot Holder
133
Adjusting the Position of the Needle Bar to the Presser Foot Bar
134
Adjusting the Needle Distribution
135
Adjusting the Zigzag Limitation
136
Needle/Hook Area
137
Adjusting the Synchronicity of the Upper Shaft to the Base Shaft
137
Adjusting the Loop Lift
138
Adjusting the Distance between the Needle and the Hook
139
Aligning the Stitch Plate in Y-Direction
140
Adjusting the Needle Height
141
Fabric Feed (Feed Dogs - Presser Foot)
142
Adjusting the Feed Dog in X-Direction
142
Adjusting the Dual Feed in X-Direction
143
Adjusting the Height of the Feed Dog
144
Synchronizing the Dual Feed with the Feed Dog
145
Adjusting the Mechanical Default Setting of the Balance for the Dual Feed
146
Thread Cutter
147
Adjusting the Electromagnet on the Clutch Carriage
147
Adjusting the Clutch Carriage Position
148
Adjusting the Mechanical Release of the Clutch Carriage
149
Adjusting the Gap Dimension of the Spring on the Clutch Lever
150
Adjusting the Thread Cutter
151
Synchronisation Position Hall
152
Needle Drive Threader
153
Adjusting the Guide of the Needle Bar
153
Adjusting the Height of the Threader Head
154
Adjusting the Laser Position
155
Adjusting the Buffer Position of the Basting Device
155
Thread Tension
157
Adjusting the Regulator Spring
157
Adjusting the Upper Thread Tension
158
Adjusting the Lower Thread Tension
159
Adjusting the Bobbin Winder
160
Service Program
161
Thread Tension
162
Handling the Service Program
163
Starting/Ending the Service Program
163
Operating the Service Program
164
Starting Page of the Service Program
165
Service Information (1)
166
Information (1A)
166
Firmware and Repair History (1B)
167
Operating Hours (1C)
167
Stitch Counter of the Machine (1D)
168
Stitch Counter of the BSR (1E)
168
Service Data (1F)
169
Backing up and Loading Customer Data (1G)
169
Customer Information (1H)
170
Dealer Information (1I)
170
Log File (1J)
171
Thread Cutter Counter (1K)
171
Display, Lighting (2)
172
Display Brightness (2B)
172
Black Display (2C)
172
White Display (2D)
173
RGB Display (2E)
173
Button Backlighting (2F)
173
Sewing Light (2H)
174
Sensors (3)
175
Threader Sensor (3A)
175
Presser Foot Height Sensor (3B)
176
Lower Thread Observer - LTO (3C)
176
Feed Dog Drop (3D)
177
Sensor for Upper Thread Observer (3E)
177
Bobbin Winder Switch (3G)
177
Free Hand System - FHS (3H)
178
Signals (4)
179
Multifunction Knobs (4A)
180
Function Buttons (4B)
180
Speed Control (4C)
180
Foot Control (4D)
181
PS2 Interface Info (4E)
181
Upper Thread Observer - UTO (4F)
181
BSR Sensor (4G)
182
PCBA Position (4H)
182
Speaker (4I)
183
USB Ports (4J)
183
Electromagnet of the Basting (4K)
184
Recognition of Presser Foot Groups (4)
184
BSR Foot Interface (4M)
187
Stitch Plate Sensor (4N)
188
Laser (4O)
189
Electromagnet of the Thread Clamp (4P)
189
Electromagnet of the Clutch Carriage (4Q)
190
Motors (5)
191
Stitch Width - SW (5A)
192
Presser Foot Pressure - PFP (5B)
192
Upper Thread Tension - TT (5C)
193
Dual Feed (5D)
193
Pinning Positions of the Stepper Motors (5E)
194
Bobbin Winder (5F)
194
Stitch Length - SL (5G)
195
Sideways Motion - SM (5I)
195
Feed Dog Drop (5K)
196
Fan (5L)
196
Balance Stitch Length (5J)
197
Adjustments (6)
198
Sewing-In (6A)
199
Balance (6B)
199
Buttonhole Calibration (6C)
201
Checking the Process Steps of Thread Cut (6E)
201
Resetting the Default Value for Upper Thread Tension (6F)
202
Resetting the Factory Settings (6G)
202
Calibration Presser Foot Height (6H)
203
Prüfung Prozessschritte Einfädlervorgang
203
(6I)
203
Calibrating the Upper Thread Tension (6J)
204
Checking the Process Steps of Sew-On Function (6K)
204
Calibration of Speed Control (6L)
205
Testing the Speed (6M)
206
Checking BSR Sewing Test (6N)
206
Calibration of the Magnetic Position Sensor (6O)
207
Weight Difference Measurement - Info (6R)
207
Calibration of Upper Thread Tension Info (6S)
207
Numeric Keypad - Info - (6T)
208
Noise Check (6U)
208
Calibrating the Camera (6V)
208
Thread Cut Length (6W)
211
Embroidery Module (7)
213
Wifi (8)
214
Check-Out Test (11)
215
Sew-In of the Machine
217
Creating a Sewing-In Pattern
217
Standard Values for the Sew-In
217
Sewing Patterns for the Customer
217
Straight Stitch
218
Zigzag
218
Satin Stitch
219
Honeycomb Stitch
219
Standard Buttonhole
220
Firmware
221
Introduction
222
Formatting the USB Stick
223
Downloading and Saving Firmware
224
Performing the Firmware Update
225
Alternative Update Process
226
Maintenance Guidelines
228
Objective and Purpose of the Maintenance Guideline
228
Explanations of the Maintenance Messages
229
Explanations of the Maintenance Messages229
229
Resetting Maintenance Messages
230
Maintenance Interval
231
Wear-And-Tear-Parts Definition
232
Maintenance Procedure
233
Cleaning and Disinfection
236
Appendix
237
Lubrication Diagram
238
Lubrication General Information
238
Lubricate Head Frame
238
Lubricate Dual Feed
239
Sliding Threader/Needle Drive
240
Lubricate the Tooth Segment of the Needle Bar Support
241
Lubricate the Upper Thread Tension Unit
242
Lubricate Dual Feed Splitter Shaft
242
Lubricating the Main Shaft
243
Lubricate Hook/Hook Driver
243
Lubricating the Thrust Fork and the Sideways Motion
244
Lubricating the Clutch Carriage and the Belt Pulley
244
Lubricate Base Shaft
245
Lubricating the Stitch Length Gear
246
Technical Summary B 990
247
Bernina 990 User Manual (220 pages)
Brand:
Bernina
| Category:
Sewing Machine
| Size: 18 MB
Table of Contents
Table of Contents
3
Safety Instructions
5
General Information
8
My BERNINA
10
Welcome to the World of BERNINA
10
Introduction
11
Machine
11
Accessories
15
User Interface Overview
20
Help and Consultant
24
Set up the Machine
26
Prior to Machine's First Use
26
Working Area
26
Connecting the Machine and Switching It on
26
Preparing the Machine for Sewing
26
Preparing the Machine for Embroidery
27
Foot Control
27
Storing Accessories
27
Slide-On Table
28
Knee Lifter / Free Hand System
29
Stitch Plate
30
Needle
31
Attaching the Retractable Thread Guide
34
Upper Thread
34
Bobbin Thread
38
Presser Foot
40
Fabric Feed
42
Embroidery Module
42
Basic Settings
44
Sewing Settings
45
Embroidery Settings
47
Sewing
49
Sewing Screen
49
Status Bar
50
File Manager
51
Stitch Overview
53
Practical Stitches
53
Decorative Stitches
56
Alphabets
57
Buttonholes
57
Quilt Stitches
59
Prepare and Edit Stitch Pattern
61
Load Stitch Pattern
61
Stitch Pattern Editing
61
Buttonholes
64
Tapering Stitches
66
Darning Program
67
Stitch Pattern Combination
68
Save
70
Securing
71
Free-Motion Quilting with Stitch Regulation
72
Stitch Regulation
72
Stitch Designer
74
Stitch Designer Screen
74
Editing Functions
75
Embroidery
77
General Embroidery Information
77
Embroidery Screen
79
Status Bar
80
Layer Bar
81
File Manager
81
Prepare and Edit Embroidery Designs
83
Loading the Embroidery Design
83
Hoop Background
83
Embroidery Design Editing
84
Lettering
91
Saving Embroidery Designs
93
Embroidering the Embroidery Design
94
Stitchout Summary
94
Stitchout
95
Maintenance
97
Care and Maintenance
97
Software
97
Machine
97
Troubleshooting
102
Storage and Disposal
108
Storing the Machine
108
Dispose of the Machine
108
Technical Data
109
Stitch Patterns
110
Practical Stitches
110
Decorative Stitches
110
Buttonholes
117
Quilting Stitches
117
Embroidery Designs
119
Inspirations
119
Quilting
128
Accents
144
Borders
149
Frames
152
Lace
153
Mini
156
Flowers
160
Stylized Flowers
166
Animals
172
Children
178
Baby
183
Food and Drink
187
Hobbies
189
Seasons
193
Holidays
197
Celebrations
200
Travel
202
Words and Sayings
205
Monograms
209
In the Hoop
212
Index
214
Advertisement
Bernina 990 Workbook (40 pages)
Brand:
Bernina
| Category:
Sewing Machine
| Size: 10 MB
Table of Contents
Table of Contents
2
Introduction
5
Preparing to Stitch
6
Machine Set up References
6
Basic Stitching
7
Stitch Selection
7
Presser Foot Selection
7
Main Menu
7
Basic Securing Stitches
8
External Buttons
8
Quick Reverse
8
Exercise 1 - Needle Stop down & Free Hand System
9
Hover
11
BERNINA Foot Control with Back-Kick
11
Total Stitch Control
11
Exercise 2 - Altered Stitches & Pinpoint Laser
12
Temporary Altered Stitch Memory
13
History Stitches
13
Needle Position
13
Edit Menu
14
Edit Submenu
14
Mirror Image
14
Triple Stitch
15
Exercise 3 - Reverse & Backstepping
17
Optimization Tools
17
Exercise 4 BALANCE
18
Presser Foot Pressure
19
Exercise 5 - Stitch Density
20
Saving Stitches
21
Save to Personal Folder
21
Save/Open from USB
21
Save as New Default
21
Combi Mode
22
Exercise 6 - Combi Mode Decorative Stitches
23
Combination Options
24
Sideways Motion and more
25
Pattern End
25
Exercise 7 - Sideways Motion Stitches
26
Exercise 8 - Jumbo Stitches
27
Exercise 9 - Directional Sewing
28
Stitch Designer
29
Touch Gestures
29
Undo/Redo
29
Exercise 10 - Edit an Existing Stitch
30
Draw Tool
31
Snap to Grid
31
Buttonholes
32
Help Center
32
Consultant
32
Exercise 11 BUTTONHOLES
34
Corded Buttonholes
36
Taper Stitches
37
Exercise 12 - Tapers
38
Bernina 990 Workbook (42 pages)
Brand:
Bernina
| Category:
Sewing Machine
| Size: 13 MB
Table of Contents
Table of Contents
2
Introduction
5
Preparing for Embroidery
6
Setting up the Machine
6
Automatic Stitch Plate Detection
6
Hoops
7
Removing the Hoop
8
Essential Navigation
9
Embroidery Settings
9
File Formats
9
File Manager
10
Design Selection
10
Folder Navigation
10
Search Function
11
Stitch Information
11
Basic Editing
12
Bounding Box
12
Edit Submenu
12
Stitch Density
15
Back to Default
16
Color Wheel
16
Shape Designer
17
Arrange Submenu
18
Contextual Icons
19
Exercise 1 - Basic Editing
20
Lettering
22
Add Lettering
22
Keyboard Shortcuts
22
Editing Lettering
23
Line Spacing
24
Exercise 2 - Shape Designer and Lettering
25
Placement
27
Position Submenu
27
Pinpoint Placement
27
Virtual Positioning
27
Exercise 3 PLACEMENT
29
Attach Hoop & Scan Fabric
29
Pinpoint Placement and Pinpoint Laser
30
Design Placement
30
Fit
34
Saving Designs
35
Save to Personal Folder
35
Retrieve from Personal Folder
35
Save/Open from USB
36
Stitchout Summary
37
Stitchout Screen
38
Embroidery Information
39
High Speed
40
Conclusion
41
Advertisement
Related Products
Bernina 950 Industrial
Bernina Bernette 92C
Bernina Record 930 Electronic
Bernina 900
Bernina BERNETTE 90e
Bernina Favorit 940
Bernina 910
Bernina 931
Bernina 932
Bernina 933
Bernina Categories
Sewing Machine
Sewing Machine Accessories
Industrial Equipment
Accessories
Laboratory Equipment
More Bernina Manuals
Login
Sign In
OR
Sign in with Facebook
Sign in with Google
Upload manual
Upload from disk
Upload from URL