Advertisement
Technical Support and E-Warranty Certificate www.vevor.com/support
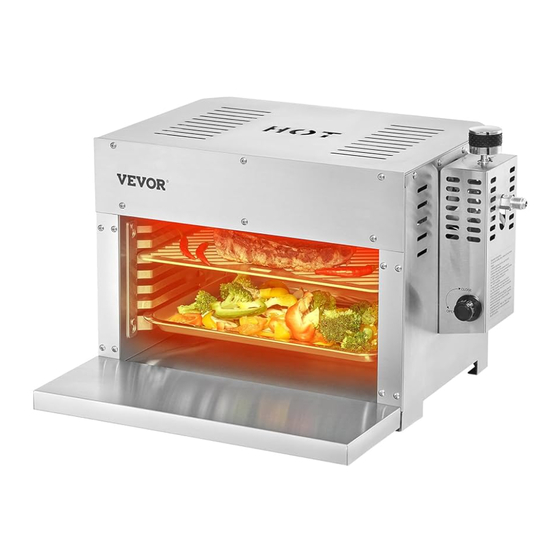
PROFESSIONAL STEAK GRILL
USER MANUAL
MODEL: GB-BFXXL
We continue to be committed to provide you tools with competitive price.
"Save Half", "Half Price" or any other similar expressions used by us only represents an
estimate of savings you might benefit from buying certain tools with us compared to the major
top brands and does not necessarily mean to cover all categories of tools offered by us. You
are kindly reminded to verify carefully when you are placing an order with us if you are
actually saving half in comparison with the top major brands.
Advertisement
Table of Contents

Related Manuals for VEVOR GB-BFXXL


Summary of Contents for VEVOR GB-BFXXL
- Page 1 Technical Support and E-Warranty Certificate www.vevor.com/support PROFESSIONAL STEAK GRILL USER MANUAL MODEL: GB-BFXXL We continue to be committed to provide you tools with competitive price. "Save Half", "Half Price" or any other similar expressions used by us only represents an estimate of savings you might benefit from buying certain tools with us compared to the major top brands and does not necessarily mean to cover all categories of tools offered by us.
- Page 2 This is the original instruction, please read all manual instructions carefully before operating. VEVOR reserves a clear interpretation of our user manual. The appearance of the product shall be subject to the product you received. Please forgive us that we won't inform you again if there are any technology or software updates on our product.
-
Page 3: Safety Information And Warnings
Warning-To reduce the risk of injury, user must read instructions manual carefully. SAFETY INFORMATION & WARNINGS Please note: • This instruction manual contains important information necessary for the proper assembly and safe use of the appliance. • Read and follow all warnings and instructions before assembling and using the appliance. -
Page 4: For Your Safety
WARNING Improper installation,adjustment,alteration,service or maintenance can cause property damage,injury or death. Read the installation,operating and maintenance instructions thoroughly before installing or servicing this equipment. DANGER If you smell gas: • Shut off gas to the appliance. • Extinguish any open flame. •... - Page 5 The Beefer's flames could cause a fire. In addition, your Beefer is a possible shelter for spiders and other insects, especially around the gas valve. This could prevent gas flow, so that performance is poorer or, in the worst case, the gas flows back and out of the gas valve.
- Page 6 • Note that the use of alcohol, prescription or non-prescription drugs may impair your ability to properly assemble or safely operate the appliance . • Make sure that the Beefer is not used under overhead unprotected combustible construction. • Ensure that there are no flammable or heat-sensitive materials or objects near the Beefer including gasoline and other flammable vapors and liquids.
- Page 7 maximum date for use and national specifications require replacement. • Ensure that there are no ignition sources near the Beefer when connecting the LPG bottle. In particular, ensure that there is no open fire or burning cigarettes, candles, lights, etc. •...
- Page 8 concentrations which are hazardous to health if it flows out uncontrollably. A too-high gas concentration could lead to suffocation due to a lack of oxygen. • Ensure that there is a sufficient inflow offresh air. • Ensure that LPG gas does not flow out uncontrollably. •...
-
Page 9: Identification Of Key Parts
IDENTIFICATION OF KEY PARTS Quantity No.: Part Name Rack Cooking grill Handle Oil tray Machine Expansion tray - 8 -... -
Page 10: Installation Instructions
INSTALLATION INSTRUCTIONS 1、Install the grill rack. 2、Installing an expansion tray. - 9 -... - Page 11 Cleaning before first-time use Before first use, you should clean the grill carefully to remove dust and possible packaging and production residues. Afterward, heat the grill without food and clean again. 1. Clean all of the accessories in warm water. Dry the parts thoroughly. Note that aggressive cleaning agents can cause corrosion, even on stainless steel.
- Page 12 1. Screw the pressure regulator to the valve on the LPG bottle if a pressure regulator is part of the delivered components (only when designed for LPG). Use the right tool for this. 2. Always exchange the LPG bottle awayfrom all ignition sources. Bring the LPG bottle to a specialist in order to have it refilled.
- Page 13 CHECKING FOR LEAKS: After first connecting, after each exchange of the LPG bottle or after a longer period of time of not using the Beefer, have a professional installer check all gas line components for leaks. INSTALLING THE BATTERY: This appliance requires a battery so that you can ignite the Beefer with the electrical ignition button.
- Page 14 CARE&TRANSPORT&STORAGE Care Ensure before cleaning the Beefer and loose parts that the Beefer is switched off and that the gas feed to the Beefer is blocked. WARNING! Burn hazard due to burning or hot fat! Hot fat in the fat pan or the tray can ignite after a longer period of time.
- Page 15 Your Beefer does not have wear parts or parts which are subject to continuous wear in this sense. If there is damage, contact your dealer or the manufacturer. Transport Observe the following points if you would like to transport your Beefer: 1.
-
Page 16: Trouble Shooting Methods
Trouble shooting methods Problem Possible reason Solution LPG bottle still closed Open the valve on the LPG bottle The applianc Gas connection is not Correctly connect the coupling open/coupling is not and open the valve on the gas cannot be ignited correctly connector clicked in... - Page 17 Battery empty Remove any items that may beblocking the vents. Ignition electrode onthe Make sure that the air electric igniter bent intakes underneath the Electrical igniter, grill are free no spark Ioosen the battery cap on Battery cap on the the ignition button ;...
-
Page 18: Packing List
Packing List Item Remark Machine 1 set Cooking Gri ll 1 pcs Handle 1 pcs Oil Tray 1 pcs 1 pcs Expansion tray 2 pcs Rack - 17 -... - Page 20 Technical Support and E-Warranty Certificate https://www.vevor.com/support...
Need help?
Do you have a question about the GB-BFXXL and is the answer not in the manual?
Questions and answers