
Related Manuals for Fulgor Milano FM4BM30IFBI


Summary of Contents for Fulgor Milano FM4BM30IFBI
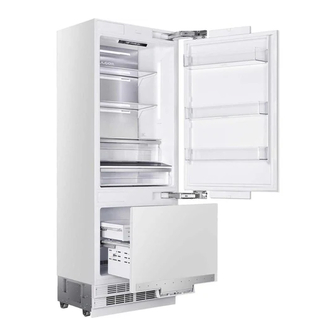
- Page 1 FM4BM30(I)FBI FM4BM36(I)FBI FM4FBM36(I)FBI REFRIGERATOR INSTRUCTION MANUAL RÉFRIGÉRATEUR MANUEL D'INSTRUCTIONS...
-
Page 3: Table Of Contents
TABLE OF CONTENTS PAGE TABLE OF CONTENTS PAGE 1 - Symbols and Their Meanings 9 - Door overlay preparation Disposing the packaging materials Removing the Mechanism Covers Product weight Removing Door Panel-Adjustment Mechanisms on the Refrigerator Load bearing capacity of the doors Preparing the Door Overlay Panels 2 - Installation Place Preparing the Fridge Door Overlay Panel... -
Page 4: Symbols And Their Meanings
1- Symbols and Their Meanings R600a Refrigerant Symbols used in the installation manual are as follows. WARNING Icon Mode Description Important information or useful usage tips. This product contains R600a isobutane refrigerant, which is a very eco-friendly natural gas. However, it is also flam- mable. -
Page 5: Product Weight
Climate range Ambient temperature of the room For Best results Between +50˚F (10oC) and +90˚F (32˚C) This appliance has been designed to be used in Between +60˚F (16˚C) and +90˚F (32˚C) certain climate ranges (ambient temperatures). Between +60˚F (16˚C) and +110˚F (38˚C) It must not be used out of this range. Between +60˚F (16˚C) and +120˚F (43˚C) Product weight Category FM4BM30(I)FBI FM4BM36(I)FBI FM4FBM36(I)FBI... -
Page 6: Installation Place
2 - Installation Place You must follow the instructions below: ATTENTION • The floor on which the product will be installed must be capable of bearing 1,200 pounds (544 kg) minimum. Failure to follow these instructions may result in death, fire, • Kitchen floor and the bottom of the product must be at the or electric shock. -
Page 7: Ventilation
Ventilation Water Connection Vent holes where the air enters and exits the unit must not • Pressure of the mains water must be in compliance with be blocked or obstructed. In addition, you must periodically the values specified in the manual. clean the dust and dirt that accumulate on these holes over • The location of the water system must comply with the time. -
Page 8: Tool List
3 - Tool list Tools to be used when installing the product are as follows: Icon Mode Description Cordless Drill Safety Goggles ½” Wrench Hammer Ladder Ø2.4 Drill Bit Ø8.0 Drill Bit Box Cutter Safety Gloves Tape Measure Phillips Bt Masking Tape 3/8” Socket 3/8” 1/4” Socket Appliance Cart Standard bit screwd river Bubble Level Tool... -
Page 9: Alternatives For Installation
4 - Alternatives for installation WARNING The product can be placed in various ways based on the kitchen design. It must be installed in a place where it is ensured that the door can be opened and closed properly. If the doors cannot be opened 90 degrees at least, you cannot completely open the drawers inside the product. -
Page 10: Preparation For Installation
5 - Preparation for installation The instructions below have been prepared according to Built-in type. Built-in: The Appliance and Panels fully seat into the opening, and dedicated cabinet is placed between the two kitchen cabinets or decorative columns. This is the most common installation scenario. Cabin Dimensions • Cabinet dimensions below must be checked before starting the installation. -
Page 11: Location Of The Electrical Wiring
Location of the Electrical Wiring WARNING Location of the electrical wiring must be within the range given below. Make sure that there is no water leakage when making the water connections. Otherwise, there will be water on the floor and the furniture will get damaged. ATTENTION You will need a hose with a minimum length of 60” (1.5 meters) and a diameter of ¼” for water connections of the... -
Page 12: Product Dimensions
Product dimensions Category FM4BM30(I)FBI FM4BM36(I)FBI FM4FBM36(I)FBI 29 3/4” (756mm) 35 3/4” (908mm) 35 3/4” (908mm) FM4FBM30(I)FBI without panel: 23 5/16” (592mm) with panel: 24 1/4” (616mm) - Page 13 FM4FBM36(I)FBI without panel: 23 5/16” (592mm) with panel: 24 1/4” (616mm)
- Page 14 Category FM4BM30(I)FBI FM4BM36(I)FBI FM4FBM36(I)FBI 15 9/32” (388mm) 15 9/32” (388mm) 15 9/32” (388mm) Category FM4BM30(I)FBI FM4BM36(I)FBI Category FM4BM30(I)FBI FM4BM36(I)FBI 32 7/16” (824mm) 38 7/16” (976mm) 443/8” (1127mm) 54 3/4” (1391mm) 29 3/4“ (756mm) 35 3/4“ (908mm) 29 3/4“ (756mm) 35 3/4“ (908mm) 55 1/32” (1398mm) 61” (1550mm) 14 5/8” (371mm) 19” (483mm) 52 11/16” (1338mm) 57 11/16” (1466mm) A - includes handle C - includes handle 115° Door swing 90º Door swing using included stop pin...
- Page 15 FM4FBM36(I)FBI 90° Door swing FM4FBM36(I)FBI Minimim to Minimim to 115° Door...
- Page 16 Anti tip bracket location Remaining space after install Minimum height adjustment for leveling Assembly dimension between Assembly dimension between Wood panel and fridge door Wood panel and freezer door...
- Page 17 FM4BM30(I)FBI - FM4BM36(I)FBI FM4FBM36(I)FBI...
- Page 18 standard 4” (102mm) 32 11/16” (831mm) 84” (2134mm) minimum 3 13/16”(97mm) 32 1/2“ 826mm 83 13/16“ 2129mm maximum 5 3/8“ 137mm 34 1/8“ 866mm 85 3/8“ 2169mm Door wood panel Door wood panel Furniture wood panel Furniture wood panel Category FM4BM30(I)FBI FM4BM36(I)FBI FM4FBM36(I)FBI 30” (762mm) 36” (914mm) 36” (914mm) 29 3/4” (756mm) 35 3/4” (908mm) 35 3/4” (908mm)
-
Page 19: Unpacking
Unpacking • Remove the Packaging Polystyrene material. WARNING At least two persons must carry the refrigerator. • Use a box cutter to remove the tape. • Cut the Packaging Board with a Box Cutter through the section illustrated in dotted lines and remove it. ATTENTION Do not remove the tape of the upper door on the product until the refrigerator is placed into the cabinet. -
Page 20: Removing Accessories From The Back
Removing Accessories from the Back Part name spec Trim fridge furniture side PVC extrusion L=617, L=1,259 Trim fridge door side PVC extrusion L=1136 Trim freezer door side PVC extrusion L=556 Trim furniture top PVC extrusion L=762, L=914 Cover freezer door top Conference Category FM4BM30(I)FBI... -
Page 21: Removing Mounting Parts In The Freezer Compartment
Removing mounting Parts in the Freezer Compartment Part name spec Furniture door preparation template paper Anti tip bracket T4.0, Zn-coating Dowel Anti tip bracket screws M8*L60 Position adjustment jig 90° limiting pins Freezer furniture door adjustment washer abs Screw freezer door hanger bracket ST4.8*16, round head screw Freezer door hanger bracket T1.0, Cr+zn-coating... -
Page 22: Removing The Freezer Drawer Bin
Part name spec Cabinet- cabin connecting bracket paper Screw cabin connecting bracket T4.0, Zn-coating Cover furniture door bracket Screw door fixing bracket M8*L60 Door- door furniture connecting bracket Screw furniture door fixing bracket Screw furniture door hanger bracket M4*12, truss washer head • Anti tip bracket screws • Truss washer head • Counter sunk head... -
Page 23: Removing The Lower Ventilation Assembly
Removing the Upper Ventilation Part • Pull the door frontward to free it from the tabs at the back and remove it. • Remove the 2 screws to take out the Upper Vent Hole Part. Removing the Lower Ventilation Assembly • Remove the 2 screws to take out the Lower Vent Hole Assembly. -
Page 24: Preparing For Installation
6 - Preparing for installation Continue to install the product according to the instructions Category FM4BM30(I)FBI FM4BM36(I)FBI FM4FBM36(I)FBI below. Additionally, consider national and local instructions 30” (762mm) 36” (914mm) 36” (914mm) regarding installation. 23 5/8” 23 5/8” 23 5/8” Please observe the following: (600mm) (600mm) (600mm) • For the USA, The National Electrical Code, ANSI/NFPA 70 3 3/16”... -
Page 25: Alternative Anti-Tip Method
• Fit the anti-tip brackets (item No.2) into their places, using 4 screws (item No.4) for each. You must use both the (2) brackets to ensure the safety of the product. Confidential l Fit the anti-tip brackets (item No.2) into their places, using 4 screws (item No.4) for each. You must use both the (2) brackets to ensure the safety of the product. -
Page 26: Cabinet
7 - Installation to the cabinet Taking the Refrigerator from the Wooden Pallet ATTENTION • Remove the brackets that connect the refrigerator to the Wooden Pallet. The risk of tipping over is high as of this point. You should not open the doors until the product is placed into the cabinet. - Page 27 Adjusting the Height of the Refrigerator in the Cabinet IMPORTANT INFORMATION • Adjust the refrigerator height using the adjustable feet. You can use masking tape and similar protectors on parts you think this is necessary to protect the edges of the furniture when placing the product.
-
Page 28: Adjusting The Appliance With Respect To The Side Walls
• For products without overlay panels in place already, the IMPORTANT INFORMATION product is placed using the adjustment part (Item No5) as shown in the figure below. Adjusting the Appliance with Respect to the Side Walls • For products with overlay panels in place, the position of the appliance is adjusted so that the door and the furniture surfaces are flush. - Page 29 IMPORTANT INFORMATION If you have difficulty tightening the screws, opening a reference hole with the drill will make this procedure easier. • Attach cabinet connection brackets (Item No12) to the cabinet with 16 screws cabin connecting bracket (Item No13).
-
Page 30: Water Connection
8 - Installation at the bottom Water connection WARNING • Use the box cutter to cut the water hose squarely from the end of the pass-through tube, leaving a section of 10”. Pressure of the water system must be between 25-80 psi (1.7-5.5 Bar). IMPORTANT INFORMATION Once the connection is complete, you must turn on the mains valve and make sure that there is no leakage at that point. -
Page 31: Attaching The Lower Ventilation Assembly
Attaching the Lower Ventilation Assembly • Attach the trim furniture top (Item No4) over top cabinet connection bracket (Item No12). • Use 2 screws to attach the lower ventilation part. WARNING Maximum weights of the door overlay panels to be mounted to the product are as follows. - Page 32 • You can limit the opening degree of your door to 90° if you want. In this case, the door thickness levels can be like the following (you can look at the relevant section to learn how to attach the 90° limiting pin (Item No6). CABINET FRONT 90°limit pin should be inserted to upper hinge and lower hinge...
-
Page 33: Door Overlay Preparation
9 - Door overlay preparation Removing the Panel-Adjustment Mechanisms on the This section contains information about preparing the door overlay panels and mounting them to the product. Refrigerator • Remove the upper and lower Adjusting Mechanism assemblies Removing the Mechanism Covers from the door. -
Page 34: Preparing The Fridge Door Overlay Panel
Confidential Preparing the Fridge Door Overlay Panel FM4BM36(I)FBI WARNING 76:1 7/16” (38mm) 15 3/4“ (400mm) 1 1/8” (28mm) Handle connection holes must be adjusted according to 91:4 7/16” (114mm) the handles to be used in kitchen design. 13/16” (21mm) 26 13/16”(680mm) WARNING Confidential Minimum thickness of the door must be ¾” (19mm). 17 11/16” 76:29 3/4“... -
Page 35: Preparing The Freezer Door Overlay Panel
FM4BM36(I)FBI WARNING FM4BM30(I)FBI Handle connection holes must be adjusted according to FM4BM36(I)FBI the handles to be used in kitchen design. WARNING Minimum thickness of the door must be ¾” (19 mm). FM4FBM36(I)FBI l Attach the fridge door handle. WARNING l Depending on the style of screw you may need to countersink. The screw head must not protrude. • Attach the fridge door handle. -
Page 36: Installing The Fridge Door Overlay Panel
Installing the fridge door overlay • Attach the fridge door overlay panel to the fridge door. How to align the fridge door with bolts Position of the door overlay panel to the kitchen cabinets must be flush. To achieve this, you should adjust 3D direction using by two fixing bolt to perform fine adjustments. Before you begin, review the position of the door overlay panels with respect to the adjacent cabinets. - Page 37 • How to align the door overlay panel lower section with bolts. 3/8” Front & back Up & down Fixing furniture door completely Left & right Use the set screws to position the panel in the Z (depth) direction then fix in place firmly with the washers and bolts removed in the earlier steps.
- Page 38 Once you are satisfied with the panel positioning - finally fix the door overlay panel with the provided brackets shown below. This gives additional strength to the handle side where most of the pulling pressure is applied to the door overlay panel. • Use the door overlay panel connecting bracket (Item No16) to join the furniture door.
- Page 39 Confidential • Snap on the door bracket covers. (Item No14). • Snap on the door bracket covers. (Item No14). FM4BM30(I)FBI - FM4FBM36(I)FBI FM4BM30(I)FBI FM4BM36(I)FBI...
- Page 40 • Snap on the bracket covers. FM4BM30(I)FBI - FM4FBM36(I)FBI IMPORTANT: Ensure the upper cover contains a magnet to detect door opening / closing. WARNING There is a magnet on the cover door hanger bracket upper. This is a functional part for the operation of the product. It should not be confused with the lower cover.
- Page 41 • Attach and screw the upper/lower decoration cover. FM4FBM36(I)FBI IMPORTANT: Ensure the upper cover contains a magnet to detect door opening / closing. WARNING There is a magnet on the cover door hanger bracket upper. This is a functional part for the operation of the product. It should not be confused with the lower cover.
-
Page 42: Installing The Freezer Door Overlay Panel
LING THE FREEZER DOOR OVERLAY PANEL Installing the freezer door overlay panel ach door overlay panel connecting bracket (Item No16) on the door lower section • Attach door overlay panel connecting bracket (Item No16) on the door lower section with screw door fixing bracket (Item No15). h screw door fixing bracket (Item No15). -
Page 43: How To Align The Freezing Door Overlay Panel To The Lower Section
Confidential How to align the freezing door overlay panel to the lower section How to align the freezing door overlay panel to the lower section • How to align the freezer door overlay panel upper part with screw freezer door hanger bracket (Item No8) • How to align the freezer door overlay panel upper part with screw freezer door hanger bracket (Item No8). Use the corresponding Front &... - Page 44 Confidential Confidential Clip the door overlay panel bracket cover onto the brackets (Item No14). • • Clip the door overlay panel bracket cover onto the brackets (Item No14). • Clip the door overlay panel bracket cover onto the brackets (Item No14). •...
- Page 45 • Once the freezer door assembly is in place, secure to the drawer rails with 2 screws. • Locate the drawer onto the rail and tighten the screws.
- Page 46 • Snap the freezer drawer cover strip (Item No5) onto the buttons on top of the freezer drawer. It should fit tightly against the overlay panel. • Install the complete freezer door assembly onto the rails. Tape...
-
Page 47: Hinge Adjustment
10 - Hinge adjustment Adjusting the strength of the hinges • Use a drill to adjust the strength of the close assist of the upper and lower hinges of the fridge door. Set the hinge adjustment screw to position "I" from position "0". 0 = Weakest setting l = Strongest setting WARNING... -
Page 48: Removing The Fridge Door
11 - Changing swing of the fridge door Removing the fridge door • Loosen 2 screws of the upper cover of the fridge door and remove it. • Set the hardness level of the hinge to "0". • Remove the upper adjustment kits. ATTENTION • Loosen 2 screws of the lower cover of the fridge door and remove it. - Page 49 Confidential • Remove fridge lower and upper bracket and fixing screws. • Remove fridge lower and upper bracket and fixing screws. FM4BM30(I)FBI - FM4FBM36(I)FBI FM4BM30(I)FBI FM4BM36(I)FBI WARNING The clad door will be released when these screws are removed. You must take measures to prevent the door from falling. You can tape the Furniture Door to the Inner Door or ask for help from another person.
-
Page 50: Removing And Preparing The Fridge Inner Door
Removing and preparing the Fridge Inner Door Replacing the hinges • Remove the hinge connection screws of the Hinge Brackets. • Remove the Hinge Caps located at the other side where you will fix the hinges. ATTENTION The appliance door will be released when these screws are removed. -
Page 51: Installing The Fridge Door
• Attach the hinge slot caps removed from the left side to the hinge caps at the right side. Installing the Fridge Door • Place the Fridge Door to the refrigerator and fix it with 4 screws. -
Page 52: Dual Installation
12 - Dual installation If you are going to make a dual installation, you must use Dual opening dimension the FM4JOINKIT installation kit. Available from your dealer. The instructions below have been prepared according to 30”+30” 30”+36” 36”+36” Category Built-in type. (76+76mm) (76+91mm) (91+91mm) -
Page 53: Location Of The Water System
Location of the water system The water connected to the water mains must be potable. The location of the water system must be within the range given below. The water system of the refrigerator must be connected to the water mains system in the house. The user must be able to switch it on/off with the valve when necessary. -
Page 54: Mounting Part Lists
Mounting Part list Part name spec Q’ty Remark Insulation foam panel Sponge, gray, T3.0*400*1750 Connecting bracket T2.0, Cr+zn-coating Truss washer head M4*12 Fastener Central cover PVC extrusion L=1876 • Truss washer head screw Spec : M4x12 Fixing Refrigerator Such as cabinet and door (press part) - Page 55 Stick the insulation panel (Item No1) to the side of one appliance so that it remains in between two cabins. Item No1 Stick the insulation panel ( ) to the side of one appliance so that it remains in between two cabins. Insulation Panel Insulation Panel T3.0*400*1750...
-
Page 56: Attaching The Fasteners And Connecting Bracket
Attaching the fasteners and connecting bracket Screw the connecting bracket(Item No2) and fasteners (Item No4) that are going to connect two refrigerators together. Fastener Connecting bracket... - Page 57 Make power and water connections of the refrigerator as explained earlier in this manual. After making sure that they are in alignment Screw the upper brackets to the other refrigerator. After making sure that they are in alignment screw the lower brackets to the other refrigerator.
-
Page 58: Adjusting The Height Of The Refrigerator In The Cabinet
Adjusting the height of the refrigerator in the cabinet Screwing the bracket furniture on the cabinet top wall Adjust the refrigerator height using the adjustable feet. Secure the appliance connecting brackets to the cabinet with 4screws. WARNING Attaching the decorative trim parts Attach the side trim onto the cabinet-appliance connecting brackets. -
Page 59: Completion Installation
Attach the trim furniture middle ( Item No5) between two refrigerators. Completion installationt You can see previous pages for other installation procedures. - Page 61 TABLE DES MATIÈRES PAGE TABLE DES MATIÈRES PAGE 1 - Symboles et leurs significations 9 - Préparation du recouvrement de la porte Mise au rebut des matériaux d'emballage Retrait des couvercles du mécanisme Poids du produit Retrait des mécanismes de réglage du panneau de la prote sur le réfrigérateur Capacité...
-
Page 62: Symboles Et Leurs Significations
1- Symboles et leurs significations Réfrigérant R600a Les symboles utilisés dans le manuel d'installation sont les suivants. AVERTISSEMENT Mode Description Icône Ce produit contient du réfrigérant isobutane R600a, qui Informations importantes ou conseils d'utilisation est un gaz naturel très respectueux de l'environnement. utiles. -
Page 63: Poids Du Produit
Plage climatique Température ambiante de la pièce Pour de meilleurs résultats Entre +10 ˚C (50°F) et +32 ˚C (90˚F) Cet appareil a été conçu pour être utilisé dans certaines plages climatiques (températures Entre +16 ˚C (60˚F) et +32 ˚C (90˚F) ambiantes). Entre +16 ˚C (60˚F) et 38 ˚C (+110˚F) Il ne doit pas être utilisé hors de cette plage de valeurs. Entre +16 ˚C (60˚F) et 43 ˚C (+120˚F) Poids du produit Catégorie... -
Page 64: Lieu D'installation
2- Lieu d'installation Vous devez suivre les instructions ci-dessous : ATTENTION • Le plancher sur lequel le produit sera installé doit pouvoir supporter un minimum de 544 kg (1 200 livres). Le non-respect de ces instructions peut entraîner la • Le plancher de la cuisine et la partie inférieure du produit mort, un incendie ou une électrocution. -
Page 65: Ventilation
ATTENTION AVERTISSEMENT La porte en acier inoxydable est également disponible Veuillez attendre 3 à 6 heures avant de mettre le produit sous tension pour le protéger contre d'éventuels dommages. De cette façon, le réfrigérant et les lubrifiants présents dans le système sont équilibrés. Ventilation Les trous d'aération desquels l'air entre et sort de l'unité... -
Page 66: Liste Des Outils
3- Liste des outils Les outils à utiliser lors de l'installation du produit sont les suivants : Icône Mode Description Perceuse sans fil Lunettes de protection Clé ½” Marteau Échelle Foret Ø2.4 Foret Ø8.0 Cutter de boîte Gants de sécurité Ruban de mesure Phillips Bt Ruban adhésif Prise 3/8”... -
Page 67: Alternatives Pour L'installation
4 - Alternatives pour l’installation AVERTISSEMENT Le produit peut être placé de différentes manières en fonction de la conception de la cuisine. Il doit être installé à un endroit où il est garanti que la porte puisse être ouverte et fermée correctement. Si les portes ne peuvent pas être ouvertes à... -
Page 68: Préparation Pour L'installation
5 - Préparation pour l'installation Les instructions ci-dessous ont été préparées selon le type intégré. Intégré : L'appareil et les panneaux s'insèrent complètement dans l'ouverture, et le meuble dédié est placé entre les deux meubles de cuisine ou les colonnes décoratives. Il s’agit du scénario d’installation le plus fréquent. -
Page 69: Emplacement Du Câblage Électrique
Emplacement du câblage électrique AVERTISSEMENT L'emplacement du câblage électrique doit être dans la plage indiquée ci-dessous. Assurez-vous qu'il n'y a pas de fuite d'eau lors de la réalisation des branchements d'eau. Dans le cas contraire, il y aura de l'eau sur le sol et les meubles seront endommagés. ATTENTION Vous aurez besoin d'un tuyau d'une longueur minimale de 1,5 m (60”) et d'un diamètre de ¼” pour les raccordements d'eau... -
Page 70: Dimensions Du Produit
Dimensions du produit Catégorie FM4BM30(I)FBI FM4BM36(I)FBI FM4FBM36(I)FBI 756 mm (29 3/4 po) 908 mm (35 3/4 po) 908 mm (35 3/4 po) FM4FBM30(I)FBI sans panneau : 23 5/16” (592mm) avec panneau : 24 1/4” (616mm) - Page 71 FM4FBM36(I)FBI sans panneau : 23 5/16” (592mm) avec panneau : 24 1/4” (616mm)
- Page 72 Catégorie FM4BM30(I)FBI FM4BM36(I)FBI FM4FBM36(I)FBI 388 mm (15 9/32 po) 388 mm (15 9/32 po) 388 mm (15 9/32 po) Catégorie FM4BM30(I)FBI FM4BM36(I)FBI Catégorie FM4BM30(I)FBI FM4BM36(I)FBI 824 mm (32 7/16 po) 976 mm (38 7/16 po) 1127 mm (443/8 po) 1391 mm (54 3/4 po) 756 mm (29 3/4 po) 908 mm (35 3/4 po) 756 mm (29 3/4 po)
- Page 73 FM4FBM36(I)FBI 90° Balancement de la porte FM4FBM36(I)FBI Minimale à Minimale à 115° Porte...
- Page 74 Installation du support anti-basculement Espace restant après installation Réglage de la hauteur minimale pour la mise à niveau Dimension d'assemblage entre Dimension d'assemblage entre Panneau en bois et porte du réfrigérateur Panneau en bois et porte du congélateur...
- Page 75 FM4BM30(I)FBI - FM4BM36(I)FBI FM4FBM36(I)FBI Écart : Écart : Écart : Écart : Écart : Écart : Écart : Écart : Écart : Écart : Écart : Écart : Écart : Écart : Écart : Écart : Écart : Écart :...
- Page 76 standard 102 mm (4 po) 831 mm (32 11/16 po) 2134 mm (84 po) minimum 97 mm (3 13/16 po) 826 mm (32 1/2 po) 2129 mm (83 13/16 po) maximum 137 mm (5 3/8 po) 866 mm (34 1/8 po) 2169 mm (85 3/8 po) Panneau en bois Panneau en bois...
-
Page 77: Déballage
Déballage • Retirez le matériau d'emballage en polystyrène. AVERTISSEMENT Au moins deux personnes doivent porter le réfrigérateur. • Utilisez un cutter pour retirer le ruban adhésif. • Coupez le carton de l'emballage avec un cutter à travers la section illustrée en pointillés puis retirez-le. ATTENTION Ne retirez pas le ruban adhésif de la porte supérieure sur le produit avant que le réfrigérateur ne soit placé... -
Page 78: Retrait Des Accessoires Depuis L'arrière
Retrait des accessoires depuis l'arrière Nom de la pièce spécification Côté du meuble du réfrigérateur Extrusion PVC L=617, L=1 259 Côté porte du réfrigérateur Extrusion PVC L=1136 Côté porte du congélateur Extrusion PVC L=556 Partie supérieure du meuble Extrusion PVC L=762, L=914 Partie supérieure de la porte du congélateur Conférence... -
Page 79: Retrait Des Pièces De Montage Dans Le Compartiment Du Congélateur
Retrait des pièces de montage dans le compartiment du congélateur Nom de la pièce spécification Modèle de préparation de porte de papier meuble Support anti-basculement T4.0, revêtement Zn Cheville Vis du support anti-basculement M8*L60 Gabarit de réglage de la position broches de limitation à... -
Page 80: Retrait Du Bac Du Tiroir De Congélation
Nom de la pièce spécification Support de liaison entre l'armoire et la cabine papier Vis de support de fixation de la cabine T4.0, revêtement Zn Couvercle support de la porte du meuble - Vis de support de fixation de la porte M8*L60 Support d'assemblage porte-meuble de porte PS Vis support crochet de la porte du meuble... -
Page 81: Retrait De L'ensemble De Ventilation Inférieur
Retrait de la partie supérieure de ventilation • Tirez la porte vers l'avant pour la libérer des languettes à l'arrière, puis retirez-la. • Retirez les 2 vis pour retirer la partie supérieure du trou d'aération. Retrait de l'ensemble de ventilation inférieur • Retirez les 2 vis pour enlever l'ensemble inférieur du trou d'aération. -
Page 82: Préparation Pour L'installation
6 - Préparation pour l'installation Continuez d’installer le produit conformément aux Catégorie FM4BM30(I)FBI FM4BM36(I)FBI FM4FBM36(I)FBI instructions ci-dessous. Vous devez également tenir compte 762 mm (30 po) 914 mm (36 po) 914 mm (36 po) des consignes nationales et locales concernant l'installation. 600 mm 600 mm 600 mm... -
Page 83: Autre Méthode Anti-Basculement
• Placez les supports anti-basculement (art. No.2) à leur emplacement, à l'aide des 4 vis (art. No.4) chacun. Vous devez utiliser tous les deux (2) supports pour assurer la sécurité du produit. Confidential l Fit the anti-tip brackets (item No.2) into their places, using 4 screws (item No.4) for each. You must use both the (2) brackets to ensure the safety of the product. -
Page 84: Installation Dans L'armoire
7 - Installation dans l'armoire Prendre le réfrigérateur de la palette en bois ATTENTION • Retirez les supports qui relient le réfrigérateur à la palette en bois. Le risque de basculement est élevé à ce stade. Vous ne devez pas ouvrir les portes tant que le produit n'est pas placé... - Page 85 Réglage de la hauteur du réfrigérateur dans l'armoire INFORMATIONS IMPORTANTES • Réglez la hauteur du réfrigérateur à l'aide des pieds Vous pouvez utiliser du ruban adhésif et des protecteurs similaires réglables. sur les pièces pour lesquelles vous pensez qu’il est nécessaire de protéger les bords du meuble lors de la mise en place du produit. AVERTISSEMENT La prise du produit doit être accessible après l'installation.
-
Page 86: Réglage De L'appareil Par Rapport Aux Parois Latérales
• Pour les produits sans panneaux de recouvrement déjà INFORMATIONS IMPORTANTES en place, le produit est placé à l'aide de la pièce d'ajustement (art. n°5) comme indiqué dans la figure ci-dessous. Réglage de l'appareil par rapport aux parois latérales • Pour les produits dont les panneaux de recouvrement sont en place, la position de l'appareil est ajustée de manière à... - Page 87 INFORMATIONS IMPORTANTES Si vous avez des difficultés à serrer les vis, l'ouverture d'un trou de référence avec la perceuse facilitera cette procédure. • Fixez les supports de connexion de l'armoire (art. n°12) à l'armoire à l'aide des 16 vis du support de connexion de l'armoire (art. n°13).
-
Page 88: Installation Dans Le Bas
8 - Installation dans le bas Raccordement d'eau AVERTISSEMENT • Utilisez le cutter pour couper le tuyau d'eau à l'équerre à partir de l'extrémité du tube de passage, en laissant une La pression du système d'eau doit être comprise entre 25- section de 10 po. -
Page 89: Raccord De L'ensemble De Ventilation Inférieur
Raccord de l'ensemble de ventilation inférieur • Fixer le meuble de finition supérieur (art. n°4) sur le support de connexion de l'armoire supérieure (art. n°12). • Utilisez 2 vis pour fixer la partie inférieure du trou de ventilation. AVERTISSEMENT Les poids maximaux des panneaux de recouvrement de porte à monter sur le produit sont les suivants. Porte du réfrigérateur : 35,7 lb. - Page 90 • Vous pouvez limiter le degré d'ouverture de votre porte à 90° si vous le souhaitez. Dans ce cas, les niveaux d'épaisseur de la porte peuvent être les suivants (vous pouvez consulter la section correspondante pour savoir comment fixer la goupille de limitation à 90° (art. No6). la goupille de limitation à 90° doit être insérée dans la charnière supérieure et la charnière inférieure...
-
Page 91: Préparation Du Recouvrement De La Porte
9 - Préparation du recouvrement de la porte Retrait des mécanismes de réglage du panneau sur le Cette section contient des informations sur la préparation des panneaux de recouvrement de la porte et leur montage réfrigérateur sur le produit. • Retirez les ensembles du mécanisme de réglage supérieur et inférieur de la porte. -
Page 92: Préparation Du Panneau De Recouvrement De
Confidential Preparing Fridge Door Overlay Panel FM4BM36(I)FBI AVERTISSEMENT 76:1 7/16 ” (38mm) 15 3/4 “ (400mm) 1 1/8 ” (28mm) Les trous de fixation des poignées doivent être ajustés en 91:4 7/16 ” (114mm) fonction des poignées à utiliser dans la conception de la 13/16”... -
Page 93: Préparation Du Panneau De Recouvrement De La Porte Du Congélateur
with the product to align these parts. It is recommended to keep this template for future reference. FM4BM36(I)FBI AVERTISSEMENT FM4BM30(I)FBI Les trous de fixation des poignées doivent être ajustés en FM4BM36(I)FBI fonction des poignées à utiliser dans la conception de la cuisine. -
Page 94: Comment Aligner La Porte Du Réfrigérateur Avec Les Boulons
Installation du revêtement de la porte du réfrigérateur • Fixez le panneau de recouvrement de la porte du réfrigérateur à la porte du réfrigérateur. Comment aligner la porte du réfrigérateur avec les boulons La position du panneau de recouvrement de la porte par rapport aux armoires de cuisine doit être affleurante. Pour ce faire, vous devez ajuster la direction 3D à... - Page 95 • Comment aligner la partie inférieure du panneau de recouvrement de la porte avec les boulons. 3/8” Avant et derrière Haut et bas Fixation complète de la porte du meuble Gauche et droite Utilisez les vis de réglage pour positionner le panneau dans le sens Z (profondeur), puis fixez-le fermement à l'aide des rondelles et des boulons retirés lors des étapes précédentes.
- Page 96 Une fois que vous êtes satisfait du positionnement du panneau, fixez enfin le panneau de recouvrement de la porte à l'aide des supports fournis ci-dessous. Cela confère une résistance supplémentaire au côté de la poignée, où s'exerce la plus grande partie de la pression de traction sur le panneau de recouvrement de la porte. • Utilisez le support de connexion du panneau de recouvrement de la porte (art. n°16) pour assembler la porte du meuble. • Utiliser 1 vis pour fixer le support de fixation de la porte (art. n°15) sur la porte. • Utiliser 2 vis (art. n°17) pour fixer le panneau de recouvrement de la porte.
- Page 97 Confidential • Enclencher les couvercles des supports de porte. (art. n°14). • Snap on the door bracket covers. (Item No14). FM4BM30(I)FBI - FM4FBM36(I)FBI FM4BM30(I)FBI FM4BM36(I)FBI...
- Page 98 • Enclencher les couvercles des supports. FM4BM30(I)FBI - FM4FBM36(I)FBI IMPORTANT : S'assurer que le couvercle supérieur contient un aimant pour détecter l'ouverture/la fermeture de la porte. AVERTISSEMENT Un aimant est présent sur le support de suspension supérieur de la porte du couvercle. Il s'agit d'une partie fonctionnelle pour le fonctionnement du produit.
- Page 99 • Fixez et vissez le cache décoratif supérieur/inférieur. FM4FBM36(I)FBI IMPORTANT : S'assurer que le couvercle supérieur contient un aimant pour détecter l'ouverture/la fermeture de la porte. AVERTISSEMENT Un aimant est présent sur le support de suspension supérieur de la porte du couvercle. Il s'agit d'une partie fonctionnelle pour le fonctionnement du produit.
-
Page 100: Installation Du Panneau De Recouvrement De La Porte Du Congélateur
LING THE FREEZER DOOR OVERLAY PANEL Installation du panneau de recouvrement de la porte du congélateur ach door overlay panel connecting bracket (Item No16) on the door lower section • Fixez le support de connexion du panneau de recouvrement de la porte (art. n°16) sur la section inférieure de la porte avec la vis du h screw door fixing bracket (Item No15). support de fixation de la porte (art. n°15). Confidential INSTALLING THE FREEZER DOOR OVERLAY PANEL • Attach door overlay panel connecting bracket (Item No16) on the door lower section with screw door fixing bracket (Item No15). -
Page 101: Comment Aligner Le Panneau De Recouvrement De La Porte De Congélation Sur La Section Inférieure
Confidential How to align the freezing door overlay panel to the lower section Comment aligner le panneau de recouvrement de la porte de congélation sur la section inférieure • How to align the freezer door overlay panel upper part with screw freezer door hanger bracket (Item No8) • Comment aligner la partie supérieure du panneau de recouvrement de la porte du congélateur avec la vis du support de suspension de la porte du congélateur (art. n°8). - Page 102 Confidential Confidential Clip the door overlay panel bracket cover onto the brackets (Item No14). • • Clip the door overlay panel bracket cover onto the brackets (Item No14). • Clipser le couvercle du support du panneau de recouvrement de la porte sur les supports (art. n°14). • Install the complete freezer door assembly onto the rails. Install the complete freezer door assembly onto the rails.
- Page 103 • Une fois que la porte du congélateur est en place, fixez-la aux rails du tiroir à l'aide de deux vis. • Placez le tiroir sur le rail et serrez les vis.
- Page 104 • Enclenchez la bande de recouvrement du tiroir de congélation (art. n°5) sur les boutons situés en haut du tiroir de congélation. Il doit être bien ajusté contre le panneau de recouvrement. • Installez l'ensemble de porte du meuble du congélateur sur les rails. Ruban...
-
Page 105: 10 - Réglage De La Charnière
10 - Réglage de la charnière Réglage de la dureté des charnières • Utilisez une perceuse pour ajuster la force de l'assistance à la fermeture des charnières supérieures et inférieures de la porte du réfrigérateur. Réglez la vis de réglage de la charnière sur la position « I » à partir de la position « 0 ». 0 = Paramètre le plus faible l = Paramètre le plus fort AVERTISSEMENT La porte doit être entièrement ouverte pendant ce réglage. -
Page 106: Retrait De La Porte Du Réfrigérateur
11 - Changer l'orientation de la porte du réfrigérateur Retrait de la porte du réfrigérateur • Desserrez les 2 vis du couvercle supérieur de la porte du réfrigérateur et le retirer. • Réglez le niveau de dureté de la charnière sur « 0 ». • Retirez les kits de réglage supérieurs. ATTENTION • Desserrez les 2 vis du couvercle inférieur de la porte du réfrigérateur et retirez-les. - Page 107 Confidential • Retirez les supports inférieur et supérieur du réfrigérateur et les vis de fixation. • Remove fridge lower and upper bracket and fixing screws. FM4BM30(I)FBI - FM4FBM36(I)FBI FM4BM30(I)FBI FM4BM36(I)FBI AVERTISSEMENT La porte blindée pourra être retirée lorsque ces vis seront retirées. Vous devez prendre des mesures pour empêcher que la porte ne tombe.
-
Page 108: Retrait Et Préparation De La Porte Intérieure Du Réfrigérateur
Retrait et préparation de la porte intérieure du Remplacement des charnières réfrigérateur • Retirez les capuchons de la charnière situés du côté opposé à la fixation les charnières. • Retirez les vis de fixation de la charnière des supports de charnière. ATTENTION La porte de l'appareil pourra être retirée lorsque ces vis seront retirées. -
Page 109: Installation De La Porte Du Réfrigérateur
• Fixez les capuchons de la fente de la charnière qui ont été retirés du côté gauche aux capuchons de la charnière sur le côté droit. Installation de la porte du réfrigérateur • Placez la porte du réfrigérateur sur le réfrigérateur et fixez-le avec 4 vis. -
Page 110: 12 - Double Installation
12 - Double installation Si vous voulez faire une double installation, vous devez utiliser Double dimension d'ouverture le kit d'installation FM4JOINKIT. Disponible auprès de votre revendeur. 76 +76 mm 30 po +36 po 36 po +36 po Catégorie Les instructions ci-dessous ont été préparées selon le type intégré. (30 po +30 po) (76 +91 mm) (91 +91 mm) -
Page 111: Emplacement Du Circuit D'eau
Emplacement du circuit d'eau L'eau raccordée aux conduites d'eau doit être potable. L'emplacement du système d'eau doit être dans la plage indiquée ci-dessous. Le circuit d'eau du réfrigérateur doit être raccordé au réseau d'eau de la maison. L'utilisateur doit pouvoir l'allumer/l'éteindre avec la vanne si nécessaire. Aucun objet susceptible de percer les tuyaux d'eau ou de les tordre ne doit se trouver à l'endroit où la conduite d'eau est installée. - Page 112 Liste de pièces de montage Nom de la pièce spécification Qté Remarque Panneau de mousse isolante Éponge, grise, T3.0*400*1750 Support de connexion T2.0, revêtement Cr + Zn Tête de rondelle d'armature M4*12 Attache Couvercle centrale Extrusion PVC L=1876 • Vis à tête sphérique pour treillis Spéc.
- Page 113 Collez le panneau d'isolation (art. n°1) sur le côté d'un appareil de manière à ce qu'il reste entre deux cabines. Item No1 Stick the insulation panel ( ) to the side of one appliance so that it remains in between two cabins. Panneau isolation Panneau isolant T3.0*400*1750...
-
Page 114: Fixation Des Attaches Et De L'étrier De Raccordement
Fixation des attaches et de l'étrier de raccordement Vissez le support de connexion (art. n°2) et les attaches (art. n°4) qui vont relier les deux réfrigérateurs entre eux. Attache Support de connexion... - Page 115 Effectuez les raccordements à l'électricité et à l'eau du réfrigérateur comme expliqué précédemment dans ce manuel. Après s'être assuré qu'ils sont alignés, vissez les supports supérieurs à l'autre réfrigérateur. Après s'être assuré qu'ils sont alignés, vissez les supports inférieurs à l'autre réfrigérateur.
-
Page 116: Réglage De La Hauteur Du Réfrigérateur Dans L'armoire
Réglage de la hauteur du réfrigérateur dans l'armoire Vissage du meuble support sur la paroi supérieure de l'armoire Réglez la hauteur du réfrigérateur à l'aide des pieds réglables. Fixez les supports de connexion de l'appareil à l'armoire à l'aide de 4 vis. AVERTISSEMENT Fixation des éléments de la garniture décorative Fixez la garniture latérale sur les supports d'assemblage de... -
Page 117: Fin De L'installation
Fixez le meuble central (art. n°5) entre les deux réfrigérateurs. Fin de l’installation Vous pouvez consulter les pages précédentes pour d'autres procédures d'installation. - Page 120 DOC COD. 5.000.044.0...
Need help?
Do you have a question about the FM4BM30IFBI and is the answer not in the manual?
Questions and answers