
Related Manuals for Fulgor Milano FM36CDFDS1


Summary of Contents for Fulgor Milano FM36CDFDS1
- Page 1 FM36CDFDS1 REFRIGERATOR INSTRUCTIONS FOR INSTALLATION AND USE INSTRUCTIONS POUR L’INSTALLATION ET L’UTILISATION RÉFRIGÉRATEUR REFRIGERADOR INSTRUCCIONES PARA LA INSTALACIÓN Y USO...
-
Page 2: Environmental Advice
Welcome to the world of simple handling and no worries Thank you for choosing Fulgor Milano .This manual contains all the information you will need to safely and correctly use your refrigerator. Please read all the instructions prior to using the appliance and keep this manual in a secure place for future reference. -
Page 3: Table Of Contents
Contents Safety......................03 Product Description...................05 Installation....................07 Door Handles....................17 Making Minor Adjustments between doors..........18 Installing the water line................19 Operation....................21 Cleaning and Maintenance...............25 Solutions to Problems................26 Attention The refrigerator you have just purchased may be slightly different from the one shown in the drawings in this manual, but its overall design intent is the same. -
Page 4: Safety
Safety For children Please keep children from entering or climbing the refrigerator to avoid locking the children inside the refrigerator and hurting them should the refrigerator tip over due to their weight. Be mindful of children's whereabouts when closing and opening doors and drawers to avoid injuries to probing hands and fingers. - Page 5 Don't put fluid in bottles or sealed containers into the freezer, such as bottled beer or drinks to avoid the containers cracking or exploding and potentially causing damage to other contents or the appliance. During a power outage or cleaning, pull out the plug. Wait at least 5 minutes after cutting the power before restarting to allow the refrigeration system to equilize as immediate startup might damage the compressor When the refrigerator is out of service, please remove the refrigerator's doors...
-
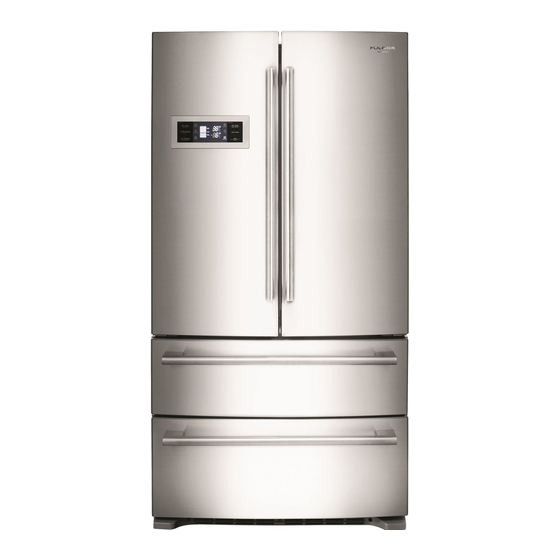
Page 6: Product Description
Product description Rated Voltage/Frequency: 115V~/60Hz Rated Current: 2.7A Total Storage Volume 20.7cu.ft/585L Freezer Storage Volume: 6cu.ft/169L Refrigerator Storage Volume: 14.7cu.ft/420L Net Weight: 133kg Gross Weight: 144kg Product Dimensions: 911x728.5x1775mm 35.9x28.7x69.1in (without handle) Refrigerator body Ice storage bin Display Ice scoop Left door for refrigerator compartment Partition plate for lower freezer drawer Upper drawer for freezer compartment... - Page 7 Left door for refrigerator compartment Right door for refrigerator compartment Butter box Cantilever shelf Air duct cover plate French door sealing flap Folded cantilever shelf Sliding cantilever shelf Side lamp for refrigerator compartment Fruit and vegetable drawer Gallon bottle shelf (with egg holder) Water tank Large drawer Light-wave freshness lamp...
-
Page 8: Installation
Installation Transport and Placing of Your Remove all packaging material before Refrigerator using the new refrigerator. This includes the foam base and all Transport adhesive tape holding the refrigerator Keep upright and avoid squeezing or accessories inside and outside. vibration during transport. Avoid a Clean both the inside and outside of slant angle over 45 degree during the refrigerator with wet cloth (a little... - Page 9 Placement Place your refrigerator in a well- ventilated place and avoid proximity to heat sources and direct sunlight. Don't place it in any humid or wet place so as to avoid rust and reduction to the effectiveness of the insulation. There must be a space not less than 1 inch from the top of your refrigerator and not less than 1 inch from both...
- Page 10 Start Up 4. Put Food into Your Refrigerator You must observe all safety Depending on ambient conditions it precautions and make sure that may take several hours for the cooling your refrigerator has been placed and freezing compartments to reach properly in its final position before their set temperatures.
- Page 11 Refrigerator compartment The refrigerator compartment is designed to maintain a temperature in the range of Adjustment of cantilever shelf 2°C to 8°C (36°F to 46°F) and should be considered as short term storage. Always ensure items are fit for consumption prior to Upper end of fixed leg ingesting.
- Page 12 Food suggested to store in 2. Ice storage bin is used to store the refrigerator compartment ice. 1. Leftovers 3. The lower drawer of the freezer is used to store fish, meat and 2. Snack food, food subject to packaged poultry meat. tainting, dairy product 3.
- Page 13 aking-out and installation of the lower freezer drawer Rear stopper for the lower drawer 1. Pull out the lower freezer drawer first. 2. Take out the two fixed screws from the partition plate of the lower freezer drawer with screw driver and then take off the partition plate.
- Page 14 Large crisper drawer The large crisper drawer has a maximum load of 10kg. Hook Removal and installation of large crisper drawer 1. Extend the large crisper drawer. Big drawer 2. Find the hook at the left and right sides at the drawer bottom (shown Sliding rail in the figure).
- Page 15 Ice-maker Operating instructions for the ice- maker 1. When the refrigerator is used for the first time, wait at least 20 minutes before starting the ice maker. The ice-maker is capable of producing 1.2~1.7Kg(2.5 - 3.75 lbs), ice in 24hr depending on the temperature of freezer compartment, ambient temperature, frequency of door opening/closing and other working...
- Page 16 Removal, cleaning and installation of ice tray Fig.3 lf the ice maker isn't used for a long period, ice cubes that are just produced might have unpleasant odor and / or taste. You must take out and clean the ice cube tray. Open the upper drawer in the freezer compartment, rotate the knob of ice maker counterclockwise by 90°, turn...
- Page 17 Removal and installation of ice maker assembly Fig.4 If the ice maker is not being used, Ice maker's it can be removed to provide power socket maker's additional storage space for frozen hook Ice maker's goods. power plug Push the Ice Maker button on the control panel at the refrigerator door and confirm the icemaking icon disappears.
-
Page 18: Door Handles
Handle Installation Assembly instructions of refrigerator door handle: Inner socket head cap screw for handle fixing 1. Find the mounting studs in the refrigerator. Thread by hand into the receivers on the door face. Bolt Tighten snug using an appropriate screw driver. -
Page 19: Making Minor Adjustments Between Doors
Making minor adjustments between doors Remember a level refrigerator is necessary for getting the doors perfectly even. If doors are uneven, follow the procedure below to raise the lower door up to be even with the higher door Do as follows 1) Raise the left door or the right door. -
Page 20: Installing The Water Line
Installing the water line The appliance can be connected to a water line using a standard 1/4" ice maker connection kit available at your Cold water line dealer or at hardware or plumbing stores. Pipe clamp Connecting to the water supply line 1. - Page 21 Water connector ice maker connection kit (not supplied). Turn on water and ensure there are no leaks. Fulgor Milano is not responsible for water damage due to improperly connected water lines. Only connect the water line to a drinkable water source.
- Page 22 Appliance Functions 13 15 17 14 16 Control buttons Energy saving mode Refrigerator temperature control Ice-making switch Freezer temperature control Child Lock Auto mode Display items Off icon: means refrigera Fast-cooling icon Locked icon shut down Refrigerator compartment icon Fast-freezing icon Refrigerator temperature Freezer compartment icon Energy-saving icon...
- Page 23 Appliance Functions Energy saving mode In order to save energy, this mode sets the temperature in the refrigerator at and the temperature in the freezer at -15 , AUTO mode default settings are 5 and -18 , respectively . To activate the Energy Saving mode, Press the ENERGY SAVING MODE button and the ENERGY SAVING icon...
- Page 24 Appliance Functions Fast-freezing mode This function is used to counteract a sudden rise in the freezer compartment in order to preserve the nutritional content of the food. It is recommended that this mode be activated at least two hours before a large quantity of items are placed into the freezer.
- Page 25 Appliance Functions To s et the temperature of the freezer compartment Press the FRZ.TEMP button and the Freezer Temperature digital display will illuminate. To change the temperature setting, press the FRZ. TEMP. button again, until the desired temperature is displayed. The temperature of the freezer compartment can be adjusted between -13 and -22 degrees C with a step of 1 C or between 9 and -8 degrees Fahrenheit wi th a step of 1 Ice-making switch...
-
Page 26: Cleaning And Maintenance
Cleaning and maintenance Refrigerator's maintenance and repair Cleaning Clean regularly dust from the back of refrigerator and floor Clean regularly the space inside the refrigerator to avoid any unpleasant odor. Before cleaning, pull out the plug and use soft towels and neutral detergent and clean it finally with clear water. - Page 27 Solutions to problems Please read the following contents before repair request: Symptom Possible cause / inspection items Whether the power is switched on, whether Not working the plug is secured? Whether the voltage is too low? Whether the temperature is set too high (might reduce the temperature as required).
-
Page 28: Operation
If power cables are damaged, please get it changed by a qualified technician recommended / assigned by our Service Centers to avoid any risk. Sounds attributable to normal operation During cooling cycles, the sound of refrigerant traveling through the capillary into the evaporator may manifest as gurgling, hissing or occassionally popping. - Page 29 -site unless expressly NOTE Replacement light bulbs are not covered by the product authorized by Fulgor Milano nor does it cover the travel costs warranty. associated with providing service to remote locations. Remote...
- Page 30 manejo simple y sin preocupaciones Gracias por elegir Fulgor como marca para su refrigerador. Los refrigeradores Fulgor han sido concebidos bajo altísimos estándares técni- cos. Poseen características especiales desarrolladas para ofrecer aun más co- modidad al usuario. Para que usted pueda disfrutar todos los recursos que su nuevo refrigerador ofrece, Fulgor creó...
- Page 31 30 Fulgor...
- Page 32 31 Fulgor...
- Page 33 32 Fulgor...
- Page 34 33 Fulgor...
- Page 35 34 Fulgor...
- Page 36 35 Fulgor...
- Page 37 36 Fulgor 1 inch 1 inch 1 inch...
- Page 38 37 Fulgor...
- Page 39 38 Fulgor...
- Page 40 39 Fulgor...
- Page 41 40 Fulgor...
- Page 42 41 Fulgor...
- Page 43 42 Fulgor...
- Page 44 43 Fulgor...
- Page 45 44 Fulgor...
- Page 46 45 Fulgor...
- Page 47 46 Fulgor...
- Page 48 47 Fulgor...
- Page 49 48 Fulgor...
- Page 50 49 Fulgor 13 15 17 14 16...
- Page 51 50 Fulgor...
- Page 52 51 Fulgor...
- Page 53 52 Fulgor...
- Page 54 53 Fulgor...
- Page 55 54 Fulgor Si la instrucción indicada aquí arriba no resuelve el problema, por favor contacte el centro de asistencia: Por Eastern Canada (Ontario -> east): Distinctive Appliances Service Department nùmero gratuito: 1-800-361-0799 Email: service@distinctive-online.com www.distinctive-online.com Por Western Canada (Manitoba -> west): Pacific Specialty Brands Service Department Email: service@pacificspecialtybrands.com or nùmero gratuito: 1-877-430-5253x106...
- Page 56 55 Fulgor Duración de la garantía: La garantía de Fulgor Milano cubre durante 24 meses, a contar lugares apartados. Por lugares apartados se entienden los que desde la fecha de compra, todas las partes y operaciones se encuentran a más de un radio de 50 millas (80 kilómetros) de reparación o cambio, en caso de uso residencial normal,...
- Page 57 - 56 -...
- Page 58 - 57 -...
- Page 59 - 58 -...
- Page 60 - 59 -...
- Page 61 - 60 -...
- Page 62 - 61 -...
- Page 63 - 62 -...
- Page 64 - 63 -...
- Page 65 - 64 -...
- Page 66 - 65 -...
- Page 67 - 66 -...
- Page 68 - 67 -...
- Page 69 - 68 -...
- Page 70 - 69 -...
- Page 71 - 70 -...
- Page 72 - 71 -...
- Page 73 - 72 -...
- Page 74 - 73 -...
- Page 75 - 74 -...
- Page 76 Si ce qui précède ne suffit pas à résoudre les problèmes, s'il vous plaît contacter le support technique: Pour Eastern Canada (Ontario -> east): Distinctive Appliances Service Department gratuit: 1-800-361-0799 Email: service@distinctive-online.com www.distinctive-online.com Pour Western Canada (Manitoba -> west): Pacific Specialty Brands Service Department Email: service@pacificspecialtybrands.com or gratuit: 1-877-430-5253x106 Pour United States:...
- Page 77 Les solutions décrites ici sont les seules qui seront et le bon de livraison originaux. fournies par Fulgor Milano , en vertu de cette garantie ou en vertu de toute garantie naissant du fait de la loi. Fulgor Milano décline Pour obtenir un service dans le cadre de cette garantie, il est toute responsabilité...
- Page 78 DOC COD. 11/2018...
Need help?
Do you have a question about the FM36CDFDS1 and is the answer not in the manual?
Questions and answers