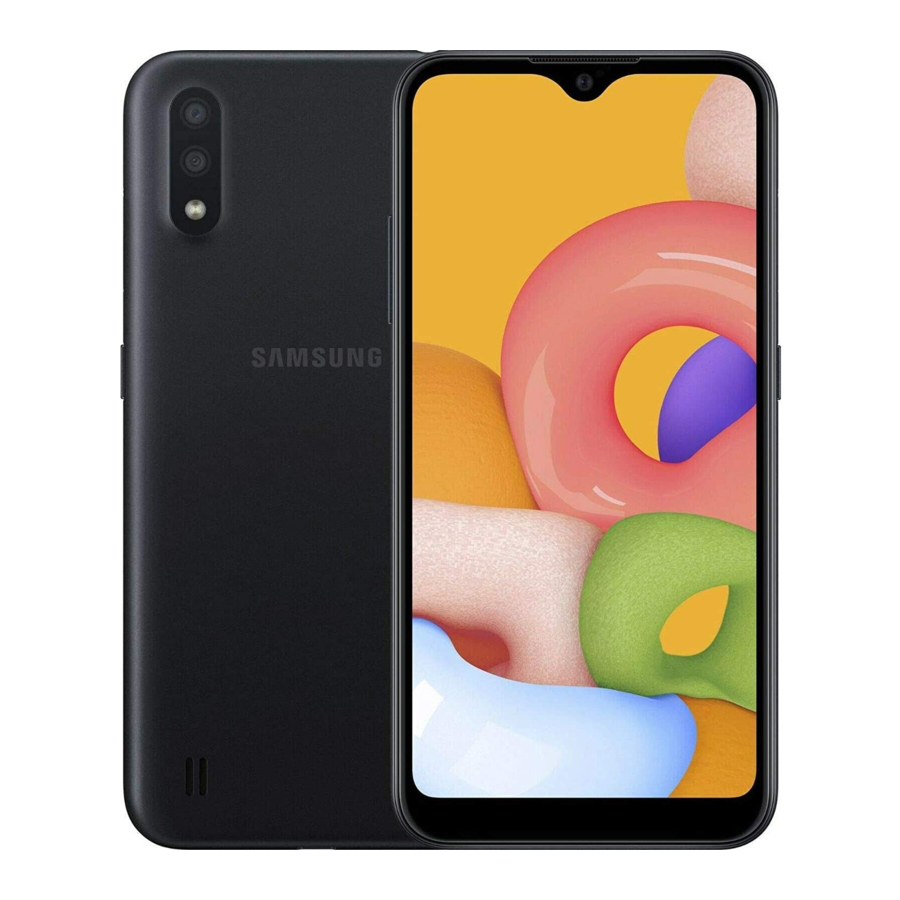
Samsung Galaxy A01 (SM-A015) Manual
- User manual (135 pages) ,
- Repair manual (45 pages) ,
- User manual (105 pages)
Advertisement
What are we learning?
What's in this guide?
This guide will assist you with the disassembly and assembly process of the Galaxy A01.
This guide will cover:
- Parts of the Device
- Disassembly of the Galaxy A01
- Assembly of the Galaxy A01
So how does this help me?
This guide will help you perform quality repairs on the Galaxy A01
Removable Parts of the Galaxy A01
The Galaxy A01 has multiple removable parts. Being able to identify the parts and understand their functions will assist you in the diagnostics and repair of the device. The parts include:
- OCTA Assembly
- Main PBA
- Sub PBA
- Components
- Rear Assembly
- Battery
- Battery Cover
Battery Cover
The Battery Cover snaps onto the OCTA assembly, and does not require heat for removal.

 NOTE: If any of the above fail to function or are damaged, they need to be replaced.
Rear Assembly
The Rear Assembly is 2 pieces and sits between the Battery Cover and internal components. The Rear Assembly contains parts such as:

- Main Antenna
- Speaker
NOTE: If any of the above fail to function or are damaged, they need to be replaced.
Components
There are a few smaller components that can also be removed such as:

NOTE: If any of the above fail to function or are damaged, they need to be replaced.
Main PBA
The Main PBA is the main board of the device. It contains the most essential components of the device such as:

- Mobile Chipset (CPU, GPU, and Radio)
- SIM/SD Card Connector
- Built in Storage
- Earphone Jack
NOTE: If any of the above fail to function or are damaged, they need to be replaced.
Sub PBA
The Sub PBA is the secondary board of the device. It contains other essential components of the device such as:

- I/F Connector (Charging port)
- Main Microphone
NOTE: If any of the above fail to function or are damaged, they need to be replaced.
OCTA Assembly
The OCTA (On Cell Touch Assembly) of Galaxy A51 includes the following:

- The Display Panel
- The Front Glass and Laminate
- Receiver
- Battery
NOTE: If any of the above fail to function or are damaged, they need to be replaced.
The Battery
The Battery is a Lithium-ion (Li-On) cell, and must be handled carefully. Improper removal can damage the cell, causing it to ignite and cause injury.

- Only hold the Battery from the center sides
- Do not squeeze the Battery or use any unauthorized tools when handling it
- Do not hold the Battery by its flex connector, as this can accidentally short the leads
- When handling the Battery, be careful not to puncture or damage the battery
NOTE: If any of the above fail to function or are damaged, they need to be replaced.
Disassembly of the Galaxy A01
Taking the device apart
In this section we will go over the disassembly of the Galaxy A01. This guide will cover:

- The tools and equipment needed
- The steps of disassembly
So how does this help me?
With this knowledge, you will be able to completely disassemble the Galaxy A01.
Tools and Equipment
To ensure proper disassembly without damage to the device, use the proper tools and equipment:

NOTE: The terms "Tweezers" and "Plastic Tipped ESD Tweezers" are used interchangeably throughout this training. Use ONLY Plastic Tipped ESD Tweezers when performing device repair.
Steps of Disassembly
- Battery Cover
- Rear Assembly
- Speaker
- Main PBA
- Main Camera
- Front Facing Camera
- Sub PBA
- Front Assembly
- Battery
- Vibrator Motor
Remove the SIM Tray
Before disassembling the device, the SIM tray must be removed.
- Insert the SIM removal tool into the SIM eject slot on the top of the device and slide the SIM tray out


Battery Cover Removal
Use a disassembly stick or pick to go in between the battery cover and rear assembly and move the disassembly stick all around to completely disconnect the battery cover.


Remove the Screws
Remove the screws from the Rear Assembly.

- There are a total of 16 screws that hold the Rear Assembly in place
- Use the Torque Screw driver to remove all screws
Disassemble the Rear Assembly

- Using your fingers gently lift the Top Rear Assembly away from the Main PBA.
- Using tweezers remove the Bottom Rear Assembly.
NOTE: Be careful not to damage charging port when removing Bottom Rear Assembly. Make sure not to insert the tweezers too deep into the disassembly point for Bottom Rear Assembly.
Precautions are required
The image to the right displays the internal components and circuitry of the Galaxy A01. Before you begin to disassemble, ensure you and your work station are properly grounded.


Disconnecting the Flex Cables from the Main PBA
Using the Disassembly Stick:

- Disconnect the battery flex cable
- Disconnect the 1 flex cables
- Disconnect 1 COAX Cables
Removing the Front Facing Camera
To remove the Front Facing camera without damage, follow these steps

- Using the Disassembly Stick, disconnect the flex cable and remove the Front Facing Camera
- Once the flex cable is slowly pull the FFC away from the bracket to ensure you don't rip the silver tape that's attached.
- Once it is removed place the FFC lens up on the ESD mat.
Removing the Rear Facing Camera
To remove the Front Facing camera without damage, follow these steps

- Using the Disassembly Stick, disconnect the flex cables for both Rear Camera Modules.
- Once they are removed place them lens up on the ESD Mat.
NOTE: If one of the Rear Camera modules malfunction then they both would need to be replaced
Remove the Main PBA
To remove the Main PBA without damage, follow these steps:

- Using the disassembly stick, lift the Main PBA from off the Front Assembly. Insert the disassembly stick into the open space where the FFC was removed.
Remove Flex cables from Sub PBA
Using the Disassembly Stick:

- Disconnect the flex cable
- Disconnect 1 COAX Cables
Remove the Sub PBA
To remove the Sub PBA without damaging:
- Use a disassemble stick and gently lift and go around the edge of the Sub PBA to remove it from the assembly.
![]()

Remove the Vibrator Motor
To remove the Vibrator Motor without damage, follow these steps
- Using ESD Tweezers, lift the Vibrator Motor from off the Front Assembly
![]()

Remove the Battery
To remove the battery without damage, follow these steps:

- Apply alcohol along the side of the edges of the battery.
- All the alcohol to soak for 30-60 seconds, this will help loosen the tape
- Be careful not to get any alcohol on the printed text on the battery
- Lift the battery out using the battery absorber
Be careful to not damage LCD FPBC
Battery Handling
Handle the Battery with care by following these steps:

- Only hold the Battery from the center sides
- Do not squeeze the Battery or use and tools when handling it
- Do not hold the battery by flex connector, as this can accidentally short the leads
- When handling the battery be careful not to puncture or damage the battery
U Class Battery Process
If replacing the battery, the following must be performed before properly discarding the battery:

- Using the Ceramic Scissors, cut the lead from the battery.
- The lead gets sent back as U-Class
The device has now been disassembled
We have covered the disassembly process of the Galaxy A01. At this point all removable components have been removed.

Keep in mind:
- In a repair scenario, only remove as much as required for the repair
- Follow proper process and tool usage to avoid damage
With the device disassembled, you can now move on to device assembly.
NOTE: Coax Cable will not be part of new OCTA, so if you perform an OCTA replacement the Coax Cable will be moved to the new OCTA
Assembly of the Galaxy A01
Putting it all back together
In this section we will go over the assembly of the Galaxy A01.
This guide will cover:

- The tools and equipment needed
- The steps of disassembly
So how does this help me?
With this knowledge you will be able to completely assemble the Galaxy A01
Tools and Equipment
To ensure proper assembly without damage to the device, use the proper tools and equipment:

You will assemble the device in the following order:

- Front Assembly
- Battery
- Vibrator Motor
- Sub PBA
- Main PBA
- Main Camera
- Front Camera
- Rear Assembly
- Battery Cover
Install the Battery
The replacement Battery will come with tapes attached.

- Remove the protective vinyl from the Battery tape
- With your fingers move the LCE Flex cable out of the way
- Lay the battery from the top left corner, while making sure the correct side of the battery is facing up
Install the Vibrator Motor into the Bracket
To properly install the Vibrator Motor without damage, follow these steps:

- Ensure the contact pads are facing the appropriate direction and are not bent between the motor and bracket
- Install the Vibrator Motor and gently press down
Installing the Sub PBA
To install the Sub PBA, perform the following:

- Align the Sub PBA to the Front Assembly and gently press to secure a fit
- Connect the LCD FPCB to the Sub PBA
- Connect the COAX cable to the Sub PBA
Installing the Main PBA
To install the Main PBA, perform the following:

- Position the Main PBA to the Front Assembly. For a safe install, loosen up all connectors before installing PBA
- Connect the Main FPCB
- Connect the Coax cable
NOTE: DO NOT connect battery FPCB at this time
Installing the Cameras
To install the Rear and FFC camera to the Main PBA, perform the following:

- Align the FFC Camera into the bracket and connect the flex cable. After you attach the flex cable lay the silver tape down
- Align the Rear Camera modules into the correct bracket and connect the flex cables to the Main PBA.
NOTE: The Rear Camera part is in pairs, so if you replace on Rear Camera module you have to replace the other.
Installing Rear Assembly
To install Rear Assembly:

- Align the bottom Rear assembly over the Sub PBA and the Top Rear Assembly over the Main PBA and both should sit flush.
- Insert 8 New screws into the bottom and 8 New screws into the top using a torque driver. Use Torque Screw driver at 1.25kgf.cm2
Installing Battery Cover

- Place the battery cover over the rear case
- Press down on the battery cover all around the edges until it completes snaps into place
The Assembled Device
Once removed from the Press Jig, the device is fully assembled.

- Make sure the SIM tray is reinstalled
- Perform a final visual inspection of the device
Once the repair is complete, perform an Outbound Quality Check.
- If PBA or Back Camera are replaced you will run a camera calibration via GD
Customer Pickup
Ensure the following before returning the device to the customer:

- OS updated to the latest version
- Device charged to 100%
- Wipe the device clean with microfiber cloth
Documents / ResourcesDownload manual
Here you can download full pdf version of manual, it may contain additional safety instructions, warranty information, FCC rules, etc.
Advertisement


Need help?
Do you have a question about the Galaxy A01 and is the answer not in the manual?
Questions and answers