Advertisement
- 1 PARTS LIST
- 2 UNPACKING
- 3 GETTING STARTED
- 4 STANDBY MODE
- 5 FACTORY DEFAULT SETTING
- 6 HOT DRINK OR COLD DRINK MODE
- 7 COFFEE PREPARATION
- 8 COFFEE VOLUME ADJUSTMENT FOR BREW
- 9 CLEANING
- 10 EMPTYING AND CLEANING THE INTERNAL PIPES
- 11 DECALCIFICATION OF THE MACHINE
- 12 HOW TO ACTIVATE SELF-PRIMING OF THE PUMP
- 13 RANGE OF APPLICATION
- 14 TROUBLESHOOTING
- 15 SECURITY WARNINGS
- 16 WARNING
- 17 SAFETY PRECAUTIONS
- 18 Documents / Resources
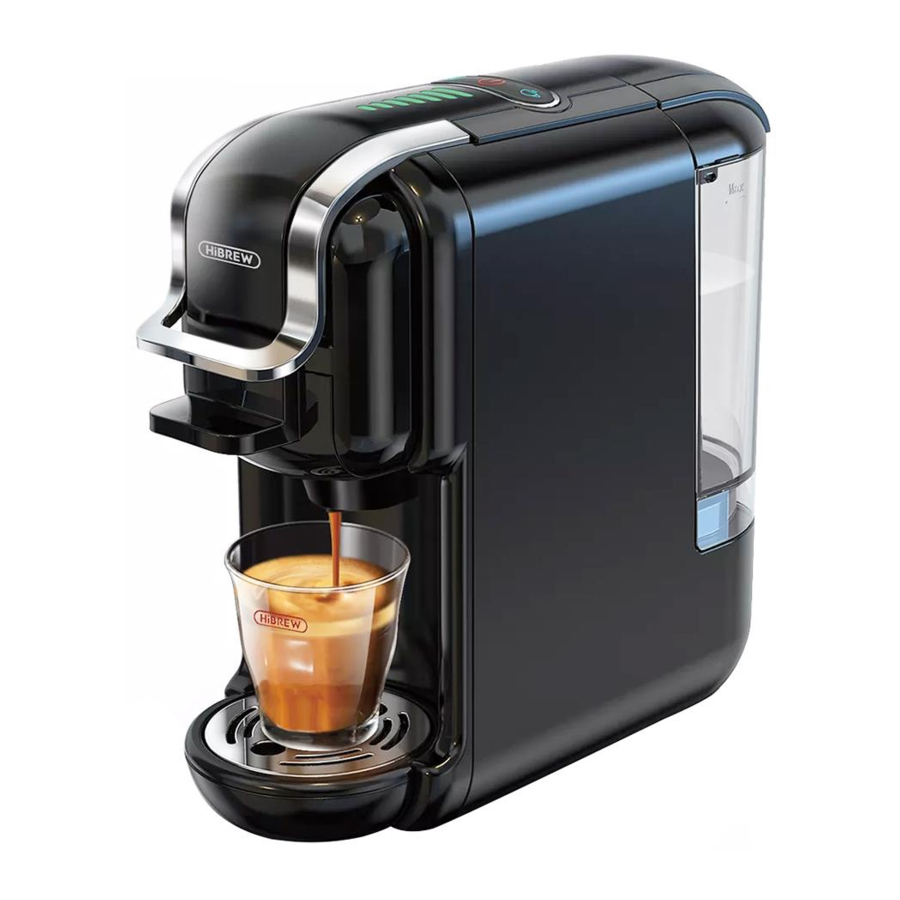
PARTS LIST

- Opening lever for changing the adapters.
- Compartment for the adapters.
- Small cup support.
- Large cup support.
- Control buttons: On/off, short coffee and long coffee.
- Water tank lid.
- Water tank.
- Adapter for Nespresso capsules.
- Adapter for Dolce Gusto capsules
- Adapter for ground coffee or E.S.E. pod (44 mm).
- Adapter for K-cup pod.
UNPACKING
- Remove your coffee machine from its packaging.
- After unpacking, verify that the following parts are included:
- Water tank
- Coffee maker
- Manual
- Adapters
Note:
- Verify that the voltage of the electrical current in your home or establishment is the same as that stated on the nameplate of the machine.
- Recycle all plastic bags to avoid hazards to children!
- Keep the packaging for transporting the machine (e.g. for disassembly, repair, etc.).
GETTING STARTED
Before using your coffee maker for the first time, pay attention to the safety precautions in this manual, in particular the following:
![]()
Be careful with the hot water! You could get burnt.- Rinse the water tank thoroughly with clean water before the first use.
- Do not operate the unit with an empty water tank or if the water level is below the minimum level.
- Only use the appliance in a dry room.
- Do not open the lever when the machine is warming up or running.
- Always unplug the power cord before cleaning the machine.
- Clean the coffee maker only with a damp cloth.
The first step is to fill the water tank; there are two ways to do this:

Fill without removing the tank.
- Lift the water tank cover.
- Fill the tank with clean water (maximum water temperature 35'C).
- Lower the tank cover.

Fill by removing the water tank.
- Slightly lift the water tank in the direction shown in the picture to remove the water tank from the appliance. Fill the tank to the "MAX" line with clean water (maximum capacity 0.6 litres)
- Slowly slide the water tank over the base of the water tank, performing the reverse procedure described above. When the water tank outlet is inserted into the inlet base, push down to lock the water tank.

There may be a drop of water left in the appliance. To ensure that this unit works perfectly, it was tested with water before it left the factory.

Improper handling of electrical equipment is dangerous and can be lethal.
STANDBY MODE

This appliance is in Standby mode by default: In this mode, the machine and all indicator lights will turn off after 15 minutes of inactivity.
If the machine enters standby mode, press the On/Off button to turn it back on.
FACTORY DEFAULT SETTING

Press and hold the Brew button.
Connect the machine to the power outlet
The LED on the button will turn on and blink twice, indicating that the machine has returned to the factory default setting.
HOT DRINK OR COLD DRINK MODE

Hot Drink Mode
- Connect the device to the main socket, the On/Off button will flash twice in red and twice in blue, indicating power is well connected.
- One quick press to the ON/OFF button to turn it on in Red light, the Volume button and Brew button will be flashing in blue for 35s about to finish the heating up process.
- When the Volume button and Brew button stop flashing, the device is ready for hot drink. in this mode, The Volume and Brew are indicated large blue light and the ON/OFF button is indicated in steady RED light.
- Press the volume button to set the coffee volume.
- Press the brew button, the coffee come out.
Cold Drink Mode
- Connect the device to the main socket, the On/Off button will flash twice in red and twice in blue, indicating power is well connected.
- Press the ON/OFF button and hold it pressed (about 2 seconds) until the indication light is turned on in BLUE light.
- When the device enters in the cold drink mode, all the three buttons are indicated in steady BLUE indication light, In this mode, heater is switched off.
- Press the volume button to set the coffee volume.
- Press the brew button, the coffee come out.
- Tips: add 2-3 pieces of ice cube into the coffee cup for cold drink, or fill in 8-10 C(46-50F) icy water into the water tank to brew your cold drink.
COFFEE PREPARATION
Your coffee machine includes different adapters for making coffee, choose the right one to prepare your coffee.
- Connect the device to the mains socket. Press the start button.
![]()
- Lift the top lever and pull it out to remove the adapter while the machine warms up.
![]()
- Follow the instructions below to use each type of adapter:


Nespresso capsules: Lift the capsule adapter lid. Insert a capsule into the adapter and lower the adapter lid.

Dolce Gusto capsules: Insert a capsule into the adapter.

K-Cup* Capsule: Insert the capsule into the adapter.
DOLCE GUSTO ADAPTOR USAGE & CLEANING
Please note when using the Dolce Gusto capsule adapter that there are 2 parts to check when cleaning:
- the Piercing Pin, and
![]()
- the Pouring Nozzle on the adaptor.


Please see below instructions for cleaning your adapter:

Ground Coffee: Lift the adapter's lid and add the ground coffee. Press down to compact the ground coffee and lower the adapter's lid.

E.S.E.pod (44 mm): Insert a coffee pod into the adapter.
- Push the adapter with the capsule in and close the lever downwards as shown in the picture.
![]()
- Place a cup under the dispenser, press the Volume button to select the desired volume level, then press the Brew button to start.
![]()
- Lift the handle and remove the used capsule from the adapter.
![]()


COFFEE VOLUME ADJUSTMENT FOR BREW
You can change the amount of coffee by adjusting the default brewing time to suit your taste.

Press the Volume button to adjust the coffee brewing size as per your preference.
The machine will record your selection for next use.

After adjustment, press the Brew button to start brewing.
The brewing process can be cancelled by pressing it again.
Attention:
- When the Brew button is pressed, its LED may blink for a few seconds first, and then start brewing coffee, which is normal.
- For best taste, It's strongly recommended to brew a cup of hot water first.
CLEANING
- Be sure to disconnect the machine before cleaning.
![shock hazard]() Never immerse the machine or part of it in water; you could suffer serious injury or even death by electric shock!
Never immerse the machine or part of it in water; you could suffer serious injury or even death by electric shock! - Do not use any strong cleaning agent or solvent cleaner.
- Do not use pointy objects, brushes, abrasives or sharp objects.
- Do not clean the parts in a dishwasher.
 Never immerse the machine or part of it in water; you could suffer serious injury or even death by electric shock!
Cleaning the capsule and ground coffee adapters
Empty the adapter tank and wash it with water. Dry the whole piece thoroughly with a napkin or dry cloth.

Cleaning the appliance
Wipe with a clean, damp cloth, reassemble all parts. Clean the coffee spout and preparation area regularly with a damp cloth.
EMPTYING AND CLEANING THE INTERNAL PIPES
Before using the machine again after long breaks (e.g, vacation), the machine must e rinsed thoroughly. This short procedure serves to thoroughly purge and clean the internal piping.
Procedure
- Fill the water tank with water (see "Getting Started".)
![]()
- Connect the device to the mains socket.
![]()
- Press the start button.
![]()
- The LEDs on the buttons will stabilize when the machine has warmed up. The warm-up time is approximately 45 seconds.
Before pressing the Brew button, make sure that:
![]()
- The compartment lever is closed and there are no capsules inside.
- The water tank is full.
- The water tank is firmly in place, otherwise the water may leak.
- Place a Volume (size 250ml or larger) under the dispenser.
![]()
- Press the Brew button and wait for the appliance to complete the rinse.
![]()
- Do not lift the lever until the rinsing process stops automatically.


DECALCIFICATION OF THE MACHINE
Drinking water varies by region. Lime particles from potable water are deposited as waste in the machine and can block the pipe and cause damage. To avoid this, be sure to decalcify the machine at least after making 300 to 400 cups of coffee or, in any case, if production drops significantly or after one or two months.
Decalcification must be done correctly to avoid damage.
Carefully follow the instructions below.
- Fill the tank with a mixture of water and a commercially available decalcifying liquid for coffee makers (always follow the manufacturer's instructions).
- Make sure there are no capsules inside the machine.
- Place a large container under the dispensing head to collect the mixture and lime residue
- Press the Volume button to perform decalcification. Repeat the process several times until all the water in the tank is used up.
- Repeat the process to rinse the internal circuit with a tank of clean water (no decalcifying liquid) to completely clean the internal circuit and ensure the good taste of your drinks.

- Use extreme caution with hot water!
- Never clean the machine with vinegar. This will damage the machine and make the drinks taste bad.
- Damage caused by incorrect decalcification or lack of decalcification is not covered by the warranty.
HOW TO ACTIVATE SELF-PRIMING OF THE PUMP
Before using for the first time or after long (e, g, holidays) the machine may be difficult to pump water, this procedure can help pump to self priming by using the pipe to fill water into the circuit manually prior to turn on the machine for refill.

- Insert the pipe into the water entrance.
- Fill water into the pipe,
- Inject the water from pipe into the machine so that the internal circuit is filled with water
Do not switch on or use the appliance if there is no water in the tank.
RANGE OF APPLICATION
This device is intended for domestic use and similar environments, such as:
- Staff kitchen areas in shops, offices and other work environments;
- Rural houses;
- Hotels, motels and other residential environments;
TROUBLESHOOTING
| PROBLEM | CAUSE | SOLUTION |
There's no coffee coming out | The water tank is empty. | Fill the water tank with water. |
The coffee's not hot enough | The coffee maker is cold. | Wait the indicated time for heating. |
| Lime buildup. | Carry out decalcification. | |
There is water at the bottom of the machine | The water tank is leaking. | Check to see if the tank's valve is clogged. |
| The bottom drip tray is filled with water. | Empty the drip tray. | |
The lever won't close | The capsule/coffee adapter is not in place. | Check and attach the adapter correctly. |
Can not insert adapter into the machine | the machine has been brewed coffee without adapter in place, so the brewing head came down. |
|
SECURITY WARNINGS

Do not wet the machine or put it in the water.

Do not touch the top of the adapter when removing it from the compartment, as it is very hot and could cause burns.


Do not lift the top cover while using the brewer.

There is a sharp needle on the top of the capsule adapter.
Do not place your hand underneath or near it as it may get punctured.
WARNING

Electrical Shock Hazard
- Never immerse the appliance in water or any other liquid.
- Damaged power cords may only be replaced by authorized service personnel, please contact customer service.
- Never touch the plug, outlet, cord, or machine with wet or damp hands.
Danger of burns
- Never move the appliance during operation.
- Never touch very hot parts of the appliance(e.g. preparation unit during operations).
- Do not approach steam or liquid jets.
- Do not move the operating lever while the machine is still under pressure making coffee.
- Disconnect the power cord and allow the appliance to cool completely before cleaning or servicing.
SAFETY PRECAUTIONS
- Only connect the coffee maker to a properly grounded electrical outlet.
- To make sure the machine is turned off, remove the plug from the electrical outlet.
- Always disconnect the power cord before moving the machine around, cleaning or maintenance and long periods of disuse.
- Do not pull the cord over sharp edges, clamp it or allow it to hang.
- Do not unplug appliances by pulling from the cord; instead grab hold of the plug and disconnect it from the electrical outlet.
- If you need an extension cord, make sure it is suitable for your machine and place the cord securely.
- Never operate the machine without water.
- Always make sure that the amount of water in the tank is not below the minimum level.
- Do not use the machine in case of faulty operation, a damaged power cord or after falling or other damage.(In this case, please contact Customer Service.)
- Keep children away from the machine during operation.
- Only use the machine in a dry environment.
- Do not allow the power cord to hang too low, as there is a risk of tripping.
- This machine is designed for home use only.
- To avoid damage, never use spare parts or accessories not recommended by the manufacturer.
- Keep this appliance out of the reach of children or persons who do not have the necessary skills to use it unsupervised.
- If the power cord is damaged, it should be replaced by the manufacturer, dealer or a qualified service technician.
- Choose a dry, stable, level surface that is not immediately below the power outlet.
- It must be at least 60 cm away from the faucet.
- Never place it on flammable surfaces or equipment, fuses or other appliances (microwave, dishwasher, etc.).
- Never place the machine or power cord within 50 cm of hot surfaces or open flames.
- Never cover the unit during operation.
Documents / ResourcesDownload manual
Here you can download full pdf version of manual, it may contain additional safety instructions, warranty information, FCC rules, etc.
Advertisement


Need help?
Do you have a question about the H2B and is the answer not in the manual?
Questions and answers