Advertisement
- 1 WHAT'S IN THE BOX
- 2 SYMBOLS
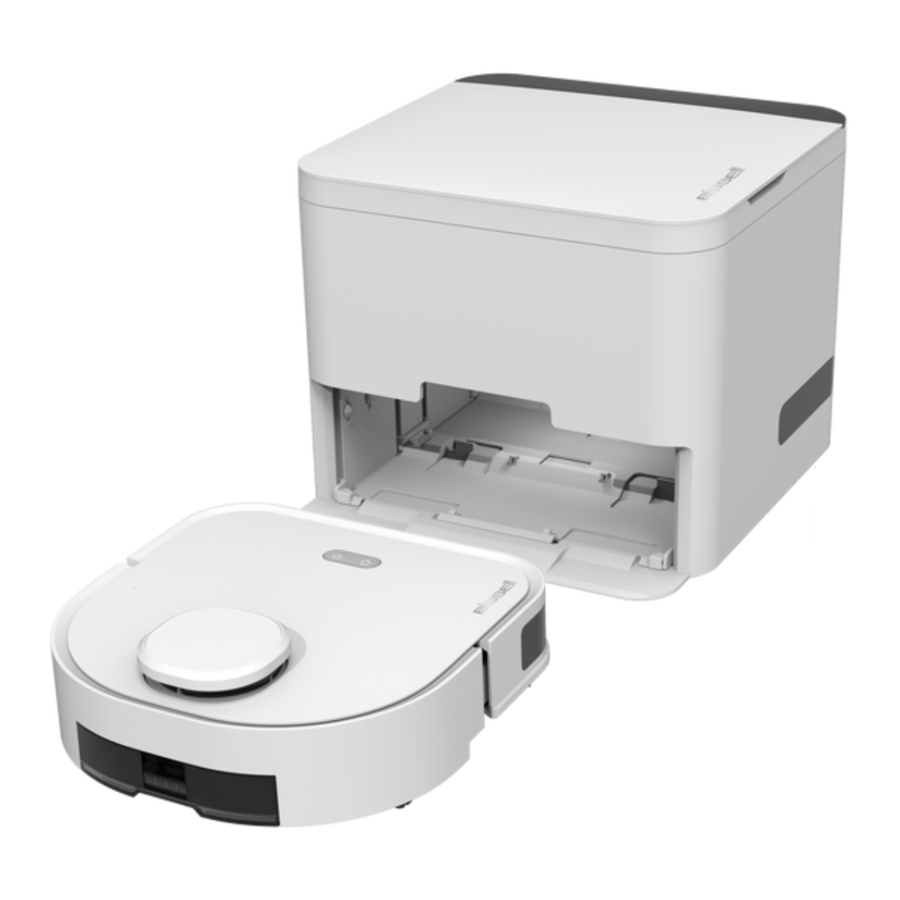
- 3 ABOUT YOUR ReadyCIean A3 ROBOTIC MOP
- 4 ABOUT YOUR DOCKING STATION
- 5 GETTING TO KNOW YOUR ReadyCIean A3
- 6 TIPS BEFORE CLEANING
- 7 GETTING STARTED
- 8 DOWNLOAD THE APP
- 9 MAPPING YOUR HOME
- 10 START CLEANING
- 11 START CLEANING
- 12 MAINTENANCE
- 13 MAINTENANCE: ROBOTIC MOP
- 14 MAINTENANCE: DOCKING STATION
-
15
TROUBLESHOOTING
- 15.1 Cannot Connect To The App
- 15.2 Failure to Update Firmware
- 15.3 LiDAR Sensor Error
- 15.4 Bumper Error
- 15.5 Cliff Sensor Error
- 15.6 Carpet Detection Sensor Error
- 15.7 Water Tank Error
- 15.8 Insufficient Water. Please Add Water
- 15.9 Drive Wheel Error
- 15.10 Charging Error
- 15.11 Docking Station Error
- 15.12 Please add clean pads
- 16 PRODUCT SAFETY
- 17 TECHNICAL SPECIFICATIONS
- 18 Documents / Resources
WHAT'S IN THE BOX

*The illustrations in this manual are for reference only. The actual appearance may vary.
SYMBOLS
 | For indoor use only |
 | To reduce the risk of injury, user must read instruction manual |
 | Caution |
 | Li-lon battery, battery must be recycled |
 | Do not burn |
 | Batteries may enter water cycle if disposed improperly, which can be hazardous for ecosystem. Do not dispose of waste batteries as unsorted municipal waste. |
ABOUT YOUR ReadyCIean A3 ROBOTIC MOP

ABOUT YOUR DOCKING STATION
FRONT VIEW

BACK VIEW

GETTING TO KNOW YOUR ReadyCIean A3
OPERATION PANEL FOR ReadyCIean ROBOTIC MOP

| Button / Indicator | Operation and function |
 | Short press: the robot starts/pauses. Long press for 3 seconds: turn on/off the robot. |
 | Short press: Pause when the robot is cleaning. Short press again: Send the robot home to recharge. Long press for 3 seconds: Robotwill start to spot clean. (Note: Spot Clean is recommended for areas that have stains or need extra cleaning attention.) |
 | Short press: The robot will return home to replace the cleaning pad Long press for 3 seconds: The robot enters pairing mode. Long press for 8 seconds: Factory reset the robot |
 | Flashing White: Robot is charging or is in testing mode Solid White Robot is cleaning or in standby mode Flashing Blue: Robot is in pairing mode Flashing Red: Robot is experiencing an error Solid Red: The battery is low (less than 15%battery remaining) |
OPERATION PANEL FOR DOCKING STATION

| Button / Indicator | Operation and function |
 | When the robot is in the docking station: Short Press: the robot will start cleaning. Flashing White: the robot is home and charging Solid White. the robot is home and fully charged (NOTE:if the robot is not in the docking station, the buttons on the docking station are not usable and will not light up.) |
 | Short press: Switch between dry mopping mode, wet mopping mode, and dry + wet mopping mode. |
 | When the child lock is engaged, the buttons on the docking station are locked and cannot be used. Unlock the child lock in order to interact with the buttons on the docking station. |
Energy-saving mode: lnsert ReadyClean A3 into docking station and make sure that it is in charging mode (" is in white flashing or white on). Then press "" and "" on ReadyClean A3 for 15s. When "
 " and "
 " on docking station turn off, your ReadyClean A3 will enter into Energy-saving mode. If you need quite Energy-saving mode. At first, pull out ReadyCIean A3 from the docking station, then press and hold "" for 3s to turn on the robot. The mode is applied to DOE/ UEC testing.
TIPS BEFORE CLEANING
Organize the space to be cleaned

For optimal performance, pick up any toys, cords, valuables, etc. that could hinder the robot mop from cleaning. (Note: Ensure that there is no object with a strong reflective surface (ex. mirror) within 10cm/3.5 inches on the ground as it will confuse the robots navigation lasers.)
Open doors for an accurate floorplan map

In order to create the most accurate map of your home, ensure the robot has access to all the areas you would like it to clean. Open doors and remove any barriers to allow the robot to explore and map freely.
Create Virtual Boundaries

After mapping your floor plan, create virtual "no-go" areas via the ReadyClean APP by BISSELL to limit areas/rooms that you do not want the robot to clean and ensure that the robot runs smoothly.
GETTING STARTED
Remove all protective packaging materials

Remove all protective foam and labels from the robot.
Place the docking station

Remove the cover on the back of the docking station to plug in the AC adapter to the docking station and a wall outlet.
Docking station location

For best performance, place the docking station against a wall leaving at least 2.3 ft (70cm) on each side and at least 5ft (150cm) in front.
Assemble the cleaning pads

Wrap a new cleaning pad around the rubber mop pad base, folding the pad firmly around the sides of the base. Assemble all mop pads in order to utilize the auto change docking station.
Install the cleaning pad

Gently flip the robot over and align an assembled cleaning pad onto the magnetic mop bracket. Press firmly to ensure correct installation. NOTE:It is a magnetic connection so you will NOT hear or feel a firm "click". You will know it's installed correctly if the pad does not fall off when you flip the robot back over.
Insert the cleaning pads

Open the lid of the docking station and place the remaining assembled cleaning pads in the clean pad storage box.
Power on the ReadyClean A3

Long press" " for3 seconds to turn on the robot. You will hear startup music to indicate success.
Charging

Manually push the robot into the docking station to charge. Ensure you push the robot to the back of the docking station to engage the charging connectors.
Note: It is recommended you fully charge the robot before first use.
 | Light on top of the docking station flashes white while charging |
| Light on docking station is solid white when charging is complete |
DOWNLOAD THE APP
For best experience, download the ReadyClean APP by BISSELL to customize your cleaning, set a schedule and access even more features. Scan the QR code below or visit your mobile application store to download the "ReadyClean APP by BISSELL"

MAPPING YOUR HOME
First Use: Creating the map

After the robot is fully charged, short press on the docking station. The robot will leave the docking station and begin exploring your home and building a map of your floor plan.
Note: The robot is NOT cleaning while building the map. The cleaning pad will be lifted up as it explores your home.
Tips while mapping

Do not follow or stand in the way of the robot as it is mapping. This can cause missing spots or errors in your floor plan map.
Open doors and remove obstacles to ensure the most accurate and complete map.
The robot will continue to optimize and adjust the map each time it goes out to clean. Download the ReadyClean APP by BISSELL to see your completed map and interact with your floor plan (mark areas as off limits, set pad changing by room or area cleaned, etc.)
Do not move the Docking Station

Do not move the docking station unless necessary. Moving the docking station will require you to remap your floor plan.
Remap as the following steps
- Long press"
![]() +
+ ![]() " for 8 seconds: Factory reset the robot.
" for 8 seconds: Factory reset the robot. - Follow the step"First Use: Creating the map"to remap
START CLEANING
Start Cleaning

After the robot has mapped your floor plan, it is ready to clean! After recharging from its mapping journey, select the cleaning mode  and press on top of the docking station or through the ReadyClean APP by BISSELL.
The robot will begin cleaning around the perimeter of the room before settling into a methodical back and forth pattern.
NOTE: Download the ReadyClean APP by BISSELL to actively see where the robot has already cleaned on your map.
Pause

To pause the robot, short press either the or  button directly on the robot or through the ReadyCIean APP by BISSELL.
If the robot is paused for more than 10 minutes, it will enter sleep mode. Short press the button to wake up the robot. Short press the button a second time to restart the cleaning task.
Return to the Docking Station

Return to the docking station
Pause the robot by pressing the or button. Press the button to send the robot back to the docking station to charge.
Note: When you manually send your robot home during mid-cleaning, it will not automatically change the cleaning pad.
START CLEANING
Your ReadyClean A3 has 3 cleaning mode options: dry mopping, wet mopping or dry + wet mopping. The mode can be selected on top of the docking station or through the ReadyClean APP by BISSELL. Note: Dry + Wet Mopping mode: the robot will dry mop first, when finished, it will go back and wet mop. If the battery depletes before the job is completed, the robot will return to the docking station to charge and will resume cleaning where it left off when it is fully charged.
- Add water and cleaning solution
- Remove the water tank by pressing the release button on the back of the tank and pulling out.
![]()
- Remove the rubber stopper and fill the water tank with water. If desired, add a cap full of the provided cleaning solution to the water tank.
NOTE:Do not fill the water tank with cleaning solution alone as it will clog the water outlets
![]()


- Firmly press the rubber stopper back into the water tank.
![]()

- Slide the water tank back into the robot.
![]()

The Auto Change Pad

By default, the robot will automatically change the cleaning pad after cleaning (20 m2). Customize when the pad is changed in the ReadyClean APP by BISSELL by sq ft. cleaned OR by room. When the robot returns to the docking station, it will drive into the docking station to drop the dirty pad. The dirty pad will be lifted into the used pad container, while a clean pad will be dropped. The robot will drive back into the docking station to pick up the clean pad to finish cleaning or to charge.
Empty the Used Cleaning Pads Frequently

Remember to dispose of the dirty cleaning pads that are collected in the used container. Lift the lid of the docking station to access the used pad container. Use the handles to lift the dirty cleaning pads out of the docking station. Dispose of the dirty pads (do not throw away the rubber pad bases).
NOTE:if the used wet pads are not emptied frequently, mold and mildew could accumulate in the docking station.
MAINTENANCE
Clean the water tank

Remove the water tank by pressing the release key

Empty the water tank

Flush the water tank

Wipe dry or air dry
Clean the rubber cleaning pad base

It is recommended that you rinse the rubber base after disposing of the dirty pad.

Dry the rubber base completely before assembling clean pads

Dispose of the dirty disposable cleaning pads ONLY.Do not throw away the rubber base.
MAINTENANCE: ROBOTIC MOP
Use a dry, clean cloth to wipe all sensors and parts to keep the robot running at peak performance.

MAINTENANCE: DOCKING STATION
Use a dry, clean cloth to clean the docking station. (NOTE: Use a dry cloth only. Do not use water to clean the docking station.)

Wipe the inside of the docking station

Remove and dispose of all dirty cleaning pads

Wipe the inside of the docking station and charging sensors
TROUBLESHOOTING
| Error | Possible Cause | Solution |
Cannot Connect To The App | Mobile phone OS version is out of date | Update your mobile phone under settings to the latest OS |
| The robot is not in pairing mode | Ensure the robot is on and then press and simultaneously for 3 seconds until you hear voice confirmation | |
| Cannot connect to Wi-Fi network | Select your 2.4 GHz network only. The robot cannot connect to 5G | |
Failure to Update Firmware | Interrupted network connection or improper update |
|
LiDAR Sensor Error | The LiDAR sensor is blocked or stuck | Use a dry cloth to wipe the LiDAR sensor or remove any objects blocking the sensor |
Bumper Error |
|
|
Cliff Sensor Error | One or multiple cliff sensors are dirty or blocked | Use a dry cloth to wipe clean all of the cliff sensors |
Carpet Detection Sensor Error | The sensor is blocked or dirty | Use a dry cloth to wipe the sensor clean or remove any foreign objects blocking the sensor |
Water Tank Error | The water tank is not installed properly | Please check the water tank to ensure that it is installed properly |
Insufficient Water. Please Add Water | The water level is too low in the water tank | Please refill the water tank and reinstall it into the robot |
Drive Wheel Error | One or multiple drive wheels is stuck or dirty | Inspect the drive wheels for any foreign objects and wipe clean with a dry cloth |
Charging Error |
|
|
Docking Station Error | The lifting mechanism of the docking station is stuck |
|
Please add clean pads | There are no clean mop pads in the docking station | Add more clean mop pads to the clean pad storage box in the docking station |
| Used Cleaning Pad Storage Error | The docking station is missing the used cleaning pad storage box or it is installed incorrectly | Install the used mop pad storage box |
| Immobilized Error | The robot is suspended off the ground or stuck | Place the robot on level ground |
For additional troubleshooting please visit support. BlSSELL.com
PRODUCT SAFETY

This product can expose you to chemicals including lead and Di(2-ethylhexyl)phthalate (DEHP) which are known to the State of California to cause cancer and birth defects or other reproductive more information go to www.P65Warnings.ca.gov.
MOPPING CLEANER SAFETY WARNINGS
IMPORTANT SAFETY INSTRUCTIONS
When using an electrical appliance, basic precautions should always be followed, including the following:
READ ALL INSTRUCTIONS BEFORE USING THIS APPLIANCE
Failure to follow the warnings and instructions may result in electric shock, fire and/or serious injury.

To reduce the risk of fire, electric injury:
- Unplug from outlet when not in use and before servicing.
- To Reduce The Risk Of Electric Shock— Do not use outdoors wet surfaces.
- Do not allow to be used as a toy. Close attention is necessary when used by or near children.
- Use only as described in this manual. Use only manufacture's recommended attachments.
- Do not use with damaged cord or plug. If appliance is not working as it should, has been dropped, damaged, left outdoors, or dropped into water, return it to a service center.
- Do not pull or carry by cord, use cord as a handle, close a door on cord, or pull cord around sharp edges or corners. Do not run appliance over cord. Keep cord away from heated surfaces.
- Do not unplug by pulling on cord. To unplug, grasp the adaptor, not the cord.
- Keep hair, loose clothing, fingers, and all parts of body away from openings and moving parts.
- Do not charge the unit outdoors.
- Use only the charger supplied by the manufacturer
- Do not incinerate the appliance even if it is severely damaged. The batteries can explode in a fire.
- Do not put any object into openings. Do not use with any opening blocked; keep free of dust, lint, hair, and anything that may reduce air flow.
- Do not handle charger, including charger plug, charger terminals and appliance with wet hands.
- Turn off all controls before unplugging.
- Do not use to sweep flammable or combustible liquids, such as gasoline, or use in areas where they may be present.
- To Reduce the Risk of Fire, do not use a flammable or combustible liquid to clean a floor
- Do not unplug by pulling on cord. To unplug, grasp the charger, not the cord.
FOR ALL BATTERY-OPERATED APPLIANCES:
- Prevent unintentional starting. Ensure the switch is in the off-position before connecting to battery pack, picking up or carrying the appliance. Carrying the appliance with your finger on the switch or energizing appliance that have the switch on invites accidents.
- Recharge only with the charger specified by the manufacturer. A charger that is suitable for one type of battery pack may create a risk of fire when used with another battery pack.
- Use appliances only with specifically designated battery packs. Use of any other battery packs may create a risk of injury and fire.
- When battery pack is not in use, keep it away from other metal objects, like paper clips, coins, keys, nails, screws or other small metal objects, that can make a connection from one terminal to another. Shorting the battery terminals together may cause burns or a fire.
- Under abusive conditions, liquid may be ejected from the battery; avoid contact. If contact accidentally occurs, flush with water. If liquid contacts eyes, additionally seek medical help. Liquid ejected from the battery may cause irritation or burns.
- Do not use a battery pack or appliance that is damaged or modified. Damaged or modified batteries may exhibit unpredictable behavior resulting in fire, explosion or risk of injury.
- Do not expose a battery pack or appliance to fire or excessive temperature. Exposure to fire or temperature above 130C(265F)may cause explosion.
- Follow all charging instructions and do not charge the battery pack or appliance outside of the temperature range specified in the instructions. Charging improperly or at temperatures outside of the specified range may damage the battery and increase the risk of fire.
- Have servicing performed by a qualified repair person using only identical replacement parts. This will ensure that the safety of the product is maintained.
- Do not modify or attempt to repair the appliance or the battery pack (as applicable) except as indicated in the instructions for use and care.
SAFETY WARNINGS FOR BATTERY PACK INSIDE THE TOOL
- Do not dismantle, open or shred battery pack.
- Do not expose battery pack to heat or fire. Avoid storage in direct sunlight.
- Do not short-circuit a battery pack. Do not store battery packs haphazardly in a box or drawer where they may short-circuit each other or be short-circuited by other metal objects. When battery pack is not in use, keep it away from other metal objects, like paper clips, coins, keys, nails, screws or other small metal objects, that can make a connection from one terminal to another. Shorting the battery terminals together may cause burns or fire.
- Do not subject battery pack to mechanical shock.
- In the event of battery leaking, do not allow the liquid to come in contact with the skin or eyes. If contact has been made, wash the affected area with copious amounts of water and seek medical advice.
- Do not use any battery pack which is not designed for use with the equipment.
- Keep battery pack out of the reach of children.
- Always purchase the battery pack recommended by the device manufacturer for the equipment.
- Keep battery pack clean and dry.
- Wipe the charging terminals with a clean dry cloth if they become dirty.
- Battery pack need to be charged before use. Always use the correct charger and refer to the manufacturer's instructions or equipment manual for proper charging instructions.
- Do not leave battery pack on prolonged charge when not in use.
- After extended periods of storage, it may be necessary to charge and discharge the battery pack several times to obtain maximum performance.
- Recharge only with the charger specified by BISSELL. Do not use any charger other than that specifically provided for use with the equipment.
- Retain the original product literature for future reference.
- Use only the battery pack in the application for which it was intended.
- Dispose of properly.
- Do not mix cells of different manufacture, capacity, size or type within a device.
- Keep the battery away from microwaves and high pressure.
SAVE THESE INSTRUCTIONS
SAFETY PRECAUTIONS WHEN USING THIS PRODUCT

Remain alert and follow the procedure below: Please read this manual carefully before using the product and keep it properly. The robot is not a toy. Supervise children and pets when the robot is cleaning DO NOT place anything on top of the unit. Take care when walking in work areas to avoid stepping on or tripping over the unit as it moves on its own. DO NOT operate unit on floors with exposed electrical outlets. DO NOT immerse robot in water or other liquids.
- Problems that may arise when the mopping robot sweeps the floor should be solved as soon as possible. Please clean up power cords and small objects on the floor so they will not block the path when mopping. Fold the fringe underneath the carpet, and keep hanging curtains and tablecloths away from the floor.
- In an environment that has stairs or drop-offs, please test the product first to check if it can detect ledges. Consider blocking off stairs or edges of drop-offs with a protective fence to prevent the product from falling. It should be ensured that the protective device will not cause personal injury such as by tripping
- Please use the product by following the instructions in the manual. Only use accessories recommended or sold by the manufacturer.
- Ensure that the supply voltage matches the voltage rating shown on the charging stand.
- If the power cord is damaged, it must be replaced by the manufacturer, its service agent or similarly qualified persons in order to avoid a hazard.
- Please turn off the product before cleaning and maintaining the product.
- Always pull the plug from the power socket before cleaning and maintaining the product.
- Before discarding the product, please remove it from the charging stand, turn off the power switch, and remove the battery.
- If the product will not be used for a long time, please disconnect the product from the power supply.
- Before discarding the product, the product battery must be removed and discarded in accordance with local laws and regulations.
- The used battery must be discarded in accordance with local laws and regulations.
- This appliance is not intended for use by persons (including children) with reduced physical, sensory or mental capabilities, or lack of experience and knowledge, unless they have been given supervision or instruction concerning use of the appliance by a person responsible for their safety.
- Use the product only in an indoor home environment. Do not use the product in outdoor, commercial, or industrial places.
- Do not use the product with a damaged power cord or power socket. Do not continue to use the product when the product cannot work properly due to falling, damage, outdoor use or water ingress. The product should be repaired by the manufacturer or its after-sales service in order to avoid accidental injury.
- Please use the product by following the instructions in the manual. Our company is not responsible for any loss and damage caused by improper use.
![]()
- Only use the original charging stand provided by the manufacturer. Users shall not replace the battery by themselves. If the battery is suspected to be damaged, please contact the manufacturer, authorized dealer or similarly qualified persons to replace it.
- The product should not be used in an environment with open flames or fragile objects.
- The product should not be used in an overly hot (above 40C)or overly cold (below 0C) environment.
- Do not allow hair, clothes, fingers, or any other parts of human body to be close to the opening and operating parts of the product.
- The product should not be used on wet or watery ground.
- The product should not mop any flammable materials such as gasoline or toner powder for printers and photocopiers. The product should not be used for cleaning areas with flammable materials.
- The product should not vacuum any burning items, such as cigarettes, matches, ashes and other items that may cause a fire.
- Use the power cord carefully to avoid damage. It is forbidden to use the power cord to drag or lift the product and its charging stand. It is forbidden to use the power cord as a handle. It is forbidden to run the power cord through a door gap. It is forbidden to pull the power cord around a sharp corner or edge. Do not operate the product over a power cord. Keep the power cord away from heat sources.
- It is forbidden to use the damaged charging stand. If the charging stand is damaged, it must be repaired or replaced by the manufacturer, authorized dealer or similarly qualified persons in order to avoid a hazard.
- It is prohibited to burn the product even if it is severely damaged. The product battery may cause an explosion.
INSTRUCTIONS FOR DISCARDING BATTERY
If you want to discard the battery contained in this machine, please do not discard it along with household garbage. Instead, hand it over to the nearest used battery recycling station or after-sales service center for centralized disposal. The following instructions are not for general users, but are to be used as the disposal instructions for the final battery disposer. The chemical substances contained in the batteries of this machine will pollute the environment if handled improperly. Before discarding the robot, please be sure to take out the battery from the robot body in advance. The battery should be handed over to a special battery collection point for centralized disposal. Be careful! Leakage of the battery can cause human injury! If the battery leaks, do not allow the leakage to come into contact with eyes or skin. In case of accidental contact, please thoroughly wash your hands and eyes with clean water immediately. If you still feel uncomfortable, consult a doctor immediately.
TECHNICAL SPECIFICATIONS
| ReadyClean A3 | |
| Dimension | 264 x 263 x 95mm (10.4 x 10.4 x 3.7in) |
| Weight | 3kg (6 61bs) |
| Battery capacity | Li Battery 2600mAh |
| Rated voltage | 14.4V |
| Rated power | 8.4W |
| Docking Station | |
| Dimension | 320 x 300 x 256mm (12.6 x 11.8x 10.1in) |
| Weight | 3.5kg (7.71bs) |
| Adaptor model | AD-0121900060US |
| Adaptor input | 100-240VN50-60Hz 0.5A |
| Rated input | 19V |
| Rated output | 19\/ O.6A O.6A |
| Rated power | 11.4W |
* Actual product may vary due to the continuous product enhancement. Our company reserves the right to make improvement to the product at any time. For household use only.
FOR BATTERY TOOLS
The ambient temperature range for the use and storage of tool and battery is 0 C-45C (32 F-113 F). The recommended ambient temperature range for the charging system during charging is 4 ºC-40 ºС (39 ºF-104ºF).
CUSTOMER SERVICE
Any questions or concerns please visit support.BlSSELL.com
Documents / Resources
References

Download manual
Here you can download full pdf version of manual, it may contain additional safety instructions, warranty information, FCC rules, etc.
Advertisement


Need help?
Do you have a question about the ReadyClan A3 and is the answer not in the manual?
Questions and answers