Table of Contents
Advertisement
Available languages
Available languages
VX-S207
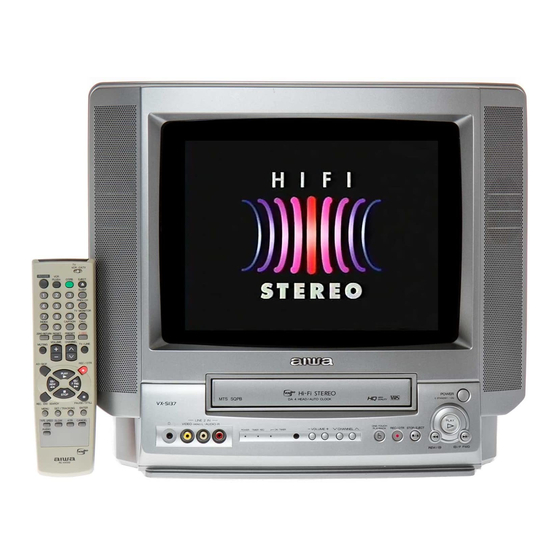
VX-S137
INTEGRATED COLOR TV/STEREO VIDEO CASSETTE RECORDER
TELEVISOR EN COLOR/VIDEOGRABADORA ESTEREO INTEGRADOS
TELEVISOR COULEUR/MAGNETOSCOPE STEREO INTEGRE
OPERATING INSTRUCTIONS
INSTRUCCIONES DE MANEJO
MODE D'EMPLOI
For Assistance And Information
Call Toll Free 1-800-BUY-AIWA
(United States and Puerto Rico)
U
U
ENGLISH
ESPAÑOL
FRANÇAIS
Advertisement
Chapters
Table of Contents

Subscribe to Our Youtube Channel
Related Manuals for Aiwa VX-S137U


Summary of Contents for Aiwa VX-S137U
-
Page 1: Operating Instructions
VX-S207 VX-S137 INTEGRATED COLOR TV/STEREO VIDEO CASSETTE RECORDER TELEVISOR EN COLOR/VIDEOGRABADORA ESTEREO INTEGRADOS TELEVISOR COULEUR/MAGNETOSCOPE STEREO INTEGRE OPERATING INSTRUCTIONS INSTRUCCIONES DE MANEJO MODE D'EMPLOI For Assistance And Information Call Toll Free 1-800-BUY-AIWA (United States and Puerto Rico) ENGLISH ESPAÑOL FRANÇAIS... -
Page 2: Important Safety Instructions
ENGLISH Warning To reduce the risk of fire or electric shock, do not expose this appliance to rain or moisture. CAUTION RISK OF ELECTRIC SHOCK DO NOT OPEN WARNING: SHOCK HAZARD - DO NOT OPEN. AVIS: RISQUE DE CHOC ELECTRIQUE - NE PAS OUVRIR. - Page 3 For your convenience, record the model number and serial number (you will find them on the rear of your set) in the space provided below. Please refer to them when you contact your AIWA dealer in case of difficulty. Model No. Serial No.
-
Page 4: Table Of Contents
Welcome Thank you for purchasing this AIWA product. To optimize the performance of this unit, please read through this operating instructions carefully. Main features of this unit VCR Plus+ system and One- Touch Playback You can easily set the timer with the VCR Plus+ system. -
Page 5: Connecting The Antenna
If the cable is a flat-type 300-ohm twin-lead cable, connect it to the antenna adaptor (supplied), and connect the adaptor to the UHF/VHF connector. When you use VX-S137U, the antenna adaptor can be taken out from the supplied telescopic antenna. Connect the AC cord to the AC wall outlet after passing it through the AC cord hook. - Page 6 Connecting the antenna (continued) To connect the supplied telescopic antenna (VX-S137 only) Antenna adaptor (Supplied) Mount the supplied antenna in the antenna holder. Extend and adjust the ends of the antenna to get the best signal reception. Note For better reception, especially in outlying areas, or where ghosting or interference is a problem, use an external room-mounted antenna.
- Page 7 CATV connections To connect a CATV system without using a CATV converter VX-S207 UHF/ AC cord hook Connect the cable from the CATV system to the UHF/VHF connector on the unit. Connect the AC cord to the AC wall outlet after passing it through the AC cord hook. To connect a CATV system using a CATV converter VX-S207 UHF/...
-
Page 8: Preparing The Remote Control
When you operate except for changing the CATV channel, set the TV VCR/CATV selector to TV VCR. Notes • Due to the variety of codes used by manufacturers, AIWA cannot guarantee that the MBR remote control will operate with every model of the brands listed. -
Page 9: Setting The Language
CATV converter manufacturer Code number ALLEGRO ARCHER CABLEVIEW CITIZEN CURTIS MATHES EAGLE 24, 25, 28 GEMINI 05, 22, 23 GENERAL ELECTRIC GENERAL INSTRUMENT 05, 07, 09 GOBRAND HAMLIN 33, 34, 35 JERROLD 04, 06, 07, 08, 09, 10, 17, KALE VISION MACOM 03, 40, 41 MAGNAVOX... -
Page 10: Setting The Clock
Setting the clock You must set the date and time for timer recording. When you connect the AC cord to the AC wall outlet, the date and time will be set automatically if the unit receives the clock adjustment signal. If the unit cannot receive the clock adjustment signal or reception signal is weak, the unit may set the clock incorrectly. -
Page 11: Saving Time
Press SET/TRACKING + or – to select AUTO CLOCK. Press ENTER to select ON. Press MENU twice to return to the normal screen. Setting the time by the daylight saving time Press MENU. Press SET/TRACKING + or – to select SYSTEM SET- UP, then press ENTER. -
Page 12: Setting The Channels
Setting the channels Before Auto Channel Memory, this unit can receive all channels in your area by pressing the CHANNEL N or M button repeatedly. After Auto Channel Memory, you can skip the channels which are not preset with the CHANNEL N or M button. -
Page 13: Checking The Channel Set-Up To Use Vcr Plus+® System
Checking the channel set-up to use VCR Plus+® system To set the timer using VCR Plus+® system, you have to check whether the VCR channel numbers match the guide channels which are assigned to the TV stations. If they do not match, the VCR Plus+® system does not function correctly. -
Page 14: Basic Operations
BASIC OPERATIONS Watching a TV program POWER Number buttons MUTING VOLUME + /– Headphones jack VOLUME + /– CHANNEL POWER indicator Press POWER to turn on the unit. The POWER indicator on the front lights. Press CHANNEL N or M repeatedly, or the number buttons to select the channel number. -
Page 15: Selecting The Closed Captions Mode
Selecting the closed captions mode This unit can decode and display closed captioned television programs or tapes. Press CAPTION repeatedly to select the caption mode. The display changes as follows: CAPTION CH1 CAPTION CH2 No display TEXT CH2 TEXT CH1 (Caption off) Captions: This closed caption mode displays text on the screen in... -
Page 16: Adjusting The Picture
Adjusting the picture You can adjust the picture settings for brightness, contrast, color, tint and sharpness. MENU SET/TRACKING +/– Before starting Set the TV VCR/CATV selector to TV VCR. Press MENU. Press SET/TRACKING + or – to select TV SET- UP, then press ENTER. -
Page 17: Adjusting The Sound
Adjusting the sound You can adjust the settings for bass sound, treble sound and the balance of the sound. MENU SET/TRACKING +/– Before starting Set the TV VCR/CATV selector to TV VCR. Press MENU. Press SET/TRACKING + or – to select TV SET- UP, then press ENTER. -
Page 18: Setting The On-Timer
Setting the On-Timer Once this timer is set, the unit turns on at the programmed time to the programmed channel. MENU SET/TRACKING +/– ON-TIMER indicator Before starting • Check that the clock is set correctly. • Set the TV VCR/CATV selector to TV VCR. Press MENU. -
Page 19: Setting The Off-Timer
Press SET/TRACKING + or – to display SET, then press ENTER. The ON-TIMER indicator on the unit lights. Press MENU 3 times to return to the normal screen. • At the programmed time, the channel is changed to a programmed one. •... -
Page 20: Playing Back A Tape
Setting the Off-Timer (continued) Press SET/TRACKING + or – to set the hours, then press ENTER. Press SET/TRACKING + or – to set the minutes, then press ENTER. To change the minutes setting in ten minutes, press and hold SET/TRACKING + or –. Press SET/TRACKING + or –... -
Page 21: Additional Functions
If you cannot get a clear playback picture Although the unit adjusts the tracking automatically, you may need to adjust the tracking manually if the tape quality is too poor. If the picture and the sound have noise, try manual tracking. To adjust the tracking manually During playback, press SET/TRACKING + or –... -
Page 22: Various Search Functions
Playing back a tape repeatedly POWER ZERO- RETURN MENU SET/TRACKING +/– Before starting Set the TV VCR/CATV selector to TV VCR. Press MENU. Press SET/TRACKING + or – to select AUTO REPEAT. Press ENTER to select ON. Press MENU to return to the normal screen. Press d PLAY. - Page 23 Searching with the index function — Index Search The unit automatically marks an index signal on the tape each time recording starts. You can use these signals to find the beginning of any recording. Before starting Set the TV VCR/CATV selector to TV VCR. Press INDEX during stop or playback.
-
Page 24: Recording
RECORDING Recording a TV program Number buttons TAPE SPEED VX-S207 CHANNEL N/M wREC/OTR Before starting Set the TV VCR/CATV selector to TV VCR. Insert a cassette with its erasure prevention tab in place. The power turns on automatically. Press TAPE SPEED to select the tape speed, SP, LP or SLP. -
Page 25: Recording With One-Touch Recording
Playing back the portion you just recorded – One-Touch Playback Using One-Touch Playback after VCR Plus+® system (page 25) or manual timer recording (page 27) is convenient. You can make timer recordings and play back only the portion you just recorded with the timer by pressing a single button later. -
Page 26: Setting The Timer With Vcr Plus+® System
Playing back a tape (continued) To stop recording Press s STOP on the remote control or Z STOP/ EJECT on the unit. The w REC/OTR button on the unit lights off. To extend the recording duration while recording Press w REC/OTR until the new duration you want appears on the screen. -
Page 27: Changing The Setting
Press SET/TRACKING + or – to select ONCE, DAILY or WEEKLY. To record a single program daily program weekly program such as every Monday (WKL-MON) Press ENTER. • The following timer information appears on the screen. • If you want to change the setting here, see “Changing the setting.”... -
Page 28: Setting The Timer Manually
Setting the timer manually If you cannot use VCR Plus+® system, you can set the timer manually. You can set up to 8 programs within one month of the current date. MENU SET/TRACKING +/– Before starting • Check that the clock is set correctly. •... -
Page 29: Dubbing
Dubbing Connecting with another VCR VX-S207 (Front) Yellow White Audio/Video cable (not supplied) Tips • If the other VCR is monaural type, connect one of the audio plugs only to AUDIO IN L (MONO). • If you use this unit for playback, connect the AUDIO/VIDEO OUT jacks on this unit and the audio/video input jacks on the recording unit. -
Page 30: Other Functions
OTHER FUNCTIONS Setting the V-chip An age limitation can be set to prevent children from viewing or listening to violent scenes or programs with adult content. This unit corresponds to “TV-RATING” and “MOVIE RATING.” To use the V-chip function, register a password at first. Number buttons MENU... -
Page 31: Changing The Password
• When TV-MA is selected, the items below appear. :TV-MA VIOLENCE SEXUAL SITUATIONS ADULT LANGUAGE Press MENU to return to the V-CHIP SET menu. Press ENTER, and press SET/TRACKING + or – to select MOVIE RATING, then press ENTER. Press SET/TRACKING + or – to display the desired setting, then press ENTER. -
Page 32: Multichannel Tv Sound (Mts) And Hi-Fi Audio Sound System
Multichannel TV Sound (MTS) and Hi-Fi audio sound system Number buttons MENU AUDIO SET/TRACKING +/– Multichannel TV Sound (MTS) This unit is equipped with the MTS (Multi-channel TV Sound) system which decodes stereo and SAP (Second Audio Program) broadcasting signals. It also decodes the stereo TV sound of the local CATV system if it satisfies the assigned cable frequencies and EIA-recommended MTS stereo/bilingual TV sound system. -
Page 33: On-Screen Display
Recorded and output signals of the MTS broadcast Recorded signal screen Broadcast Hi-Fi Normal track track Mono Mono — Mono Left/ Mono Right STEREO Stereo (L+R) channel Mono Mono Mono+SAP L:Mono R:SAP Left/ Mono STEREO/ Stereo+SAP Right (L+R) channel L:L+R R:SAP Playing back a MTS-program recorded tape... -
Page 34: Additional Information
ADDITIONAL INFORMATION Troubleshooting If the unit does not seem to operate properly, read the instructions again, then check the following guide. TV reception is noisy or there is no TV reception. Connect the antenna correctly and securely. There is no picture or sound The unit is in LINE input mode. -
Page 35: Specifications
Specifications Tuner system Frequency synthesized tuner TV system Channel coverage VHF: 2 to 13 UHF: 14 to 69 CATV: 5A, A-1 to A-5, A to W, W+1 to W+84 Program memory Antenna input 75 ohms, unbalanced Picuture tube VX-S207 406(W) 305(H) mm in.) 508 mm (diagonal) (20 in.) -
Page 36: Parts And Controls
Parts and controls Front panel (VX-S207) Television screen Cassette compartment Headphones jack LINE 2 IN VIDEO/AUDIO L (MONO)/R jacks Indicators (POWER, TIMER REC, ON-TIMER) Remote sensor Front panel (VX-S137) Television screen Cassette compartment Headphones jack LINE 2 IN VIDEO/AUDIO L (MONO)/R jacks Indicators (POWER, TIMER REC, ON-TIMER) Remote sensor... -
Page 37: Remote Control
Rear panel Antenna holder UHF/VHF connector VIDEO OUT/AUDIO OUT L/R jacks LINE 1 IN VIDEO/AUDIO L (MONO)/R jacks Remote control VCR PLUS+ button POWER button Number buttons (0-9) INDEX button RESET button ZERO-RETURN button MUTING button VOLUME + /– button AD-SKIP (Advertisement skip) button fREW (Rewind)/ [ button... -
Page 38: Instructions De Securite Importantes
FRANÇAIS Avertissement Pour réduire le risque d’incendie ou d’électrocution, ne pas exposer cet appareil à la pluie ou à l’humidité. CAUTION RISK OF ELECTRIC SHOCK DO NOT OPEN WARNING: SHOCK HAZARD - DO NOT OPEN. AVIS: RISQUE DE CHOC ELECTRIQUE - NE PAS OUVRIR. - Page 39 Pour votre facilité, inscrivez la désignation du modèle et le numéro de série de cet appareil (qui se trouvent à l’arrière) dans les cases ci-dessous. Signalez ces références lorsque vous prenez contact avec votre revendeur Aiwa en cas de problème. Numéro du modèle Numéro de série FRANÇAIS...
- Page 40 Félicitations ! Nous vous remercions d’avoir fait l’acquisition de ce produit Aiwa. Pour optimiser les performances de cet appareil, nous vous invitons à lire attentivement le présent mode d’emploi. Principales caractéristiques de ce téléviseur Système VCR Plus+ et lecture monotouche Le programmateur se règle simplement...
-
Page 41: Raccordements De Base
Si le câble est un câble bifilaire plat de 300 ohms,raccordez-le à l’adaptateur d’antenne (fourni), et raccordez ensuite l’adaptateur au connecteur UHF/VHF. Si vous utilisez un téléviseur VX-S137U, l’adaptateur d’antenne peut être tiré de l’antenne télescopique fournie. Raccordez le cordon d’alimentation à une prise murale (secteur) après l’avoir fait passer dans le crochet. - Page 42 Raccordement de l’antenne (suite) Pour installer l’antenne télescopique fournie (VX-S137 uniquement) Adaptateur d’antenne (fourni) Placez l’antenne fournie dans le porte-antenne Etirez et déplacez les deux branches de l’antenne afin d’obtenir le meilleur signal de réception. Remarque Pour obtenir une meilleure réception, spécialement dans les zones isolées, ou si vous rencontrez des problèmes d’interférences ou d’images fantôme, utilisez une antenne d’extérieur.
- Page 43 Raccordements CATV Pour raccorder un système CATV sans utiliser de convertisseur CATV VX-S207 UHF/ Crochet du cordon d’alimentation Raccordez le câble du système CATV au connecteur UHF/VHF du téléviseur. Raccordez le cordon d’alimentation à une prise murale (secteur) après l’avoir fait passer dans le crochet. Pour raccorder un système CATV avec un convertisseur CATV VX-S207 VHF/...
-
Page 44: Préparation De La Télécommande
TV VCR/CATV sur TV VCR. Remarques • En raison de la diversité des codes utilisés par les fabricants, AIWA ne peut garantir que la télécommande MBR fonctionnera avec tous les modèles des marques mentionnées. • Les touches numériques peuvent exclusivement être utilisées pour la sélection des chaînes, mais il se peut... -
Page 45: Sélection De La Langue D'affichage
Fabricant du convertisseur CATV Numéro de code ALLEGRO ARCHER CABLEVIEW CITIZEN CURTIS MATHES EAGLE 24, 25, 28 GEMINI 05, 22, 23 GENERAL ELECTRIC GENERAL INSTRUMENT 05, 07, 09 GOBRAND HAMLIN 33, 34, 35 JERROLD 04, 06, 07, 08, 09, 10, 17, KALE VISION MACOM 03, 40, 41... -
Page 46: Réglage De L'horloge
Réglage de l’horloge Vous devez régler la date et l’heure manuellement pour effectuer des enregistrements par programmateur. Lorsque vous raccordez le cordon d’alimentation secteur à la prise murale, la date et l’heure sont automatiquement réglées si l’appareil reçoit un signal de réglage de l’horloge. S’il ne peut pas recevoir un tel signal ou si ce signal est faible, il est possible que l’horloge soit mal réglée. - Page 47 Appuyez sur SET/TRACKING + ou – pour sélectionner HOLOGE AUTO. S Y S T E M E D E R E G L AG E R E G L AG E H O R L O G E LANGUAGE/IDIOMA/LANGUE H O L O G E AU TO O F F H E U R E D E L ' E S T H E U R E AVA N C E E...
-
Page 48: Sélection Des Chaînes
Sélection des chaînes Avant la mémoire de chaîne automatique, cet appareil peut recevoir toutes les chaînes captables dans votre zone géographique en appuyant plusieurs fois de suite sur la touche CHANNEL N ou M. Après la mémoire de chaîne automatique, vous pouvez omettre les chaînes qui ne sont pas présélectionnées à... -
Page 49: Contrôle De La Sélection Des Chaînes En Vue De L'utilisation Du Système Vcr Plus
Contrôle de la sélection des chaînes en vue de l’utilisation du système VCR Plus+® Pour régler le programmateur à l’aide du système VCR Plus+®, vous devez vérifier si le numéro des chaînes sur le magnétoscope correspond aux canaux guides assignés aux stations de télévision. -
Page 50: Opérations De Base
OPERATIONS DE BASE Regarder une émission de télévision POWER Touches numériques MUTING VOLUME + /– Prise casque VOLUME POWER + /– CHANNEL Indicateur POWER Appuyez sur POWER pour mettre le téléviseur sous tension. L’indicateur POWER à l’avant s’allume. Appuyez plusieurs fois de suite sur CHANNEL N ou M, ou sur les touches numériques pour sélectionner le numéro de chaîne. -
Page 51: Sélection Du Mode De Sous-Titres
Sélection du mode de sous- titres Cet appareil peut décoder et afficher les sous-titres de télévision ou des cassettes vidéo. Appuyez plusieurs fois de suite sur CAPTION pour sélectionner le mode de sous-titres. SS-TITRE CNL1 L’affichage change selon la séquence suivante: SS-TITRE CNL1 SS-TITRE CNL2 Pas d’affichage... -
Page 52: Réglage De L'image
Réglage de l’image Vous pouvez ajuster le réglage de la luminosité, du contraste, de la couleur, de la teinte et de la netteté de l’image. MENU SET/TRACKING +/– Avant de commencer... Réglez le sélecteur TV VCR/CATV sur TV VCR. Appuyez sur MENU. Appuyez sur SET/TRACKING + ou –... -
Page 53: Réglage Du Son
Réglage du son Vous pouvez ajuster les graves, les aiguës et la balance du son. MENU SET/TRACKING +/– Avant de commencer... Réglez le sélecteur TV VCR/CATV sur TV VCR. Appuyez sur MENU. Appuyez sur SET/TRACKING + ou – pour sélectionner PROG. FONC et appuyez ensuite sur ENTER. -
Page 54: Réglage Du Programmateur De Mise Sous
Réglage du programmateur de mise sous tension Lorsque vous avez réglé ce programmateur, l’appareil se met sous tension à l’heure programmée et syntonise la chaîne programmée. MENU SET/TRACKING +/– Indicateur ON-TIMER Avant de commencer... • Vérifiez si l’horloge est réglée correctement. •... -
Page 55: Réglage Du Programmateur De Mise Hors
Appuyez sur SET/TRACKING + ou – pour afficher MARCHE et appuyez ensuite sur ENTER. L’indicateur ON-TIMER de l’appareil s’allume. MINU MAR/ARR MINU. MARCHE 10:30AM CNL 023 DIM–SAM MARCHE MINU. ARRET 12:00AM ANNULER Appuyez trois fois sur MENU pour revenir à l’écran normal. -
Page 56: Lecture
Réglage du programmateur de mise hors tension (suite) Appuyez sur SET/TRACKING + ou – pour régler l’heure et appuyez ensuite sur ENTER. MINU MAR/ARR MINU. MARCHE 12:00AM CNL 001 DIM–SAM ANNULER MINU. ARRET 11:00PM ANNULER Appuyez sur SET/TRACKING + ou – pour régler les minutes et appuyez ensuite sur ENTER. -
Page 57: Fonctions Complémentaires
Si vous ne parvenez pas à obtenir une image de lecture claire Bien que le magnétoscope ajuste automatiquement l’alignement, il se peut que vous deviez le régler manuellement si la cassette est de qualité médiocre. Si l’image et le son comportent des parasites, réglez l’alignement manuellement. -
Page 58: Différentes Fonctions De Recherche
Lecture répétée d’une cassette POWER MENU SET/TRACKING +/– Avant de commencer... Réglez le sélecteur TV VCR/CATV sur TV VCR. Appuyez sur MENU. Appuyez sur SET/TRACKING + ou – pour sélectionner AUTO REPEAT. M E N U PROG. ENR. PROG. FONC PROG. - Page 59 Recherche avec la fonction d’indexation — Recherche d’index Le magnétoscope insère automatiquement un signal d’index sur la cassette chaque fois qu’un enregistrement démarre. Vous pouvez utiliser ces signaux pour localiser le début de chaquee nregistrement. Avant de commencer... Réglez le sélecteur TV VCR/CATV sur TV VCR. Appuyez sur INDEX en mode d’arrêt ou de lecture.
-
Page 60: Enregistrement
ENREGISTREMENT Enregistrement d’une émission télévisée Touches numériques TAPE SPEED CHANNEL N/M wREC/OTR Avant de commencer... Réglez le sélecteur TV VCR/CATV sur TV VCR. Introduisez une cassette dont l’onglet de protection contre l’effacement est intact. La mise sous tension est automatique. Appuyez sur TAPE SPEED pour sélectionner la vitesse de défilement de la bande, SP, LP ou SLP. -
Page 61: Enregistrement Avec La Fonction Monotouche
Lecture du passage que vous venez d’enregistrer — Lecture monotouche La fonction de lecture monotouche s’avère très pratique après un enregistrement suivant le système VCR Plus+® (page 25) ou un enregistrement programmé manuellement (page 27). Vous pouvez réaliser des enregistrements par programmateur et ne reproduire ultérieurement que le passage que vous venez d’enregistrer à... -
Page 62: Réglage Du Programmateur Avec Le Système
Enregistrement avec la fonction monotouche (suite) Pour arrêter l’enregistrement Appuyez sur la touche s STOP de la télécommande ou Z STOP/EJECT de l’appareil. Le bouton wREC/OTR de l’appareil s’éteint. Pour allonger la durée d’enregistrement pendant un enregistrement Appuyez sur w REC/OTR jusqu’à ce que la durée voulue apparaisse dans la fenêtre d’affichage. -
Page 63: Changement Des Réglages
Appuyez sur SET/TRACKING + ou – pour sélectionner 1 FOIS, QUOT ou HEBDO. Pour Une seule émission Une émission journalière Une émission hebdomadaire, par ex. tous les lundis (HEB-LUN) Appuyez sur ENTER. • Les informations du programmateur suivantes apparaissent sur l’écran. •... -
Page 64: Réglage Manuel Du Programmateur
Réglage manuel du programmateur Si vous ne pouvez pas utiliser le système VCR Plus+®, vous pouvez programmer manuellement des enregistrements. Vous pouvez programmer jusqu’à 8 enregistrements dans un délai d’un mois à partir de la date d’aujourd’hui. MENU SET/TRACKING +/– Avant de régler le programmateur... -
Page 65: Copie
Copie Raccordement d’un autre magnétoscope VX-S207 (Avant) Jaune Rouge Blanc Câble audio/vidéo (non fourni) Conseils • Si l’autre magnétoscope est un modèle mono, ne raccordez qu’une fiche audio à la prise AUDIO IN L (MONO). • Si vous utilisez ce magnétoscope pour la lecture, raccordez ses prises AUDIO/VIDEO OUT aux prises d’entrée audio/vidéo du magnétoscope assurant l’enregistrement. -
Page 66: Autres Fonctions
AUTRES FONCTIONS Réglage de la puce V Vous pouvez programmer une limitation suivant l’âge afin d’empêcher les enfants de regarder ou d’écouter des scènes violentes ou des programmes pour adultes. Cet appareil est conforme à “CLASS. PROG. TV” et “CLASS. FILM”. Pour pouvoir utiliser la fonction de puce V, vous devez d’abord enregistrer un mot de passe. -
Page 67: Modification Du Mot De Passe
• Si TV-MA est sélectionné, les éléments suivants apparaissent. REGLAGE CLASS. :TV-MA VIOLENCE CONTEXTE SEXUEL LANGUE ADULTE Appuyez sur MENU pour revenir au menu V-CHIP SET. Appuyez sur ENTER et appuyez ensuite sur SET/ TRACKING + ou – pour sélectionner CLASS. FILM et appuyez ensuite sur ENTER. -
Page 68: Son Télévisé Multicanal (Mts) Et Système De Son Hi-Fi
Son télévisé multicanal (MTS) et système de son Hi-Fi Touches numériques MENU AUDIO SET/TRACKING +/– Son télévisé multicanal (MTS) Cet appareil est équipé du système MTS de son télévisé multicanal qui décode les signaux de retransmission stéréo et SAP (émission audio secondaire). Il décode également le son télévisé... -
Page 69: Hi-Fi
Signal enregistré et signal transmis de l’émission MTS Signal enregistré Ecran Emission Piste Piste téléviseur hi-fi normale Mono Mono Mono — Canal Mono Stéréo Gauche/ Gauche STEREO Droit + droit Mono Mono Gauche: Mono+SAP Mono Droit:SAP Canal Mono Gauche Gauche/ + droit Droit STEREO/... -
Page 70: Informations Complémentaires
INFORMATIONS COMPLEMENTAIRES Dépannage Si l’appareil semble ne pas fonctionner correctement, relisez les instructions d’utilisation et consultez ensuite le guide dedépannage suivant. La réception télévisée est parasitée ou il n’y a pas de réception télévisée. Raccordez correctement l’antenne. Absence d’image ou de son L’appareil est en mode d’entrée LINE. -
Page 71: Spécifications
Spécifications Tyntoniseur Syntoniseur à fréquence synthétisée Système de télévision Couverture des chaînes VHF: 2 à 13 UHF: 14 à 69 CATV: 5A, A-1 à A-5, A à W, W+1 à W+84 Mémoire de programmes Entrée d’antenne 75 ohms, asymétrique Tube image VX-S207 406(L) 305(H) mm... -
Page 72: Composants Et Commandes
Composants et commandes Panneau frontal (VX-S207) Ecran du téléviseur Compartiment de la cassette Prise pour casque d’écoute Prises LINE 2 IN VIDEO/ AUDIO L (MONO)/R Indicateurs (POWER, TIMER, REC, ON-TIMER) Capteur de télécommande Panneau frontal (VX-S137) Ecran du téléviseur Compartiment de la cassette Prise pour casque d’écoute Prises LINE 2 IN VIDEO/ AUDIO L (MONO)/R... -
Page 73: Panneau Arrière
Panneau arrière Support d’antenne Connecteur UHF/VHF Prises VIDEO OUT/AUDIO OUT L/R Prises LINE 1 IN VIDEO/ AUDIO L (MONO)/R Télécommande Touche VCR PLUS+ Touche POWER Touches numériques (0-9) Touche INDEX Touche RESET Touche ZERO-RETURN Touche MUTING Touche VOLUME +/– Touche AD-SKIP (omission publicités) Touche fREW (Rembobinage)/ [... - Page 74 Call Toll Free 1-800-BUY-AIWA For Assistance and Information, (United States and Puerto Rico) 8A-JTD-901-31 Printed in Thailand 000620DTN-YX...
Need help?
Do you have a question about the VX-S137U and is the answer not in the manual?
Questions and answers