Table of Contents
Advertisement
Available languages
Available languages
Quick Links
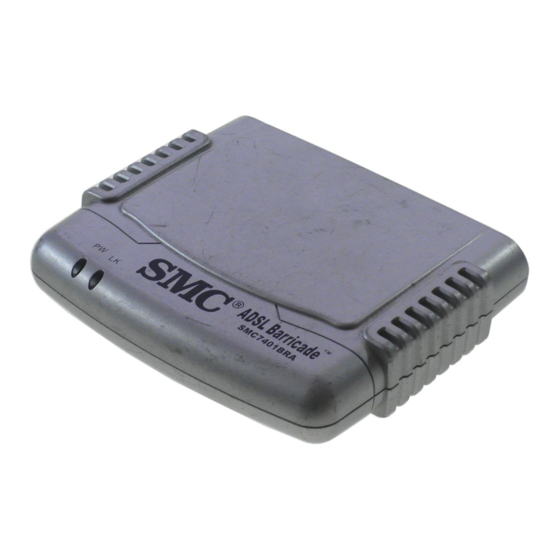
Model Number: SMC7401BRA V.2
2-port ADSL Router
with built-in Annex A ADSL Modem
2-port ADSL Router with built-in ADSL Modem
Routeur ADSL 2 ports avec modem ADSL intégré
Router ADSL de 2 puertos con módem ADSL integrado
2-poorts ADSL-router met ingebouwde ADSL-modem
Router ADSL de 2 Portas com Modem ADSL Integrado
Quick Installation Guide
Guide d'installation rapide
Guía de inicio rápido
Beknopte installatiehandleiding
Manual de instalação rápida
SMC7401BRA V.2
Advertisement
Table of Contents

Related Manuals for SMC Networks 7401BRA V.2


Summary of Contents for SMC Networks 7401BRA V.2
- Page 1 2-port ADSL Router with built-in Annex A ADSL Modem 2-port ADSL Router with built-in ADSL Modem Routeur ADSL 2 ports avec modem ADSL intégré Router ADSL de 2 puertos con módem ADSL integrado 2-poorts ADSL-router met ingebouwde ADSL-modem Router ADSL de 2 Portas com Modem ADSL Integrado Quick Installation Guide Guide d’installation rapide Guía de inicio rápido...
-
Page 2: Package Contents
Contents Package Contents English 2 - 21 • One ADSL Barricade • One Power adapter. • One RJ-45 Ethernet cable. Français 22 - 41 • One RJ-11 Standard phone/DSL line cable. • One USB Cable. • One Installation utility and Documentation CD. Español 42 - 61 •... -
Page 3: System Requirements
System Requirements Hardware Description In order to use the ADSL Barricade , you must have Front Panel the following: The front panel contains lights called LEDs that indicate the status of the unit. • ADSL service up and running on your telephone line, with at least one public Internet address for your LAN. - Page 4 This Quick Installation Guide provides basic instructions LABEL FUNCTION for connecting the ADSL Barricade to a computer or LAN and to the Internet. Connects the device to a telephone jack for DSL communication. • Section 1 describes how to set up the hardware. Ethernet •...
-
Page 5: Connecting The Hardware
Connecting the Hardware Warning: Before you begin, turn the power off for all devices. Step 3. Attach the power connector These include your computer(s), your LAN hub/switch Connect the AC power adapter to the Power connector on (if applicable), and the ADSL Barricade the back of the device and plug in the adapter to a wall outlet or power strip. - Page 6 Configuring Your Computers This section provides instructions for configuring the Internet Windows® XP settings on your computers to work with the ADSL Barricade 1. In the Windows task bar, click the [Start] button, and then click [Control Panel]. Before you begin 2.
- Page 7 Windows 2000 5. In the [Select Network Component Type] dialog box, select [Protocol], and then click [Add…]. First, check for the IP protocol and, if necessary, install it. 6. Select [Internet Protocol (TCP/IP)] in the [Network Protocols] 1. In the Windows task bar, click the [Start] button, point to list, and then click [OK].
- Page 8 9. In the [Network and Dial-up Connections] window, right-click Windows 98, Me, SE the [Local Area Connection] icon, and then select 1. In the Windows task bar, click the [Start] button, point to [Properties]. [Settings], and then click [Control Panel]. 10.
- Page 9 5. In the [Select Network Component Type] dialog box, select 10. In the [Network and Dial-up Connections] window, right-click [Protocol], and then click [Add…]. the [Network] icon, and then select [Properties]. 6. Select [Microsoft] in the [Manufacturers] box. 11. In the [Network Properties] dialog box, select [TCP/IP], and then click [Properties].
- Page 10 Configuring the ADSL Barricade This section provides instructions on how to use the Auto Setup 4. Select your country from the drop down list, then click [Next] utility for configuration of the ADSL Barricade to continue. If your country is not listed, click [Custom] and your ISP.
- Page 11 7. Finally click [Finish]. The AutoSetup utility will now configure Custom the ADSL Barricade with the settings you have entered. This If your Country or ISP is not listed you will be required to may take a few moments. When the setup is complete you will manually enter your ISP settings.
-
Page 12: Contenu De L'emballage
Contenu de l’emballage 1. Select/enter values corresponding to the above settings • Un routeur Barricade ADSL. supplied by your ISP. • Un cordon d’alimentation. • Un câble Ethernet RJ-45. • Un câble téléphonique/DSL RJ-11 standard. • Un câble USB. • CD-ROM avec l’utilitaire d’installation et la documentation. -
Page 13: Configuration Requise
Configuration requise Description du matériel Pour pouvoir utiliser le routeur Barricade ADSL, vous devez Panneau avant disposer des éléments suivants : Le panneau avant contient les témoins lumineux indiquant l’état de fonctionnement de l’unité. • Un service ADSL opérationnel sur votre ligne téléphonique, avec au moins une adresse Internet publique pour votre réseau local. - Page 14 Ce Guide d’installation rapide fournit des instructions de base pour la connexion du routeur Barricade ADSL à un ordinateur INTITULÉ FONCTION ou un réseau local et à Internet. Connecte l’appareil à une prise téléphonique pour une communication DSL. • La section 1 décrit comment configurer le matériel. •...
-
Page 15: Connexion Du Matériel
Connexion du matériel Avertissement : Avant de commencer, mettez tous les appareils Étape 3. Raccordez le cordon d’alimentation hors tension. Cela inclut vos ordinateurs, votre Raccordez une extrémité du cordon d’alimentation au connecteur concentrateur/commutateur sur le réseau local d’alimentation situé à l’arrière de l’appareil et l’autre extrémité à (s’il y a lieu), et le routeur Barricade ADSL. - Page 16 Configuration de vos ordinateurs Cette section contient les instructions qui vous permettront de Windows® XP configurer les paramètres Internet sur vos ordinateurs pour 1. Dans la barre des tâches Windows, cliquez sur [Start] pouvoir utiliser le routeur Barricade ADSL. (Démarrer), puis cliquez sur [Control Panel] (Panneau de configuration).
- Page 17 Windows 2000 5. Dans la boîte de dialogue [Select Network Component Type] (Sélection du type de composant réseau), sélectionnez Commencez par vérifier la présence du protocole IP et, si [Protocol] (Protocole), puis cliquez sur [Add] (Ajouter). nécessaire, installez-le. 6. Sélectionnez [Internet Protocol (TCP/IP)] (Protocole Internet 1.
- Page 18 9. Dans la fenêtre [Network and Dial-up Connections] Windows 98/Me/SE (Connexions réseau et accès à distance), cliquez avec le 1. Dans la barre des tâches Windows, cliquez sur le bouton bouton droit de la souris sur l’icône [Local Area Connection] [Start] (Démarrer), pointez sur [Settings] (Paramètres), puis (Connexion au réseau local), puis sélectionnez [Properties] cliquez sur [Control Panel] (Panneau de configuration).
- Page 19 5. Dans la boîte de dialogue [Select Network Component Type] 10. Dans la fenêtre [Network and Dial-up Connections] (Sélection du type de composant réseau), sélectionnez (Connexions réseau et accès à distance), cliquez avec le [Protocol] (Protocole), puis cliquez sur [Add] (Ajouter). bouton droit de la souris sur l’icône [Network] (Réseau), puis sélectionnez [Properties] (Propriétés).
-
Page 20: Configuration Du Routeur
Configuration du routeur Barricade ADSL Cette section contient des instructions qui vous permettront 4. Sélectionnez votre pays dans la liste déroulante, puis cliquez d’utiliser l’utilitaire Auto Setup pour configurer automatiquement sur [Next] pour continuer. Si votre pays n’apparaît pas, cliquez le routeur Barricade ADSL pour votre FAI. - Page 21 7. Enfin, cliquez sur [Finish] (Terminer). L’utilitaire Auto Setup Personnalisé va maintenant configurer le routeur Barricade ADSL avec les Si votre pays ou votre FAI ne figure pas dans la liste, vous devrez paramètres que vous avez saisis. Cette opération peut durer entrer manuellement vos paramètres de FAI.
-
Page 22: Contenido Del Paquete
Contenido del paquete 1. Sélectionnez/entrez les valeurs correspondant aux paramètres • Un ADSL Barricade ci-dessus fournis par votre FAI. • Un adaptador de corriente. • Un cable Ethernet RJ-45. • Un cable RJ-11 para la línea DSL o la línea telefónica estándar. •... -
Page 23: Requisitos Del Sistema
Requisitos del sistema Descripción del hardware Para utilizar el ADSL Barricade , debe disponer de los siguientes Panel frontal elementos: El panel frontal contiene las luces, denominadas LED, que indican el estado de la unidad. • Línea telefónica con servicio ADSL en funcionamiento y con al menos una dirección pública de Internet para su LAN. - Page 24 Este Manual de instalación rápida contiene las instrucciones ETIQUETA FUNCIÓN básicas para conectar el ADSL Barricade a un ordenador o a una LAN, y a Internet. Conecta el dispositivo al conector telefónico para la comunicación DSL. • La sección 1 describe cómo configurar el hardware. Ethernet •...
- Page 25 Conexión del hardware Advertencia: Antes de empezar, desconecte la corriente de todos Paso 3. Enchufar el cable de alimentación de corriente los dispositivos. Desconecte el ordenador u Conecte el adaptador de CA a la toma de alimentación de la parte ordenadores, el hub o switch de la LAN (si procede) trasera del dispositivo y enchufe el adaptador a una toma de pared y el ADSL Barricade...
- Page 26 Configuración de los ordenadores Esta sección proporciona instrucciones para configurar los ajustes Windows® XP de Internet del ordenador y poder trabajar con el ADSL 1. En la barra de tareas de Windows, pulse el botón [Start] Barricade (Inicio) y luego [Control Panel] (Panel de control). Antes de empezar 2.
- Page 27 Windows 2000 5. En el cuadro de diálogo [Select Network Component Type] (Seleccionar tipo de componente de red), seleccione En primer lugar, hay que comprobar la existencia del protocolo IP [Protocol] (Protocolo) y luego seleccione [Add…] (Agregar). e instalarlo, en caso de ser necesario. 6.
- Page 28 9. En la ventana [Network and Dial-up Connections] (Conexiones Windows 98, Me, SE de red y de acceso telefónico), haga clic con el botón derecho 1. En la barra de tareas de Windows, pulse el botón [Start] del ratón en el icono [Local Area Connection] (Conexión de (Inicio), vaya a [Settings] (Configuración) y luego pulse área local) y seleccione [Properties] (Propiedades).
- Page 29 5. En el cuadro de diálogo [Select Network Component Type] 10. En la ventana [Network and Dial-up Connections] (Conexiones (Seleccionar tipo de componente de red), seleccione de red y de acceso telefónico), pulse el icono [Network] (Red) [Protocol] (Protocolo) y luego seleccione [Add…] (Agregar). con el botón derecho y seleccione [Properties] (Propiedades).
- Page 30 Configuración del ADSL Barricade Esta sección contiene instrucciones sobre cómo emplear la utilidad 4. Seleccione su país en la lista despegable y luego pulse [Next] de configuración automática del ADSL Barricade según su ISP. (Siguiente) para continuar. Si su país no aparece en la lista, pulse [Custom] (Personalizado) y vaya a la sección 1.
- Page 31 7. Pulse [Finish] (Finalizar) para terminar. La utilidad de Personalización configuración automática configurará el ADSL Barricade Si su país o ISP no aparece en la lista, deberá introducir la configuración introducida. Puede que tarde unos minutos. manualmente la configuración de su ISP. Esto se hace mediante la Una vez completada la configuración, aparecerá...
-
Page 32: Inhoud Van De Verpakking
Inhoud van de verpakking 1. Seleccione o introduzca los valores correspondientes de los • Eén ADSL Barricade ajustes mencionados proporcionados por su ISP. • Eén voedingsadapter. • Eén RJ-45 Ethernet-kabel. • Eén RJ-11 standaard telefoon/DSL-kabel. • Eén USB-kabel. • Een cd met installatieprogramma en documentatie. •... - Page 33 Systeemvereisten Beschrijving van de hardware Teneinde de ADSL Barricade te kunnen gebruiken, moet u over Voorpaneel het volgende beschikken: Het voorpaneel bevat lampjes, zogenaamde LED’s, die de status van het apparaat aangeven. • Werkende ADSL-service op uw telefoonlijn, met minimaal één openbaar internetadres voor uw LAN.
- Page 34 Deze Quick Installation Guide biedt basisinstructies voor het OPSCHRIFT FUNCTIE aansluiten van de ADSL Barricade op een computer of LAN en op internet. Hiermee wordt het apparaat aangesloten op een telefoonaansluiting voor DSL-communicatie. • In sectie 1 wordt beschreven hoe u de hardware moet instellen.
- Page 35 De hardware aansluiten Waarschuwing: Schakel, voordat u begint, de stroom uit op alle Stap 3. De voedingsconnector aansluiten apparaten. Dit geldt voor uw computer(s), uw Sluit de wisselstroomadapter aan op de voedingsconnector aan LAN-hub/switch (indien van toepassing) en de de achterkant van het apparaat en sluit de adapter aan op een ADSL Barricade stopcontact of stekkerdoos.
- Page 36 Uw computers configureren Deze sectie bevat instructies voor het configureren van de Windows® XP internetinstellingen op uw computer zodat deze werken met de 1. Klik achtereenvolgens op [Start] en [Control Panel] ADSL Barricade (Configuratiescherm) op de taakbalk van Windows. Voordat u begint 2.
- Page 37 Windows 2000 5. Selecteer [Protocol] in het dialoogvenster [Select Network Component Type] (Type netwerkonderdeel selecteren) en klik Controleer eerst of het IP-protocol beschikbaar is en installeer dit, vervolgens op [Add…] (Toevoegen). indien nodig. 6. Selecteer [Internet Protocol (TCP/IP)] (Internet-protocol 1. Klik op [Start], wijs [Settings] (Instellingen) aan en klik op (TCP/IP)) in de lijst [Network Protocols] (Netwerkprotocollen) [Control Panel] (Configuratiescherm) op de taakbalk van en klik vervolgens op [OK].
- Page 38 9. Klik in het venster [Network and Dial-up Connections] Windows 98, Me, SE (Netwerk- en inbelverbindingen) met de rechtermuisknop op 1. Klik op [Start], wijs [Settings] (Instellingen) aan en klik op het pictogram [Local Area Connection] (LAN-verbinding) en [Control Panel] (Configuratiescherm) op de taakbalk van selecteer [Properties] (Eigenschappen).
- Page 39 5. Selecteer [Protocol] in het dialoogvenster [Select Network 10. Klik in het venster [Network and Dial-up Connections] Component Type] (Type netwerkonderdeel selecteren) en klik (Netwerk- en inbelverbindingen) met de rechtermuisknop op vervolgens op [Add…] (Toevoegen). het pictogram [Network] (Netwerk) en selecteer vervolgens [Properties] (Eigenschappen).
- Page 40 De ADSL Barricade configureren Deze sectie bevat instructies voor het gebruik van het 4. Selecteer uw land uit de keuzelijst en klik vervolgens op [Next] hulpprogramma Auto Setup voor configuratie van de ADSL (Volgende) om door te gaan. Als uw land niet in de lijst Barricade voor uw internetprovider.
- Page 41 7. Klik tenslotte op [Finish] (Voltooien). Het hulpprogramma Aangepast AutoSetup configureert nu de ADSL Barricade met de Als uw land of internetprovider niet voorkomen in de lijst, moet u instellingen die u hebt ingevoerd. Dit kan enkele seconden in de instellingen voor de internetprovider handmatig invoeren. Dit beslag nemen.
-
Page 42: Conteúdo Da Embalagem
Conteúdo da Embalagem 1. Selecteer waarden die overeenkomen met de bovenstaande • Um ADSL Barricade instellingen die zijn verstrekt door uw internetprovider of voer • Um adaptador de corrente. deze waarden in. • Um cabo Ethernet RJ-45. • Um cabo de linha DSL/telefone standard RJ-11. •... -
Page 43: Requisitos Do Sistema
Requisitos do Sistema Descrição do Hardware Para utilizar o ADSL Barricade , deverá possuir o seguinte: Painel Frontal O painel frontal contém as luzes, designadas por LEDs, que indicam • Serviço ADSL activado e em funcionamento na sua linha o estado da unidade. telefónica, no mínimo com um endereço público de Internet para a sua LAN. - Page 44 Este Manual de Instalação Rápida inclui instruções básicas IDENTIFICAÇÃO FUNÇÃO sobre como ligar o ADSL Barricade a um computador ou LAN e à Internet. Liga o dispositivo a uma tomada de telefone, para uma comunicação DSL. • A secção 1 explica como instalar o hardware. Ethernet •...
- Page 45 Ligar o Hardware Aviso: Antes de começar, desligue a alimentação de todos os Passo 3. Ligar o conector de alimentação dispositivos. Entre estes dispositivos encontram-se o(s) Ligue o adaptador de corrente CA ao conector de corrente computador(es), o hub/switch de LAN (se aplicável) e o eléctrica, situado na parte traseira do dispositivo, e ligue o ADSL Barricade adaptador a uma tomada de corrente ou a uma tomada múltipla...
- Page 46 Configurar os Computadores Esta secção explica como configurar as definições de Internet dos Windows® XP seus computadores, para funcionarem com o ADSL Barricade 1. Na barra de tarefas do Windows, faça clique no botão [Start] (Iniciar) e, em seguida, em [Control Panel] (Painel de Antes de começar controlo).
- Page 47 Windows 2000 5. Na caixa de diálogo [Select Network Component Type] (Seleccionar tipo de componente de rede), seleccione Em primeiro lugar, verifique o protocolo IP e, se necessário, [Protocol] (Protocolo) e, em seguida, faça clique em [Add…] instale-o. (Adicionar). 1. Na barra de tarefas do Windows, faça clique no botão [Start] 6.
- Page 48 9. Na janela [Network and Dial-up Connections] (Ligações de Windows 98, Me, SE acesso telefónico e de rede), faça clique com o botão direito 1. Na barra de tarefas do Windows, faça clique no botão [Start] do rato no ícone [Local Area Connection] (Ligação de área (Iniciar), marque [Settings] (Definições) e, em seguida, faça local) e, em seguida, seleccione [Properties] (Propriedades).
- Page 49 5. Na caixa de diálogo [Select Network Component Type] 10. Na janela [Network and Dial-up Connections] (Ligações de (Seleccionar tipo de componente de rede), seleccione acesso telefónico e de rede), faça clique com o botão direito [Protocol] (Protocolo) e, em seguida, faça clique em [Add…] do rato no ícone [Network] (Rede) e, em seguida, seleccione (Adicionar).
- Page 50 Configurar o ADSL Barricade Esta secção explica como usar o utilitário Auto Setup (Instalação 4. Seleccione o seu país na lista pendente e faça clique em Automática) para configurar o ADSL Barricade para o seu ISP. [Next] (Seguinte) para continuar. Se o seu país não se encontrar na lista, faça clique em [Custom] (Personalizar) e 1.
- Page 51 7. Por fim, faça clique em [Finish] (Concluir). O utilitário Personalizar AutoSetup irá configurar o ADSL Barricade com as definições Se o seu país ou ISP não for apresentado na lista, deverá especificadas. Este processo pode demorar alguns segundos. introduzir manualmente as sua definições de ISP. Para tal, deverá Uma vez concluída a instalação, será...
- Page 52 Compliances 1. Seleccione/Introduza os valores correspondentes às definições FCC - Class B anteriores, fornecidos pelo seu ISP. This equipment has been tested and found to comply with the limits for a Class B digital device, pursuant to Part 15 of the FCC Rules.
- Page 53 FCC - Part 68 If trouble is experienced with this equipment, please contact our company at the numbers shown on back of this manual for repair This equipment complies with Part 68 of the FCC rules. This and warranty information. If the trouble is causing harm to the equipment comes with a label attached to it that contains, among telephone network, the telephone company may request you to other information, the FCC registration number and ringer...
- Page 54 EC Conformance Declaration - Class B • Immunity to conducted disturbances, Induced by radio- frequency fields: This information technology equipment complies with the EN 61000-4-6:1996 (0.15 - 80 MHz with 1 kHz AM 80% requirements of the Council Directive 89/336/EEC on the Modulation: 3 V/m) Approximation of the laws of the Member States relating to Electromagnetic Compatibility and 73/23/EEC for electrical...
- Page 55 Safety Compliance 13. Öffnen sie niemals das Gerät. Das Gerät darf aus Gründen der Wichtige Sicherheitshinweise (Germany) elektrischen Sicherheit nur von authorisiertem Servicepersonal geöffnet werden. 1. Bitte lesen Sie diese Hinweise sorgfältig durch. 14. Wenn folgende Situationen auftreten ist das Gerät vom 2.
- Page 56 However, no responsibility is assumed www.smc-europe.com (section support, product registration). by SMC for its use, nor for any infringements of patents or other rights of third parties which may result from its use. No license...
Need help?
Do you have a question about the 7401BRA V.2 and is the answer not in the manual?
Questions and answers