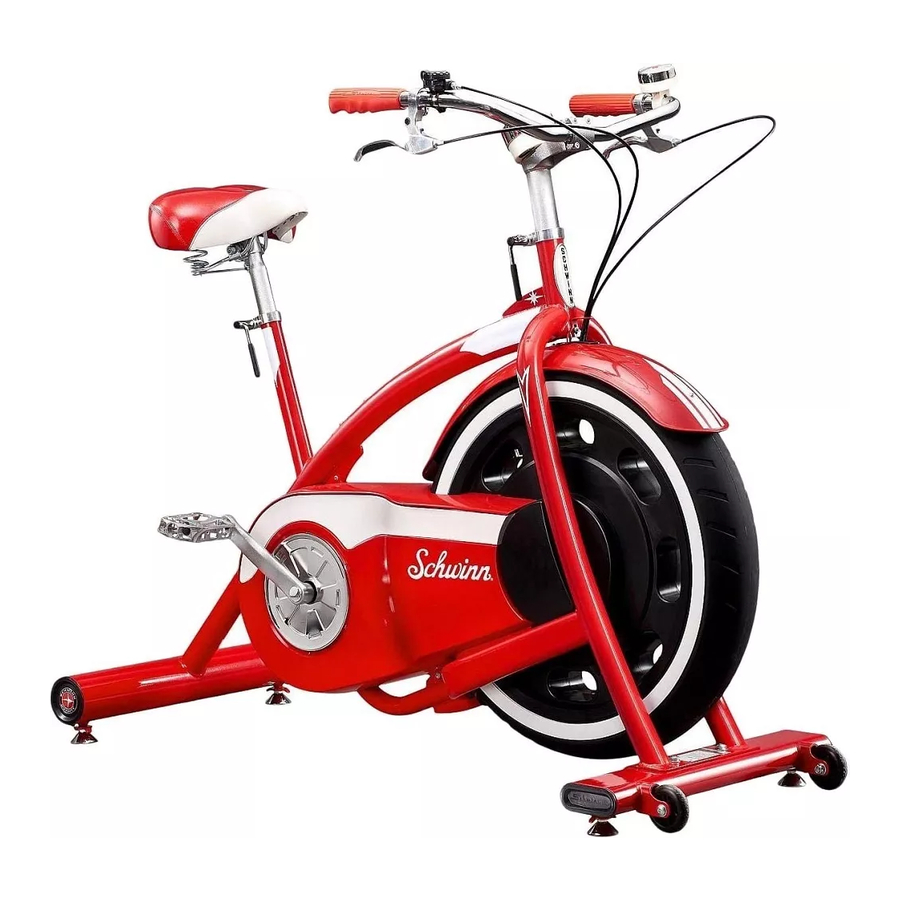
Schwinn Classic Cruiser Manual
- Assembly & owners manual (32 pages) ,
- Troubleshooting manual (5 pages)
Advertisement
- 1 Parts / Hardware
- 2 Assembly
- 3 Features
- 4 Operations
- 5 Maintenance
-
6
Troubleshooting
- 6.1 No display/partial display/unit will not turn on
- 6.2 No speed/RPM reading
- 6.3 Resistance does not change (machine turns on and operates)
- 6.4 Console shuts off (enters sleep mode) while in use
- 6.5 Unit rocks/does not sit level
- 6.6 Pedals loose/unit difficult to pedal
- 6.7 Clicking sound when pedaling
- 6.8 Seat or handlebar post movement
- 6.9 Console will not sync with Bluetooth enabled device
- 7 Important Safety Instructions
- 8 Safety Warning Labels and Serial Number
- 9 Specifications / Tools
- 10 Documents / Resources
Parts / Hardware

| Item | Qty | Description | Item | Qty | Description |
| 1 | 1 | Handlebar Post | 9 | 1 | Seat Adjustment Clamp |
| 2 | 1 | Handlebar Assembly | 10 | 1 | Seat Post |
| 3 | 1 | Media Rack | 11 | 1 | Seat |
| 4 | 1 | Handlebar Adjustment Clamp | 12 | 1 | Console |
| 5 | 1 | Frame Assembly | 13 | 1 | Pedal, Left |
| 6 | 1 | Front Stabilizer | 14 | 1 | Rear Stabilizer |
| 7 | 4 | Leveler | 15 | 1 | Power Supply |
| 8 | 1 | Pedal, Right |
A
| A | 6 | Button Head Hex Screw, M8 x 20 | D | 4 | Socket Head Cap Screw, M6 x12 |
| B | 6 | Lock Washer, M8 | E | 4 | Lock Washer, M6 |
| C | 6 | Flat Washer, M8 |
Note: Select pieces of Hardware have been provided as spares on the Hardware Card. Be aware that there may be remaining Hardware after the proper assembly of your machine.
Assembly
Note: Because of the cables that run from the Handlebars to inside the Frame Assembly, be sure to carefully unpack and place the Handlebars in front of the Frame Assembly. Be sure not to crimp the cables during unpacking or assembly.

![]() Attach Levelers to the Front and Rear Stabilizers
Attach Levelers to the Front and Rear Stabilizers

- Attach the Stabilizers to the Frame Assembly

- Attach the Seat to the Seat Post
NOTICE: Tighten the bolts on each side of the Seat bracket to hold the Seat in position.

- Place the Seat and Handlebar Adjustment Clamps on the Frame Assembly
NOTICE: Orient the clamps so the inner ridge rests on the top of the posts from the Frame Assembly. Do not fully tighten.

- Route the Console Cable through the Handlebar Post. Attach the Handlebar and Seat Posts to the Frame Assembly
NOTICE: Do not crimp the cable. Make sure the adjustment levers fully engage the Posts.
Be sure the Posts are below the maximum height marks.

- Attach the Console to the Frame Assembly
NOTICE: Do not crimp the cable. Hardware is pre-installed and not on the Hardware Card (*).

- Attach the Handlebars to the Frame Assembly
Note: Be sure not to crimp any cables when attaching the Handlebars.

- Attach Pedals to Frame Assembly
Note: The Left Pedal is reverse-threaded. Be sure to attach Pedals on the proper side of he Bike. Orientation is based from a seated position on the bike.
The Left Pedal has an "L", the Right Pedal an "R".

- Attach Media Rack to Frame Assembly
Note: Adjust the Media Rack to the desired orientation, and fully tighten the hardware that secures it to the Handlebars.

- O n the Handlebars, inspect the orientation of the Timer, Resistance Shifter, and Brake Levers. Adjust for Proper Positioning
- Fully Tighten All Hardware from Previous Steps
![]()
- Connect AC Power Adapter to Frame Assembly
![]()
- Final Inspection
Inspect your machine to ensure that all hardware is tight and components are properly assembled.
Be sure to record the serial number in the field provided at the front of this manual. Refer to the Safety Warning Labels and Serial Number section of this manual.
![warning]() Do not use or put the machine into service until the machine has been fully assembled and inspected for correct performance in accordance with the Owner's Manual.
Do not use or put the machine into service until the machine has been fully assembled and inspected for correct performance in accordance with the Owner's Manual.


Leveling the Bike
Levelers are found on each side of the stabilizers. Turn the knob to adjust the stabilizer foot. Make sure the bike is level and stable before you exercise.

Moving the Bike
To move the bike, carefully pull the Handlebars toward you while pushing the front of the bike downward. Push the bike to the desired location.
NOTICE: Be careful when you move the machine. Abrupt motions can affect the computer operation.

Features

- Console
- Handgrip
- Timer
- Handlebars
- Media Rack
- Resistance Shifter
- App Game Control Lever
- Handlebar Adjustment Lever
- Flywheel (enclosed)
- Stabilizer, Front
- Transport Wheels
- Leveler
- Power Inlet
- Drive Belt Guard
- Pedal
- Rear Stabilizer
- Seat Adjustment Lever
- Seat

Use the values calculated or measured by the machine's computer for reference purposes only. Over exercising may result in serious injury or death. If you feel faint stop exercising immediately.
Console Features
The Console provides information about your workout.
Note: The USB Port is only used to update the Console. It is not able to charge a device or export workout results.

Odometer and Units Switch
The odometer tracks the total distance of the fitness machine in miles or kilometers depending on the units selected. The units switch on the back side of the Console selects between miles and kilometers.
Note: If the units switch is changed after a distance has already been tracked, the odometer will continue to add to the total, but at the new rate. This will result in a mixed value of miles and kilometers.
Speed
The Speed display field shows the machine speed in miles per hour (mph) or kilometers per hour (km/h). The maximum displayed speed is 30 mph or 44 km/h.
Note: The needle for the Speed display will adjust to zero when power is initially supplied to the Console.
Bluetooth® Connectivity with the "Schwinn Classic Cruiser™" Fitness App
This fitness machine is equipped with Bluetooth® connectivity and can wirelessly sync with the "Schwinn Classic Cruiser™" Fitness App on supported devices. The App syncs with your fitness machine to track total calories burned, time, distance, and more. The Bluetooth® App Connected display shows when the Console is paired with the App.
Before you begin your workout, open the App on your Bluetooth® enabled device. If the App is not running during your workout, the results will not be tracked. Be sure to select the desired User (1 or 2) on the App to correctly track the workout.
- Download the free App, named Schwinn Classic Cruiser™. The App is available on iTunes® and Google Play™.
Note: For a complete list of supported devices, review the App on iTunes® or Google Play™.
![www.apple.com]()
![play.google.com]()
- Follow the instructions on the App to sync your device to your exercise machine.


Workout with Other Fitness Apps
This fitness machine has integrated Bluetooth® connectivity which allows it to work with a number of digital partners. For our latest list of supported partners, please visit: www.nautilus.com/partners
Operations
What to Wear
Wear rubber-soled athletic shoes or appropriate cycling shoes. You will need the appropriate clothes for exercise that allow you to move freely.
How Often Should You Exercise
 Consult a physician before you start an exercise program. Stop exercising if you feel pain or tightness in your chest, become short of breath, or feel faint. Contact your doctor before you use the machine again. Use the values calculated or measured by the machine's computer for reference purposes only.
- 3 times a week for 30 minutes each day.
- Schedule workouts in advance.
Seat Post Adjustment
Correct seat and handlebar placement encourages exercise efficiency and comfort, while reducing the risk of injury.

- With a Pedal in the forward position, center the ball of your foot over the center of the Pedal. Your leg should be bent slightly at the knee.
- If your leg is too straight or your foot cannot touch the Pedal, move the seat down on the upright bike. If your leg is bent too much, move the seat up on the upright bike.
![warning]() Step off the bike before you adjust the seat.
Step off the bike before you adjust the seat.
Loosen the Seat Adjustment Lever on the seat post. Adjust the seat to the desired height. Tighten the adjustment lever to lock the seat post. Be sure that the adjustment lever is fully engaged.
Do not lift the Seat Post above the MAX mark on the tube.
Handlebar Adjustment
Loosen the Handlebar Adjustment Lever on the handlebar post. Adjust the handlebar assembly to the desired height.
Fully tighten the adjustment lever.
Do not lift the Handlebar Assembly above the MAX mark on the tube.
To adjust the angles of the items attached to the Handlebar, loosen the screws that secure them and adjust to the desired angle. Fully tighten the hardware.

Resistance Shifter
The Resistance Shifter controls the level of resistance that is applied to the flywheel. The selected resistance level is pointed to by the lower "star burst" of the Schwinn® Quality logo. There are seven levels of resistance (1-7) on the exercise bike.
Adjust the Resistance Shifter to increase or decrease the resistance at any time during your workout.

Workout Timer
Your fitness machine is equipped with a 20 minute Workout Timer. Gently turn the face of the Timer clockwise 3/4 of the way around (past 15), and then to the desired amount of time and release it. The Workout Timer begins counting down immediately, and will make an audible sound when the time ends.
Note: Never turn the face of the Timer counterclockwise during the initial 3/4 of the way around winding. This may damage the Timer.

Media Rack
Your fitness machine is equipped with a Media Rack above the Handlebars. The Media Rack secures your mobile device, or other media. Adjust the lower part to the lowest setting for your mobile device. Place your device on the lower part of the Media Rack and, while holding the device in place, slide down the upper part until your device is secure between the lower and upper parts.

Workout Mode
The machine starts Workout Mode when it is plugged in or if it receives a signal from the RPM sensor as a result of pedaling the machine.
Pausing or Stopping a Workout / Auto Shut-Off (Sleep Mode)
If the Console does not receive any input in approximately 2 minutes, it will automatically shut off.
Workout Results
The Console does not show your workout results. To be able to review a workout, a Bluetooth® enabled device with the Schwinn Classic Cruiser™ App must be running for the duration of the workout. Be sure to select your User profile (1 or 2) on the App before the work out.
The App will track the user, date/time of the workout, duration, average speed, highest speed, distance, RPMs (Rotations Per Minute), and Total Calories.

App Game Control Levers
The App Game Control Levers add a level of interaction when used with features on the Schwinn Classic Cruiser™ App.
Maintenance
Read all maintenance instructions fully before you start any repair work. In some conditions, an assistant is necessary to do the necessary tasks.
Equipment must be regularly examined for damage and repairs. The owner is responsible to make sure that regular maintenance is done. Worn, damaged or loose components must be repaired or replaced immediately. Only manufacturer supplied components can be used to maintain and repair the equipment. If at any time the Warning labels become loose, unreadable or dislodged, replace the labels. If purchased in US/Canada, contact Customer Service for replacement labels. If purchased outside US/Canada, contact your local distributor for them.
| Daily: | Before each use, examine the exercise machine for loose, broken, damaged, or worn parts. Do not use if found in this condition. Repair or replace all parts at the first sign of wear or damage. Make sure adjustment clamps are tight. Tighten as necessary. After each workout, use a damp cloth to wipe your machine and Console free of sweat. Note: Avoid excessive moisture on the Console. |
| Weekly: | Clean the machine to remove any dust, dirt, or grime from the surfaces. Check for smooth seat and handlebar operation. If needed, sparingly apply a thin coating of silicone lube to ease operation. Silicone lubricant is not intended for human consumption. Keep out of reach of children. Store in a safe place. Note: Do not use petroleum based products. |
| Monthly or after 20 hours: | Check pedals and crank arms and tighten as necessary. Make sure all bolts and screws are tight. Tighten as necessary. |
| NOTICE: D o not clean with a petroleum based solvent or an automotive cleaner. Be sure to keep the Console free of moisture. | |
Maintenance Parts

- Seat
- Seat Post
- Console
- Console Mast
- App Game Control Lever
- Handlebar Grip
- Brake Shifter
- Handlebars
- Media Rack
- Timer
- Crank Arm, Left
- Pedal, Left
- Left Shroud
- Left Wheel Shroud
- Left Axle Shroud
- Adjustment Knob
- Power Inlet Shroud
- Transport Wheel
- Front Stabilizer
- Leveler
- Flywheel
- Tensioner
- Brake Assembly/Servo Motor
- Drive Belt
- Drive Pulley
- Data Cable
AA Handlebar Adjustment Clamp
BB Seat Adjustment Clamp
CC Crank Arm, Right
DD Pedal, Right
EE Right Wheel Shroud
FF Right Axle Shroud
GG Crank Cover
HH Right Shroud
II Rear Stabilizer
JJ Frame Assembly
Troubleshooting
| Condition/Problem | Things to Check | Solution |
No display/partial display/unit will not turn on | Check electrical (wall) outlet | Make sure unit is plugged into a functioning wall outlet. |
| Check connection at unit | Connection should be secure and undamaged. Replace adapter or connection at unit if either are damaged. | |
| Check data cable integrity | All wires in cable should be intact. If any are visibly crimped or cut, replace cable. | |
| Check data cable connections/orientation | Be sure cable is connected securely and oriented properly. | |
| Check console display for damage | Check for visual sign that console display is cracked or otherwise damaged. Replace Console if damaged. | |
| If the above steps do not resolve the problem, contact Customer Service (if inside US/Canada) or your local distributor (if outside US/Canada) for further assistance. | ||
No speed/RPM reading | Check data cable integrity | All wires in cable should be intact. If any are cut or crimped, replace cable. |
| Check data cable connections/orientation | Be sure cable is connected securely and oriented properly. | |
| Check magnet position (requires shroud removal) | Magnets should be in place on pulley. | |
| Check Speed Sensor (requires shroud removal) | Speed sensor should be aligned with magnet and connected to data cable. Realign sensor if necessary. Replace if there is any damage to the sensor or the connecting wire. | |
Resistance does not change (machine turns on and operates) | Check Resistance Shifter | Check for visual sign that Resistance Shifter is damaged. Replace Resistance Shifter if damaged. |
| If the above step does not resolve the problem, contact Customer Service (if inside US/Canada) or your local distributor (if outside US/ Canada) for further assistance. | ||
Console shuts off (enters sleep mode) while in use | Check electrical (wall) outlet | Make sure unit is plugged into a functioning wall outlet. |
| Check connection at unit | Connection should be secure and undamaged. Replace adapter or connection at unit if either are damaged. | |
| Check data cable integrity | All wires in the cable should be intact. If any are cut or crimped, replace cable. | |
| Check data cable connections/orientation | Be sure cable is connected securely and oriented properly. | |
| Reset Machine | Unplug unit from electrical outlet for 3 minutes. Reconnect to outlet. | |
| Check magnet position (requires shroud removal) | Magnets should be in place on pulley. | |
| Check Speed Sensor (requires shroud removal) | Speed sensor should be aligned with magnet and connected to data cable. Realign sensor if necessary. Replace if there is any damage to the sensor or the connecting wire. | |
Unit rocks/does not sit level | Check leveler adjustment | Adjust levelers until bike is level. |
| Check surface under unit | Adjustment may not be able to compensate for extremely uneven surfaces. Move bike to level area. | |
Pedals loose/unit difficult to pedal | Check pedal to crank arm connection | Pedal should be tightened securely to crank. Insure connection is not cross-threaded. |
| Check crank arm to axle connection | Crank should be tightened securely to axle. Be sure cranks are connected at 180 degrees from each other. | |
Clicking sound when pedaling | Check pedal to crank arm connection | Remove pedals. Make sure there is no debris on threads, and reinstall the pedals |
Seat or handlebar post movement | Check adjustment lever | Be sure lever is securely tightened. |
Console will not sync with Bluetooth® enabled device | Fitness machine | Unplug unit from electrical outlet for 5 minutes. Reconnect to outlet. |
| Bluetooth® enabled device | Consult your device to be sure that the Bluetooth® wireless feature has been enabled on it. | |
| Previous device still synced | A device is still synced to Console. Disconnect that device and sync to Console. | |
| Open Fitness App | Open the Fitness App and sync to the Console. | |
| Fitness App | Review Specifications of Fitness App and confirm your device is compatible. | |
| Contact appsupport@nautilus.com or your local distributor for further assistance. |
Important Safety Instructions
This icon means a potentially hazardous situation which, if not avoided, could result in death or serious injury.
Obey the following warnings:
Read and understand all warnings on this machine.
Carefully read and understand the Assembly instructions.
- Keep bystanders and children away from the product you are assembling at all times.
- Do not connect power supply to the machine until instructed to do so.
- Do not assemble this machine outdoors or in a wet or moist location.
- Make sure assembly is done in an appropriate work space away from foot traffic and exposure to bystanders.
- Some components of the machine can be heavy or awkward. Use a second person when doing the assembly steps involving these parts. Do not do steps that involve heavy lifting or awkward movements on your own.
- Set up this machine on a solid, level, horizontal surface.
- Do not try to change the design or functionality of this machine. This could compromise the safety of this machine and will void the warranty.
If replacement parts are necessary, use only genuine Nautilus replacement parts and hardware. Failure to use genuine replacement parts can cause a risk to users, keep the machine from operating correctly and void the warranty.
Do not use until the machine has been fully assembled and inspected for correct performance in accordance with the Manual. - Read and understand the complete Manual supplied with this machine before first use. Keep the Manual for future reference.
- Do all assembly steps in the sequence given. Incorrect assembly can lead to injury or incorrect function.
- SAVE THESE INSTRUCTIONS.
Before using this equipment, obey the following warnings:
Read and understand the complete Manual. Keep the Manual for future reference.
Read and understand all warnings on this machine. If at any time the Warning labels become loose, unreadable or dislodged, replace the labels. If purchased in US/Canada, contact Customer Service for replacement labels. If purchased outside US/Canada, contact your local distributor for them.
- Children must not be let on or near to this machine. Moving parts and other features of the machine can be dangerous to children.
- Not intended for use by anyone under 14 years of age.
- Consult a physician before you start an exercise program. Stop exercising if you feel pain or tightness in your chest, become short of breath, or feel faint. Contact your doctor before you use the machine again. Use the values calculated or measured by the machine's computer for reference purposes only.
- Before each use, examine this machine for damage to power cord, power receptacle, loose parts or signs of wear. Inspect all cables, pulleys and their connections, making sure they are properly secured and attached, and show no signs of visible wear or damage. Do not use if found in this condition. If purchased in US/Canada, contact Customer Service for repair information. If purchased outside US/Canada, contact your local distributor for repair information.
- This appliance should only be used with the power supply unit provided, or a replacement power supply unit supplied from Nautilus, Inc.
- Maximum user weight limit: 136 kg (300 lbs.). Do not use if you are over this weight.
- This machine is for home use only.
- Do not wear loose clothing or jewelry. This machine contains moving parts. Do not put fingers or other objects into moving parts of the exercise equipment.
- Set up and operate this machine on a solid, level, horizontal surface.
- Make the Pedals stable before you step on them. Use caution when you step on and off the machine.
- Disconnect all power before servicing this machine.
- Do not operate this machine outdoors or in moist or wet locations. Keep the foot pedals clean and dry.
- Keep at least 0.6 m (24") on each side of the machine clear. This is the recommended safe distance for access and passage around and emergency dismounts from the machine. Keep third parties out of this space when machine is in use.
- Do not over exert yourself during exercise. Operate the machine in the manner described in this manual.
- Correctly adjust and safely engage all Positional Adjustment Devices. Make sure that the Adjustment Devices do not hit the user.
- Exercise on this machine requires coordination and balance. Be sure to anticipate that changes in speed and resistance level can occur during workouts, and be attentive in order to avoid loss of balance and possible injury.
- Prior to use, read and understand the owner's manual. The appliance is not to be used by persons with functional limitations and impairments, reduced physical, sensory or mental capabilities, or lack of experience and knowledge.
Safety Warning Labels and Serial Number

Specifications / Tools

Maximum User Weight: 136 kg (300 lbs.)
Machine Weight: 33.1 kg (73 lbs.)
Power Requirements: I nput Voltage: 100-240V AC, 50-60Hz, 0.4A
Output Voltage: 9V DC, 1.5A
Before Assembly
Select the area where you are going to set up and operate your machine. For safe operation, the location must be on a hard, level surface. Allow a workout area of a minimum 242.6 cm x 179 cm (95.5" x 70.5").
Basic Assembly Tips
Follow these basic points when you assemble your machine:
- Read and understand the "Important Safety Instructions" before assembly.
- Collect all the pieces necessary for each assembly step.
- Using the recommended wrenches, turn the bolts and nuts to the right (clockwise) to tighten, and the left (counterclockwise) to loosen, unless instructed otherwise.
- When attaching 2 pieces, lightly lift and look through the bolt holes to help insert the bolt through the holes.
- The assembly requires 2 people.
Tools
Included

Documents / Resources
References
Download manual
Here you can download full pdf version of manual, it may contain additional safety instructions, warranty information, FCC rules, etc.
Advertisement


Need help?
Do you have a question about the Classic Cruiser and is the answer not in the manual?
Questions and answers