
Related Manuals for VDO CD 1107


Summary of Contents for VDO CD 1107
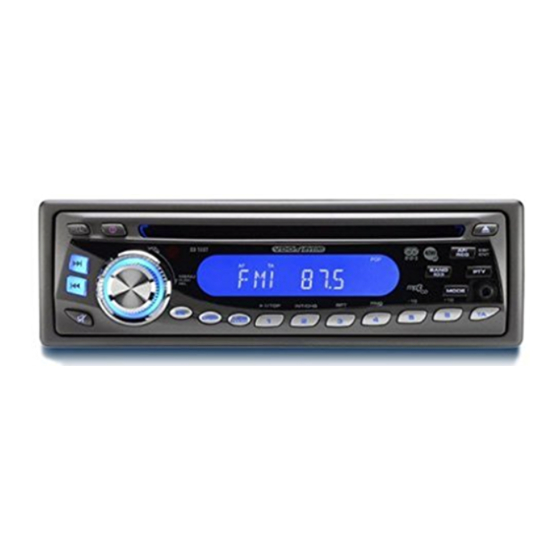
- Page 1 CD 1327 BAND MODE INT/CHG DISP A/PS SEARCH...
- Page 2 RE SET Ant. Rout Lout...
- Page 3 188mm 58mm...
-
Page 5: Table Of Contents
Before Starting Connecting the Radio (fig. C) ....13 Mounting the Radio (fig. G and H) ..13 Thank you for purchasing this VDO Dayton prod- Removing the Radio (using the two uct which has been designed and manufactured removal keys supplied) (fig. J) ....13... -
Page 6: General Information
If there are earth connections on the chassis, GENERAL INFORMATION insert toothed washers. Remove paint and dirt first, if necessary. Disclaimer Use only the parts included with the unit to Designs and specifications are subject to ensure proper installation. The use of unau- changes without prior notice. -
Page 7: Notes On Mp3 Files
CD Mixed Mode (in accordance with Light Important Yellow Book); When naming a MP3 file, add the corre- Only the audio tracks are played. sponding file name extension (.mp3). CD-Extra; Only the audio tracks are played. This unit plays back files with the file name Multi-session CD (in accordance with multi- extension (.mp3) as a MP3 file. -
Page 8: Notes On Folders
Notes on Folders Important Never use force or grip the display and the An outline of a CD-ROM with MP3 files on it buttons too tightly when removing or attach- is shown below. Sub folders are shown as ing. folders in the folder currently selected. Avoid subjecting the front panel to excessive shocks. -
Page 9: Installation
Cleaning the unit Connection in vehicles equipped with standard ISO connectors Do not clean using cleaning fluid, alcohol or other solvents. Use only a damp cloth. The radio may be installed without major prepa- CD-R/CD-RW discs ration in vehicles equipped with ISO connectors. Some signals may have to be adapted or con- When CD-R/CD-RW discs are used, play- nected to the ISO connectors. -
Page 10: Mounting
Connecting 4 loudspeakers Rear Mounting Side & pol. Front/colour Pin Rear/colour Pin Choose a position where the screw holes of Left (+) Green [B5] White [B7] the mounting bracket and the screw holes of Left (-) Green/black [B6] White/black [B8] the radio become aligned and tighten the Right (+) Grey... -
Page 11: Security
Mute/demute audio level Activate/deactivate Traffic Announcement Search 5. SEL MENU Short press the knob to select the modes in the Change source between following sequence: the FM/AM, CD and VOLUME>BASS> Auxiliary modes TREBLE>BALANCE> FADER. Select stations by program Long press the knob to select the modes in the type following sequence:... -
Page 12: General Operation
Note 3: Do not touch the electrical contacts Bass (only when DSP is off) when removing or replacing the front panel! To change the enhancement of low frequency. 1. Press the SEL MENU knob to select the GENERAL OPERATION sound control Bass (BAS). 2. -
Page 13: Radio Operation
4. Turn the volume knob either to the left or Preset Scan right to set the MINUTES. Short Press the SCH/ A /PS button, the radio 5. Press the DISP button to store the current pauses for 5 sec. at each preset station. When setting. -
Page 14: Traffic Announcements (Ta)
Traffic Announcements (TA) MASK DPI or MASK ALL mode You can activate the TA mode to give priority to MASK DPI hear announcements related to these subjects In the MASK DPI mode, radio on alternative (even if you do not listen to the radio). frequencies (AF) that have different programme This function is only available with RDS on. -
Page 15: Programme Type Selection (Pty)
TA VOL+/- mode DX/LOCAL With this option the volume for Traffic Announce- Via this mode selection you can determine the ments can be preset to the required level. threshold for radio station search. To only re- 1. Long press the SEL MENU knob. ceive local radio stations with high transmitting 2. -
Page 16: Loading Cd In The Cd Player
Loading CD in the CD player Playing a “copy protected” non- conforming audio CD 1. Press the button to switch the set on. 2. Press REL button to open the front. Due to use of copy protection schemes of some 3. -
Page 17: Pausing
Select a Track or File Root Search for Directories 1. Long press the SCH A/PS button. 1. Press the SCH/A/PS/ button three times. 2. Use the VOL knob (radio) or buttons (remote ROOT/ will appear in the display. control) to select the desired track or file. 2. -
Page 18: Troubleshooting
SOUND TROUBLE Verify: TROUBLESHOOTING The sound level is to low during traffic an- May be, it will happen that your car radio will not nouncements. functioning as you expected it to. Before calling Adjust the volume setting for traffic announce- for service, please read this user manual and ments (see Presetting TA Volume).
Need help?
Do you have a question about the CD 1107 and is the answer not in the manual?
Questions and answers