Hive Active Heating Manual
- Installation manual (37 pages) ,
- Install manual (28 pages) ,
- User manual (23 pages)
Advertisement
Installation of the product
Pre-installation checklist
✓ Is the current heating system in working order?
✓ Have you checked the controls voltage?
✓ Is the boiler supplied by gas or oil?
✓ Is the boiler safe to work on?
Hive can not be installed
✕ On electric boilers
✕ If there is a weather compensating controller that talks to the boiler and controls it
✕ On district heating where there is no standard heating controls in the home
✕ When the boiler is installed outside
✕ On wet underfloor heating which surpasses the maximum zone limit (3 zones max)
✕ Electric underfloor heating
Installation order
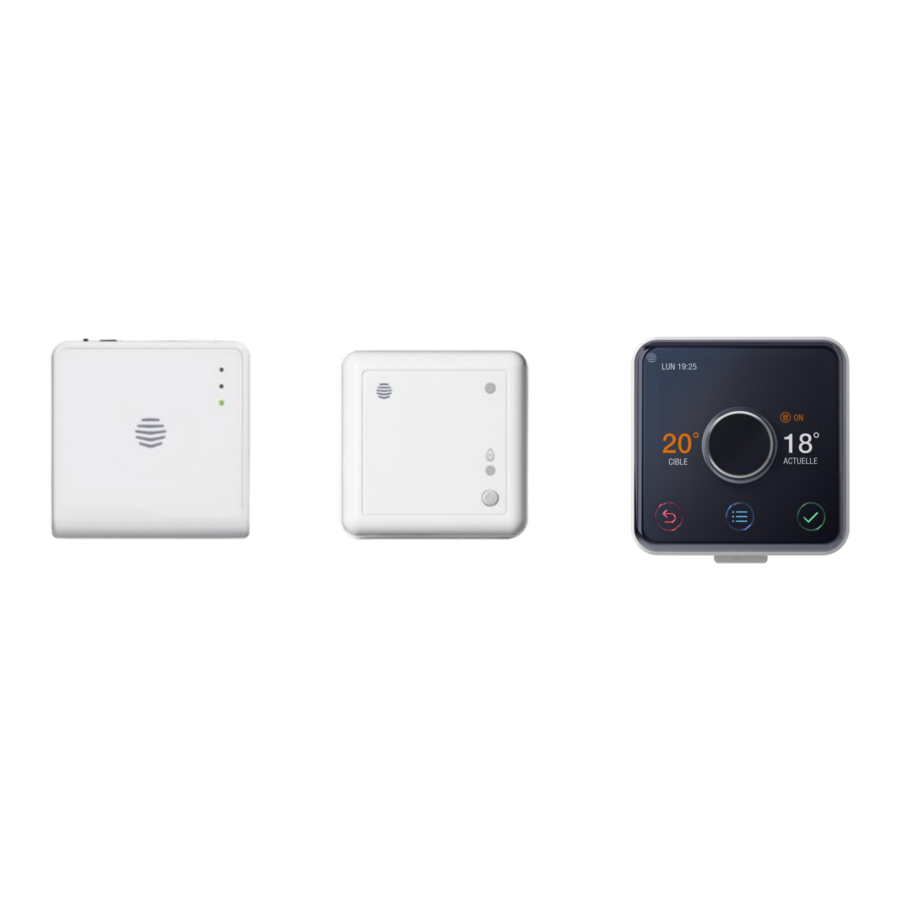
Basic overview
- Hub
Install the Hub first, this should be done by connecting an Ethernet cable to the customer's router, and powering up by the power cable provided.
*Do not interrupt power to the Hub whilst it performs initial updates
![]()
- Receiver
Wire the receiver to the central heating system.
![]()
- Thermostat
Install the thermostat using batteries provided.
![]()


Installing the hub
- Install the hub by connecting an Ethernet cable to the customer's router, and powering up by power cable provided.
- During start-up the GREEN light will flash, followed by the AMBER light. This usually takes 5-10 minutes. Wait for the middle light to flash AMBER.
![]()
- Once the AMBER light is flashing, the hub is set up and you can move on to installing the receiver. If no lights are displayed immediately after the hub has been turned on, check all cables are connected and the power socket works. If the problem still persists contact Hive Technical Support.

*Do not interrupt power to the Hub whilst it performs initial updates
Hub lights and what they mean
| Colour | Pattern | What does this mean | Notes |
| GREEN | Flashing | Installation and start up. The hub is attempting to connect to the hive servers and update itself. | Do not disconnect the hub. If flashing continues after 15 minutes contact hive technical support to confirm it has connected. |
| AMBER | Flashing | Installation. The hub is actively seeking to connect to the receiver and thermostat. | The hub will search for devices for 2 hours at a time. It will then pause, and show solid AMBER. |
| AMBER | Solid | Installation. The hub has paused it's search for other devices. | To restart the search, simply turn the hub off then on. The AMBER flashing light should then return. |
| GREEN | Solid | Normal Operation. The hub is connected. | This happens once the hub, receiver and thermostat are all installed and synchronized. |
| RED | Solid or Flashing | Error. The Hub has failed to connected to the hive servers. | Check that the hub is plugged in and the broadband is working. If the problem persists, call technical support. |
The receiver

The thermostat

Installing the thermostat

To install the thermostat you must ensure it is placed in the correct location this will be vital the future accuracy of the thermostat.
Installation method
- Before inserting the batteries into the thermostat ensure the Hub is flashing AMBER. If the Hub is solid amber turn it on and off again, and also power cycle the boiler/receiver the Hub will once again flash AMBER.
- Insert 4 x AA batteries.
- The Thermostat will now show 'search' on the display, it is now looking for the Hub and receiver.
- Once found the receiver will show a solid GREEN light indicating it has found the Hub and Receiver.
- Hub will show solid GREEN light.
Wiring
Engie
*Please note this is an example of the content used in the UK. Partners will need to create country specific content if required.
Receiver wiring
Single channel receiver: For combi boilers and additional plumbed heating zones.


Dual channel receiver: For conventional boilers with hot water cylinders.


Please ensure you install the receiver a minimum of 30cm from large metal objects to avoid interference with radio signals.
Extra Low Voltage
Whenever you install Hive Active Heating you must check the voltage rating used for external controls.
If you have a boiler where Extra Low Voltage controls are used (24v) you must ensure that any mains voltages remains separated.
- Receivers are suitable for low voltage installations only (not dual channel)
- The relay in the receiver has 'dry contacts', it is effectively a switch that routes whatever voltage is fed into the Common terminal (1) to other required terminals.
- The receiver has a SELV rating to ensure it is safe to mix low voltages and mains voltages in the connections to it. *Please see diagram.
![]()

Installing Hive to a combination boiler will allow the user to control their heating only. Hive will replace any existing controls or be wired directly into the boiler as new.
Once removed use a 5 core flex to wire L, N, E and Heating On and Off from the Boilers wiring connections to Hive Receiver.

Combi boiler wiring
Method 1
Replacing existing controls - This method will require you to completely remove existing controls from the Combi boilers wiring centre, this is completed by removing the 'Heating On and Off' connections and possibly 'Live, neutral and earth', which may have been used to power the existing controls.
Once removed use a 5 core flex to wire L, N, E and Heating On and Off from the Boilers wiring connections to Hive Receiver.

Please note that some boilers may work on Low Voltage 24v please ensure you identify the correct voltage before installing Hive controls, incorrect identification may damage the boiler.
Method 2
For a newly installed boiler with no existing controls or a boiler with internal controls a link may exist between 'Heating on Heating off', this must be removed and your wiring made in these connections. Once removed, use a 5 core flex to wire L, N, E and Heating On and Off from the Boilers wiring connections to Hive Receiver.

Please note that some boilers may work on Low Voltage 24v please ensure you identify the correct voltage before installing Hive controls, incorrect identification may damage the boiler.
Combi install overview

Multizone
Engie
Hive Multizone What is a Multizone heating system?
A Multizone system is when you have more than one heating zone in your home. For example, if you have a thermostat upstairs and another one downstairs, you have a zonal heating system.
How does a zonal heating system work?
Each individual thermostat you have enables you to set a different temperature in each zone. This means that you could have a hotter temperature in one area and a cooler temperature in another. Zonal heating helps you save energy because you can heat separate parts of your home rather than the whole house.
How does Hive support a zonal heating system?
Hive Multizone will support up to 2 additional heating zones as long as you have a zone valve that the Hive receiver can control in your zonal heating system.
What is a zone valve?
A zone valve is used to control the flow of heating in a zonal system so you can heat different parts of your home separately. For example, when one zone needs heating, that zone's valves open and guide the hot water to the radiators or in-floor pipes in that area of your home.
Facts and example
- Hive will support 3 heating zones in total – core zone + up to 2 additional zones
- System must be controlled by zone valves
- Additional thermostat and single channel receiver per zone
- Compatible with existing hardware – Nano 2 Hubs*, Hive 1 & Hive 2
- No Support for Additional Hot Water Zones – Only 1 Hot Water Zone
- Supports Wet Underfloor Heating - Not Electric
| Hive Multizone, component configurations | |
 | Original H/W & CH |
 | Additional CH Zone 1 |
 | Additional CH Zone 2 |
Installation video

Multizone Example

Installing more than one zone as part of a fresh Hive installation
- Wire up all Receivers at the same time (they should flash amber)
- Insert batteries into one Thermostat only, 1 receiver will stop flashing amber and turn green (thermostat 1 and receiver 1 paired)
- Put Hub into Pairing Mode– Press black button on rear of Hub to access pairing mode *
![]()
- Add batteries into thermostat 2, status light on receiver 2 will turn green (thermostat 2 & receiver 2 now paired)

Multizone

When wiring an additional zone in a multizone system, installation of any additional zones will require the removal of the original thermostats.
A link must also be made in any wiring centre between the removed thermostats connections.
An additional Hive Receiver can now replace any original controls, 1 new receiver should be added per zone.
Install method
- Wire main zone (Heating)
- Additional Zones must be wired using a Hive receiver, this will be wired to a 2 port valve and all original thermostats should be removed and linked out in the wiring centre. *Example of additional zone shown


Stand alone mode

Activating 'Hive' stand alone mode
- Remove the batteries from the thermostat.
- Switch off the boiler and receiver.
- Wait at least 5 seconds, then turn the boiler and receiver back on. The receiver's status light will begin to flash AMBER.
- Press and hold the heating button for at least 10 seconds – until the status light begins to flash WHITE. The receiver is now in 'stand-alone' mode and is searching for a thermostat
- Insert the batteries into the thermostat, press and hold down the menu and back buttons on the thermostat and follow the factory reset instructions on screen. After about 10 seconds, 'Welcome' and 'Searching...' will be displayed on screen. If the thermostat shows 'REJOIN' then try steps 1 and 5 again.
Booster plug installation
If required your Signal Booster will help your other Hive Active Heating devices talk to each other and extend the wireless range of your system.
Connectivity issues can occur in very large houses, houses with very thick walls and in areas where other devices are causing wireless interference. In some cases moving your hub or device may solve a connectivity issue, and adding a Signal Booster can also help.
We recommend finding a spot to plug in mid-way between your Hive hub (this is plugged into your broadband router) and the device(s) that are experiencing range issues. It needs to be plugged into either a mains power socket or an extension cable that can be left switched on.
*If a customer does not want to lose a socket outlet, they can purchase a Hive Active Plug from our website. A Hive Active Plug will work as a booster and increase the ZigBee signal within their home.

How to install your signal Booster
- First plug in your signal booster into a power socket
- If the Hub is already flashing Amber and in pairing mode it will automatically find your signal booster. If not press the black button on the rear of the Hub to place It into pairing mode.
- Once paired the signal booster will display a solid green light
How to remove a device
During an Installation you may need to remove a certain device if it is faulty or has been installed incorrectly.
You can do this from the customers dashboard when viewing from a Web Browser.
![]()
- Visit www.hivehome.com and log in to the customers account

- Find Manage Devices along the top tool bar
- Select the device you would like to remove, in this instance the Thermostat and press Manage
![]()
- Now select remove device
-
![]()
- Confirm you would like to remove device

- The Device will now be removed.


* To remove more devices please repeat the process.
Please see below information on how to now re add your devices-
- To Re add an unpaired device such as a Thermostat your will need to manually reset the device, you can do this by holding the Menu and back button for 10 seconds
- To reset the receiver, hold the Heating button until a double flash Amber light appears. You can now place your hub into pairing mode via install devices or by holding the black button on the rear on the Nano 2 hub, and repair.
Online account setup
*This may be different dependent on the ENI sales journey
Customer quotation
The customer will have received their quote via email

Self register
Customer will accept quote and self register their account, they will then create their own password


Logging in
Log in using the account details (email address and customer's password).

Hub ID
Enter the hub ID – this is the ABC-123 formatted number on the underside of the hub.

Begin using the App
Once the hub ID has been entered, setup is complete and Hive Active Heating is ready to use.
Please note: If the customer has not received an account set up email, please direct them to www.hivehome.com/register
Customer handover checklist
✓ Set daily schedules
Show the customer how to set up schedules.
✓ Adjust temp and on/off settings
How to adjust the temperate and turn the heating on & off.
✓ Geolocation
Get reminders to turn your heating on or off.
✓ Boost button
Boost your heating and hot water for up to six hours.
✓ Holiday mode
Put your thermostat to sleep until you return from holiday and come back to a warm home.
✓ Child lock
Show how to lock the thermostat and how to unlock it!
✓ Install new devices
Show customers how to install another device
✓ Show how to change the batteries
demo how easy it is to change the batteries in the thermostat
Documents / Resources
References
Download manual
Here you can download full pdf version of manual, it may contain additional safety instructions, warranty information, FCC rules, etc.
Advertisement


Need help?
Do you have a question about the Active Heating and is the answer not in the manual?
Questions and answers