Table of Contents
Advertisement
Quick Links
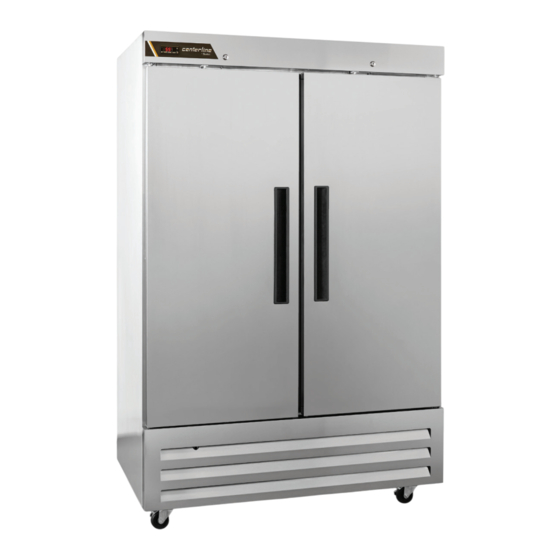
OWNER'S MANUAL
Instructions for Installation, Operation, &
Maintenance of all Centerline™ by Traulsen:
Reach-In Refrigerators & Freezers*
*Please Note: This manual is intended for use with the above referenced equipment manufactured after December 1, 2024.
4401 Blue Mound Road Fort Worth, Texas 76106 (USA)
Phone: 800.825.8220 | Service Fax: 817.740.6757 | E-mail: service@traulsen.com | Website: centerlinefoodequipment.com
Hours of Operation: Monday - Friday 7:30 a.m. - 4:30 p.m. (CST)
Advertisement
Table of Contents

Summary of Contents for Traulsen centerline CLBM-49F-FS
- Page 1 *Please Note: This manual is intended for use with the above referenced equipment manufactured after December 1, 2024. 4401 Blue Mound Road Fort Worth, Texas 76106 (USA) Phone: 800.825.8220 | Service Fax: 817.740.6757 | E-mail: service@traulsen.com | Website: centerlinefoodequipment.com Hours of Operation: Monday - Friday 7:30 a.m. - 4:30 p.m. (CST)
-
Page 2: Table Of Contents
Hi Press. (PRESH): • Model = The model # of your Traulsen unit Lo Press. (PRESL): Input Power (ELIN) - FOR INDOOR USE ONLY • (S/N) Serial Number = The permanent ID# of your Traulsen unit Voltage Hertz Phase Total Amps •... -
Page 3: Receipt Inspection
STA B L E B E FO R E I N STA L L I N G L EG S O R C A ST E RS . a damaged unit be returned to Traulsen without first The “Stem” casters are installed by threading them firmly obtaining written permission (return authorization). -
Page 4: D) Installing Drain Pan
III. INSTALLATION (continued) III. c - INSTALLING LEGS OR CASTERS (cont’d) Please note that Centerline units are not designed to be moved while on legs. If the unit requires moving, a pallet jack or fork- lift should be used to prevent damage. Tighten Remove Clockwise... -
Page 5: G) Door Removal For Half Door Units
To begin, remove top/bottom panels, then open the door to Should you require one, please contact Traulsen Service at its open feature position about 110°. For top door, remove (800) 825-8220, and provide the model and serial number two bolts on the top hinge bracket. -
Page 6: Operation
IV. OPERATION IV. c - FREEZERS (cont’d) Both refrigerators and freezers do not require manual defrosting. However, manual defrost option is available on The electric heater (attached to the coil) is energized. When the control, if required. the temperature sensor affixed to the coil senses 44°F, the coil is fully defrosted and the compressor operation IV. -
Page 7: B) Hinge Replacement
V. CARE AND MAINTENANCE (continued) V. a - CLEANING THE CONDENSER (cont’d) V. d - CLEANING THE EXTERIOR Exterior anodized aluminum should be cleaned with warm water, mild soap and a soft cloth. Apply with a dampened cloth and wipe in the direction of the metal grain. Remove single screw, slide it up &... -
Page 8: Control Basics
VI. CONTROL BASICS Your new Centerline Refrigerator or Freezer is equipped VI. c - INITIATING A DEFROST with a digital control, which precisely regulates operation. Automatic defrost: It is supplied from the factory completely ready for use. Defrost starts automatically as soon as the time set with parameter DFT has elapsed. -
Page 9: D) Configuration Parameters
VI. CONTROL BASICS (continued) Caution: if DFM = NON or C-H = HEA all defrost functions are inhibited; if DFT = 0, automatic defrost functions are excluded. VI. d - CONFIGURATION PARAMETERS Parameter Configuration: • To get access to the parameter configuration menu, press button for 5 seconds. - Page 10 VI. CONTROL BASICS (continued) RANGE DESCRIPTION -58..SPH Minimum limit for SP setting. SPL...180° Maximum limit for SP setting. SPL... SPH Setpoint (value to be maintained in the room). REF; HEA Refrigerating (REF) or Heating (HEA) control mode. 1...10° Thermostat OFF -> ON differential. 0...10°...
- Page 11 VI. CONTROL BASICS (continued) RANGE DESCRIPTION 0...60min Display delay. The display shows the information selected with parameter DDM during defrost and for DDY minutes after defrost termination. NO/YES Fans active during defrost. -58...180° Evaporator fan re-start temperature after defrost. 0...120min Maximum evaporator fan stop after defrost.
- Page 12 VI. CONTROL BASICS (continued) RANGE DESCRIPTION 1...5 Controller sensitivity for the automatic switchover from Group I to Group II (1=minimum, 5=maximum). 1…5 Controller sensitivity for the automatic switchover. 0...240 min Eco pull-down time. Only with IISM=ECO. Group I parameters are used in regulation for at least EPT minutes.
-
Page 13: F) Components And Wiring Diagram
VI. CONTROL BASICS (continued) RANGE DESCRIPTION -12.5..12.5° Probe T1 offset. NO/YES Probe T2 enabling (evaporator). -12.5..12.5° Probe T2 offset. NON; Auxiliary probe T3 operation DSP; NON : probe T3 not fitted. CND; DSP : temperature T3 to be displayed. CND : condenser temperature measurement. 2EU : second evaporator temperature measurement. -
Page 14: Troubleshooting Guide
VII. TROUBLESHOOTING GUIDE VII. a -TROUBLESHOOTING GUIDE FIND YOUR PROBLEM HERE REMEDY a.Check if cord & plug has been disconnected. 1. Condensing unit fails to start. b.Check control temperature setting. a.Are doors closing properly? 2. Condensing unit operates for prolonged periods or b.Dirty condenser or filter. -
Page 15: A) Service Information
4401 Blue Mound Road Fort Worth, TX 76106 (800) 825-8220. Centerline by Traulsen reserves the right to change specifications or discontinue models without notice. This appliance is marked with the ISO 7010-W021 warning label to indicate the presence of FLAMMABLE REFRIGERANTS. -
Page 16: B) Spare Parts Information
VIII. b - SPARE PARTS INFORMATION To purchase replacement parts or to speak to service support for Centerline by Traulsen units please contact our Ft. Worth facility by phone at 800-825-8220 or fax to 817-740-6748 (parts) or 817-740-6757 (service). - Page 17 -16-...
- Page 18 4401 Blue Mound Road Fort Worth, Texas 76106 (USA) Phone: 800.825.8220 | Service Fax: 817.740.6757 | E-mail: service@traulsen.com | Website: centerlinefoodequipment.com Form Number: TR36229 | Part Number:375-60364-00 (Rev. E) | Revision Date: 12-2024 Traulsen © All Rights Reserved...


Need help?
Do you have a question about the centerline CLBM-49F-FS and is the answer not in the manual?
Questions and answers