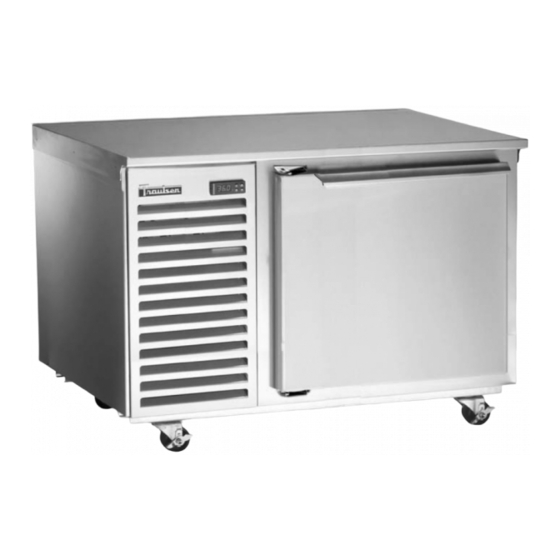
Traulsen TU044HT Owner's Manual

Traulsen TU044HT Owner's Manual

Traulsen undercounter refrigerators/undercounter freezers owner manual

Advertisement

OWNER'S MANUAL
This Traulsen unit is built to our highest quality standards. We build our refrigerators and freezers this way as a matter of
pride. This philosophy has made Traulsen the leader in commercial refrigeration since 1938. We thank you for your choice
and confidence in Traulsen equipment and we know you will receive many years of utility from this equipment.
All Traulsen units are placed on a permanent record file with the service department. In the event of any future ques-
tions you may have, please refer to the model and serial number found on the name tag affixed to the unit. Should
you need service, call us on our toll free number, 800-825-8220 between 7:30 am - 4:30 pm CST, Monday thru Friday.
You may also log onto www.traulsen.com for further information. It is our pleasure to help and assist you in every
possible way.
COMPLETE THE FOLLOWING INFORMATION PRIOR TO UNIT INSTALLATION
INITIAL START DATE:
MODEL TYPE:
COMPANY/INDIVIDUAL NAME:
INSTALLER:
FORM NUMBER TR35745 REV. 1/08
Quality Refrigeration
Instructions for the installation, operation
and maintenance of Traulsen:
TU Series Full-Size Undercounter Refrigerators
TU044HT, TU072HT & TU100HT
TU Series Full-Size Undercounter Freezers
TU044LT & TU072LT
INSTALLER
SERIAL NO.
P/N 375-60297-00

Advertisement

Table of Contents
loading

Summary of Contents for Traulsen TU044HT

  • Page 1 TU Series Full-Size Undercounter Freezers This Traulsen unit is built to our highest quality standards. We build our refrigerators and freezers this way as a matter of pride. This philosophy has made Traulsen the leader in commercial refrigeration since 1938. We thank you for your choice and confidence in Traulsen equipment and we know you will receive many years of utility from this equipment.
  • Page 2: Table Of Contents

    XII. SERVICE PARTS LIST The serial tag is a permanently affixed label on which is recorded vital electrical and refrigeration data about your Traulsen product, as well as the model and serial number. This tag is located in the right interior compart- PH ment on all standard full-size undercounter models.
  • Page 3: Receipt Inspection

    III. b - PACKAGING: Your Traulsen unit is shipped from the factory bolted to a sturdy wooden pallet in stretch wrapped material. Most exterior stainless steel surfaces have a protective vinyl covering to prevent scratching during manufactur- ing, shipping and installation.
  • Page 4: Operation

    V. a - CLEANING THE CONDENSER/FILTER: The most important thing you can do to insure a long, reliable service life for your Traulsen is to regularly clean the condenser coil and or filter if provided. The microprocessor control will notify you through a “CLN-FIL”...
  • Page 5: B-Replacing The Gaskets

    V. CARE & MAINTENANCE-(continued) V. b - REPLACING THE GASKETS: To remove the gasket to be replaced, grasp it firmly by one corner and pull it out. Before attempting to install a new gasket, both the unit and the gasket itself must be at room temperature.
  • Page 6: Microprocessor Control

    5- Communication Ability - A NAFEM Data Protocol (NDP) compliant RS-485 serial communications port is available to interface with data collection software (by others). municating within a NAFEM Data Protocol network if provided with an optional Gateway Hub (available from Traulsen). The actual communications software is available from a number of third party software vendors.
  • Page 7: B-Alarm Explanations

    VII. MICROPROCESSOR CONTROL (continued) VII. b - ALARM EXPLANATIONS: *NOTE: Explanation of alarms assume the audible alarm style is set at a 3-second burst or a continuous audible alarm. References to the audible alarm do not apply if the audible alarm style is set to OFF (Refer to page 16 for setting the audible alarm style).
  • Page 8: C-Control Panel Diagram

    VII. MICROPROCESSOR CONTROL (continued) VII. c - CONTROL PANEL DIAGRAM: F LED & C LED INTELA-TRAUL °F °C LED DISPLAY VII. d - NOTES TO THE USER: You only have 20-30 seconds between button pushes. If you take longer than 30 seconds, the controller will revert back to displaying the cabinet temperature.
  • Page 9: E-Enter The Service Access

    VII. MICROPROCESSOR CONTROL (continued) VII. e - ENTER THE SERVICE ACCESS: Use the security code 0, A, 1 Press the set button . The display will read Press the set button SET The display will show three zeros with the left zero flashing Press the set button SET The display will show three zeros with the center zero flashing...
  • Page 10: F-Service Parameters

    VII. MICROPROCESSOR CONTROL (continued) VII. f - SERVICE PARAMETERS: Listed below are the available parameters in the order they appear, using the down arrow key on the controller. You can use either the up or down arrow keys to scroll through the options. Thermostat Set Point High Thermostat Set Point Low Temperature Scale...
  • Page 11: H-Adjusting Thermostat Set Point Low

    VII. MICROPROCESSOR CONTROL (continued) VII. h - ADJUSTING THERMOSTAT SET POINT LOW: This parameter sets the low point of the desired cabinet temperature range. Typically, freezers will range from –6° F to -4° F (-21° C to –20° C) and refrigerators will range from 32° F to 34° F ( 0° C to 1° C) for this parameter setting. This parameter is preset at the factory and does not have to be adjusted unless the customer chooses to do so.
  • Page 12: J-Setting The 24-Hour Clock

    VII. MICROPROCESSOR CONTROL (continued) VII. j - SETTING THE 24-HOUR CLOCK: The internal time clock must be set in order for the data storage memory to correctly log events and to allow any defrost lockout to occur at the correct time of day. If the clock is not set, the control assumes the time is 12 am at the time power is supplied to the unit.
  • Page 13: K-Setting The Date

    VII. MICROPROCESSOR CONTROL (continued) VII. k - SETTING THE DATE: The date must be set in order for the data storage memory to correctly log events. Follow the instructions to enter the service access code on page 8. When the control displays until the control display reads (year).
  • Page 14: M-Starting A Manual Defrost

    Press the set button DEFROST ICON NOTE: Traulsen refrigerator units also have an off-cycle defrost, at which time the control will read defrost is temperature terminated and can last from 3 - 20 minutes (dEF will be displayed for 20-37 minutes time).
  • Page 15: N-Setting Defrost Lockouts

    VII. MICROPROCESSOR CONTROL (continued) VII. n - SETTING THE DEFROST LOCKOUTS: The defrost lockout parameters allow the customer to prevent the unit from going into a defrost cycle for two hours during a set time frame. Customers can set up to four defrost lockout parameters. They are all programmed the same way. The parameters will be set for the time the lockout is to start.
  • Page 16: O-Adjusting The Drawer Perimeter Heaters

    VII. MICROPROCESSOR CONTROL (continued) VII. o - ADJUSTING THE DRAWER PERIMETER HEATERS: This parameter allows the customer to turn ON and OFF the anti-condensate door/drawer perimeter heaters. This param- eter is set to the highest setting (100) at the factory so that the door/drawer heaters stay on continuously. If you choose to have the door/drawer heaters cycle on and off, lower this parameter to approximately 30.
  • Page 17: Q-Setting The Audible Alarm Style

    VII. MICROPROCESSOR CONTROL (continued) VII. q - SETTING THE AUDIBLE ALARM STYLE: These parameters will allow the customer to turn on/off the audible alarm feature on the INTELA-TRAUL audible alarm is preset from the factory to OFF. The customer can choose between an audible alarm that sounds for 3 seconds then automatically turns off, or a continuous audible alarm that must be manually acknowledged.
  • Page 18: Wiring Diagram

    VIII. WIRING DIAGRAM Note: Refer to the wiring diagram below (applies to refrigerators and freezers units) for any service work performed by a qualified technician. -17-...
  • Page 19: Trouble Shooting Guide

    PROBLEM 1. Condensing unit fails to start. 2. Condensing unit operates for prolonged periods or continuously. 3. Food Compartment is too warm. (NOTE: Compressor may be cycling ON/OFF frequently) 4. Food Compartment is too cold. 5. Condensation on exterior surface. 6.
  • Page 20: Service Assistance

    Note: When calling for spare parts or service support, please make sure you have model and serial number of unit available. X. c - WARRANTY REGISTRATION: The warranties for your new Traulsen unit may be registered with us by contacting our Ft. Worth facility by phone at 800- 825-8220 or you may register on line: 1. Log onto www.traulsen.com 2.
  • Page 21: Warranties

    TRAULSEN & CO., INC. warrants to the original purchaser the Refrigeration Equipment manufactured and sold by it to be free from defects in material and workmanship under normal use and service for a period of one (1) year from date of shipment. Under this warranty, TRAULSEN & CO., INC. will reimburse the purchaser for the replacement of any part of said equipment (excluding dryers &...
  • Page 22: Service Parts List

    NOTE: Part numbers listed are for standard products as currently manufactured. For products manufactured as other than standard, please contact the factory. ITEM CASTER ALL MODELS 6” ADJUSTABLE CASTER NO LOCK 6” ADJUSTABLE CASTER WITH LOCK ALL MODELS 6” LEG DOOR ALL MODELS DOOR ASSEMBLY, HINGED LEFT...
  • Page 23 NOTES:...
  • Page 24 HOURS OF OPERATION: Monday thru Friday 7:30 am - 4:30 pm CST Quality Refrigeration raulsen 4401 Blue Moud Road Fort Worth, TX 76106 Phone (800) 825-8220 Fax (817) 740-6757 Website: www.traulsen.com © 2008 Traulsen - All Rights Reserved...

This manual is also suitable for:

Tu044ltTu072htTu072ltTu100ht

Table of Contents