
Subscribe to Our Youtube Channel
Related Manuals for Dr.coffee F10


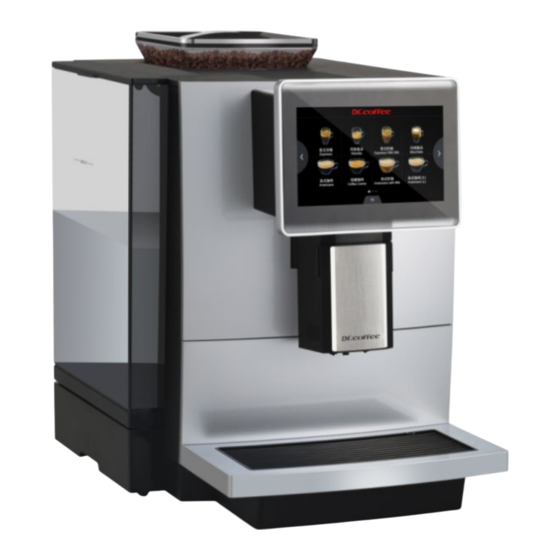
Summary of Contents for Dr.coffee F10
- Page 1 F10 & H10 Service manual (Version:V01) Applied Model: F10 H10 During the period due to product upgrades, there may be differences between the pictures and the actual products please refer to real object. Dr.coffee 产品维修手册...
- Page 2 2.1.1 Machine Risky ........................................6 Structure .............................................. 7 Overview............................................7 Internal components overview ....................................... 8 Circuit Overview ..........................................10 F10 Main control board circuit ...................................... 10 F10 HMI circuit..........................................11 Specification ............................................12 5.1.1 Capacity ..........................................12 5.1.2 Technical Sheet ........................................12 Screenshot Description ........................................
- Page 3 Brewer Check Up ....................................... 33 8.1.14 Brewer Unit Deep Clean Required ..................................33 8.1.15 Milk Frother Deep Clean Required ..................................33 8.1.16 Descaling Required ......................................34 8.1.17 The filter needs to be replaced ..................................34 Trouble Shooting ..........................................34 Dr.coffee 产品维修手册...
- Page 4 Disassemble grinder group ....................................49 10.2.10 Disassemble thermo-block ....................................50 10.2.11 Disassemble control board ....................................51 10.2.12 Disassemble front panel group ..................................52 MAINTENANCE ................................... 53 11.1 Milk frother clean ......................................... 53 DAILY USING AND MAINTENANCE ATTENTION ........................54 Dr.coffee 产品维修手册...
- Page 5 Caution Drinks with additives or residues may cause allergies. Do follow below points: In self-service, check for possible allergenic products listed on the coffee machine; In self-service, check for possible allergenic products with professional person. Dr.coffee 产品维修手册...
- Page 6 Always use a new hose kit (drinking water/waste water hose) supplied with the machine, and do not use old hoses. Dr.coffee 产品维修手册...
- Page 7 Rev 0.0 Structure Overview (F10 front view) Bean hopper Touch screen Water tank Milk Tube Connection Coffee outlet Drip Tray Bottom (F10 Back side) Socket Switch Switch of changing water supply Water Inlet tube Dr.coffee 产品维修手册...
- Page 8 Internal components overview Coffee Thermo-block Steam Thermo-block Dispenser Valve1 Regulator Valve Brew Motor Group Pump Dispenser Valve 2 Step Motor Distributor Valve Transformer Front Panel Assembly Body Support Brewer Pressure Release Valve Water Inlet Valve Group Flow Meter Dr.coffee 产品维修手册...
- Page 9 Rev 0.0 Adjust Gear Grinder Control Board Transformer Waste Water Sensor Dr.coffee 产品维修手册...
- Page 10 Rev 0.0 Circuit Overview F10 Main control board circuit Pressure releasing step motor Flowmeter Power of drive motor Detective sensor of water tank Power of switch valve Detective sensor of drip tray Power of fan Transformer AC 20V output line...
- Page 11 Rev 0.0 F10 HMI circuit Control board Display wire Touch wire USB transformer Dr.coffee 产品维修手册...
- Page 12 Drip tray capacity Approx.1L 5.1.2 Technical Sheet Model Voltage(V) 220V~50Hz 1450W Power(W) Connection tube set inner diameter 5mm ,outer diameter9mm , Silicone Tube, length 1.5M Connection water pressure Without tap water Coffee machine W*D*H 340*500*430mm 300*500*430mm Coffee machine N.W 15kg Dr.coffee 产品维修手册...
- Page 13 Tap“ ”to show menu bar 6.2.1 Wipe Protect Touch“Wipe Protect” ,pictures disappeared,count down 10 seconds to do wiping, any touch unlocks the screen; Press“Wipe Protect”more than 3 seconds,enter to the descaling process。 (see details in the user manual) Dr.coffee 产品维修手册...
- Page 14 Tap “Power Off” to see the interface above “Back or Power off” for your choice, machine will proceed the process if no response in 10 seconds. Start rinsing process before power off Tap “Confirm”, start rinsing automatically, screen turned off and power off (press more than 5 seconds to wake up machine) Tap “Return”, return to top level automatically. Dr.coffee 产品维修手册...
- Page 15 Rev 0.0 Service Menu Method of Entry Step 1: Tap “Service Menu” for entry (as picture below) Step 2: Input correct password Password:default password is 1609 Maintenance Dr.coffee 产品维修手册...
- Page 16 Use professional cleaning tables to do deep clean. Follow the instruction to finish this process. See details in User Manual. 7.1.3 Descaling Use professional cleaning powder to do descaling. Follow the instruction to finish this process. See details in User Manual. Dr.coffee 产品维修手册...
- Page 17 Empty the remaining water in the internal piping of the coffee machine to prevent it from freezing and causing cracking after transporting in a low temperature environment. Follow the instruction to finish this process. See details in User Manual Dr.coffee 产品维修手册...
- Page 18 The time of milk output Unit: s Setting range: Please refer to the screen value input interface. Different drinks have different tolerance. 7.2.5 Milk Foam(s) The time of milk foam output Unit: s Setting range: Please refer to the screen value input interface. Different drinks have different tolerance Dr.coffee 产品维修手册...
- Page 19 ℃ ) The heating temperature of the coffee thermos-block is controlled at around 86 if the NTC of thermos-block reaches 86 , heating stop ,if the temperature lower than : ℃ ( ℃ starts heating ℃ ) Dr.coffee 产品维修手册...
- Page 20 7.2.13 Positon change Positon change:Touch any two drinks icons, position changes, save the data. Machine setting Machine setting:Set the condition values for various maintenance intervals of the machine. Tap “Save” to effect. 7.3.1 Language Language:Select the language and save Dr.coffee 产品维修手册...
- Page 21 For example: the default setting is “500”, which means that after the coffee machine makes 500 cups of milk-containing drinks, the machine will automatically prompt you to use the milk detergent for deep cleaning of the milk system. Dr.coffee 产品维修手册...
- Page 22 1250cups,the machine will prompt to do descaling. ※ Three periodic conditions, when any one of them is reached, prompt to do descaling. After the required descaling operation, all conditions are reset and cleared, and then the calculation is restarted. Dr.coffee 产品维修手册...
- Page 23 Once set, the machine will automatically shut down every day according to the set time. (Long press the screen for more than 3 seconds to restart the machine.) If you do not use the machine for a long time, please turn off the machine. Dr.coffee 产品维修手册...
- Page 24 Level2 Password:Limited access to Service Menu (Including Drinks Setting, Maintenance, Machines Setting, default password is 1608) Master code :1809 This password can enter "service menu" Eng. Settings ", this code is fixed. Remark: Through "factory resetting", you can set the modified level 1&2 password to the default value! Dr.coffee 产品维修手册...
- Page 25 Forth step: Enter the weight of the coffee powder into the “Grounds” on the machine interface; (Enter the value as an integer, round to the nearest decimal point) Fifth step:After the above steps are cycled 3 times Sixth step: The “Save” button will appear on the interface, and all the steps of calibration will be completed after clicking. Dr.coffee 产品维修手册...
- Page 26 Choose the way the coffee machine supplies water. Choice range: water tank, water barrel, tap water. (Note: The water supply method must be set to match the actual water supply status of the machine) Select water tank it means the supply mode is water tank. “ ” , Select tap water it means the supply mode is tap water. “ ” , Dr.coffee 产品维修手册...
- Page 27 After clicking the button next to “Factory reset”, you can save the parameters after saving and restarting the coffee machine. Information 7.5.1 Total cups Total cups:See the total number of cups that the machine makes for drinks, and the total number of cups for each drink. Dr.coffee 产品维修手册...
- Page 28 Maint. Record:See the cumulative number of machine maintenance and the number of times each maintenance has been accumulated. 7.5.3 Soft. Version Mainboard version: Shows the coffee machines mainboard version HMI Version: Shows the coffee machines HMI version Machine S/N: Shows coffee machine tracking no. Dr.coffee 产品维修手册...
- Page 29 Showing on the Screen Cause Solutions Fill coffee beans to the bean box; coffee bean hopper is empty; Stir the beans in the bopper until they are Beans sticks together; loose; 8.1.4 Drip Tray Is Not In Place Dr.coffee 产品维修手册...
- Page 30 Wait, as the tips in the Screen “The hot water thermos-block is cooling down, Bloc Temperature is over 160℃; please wait ...”; While the thermos-block is cooling down, Over no beverage could be made. -hea 8.1.7 Steam Thermo-Block Heating Overtime Dr.coffee 产品维修手册...
- Page 31 8.1.9 Environment Temp. Is Too Low Showing on the Screen Cause Solutions Envi Please power on the machine when the The temperature of the environment is temperature of environment is 10℃~ 0℃ or lower; 40℃; p. Is Dr.coffee 产品维修手册...
- Page 32 It will alarm at the 2000th cup, 7000 th Calib to do finish calibration; cup, 17000th cup, 27000th cup… and so ratio Follow the instruction of service manual; on.( every 10 thousand cups) Turn off, will not alarm. Dr.coffee 产品维修手册...
- Page 33 Reach the set value, it will alarm. Set in Follow the tips and enter service manual Manu; to do deep clean; Clea The settled valve can be changed in the Follow the instructions of service manual service manual uire Dr.coffee 产品维修手册...
- Page 34 3 times. Re-fix the tank. Push it to the end;; Erro Clean the strainer by Brewer Deep Clean with tablets or by dissembling; Replace a new Pump; Replace a new Flow meter; Dr.coffee 产品维修手册...
- Page 35 Showing on the Screen Cause Solutions Coff Ther The temperature of the thermos-block exceeds settled value Replace the fuse of thermos-block; bloc Electronic fault between sensor and Replace the NTC sensor; master Replace thermos-block group Sensor damaged; Erro Dr.coffee 产品维修手册...
- Page 36 Solutions Stea Ther The temperature of the thermos-block Replace the fuse of thermos-block; bloc exceeds settled value and fuse burn out Replace the NTC sensor; sensor damaged; Replace thermos-block group Thermo-block damaged Heat Over time Dr.coffee 产品维修手册...
- Page 37 The number of Air Intake is set too high. Set the number of Air Intake lower;; The Milk Frother is blocked; Dissemble and clean the Milk Frother Replace a new Milk Frother; 9.2.3 No Milk Foam, Warm Milk Only Dr.coffee 产品维修手册...
- Page 38 Check if the connector is loosed; Leaking at the inlet connector of machine Leak Dissemble the cover of machine and find to Tap water ; out the place leaking; Leaking inside of machine; Replace the parts leaking; Dr.coffee 产品维修手册...
- Page 39 Rev 0.0 10 Disassembly & Assembly 10.1 Tools Screwdriver (T10) Screwdriver (T20) Millimeter Thermometer Flat Screwdriver ( 3.2mm) Long nose pliers Electronic scale 10.2 General Disassembly 10.2.1 Disassemble Exterior Parts Dr.coffee 产品维修手册...
- Page 40 Step1 :First open the water tank cover as shown in the figure, remove the large water tank upwards, and then remove a fixing screw at the marked position of the red circle; Step 2: Hold the base and take out the tank base downward. Remove the tank base Attention: ★ 1、Handle gently during disassembly to prevent scratching! Dr.coffee 产品维修手册...
- Page 41 Step2:Use a flat-blade screwdriver to press (as shown in Figure 1 to Figure 5) the buckle at the position indicated by the red arrow to release the buckle at these five positions. Attention: ★ 1、Handle gently during disassembly to prevent scratching! Dr.coffee 产品维修手册...
- Page 42 Step1: First push the left side panel from bottom to top, then pull back the left side panel and remove it, remove the left side panel to complete. Step 2:First push up the right side plate, then pull back the right side plate and remove, remove the right side plate complete. Attention: ★ 1、Handle gently during disassembly to prevent scratching! Dr.coffee 产品维修手册...
- Page 43 Attention: ★ 1、 Please disassemble the machine after it has cooled down to prevent burns! 2、 In the process of disassembly, you can use both hands to take care of it, beware of bruises! Dr.coffee 产品维修手册...
- Page 44 Step3:Grasp the pressure relief valve block with your hand and pull out the pressure relief valve group in the direction indicated by the arrow (Figure 1). Disassemble the group. Attention: ★ 1、Unplug the coffee machine before doing this! Dr.coffee 产品维修手册...
- Page 45 Step2:Unplug the two wiring plugs by the arrow, unplug the hose and water pipe connected to the red circle, and finally take out the split valve and remove the valve. Attention: ★ 1、 Unplug the coffee machine before doing this! 2、 Take a picture for record before disassembling. Dr.coffee 产品维修手册...
- Page 46 Step2: Then unscrew the two fixing screws at the position marked by the red circle, and finally take the drive unit out and take out the motor complete. Attention: ★ 1、 Be careful during the disassembly process to prevent scratching your fingers! 2、 Unplug the coffee machine before doing this! Dr.coffee 产品维修手册...
- Page 47 Step2:According to the position shown by the arrow), pull out the silicone water pipe connected to the pump, and finally take out the pump set and remove the pump set. Attention: ★ 1、Be careful during the disassembly process to prevent scratching your fingers! Dr.coffee 产品维修手册...
- Page 48 First pull out the water guide cover (can be picked up with a screwdriver), then pull up the water guide and unplug the connected water pipe. Disassemble the water inlet valve Pull out Attention: ★ 1、 Be careful during the disassembly process to prevent scratching your fingers! 2、 There may be residual water in the pipe. Please prepare the water container in advance! Dr.coffee 产品维修手册...
- Page 49 Step2: Grab the parts of the grinder by hand, take out the whole grinder group upwards, and disassemble the grinder group. Attention: 1、Switch off the machine before disassembling! 2、Before removing the grinder group, please empty the residual coffee beans and coffee powder in the grinder! Dr.coffee 产品维修手册...
- Page 50 Attention: ★ 1、Unplug the coffee machine before doing this! 2、There may be residual water in the pipe. Please prepare the water container in advance! 3、Please disassemble the coffee machine after it has cooled down completely, beware of burns! Dr.coffee 产品维修手册...
- Page 51 Step: First unplug all the wiring plugs on the main control board, then remove the four screws that fix the main control board, and finally remove the main control board. Attention: ★ 1、Unplug the coffee machine before doing this! 2、When pulling the cable plug, please press the buckle first and then pull the plug to prevent the terminal from being broken! Dr.coffee 产品维修手册...
- Page 52 Step3:(Figure 1, 2) Grab the front panel group with both hands, pull out the entire assembly forcefully, remove the front panel group to complete. Attention: ★ 1、The display is made of glass. Please take it lightly during the disassembly process to prevent the glass from breaking! Dr.coffee 产品维修手册...
- Page 53 Step4:Put the rinsed milk frothers back into the machine as shown in the figure and cover the coffee outlet cover. Attention: ★ 1、Please disassemble the machine after it has cooled down to prevent burns! 2、When installing the silicone device, carefully check that it is in place. Otherwise it may also cause no milk or milk foam Dr.coffee 产品维修手册...
- Page 54 To ensure the quality of the coffee, it is recommended to clean the water tank daily and replace the water in the water tank; If you use tap water, do not use the machine after the external water source is stopped Dr.coffee 产品维修手册...
- Page 55 Rev 0.0 苏 州 咖 博 士 咖 啡 系 统 科 技 有 限 公 司 地址:中国 江苏 苏州高新区泰山路 599 号 3#楼 3 楼 邮编:215163 热线:400-897-7711 网址:www.dr-coffee.com Dr.coffee 产品维修手册...
Need help?
Do you have a question about the F10 and is the answer not in the manual?
Questions and answers