Page 1
F22 Service Manual(Standard) (Version:V00) (Main control version:V4.4.4.221118、HMI version:V5.0.1.2211211432) 
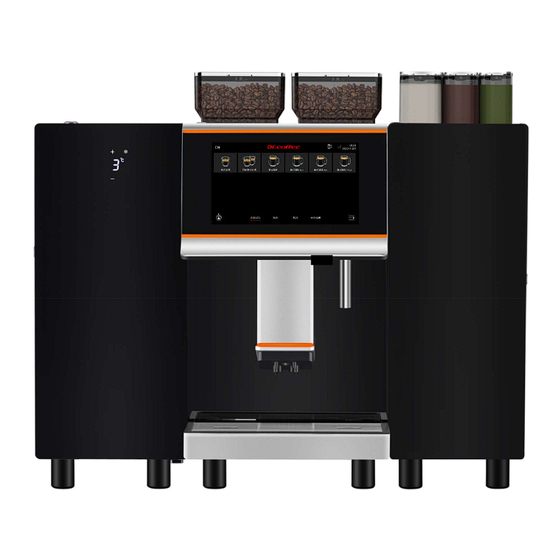
Applicable models of this manual: F20、F22; Due to product upgrades during the period, there may be differences between pictures and real machines, please subject to real machines! Dr.coffee 产品维修手册 No.CS-04-055...
Page 4
4.1.9 The left bean box is not installed in place .............................. 54 4.1.10 The right bean box is not installed in place ............................54 4.1.11 The left powder box is not installed in place ............................55 Dr.coffee Product Maintenance Manual...
Page 5
5.2 F ......................................69 AULTS WITHOUT SCREEN PROMPT 5.2.1 Unable to start the machine ..................................... 69 5.2.2 Can't suck milk ........................................69 5.2.3 Milk can be produced without milk foam ................................ 69 5.2.4 No coffee..........................................69 Dr.coffee Product Maintenance Manual...
Page 6
6.3.6 Dismantle the diaphragm pump set ..................................92 6.3.7 Removal of water pump ......................................94 6.3.8 Remove the main control board..................................94 6.3.9 Dismantling powder boiler ....................................94 6.3.10 Remove the blower ....................................... 95 6.3.11 Dismantling agitator ......................................95 Dr.coffee Product Maintenance Manual...
Page 7
LEANING OF POWDER SILO 7.3.1 Disassembly method of powder silo ................................101 7.3.1 Installation method of powder silo ................................101 7.4 C ....................................... 102 OFFEE MACHINE CLEANING 8 PRECAUTIONS FOR DAILY USE AND MAINTENANCE ......................... 103 Dr.coffee Product Maintenance Manual...
Drinks with additives or residues may cause allergies. Do follow below points: In self-service, check for possible allergenic products listed on the coffee machine; In self-service, check for possible allergenic products with professional person. Dr.coffee Product Maintenance Manual...
Beans hopper only for beans only, powder hopper only for instant powder only, manual outlet only for tablets; Frozen dry coffee is not permitted, otherwise the brewer will be stick; If delivered under 10℃, before switch on the coffee machine must be placed three hours for room temperature recovering Dr.coffee Product Maintenance Manual...
Page 10
After shipment, otherwise it may lead to short circuit hazard or damage to electrical components; New hose kit (drinking water/waste water hose) supplied with the machine should be used, and do not use old hoses. Dr.coffee Product Maintenance Manual...
Rev 00 INTERNAL COMPONENT INTRODUCTION 3.2.1 F20 Coffee Machine Exhaust duct 3-way milk valve Ice coffee valve group Steam valve group Powder drinks outlet connection Pressure Releasing Solenoid Valve Hydraulic cleaning valve Coffee thermoblock Hot water valve Steam boiler group...
Page 14
Rev 00 coffee machine Encoder Group Exhaust duct Pressure regulating valve Left grinder Right grinder Grinder adjustment gear Milk pump foamer connection Main control board Water pump group Water inlet assembly Dr.coffee Product Maintenance Manual...
Mixer motor group Switching power supply Middle and right powder valve Left powder valve Mixed water valve Water pump Powder hot water boiler Flow meter Water supply valve Main control board Exhaust duct Diaphragm pump Blower Dr.coffee Product Maintenance Manual...
Rev 00 4 SCHEMATICINTRODUCTION 4.1 CIRCUIT BOARD DIAGRAM 4.1.1 F20 Main Control Diagram 11~12 Ice coffee valve 09~10 Water supply valve for steam Powder machine connection 07~08 Drinks hot water valve 05~06 Powerful hot water wand valve 07~08 Water inlet valve...
IOT function, equip with 4G model or WiFi model) 6、Click“ ”,will start to make hot water. 7、 :Icon for F20 and P30 connection. Without this icon, means doesn’t connect well. 6.2 LANGUAGE Click the language icon, different languages are available. 6.3 SHORTCUT MENU Click“...
Click “Milk Rinse” to see the interface above “Back or OK” for your choice, machine will proceed to rinse process if no response in 10 seconds. Long touch “Milk Rinse” and for 3 seconds entering “Milk Deep Clean” (see details in user manual) Dr.coffee Product Maintenance Manual...
Long touch “Wipe Protect” and hold for 3 seconds to enter “Descaling” process. (See details in user manual) 6.3.7 Information Total cups Data Source: Click the “Arrow” to choose the amount of “Product Cup” or “Test Cup” Dr.coffee Product Maintenance Manual...
Page 24
HMI Version: Current Software Version Info of Mainboard; Beverage DB Version: This column displays the version number of the beverage DB of the current machine Machine parameter Version: this column displays the current machine parameter library version number Machine Info. Dr.coffee Product Maintenance Manual...
Click “Power Off” to see the interface above “Back or Power off” for your choice, machine will proceed the process if no response in 10 seconds. Start rinsing process before power off Click “Confirm”, start rinsing automatically, screen turned off and power off (press more than 5 seconds to wake up machine) Click “Return”, return to top level automatically. Dr.coffee Product Maintenance Manual...
The second and the third number is same with the second and the third PIN code, so the second and the third number is 3 and 1. The forth number is the last digital of the sum of the second and the third PIN code(3+1=04)so the forth number is 4 Above, password is 2314 Step 3: Service Menu Interface Dr.coffee Product Maintenance Manual...
Click the powder box, select the powder which match with the powder box. Calibration:Click the calibration to do the powder calibration. (Detail information please refer the Eng setting) 7.1.1.2 Powder Type Represent the kind of powder, click to add type. Dr.coffee Product Maintenance Manual...
”icon,then click the aim position. Click the image of the drink that needs to be exchanged to accomplish the position exchange of the two drinks. 7.1.3 Delete Drinks Click“ ”icon to the interface to see the interface below. Cancel: Cancel this process Delete this beverage. 7.1.4 Drinks Parameters Setting Click“ ”to see the parameters setting interface Dr.coffee Product Maintenance Manual...
”icon,can open or close big cup optional.Close it there will be no big cup.(Green means open, dark means close) 7.1.4.9 Cup Type Set parameters for the three cup types. Click”Save” after setting 7.1.4.10 Cycle The number of times to make drinks. Range: 1-5 Dr.coffee Product Maintenance Manual...
Range: Please refer to the drinks parameter of the interface. Get powder:means the real powder weight. 7.1.4.20 Front Water Outlet(ml) Means the water before mixing powder. Range: Please refer to the drinks parameter of the interface. Dr.coffee Product Maintenance Manual...
Means the value of of water. Unit: ml Range: Please refer to the drinks parameter of the interface. 7.1.4.27 Milk(s) Means the time of milk out. Unit: s. Range: Please refer to the drinks parameter of the interface. Dr.coffee Product Maintenance Manual...
Step 5: It means the production options in the fifth step of setting of the production process; (if you select two options in this step, it means that the two options are produced at the same time) Test Beverage test making with the parameters set. Save Save the parameters. Back Back to the previous menu. 7.1.4.34 Create New Drinks Click “ ” to create a new beverage; Dr.coffee Product Maintenance Manual...
Page 33
Remarks: It is recommended to set and save the parameters of "small cup", "medium cup" and "large cup" in the "Please select cup type" option. (Otherwise, it may happen that the beverage cannot be prepared normally due to incomplete beverage parameters) Dr.coffee Product Maintenance Manual...
Use professional cleaning tables to do deep clean. Follow the instruction to finish this process. See details in User Manual. 7.2.2 Milk Deep Clean Use professional cleaning tables to do deep clean. Follow the instruction to finish this process. See details in User Manual. Dr.coffee Product Maintenance Manual...
Empty the remaining water in the internal piping of the coffee machine to prevent it from freezing and causing cracking after transporting in a low temperature environment. Follow the instruction to finish this process. See details in User Manual Dr.coffee Product Maintenance Manual...
* For example: set to "1000", it means that after the coffee machine makes 1000 cups of drinks, the machine will automatical ly prompt that the coffee machine needs to be descaled with descaling powder. Dr.coffee Product Maintenance Manual...
Set the time of milk deep clean at Wednesday18:30, means coffee machine inform you do the milk deep clean at this time. Only after the cleaning machine can : make drinks. 7.3.2 Time/Date Time/Date:Set the date and time of the coffee machine system. Click “Save” to effect. Time Zone This indicates the time zone setting of machine. Dr.coffee Product Maintenance Manual...
After standing by for 1 hour, the temperature of Steam Boiler will drop to be the same with hot water thermoblock, coffee thermoblock and powder boiler. And maintain this constant temperature. ECO 2 After standing by after 1 hour, the temperature of Steam Boiler, hot water thermoblock, coffee thermoblock and powder boiler will drop to 60 And maintain this constant ℃, temperature. Dr.coffee Product Maintenance Manual...
Primary Password: The highest level, all access to Service Menu (Including Drinks Setting, Maintenance, Machines Setting, Eng. Setting; default password is 1809) Secondary Password: Secondary level, limited access to Service Menu (Including Drinks Setting, Maintenance, Machines Setting, default password is 1709) Tertiary Password: Tertiary level, limited access to Service (Drinks Setting only, default password is 1609) Dr.coffee Product Maintenance Manual...
Remark 1: WiFi function only for machines equip with WiFi model. Remark 2:Mobile data and WiFi function can’t turn on at the same time.(If mobile date turn on, WiFi will turned off automatically; If WiFi function turn on, mobile data will turned off automatically.) Dr.coffee Product Maintenance Manual...
16A mode:Coffee thermobloack and steam boiler can work at the same time.(When making drinks, coffee and milk can out at the same time) 10Amode:Coffee thermobloack and steam boiler can’t work at the same time.(When making drinks, coffee and milk can’t out at the same time Dr.coffee Product Maintenance Manual...
Step 4: Enter the weight of the coffee powder into the “Grounds” on the machine interface; (Enter the value as an integer, round to the nearest decimal point); Step 5: After repeating the steps above 3 times, “Save” will appear, and all the steps of calibration will be completed after tapping. Then repeat the steps above for calibration of another grinder. Dr.coffee Product Maintenance Manual...
7.4.3 Grinding Index Grinding Index: The grinding amount of the grinder can be calibrated. Tap “Save” to effect. It is the multiple of the Grounds set in drink setting. Set Choice: 0.7~1.3; Default: 1.0 About Grounds Calibration: Dr.coffee Product Maintenance Manual...
Set the milk temperature when making hot milk. Optional: 1-10. The bigger the number, the higher the temperature. Default: 3 Milk Foam Temperature Set the milk foam temperature when making milk foam. Optional: 1-10. The bigger the number, the higher the temperature. Default: 3 Dr.coffee Product Maintenance Manual...
Page 45
Step 1: Click”Start”, the first data will not be recorded. Step 2: Take a measuring cup(at least 200ml), weight and under the outlet. Step 3: Click “Start” Step 4: Waiting the milk finish. Step 5: Weight the milk and record in machine, click “Save”. Dr.coffee Product Maintenance Manual...
Means the time for setting to exit the screen saver function. Unit: minutes. Setting range: 1~30 minutes; For example: setting "5" minutes means that the machine will automatically exit the screen saver mode after no one is used for 5 minutes; Dr.coffee Product Maintenance Manual...
; 2) USB interface: USB 1.0 or USB 2.0; File Size: Less than 2MB; 3) U disk format: FAT or FAT32; Image Size:6 00x1024 pixels Format: png File Size: Less than 1MB; ; ; Dr.coffee Product Maintenance Manual...
Connect to U-Disk and follow the tips in the interface to import or export the parameters. Export steps: Connect to U-Disk, tap” ”, parameters export accomplished. Import steps: Connect to U-Disk, tap” ”, parameters import accomplished. Dr.coffee Product Maintenance Manual...
The format of update program is “.ipk”. The program should be move into a folder named”update_ipk” (This is the only one useful name.) 7.4.10 Function Switch Function Switch: This is where you can turn on or off the relevant functions in the menu. Click save to take effect Grounds Counter Dr.coffee Product Maintenance Manual...
Page 50
If “On”, it means that the machine can use hot water wand. If “Off”, machine can’t use hot water wand and ‘ ’icon will disappear from the interface. Hot Water Volume Set the hot water volume.Range: 0-480 Dr.coffee Product Maintenance Manual...
”icon, turn on or turn off this function.(Green means turn on, dark means turn off) Money Tube Remaining Coin Detection:Click“ ”icon, turn on or turn off this function.(Green means turn on, dark means turn off) Remaining Coin Quantity:Set range: 1-20 Dr.coffee Product Maintenance Manual...
Pull out the water storage pan and empty storage The metal terminal of the water level the waste water; pan is full detection of the water storage pan is dirty; Clean and dry the detection terminal; Dr.coffee Product Maintenance Manual...
Stir the powder in the powder box the left bonded into blocks; to the loose powder state; powder box The powder sensor is damaged; Replace the sensor with a new one; 4.1.7 Lack of powder in medium powder box Dr.coffee Product Maintenance Manual...
The left bean box sensor is damaged; Replace the induction magnet with a The induction magnet of the left installed new one; bean box is missing or damaged; in place 4.1.10 The right bean box is not installed in place Dr.coffee Product Maintenance Manual...
Replace the induction magnet with a installed The induction magnet of the medium new one; in place powder box is missing or damaged; 4.1.13 The right powder box is not installed in place Dr.coffee Product Maintenance Manual...
Replace the induction magnet of the The induction magnet of the coffee coffee machine door with a new one; machine door is missing or damaged; 4.1.16 The door of the powder feeder is not closed in place Dr.coffee Product Maintenance Manual...
150 ℃, it will prompt that please wait..."; is too high the temperature is too high; Do not make any drinks during cooling; 4.1.19 The coffee hot plate temperature is too high Dr.coffee Product Maintenance Manual...
During heating, no drinks can be is too low system, it will prompt that the made; temperature is too low; 4.1.22 The coffee hot plate temperature is too low Display prompt Reason Solution Name Dr.coffee Product Maintenance Manual...
Low ambient coffee machine, improve the ambient temperature of the coffee machine is temperature temperature and restart it after as low as 0 ℃ or below; 10 ℃~40 ℃; 4.1.25 Insufficient milk Name Display prompt Reason Solution Dr.coffee Product Maintenance Manual...
In the process of making coffee, the Check whether the external water pump pumped air, resulting in high source is used up, or the external pressure; water pipe is loose and leaking; 4.1.28 Grinder calibration Display prompt Reason Solution Name Dr.coffee Product Maintenance Manual...
In the service menu, you can Refer to the product manual or modify the threshold value of maintenance manual specific the number of cups prompted; operation methods; 4.1.31 The milk system needs to be cleaned Name Display prompt Reason Solution Dr.coffee Product Maintenance Manual...
In the service menu, you can descaling Refer to the product manual or modify the number of cups or maintenance manual specific time threshold for setting operation methods; the prompt; 4.1.34 Network exception Name Display prompt Reason Solution Dr.coffee Product Maintenance Manual...
Page 63
The network module in the coffee Turn off the coffee machine power, machine is damaged, resulting in replace the new network module, and the failure of the coffee machine restart the coffee machine; networking; Dr.coffee Product Maintenance Manual...
Replace the flowmeter with a new one; Replace the water pump with a new one; 5.1.3 Left bean grinder is abnormal Display prompt Reason Solution Name Dr.coffee Product Maintenance Manual...
The brewer is damaged; Replace the new brewer; The main control board is damaged; Replace the main control board with a new one; 5.1.6 HMI communication abnormality Display prompt Reason Solution Name Dr.coffee Product Maintenance Manual...
Replace the steam boiler with a new exceeds the alarm upper limit; one; 5.1.9 Coffee hot plate NTC abnormality Name Display prompt Reason Solution Dr.coffee Product Maintenance Manual...
The NTC temperature sensor of steam with a new one; boiler is damaged; timeout Replace the steam boiler with a new The steam boiler is damaged; one; 5.1.12 Coffee hot plate heating timeout Display prompt Reason Solution Name Dr.coffee Product Maintenance Manual...
Replace the water level probe with water make- set time of the system, it will a new one; up timeout prompt "Steam boiler water replenishing timeout" Dr.coffee Product Maintenance Manual...
The filter screen of the bubbler Use tablets for deep cleaning of is blocked; the washing and boiling system; Water leakage or damage of the Dismantle the bubbler and bubbler; reinstall it or replace it with a new one; Dr.coffee Product Maintenance Manual...
External water inlet interface Dismantle the appearance of the Water nothing leaks; machine and check the specific leakage Water leakage inside the machine; leakage position; Replace the accessories at the leakage position; Dr.coffee Product Maintenance Manual...
Remove the rear cover plate F20 coffee machine: first remove the two screws at the position shown in the red circle (as shown in Figure 1) with a T20 screwdriver, and then (as shown in Figure 2) push out the rear cover plate from top to bottom and remove it, and then remove the rear cover plate.
Step 2: Press the buckle at the position shown in the red circle (as shown in Figure 1) inwards with your fingers, and then (as shown in Figure 2) push out the side cover plate from the bottom to the top and remove it, and then remove the left side plate. Dr.coffee Product Maintenance Manual...
Page 74
Rev 00 ★ Precautions: 1. Handle with care during disassembly to avoid scratching the appearance! Dr.coffee Product Maintenance Manual...
1. Please disassemble the machine after it cools down to prevent scalding! 2. The bubbler is made of metal and weighs a lot. In the process of disassembly, you can properly use your hands to help you take it, to avoid injury! Dr.coffee Product Maintenance Manual...
Finally, take out the entire bean grinder set and complete the removal of the bean grinder set. ★ Precautions: 1. Please unplug the coffee machine before doing this! 2. Before disassembling the bean grinder, please empty the residual coffee beans and coffee powder in the bean grinder! Dr.coffee Product Maintenance Manual...
Step 2: Then use T20 to remove the two screws fixing the drive set (as shown in Figure 1), pull out the corresponding wiring plug on the main control board (as shown in Figure 2), and finally take out the drive set upwards. The drive set is removed. Dr.coffee Product Maintenance Manual...
Page 78
Rev 00 ★ Precautions: 1. When removing the metal pressing piece of the motor feedback device, use a slotted flat-blade screwdriver to gently pry up the metal pressing piece and then remove it by hand! Dr.coffee Product Maintenance Manual...
Step: First (as shown in Figure 1) pull out the connecting water pipe of the flowmeter, then pull out the harness plug upwards, then pull out the flowmeter upwards, and then remove the flowmeter. ★ Precautions: 1. Be careful during disassembly to avoid scratching fingers! Dr.coffee Product Maintenance Manual...
Step: first remove a fixing screw at the position shown in Figure 1 and pull out the water pipe; Dismantling of the beater is completed. Note: (as shown in Figure 1) Turn the core of the beater counterclockwise and pull it out to clean the beater ★ Precautions: 1. Be careful during disassembly to avoid scratching fingers! Dr.coffee Product Maintenance Manual...
Step 2: Unscrew the four screws that fix the HMI group as shown in the circle (as shown in Figure 1), and finally remove the HMI group, and then dismantle the HMI group. ★ Precautions: 1. The display screen is made of glass. Please handle it with care during disassembly to prevent glass breakage! Dr.coffee Product Maintenance Manual...
★ Precautions: 1. Please unplug the coffee machine before doing this!! 2. Please cool the machine thoroughly before disassembly to prevent scalding! 3. There is water in the boiler. Please prepare the water container in advance! Dr.coffee Product Maintenance Manual...
Figure 2; Step 2: unscrew the fixing nut of the three-way milk valve at the position shown in Figure 1, and remove the milk valve. ★ Precautions: 1. Be careful during disassembly to avoid scratching fingers! Dr.coffee Product Maintenance Manual...
Step: First (as shown in Figure 1) pull out the four wiring plugs of the inlet valve group, and then pull out the three connecting water pipes, and then (as shown in Figure 2) loosen the bottom screws and press the snap, take out the inlet valve group, and disassemble the inlet valve group. ★ Precautions: Dr.coffee Product Maintenance Manual...
Page 86
Rev 00 1. Be careful during disassembly to avoid scratching fingers! Dr.coffee Product Maintenance Manual...
Figure 2) unplug the corresponding water pipe plug and wiring plug on each solenoid valve, and then remove the steam/ice coffee solenoid valve group. ★ Precautions: 1. Be careful during disassembly to avoid scratching fingers!! Dr.coffee Product Maintenance Manual...
Step: First loosen the two screws at the position shown in Figure 1, then remove the solenoid valve, and then (as shown in Figure 2) unplug the corresponding water pipe plug and wiring plug on the solenoid valve, and then remove the steam boiler water supply solenoid valve. ★ Precautions:: 1. Be careful during disassembly to avoid scratching fingers! Dr.coffee Product Maintenance Manual...
Step 1: First press the snap at the position shown in the red circle with your fingers inward (as shown in Figure 1), then (as shown in Figure 2) push out the side cover plate from the bottom to the top and remove it, and then remove the left side plate. Dr.coffee Product Maintenance Manual...
步 Step: First (as shown in Figure 1) pull out the two water pipes and plug wires connecting the flow meter in the direction of the arrow, and then (as shown in Figure 2) pull out in the direction of the arrow to complete the removal of the flow meter. ★ Precautions: Be careful during disassembly to avoid scratching fingers! Dr.coffee Product Maintenance Manual...
The removal of the powder feeding motor set is completed. ★ Precautions 1. Please unplug the power plug of the powder machine before performing this operation! 2. Be careful during disassembly to avoid scratching fingers! Dr.coffee Product Maintenance Manual...
Step 2: Unplug the quick-insert connector at the position shown by the red arrow (as shown in Figure 1), remove the fixing screws at the position shown in Figure 2 and 3), and disassemble the diaphragm pump; Dr.coffee Product Maintenance Manual...
Page 93
Rev 00 ★ Precautions: 1. Please unplug the power plug of the powder machine before performing this operation! 2. There may be residual water in the pipeline. Please prepare the water container in advance! Dr.coffee Product Maintenance Manual...
Step 1: First loosen the fixing screws of the boiler (as shown in Figure 1), then (as shown in Figure 2) pull out the wire plug and outlet pipe connector, and (as shown in Figure 3) pull out the NTC connector of the powder boiler; Dr.coffee Product Maintenance Manual...
Step: First pull off the hose on the beverage outlet of the blender (as shown in Figure 1), then (as shown in Figure 2) rotate the lock anticlockwise, and then (as shown in Figure 3) pull out the blender. The left and right blenders are removed in the same way, and the blender is removed. Dr.coffee Product Maintenance Manual...
Page 96
Rev 00 ★ Precautions: This item is only available for P30 models 1. In order to prevent powder from falling, please remove the powder silo before disassembly! Dr.coffee Product Maintenance Manual...
1. Please disassemble the machine after it cools down to prevent scalding! 2. The bubbler is made of metal and weighs a lot. In the process of disassembly, you can properly use your hands to help you take it, to avoid injury! Dr.coffee Product Maintenance Manual...
1. When installing the bubbler, please pay attention to that first place the bubbler on the platform of the card holder, and then push the card holder to lock it in place! 2. The bubbler is made of metal and weighs a lot. In the process of disassembly, you can properly use your hands to Dr.coffee Product Maintenance Manual...
Page 99
Rev 00 help you take it, to avoid injury! Dr.coffee Product Maintenance Manual...
★ Precautions: This item is only available for F22 models 1. Before reinstalling, please be sure to wipe the water from the filter sponge and the powder guide completely! Dr.coffee Product Maintenance Manual...
Step 2: (as shown in Figure 1) Install the mixing gear plate back, note that the two gear plates are opposite, and then (as shown in Figure 2) install the powder box cover back, and the installation of the powder bin is completed. Dr.coffee Product Maintenance Manual...
3. Clean the slag box: wash and wipe the slag box with flowing water (as shown in Figure 7); ★ Precautions: 1. When cleaning the coffee machine, do not put any parts into the dishwasher! 2. Do not remove stains or coffee grounds with metal or sharp objects! Dr.coffee Product Maintenance Manual...
After the machine is shut down and out of use every day, please drain and clean the coffee grounds and waste water in the machine; To ensure the quality of coffee, it is recommended to clean the water tank and replace the water in the water tank Dr.coffee Product Maintenance Manual...
Page 104
Rev 00 every day; If the machine with external water supply is used, please do not use the machine after the external water supply is stopped. Dr.coffee Product Maintenance Manual...
Page 105
Rev 00 Suzhou Dr.Coffee System Technology Co., Ltd No.3 Building,No.55 Taishan Road, New District, Suzhou ,Jiangsu,China,215151 Zip code : 215163 hot line : 400-897-7711 website : www.dr-coffee.com Dr.coffee Product Maintenance Manual...
Need help?
Do you have a question about the F20 and is the answer not in the manual?
Questions and answers