
Subscribe to Our Youtube Channel
Related Manuals for Dr.coffee M12


Summary of Contents for Dr.coffee M12
- Page 1 Dr.coffee M12 Service Manual (Version:V01) ❖ Applied Model: M12 Series Due to product upgrades, there may be differences between the pictures and the actual products please refer to real object. Dr.coffee Service Manual...
-
Page 2: Table Of Contents
Machine Risky ........................................8 STRUCTURE INTRODUCTION ..............................9 Overview............................................9 Internal Components Overview ....................................10 SCHEMATIC CIRCUIT ................................12 M12 Main Control Board Circuit ....................................12 M12 Power Board Circuit ......................................13 TECHNICAL DATA ................................. 14 5.1.1 Capacity ..........................................14 5.1.2... - Page 3 7.4.5 Business Setting ......................................... 38 7.4.5.1 Payment Settings ............................................38 7.4.5.2 Mode Selection ............................................38 7.4.5.3 Monetary Unit ............................................. 38 7.4.5.4 LOGO Setting ............................................... 39 7.4.5.5 Startup Picture Setting ..........................................39 7.4.5.6 Screen Saver Picture Setting......................................... 39 Dr.coffee Service Manual...
- Page 4 Milk Deep Clean ......................................... 49 8.1.19 Descaling Required ......................................50 8.1.20 No Network ........................................50 TROUBLE SHOOTING ................................51 Error with Tips in the Screen ......................................51 9.1.1 Water Supply Error......................................51 9.1.2 Steam Thermo Block Water Supply Error ................................51 Dr.coffee Service Manual...
- Page 5 MAINTENANCE ................................... 72 11.1 Milk Frother Cleaning ........................................72 11.1.1 Method for Disassembling Milk Frother ................................72 11.1.2 Method for Installing Milk Frother ..................................72 11.2 Milk Pipe Cleaning ........................................73 11.2.1 Method of Milk Pipe Dissembling ..................................73 Dr.coffee Service Manual...
- Page 6 Rev 0.1 11.2.2 Method of Milk pipe connection ..................................73 DAILY USE AND MAINTENANCE CONSIDERATIONS ......................74 Dr.coffee Service Manual...
-
Page 7: Safety Instructions
In self-service, check for possible allergenic products listed on the coffee machine; ❖ In self-service, check for possible allergenic products with professional person. There is risky of getting poison by touching cleaning powders. Do follow below points: Dr.coffee Service Manual... -
Page 8: Machine Risky
❖ New hose kit (drinking water/waste water hose) supplied with the machine should be used, and do not use old hoses. Dr.coffee Service Manual... -
Page 9: Structure Introduction
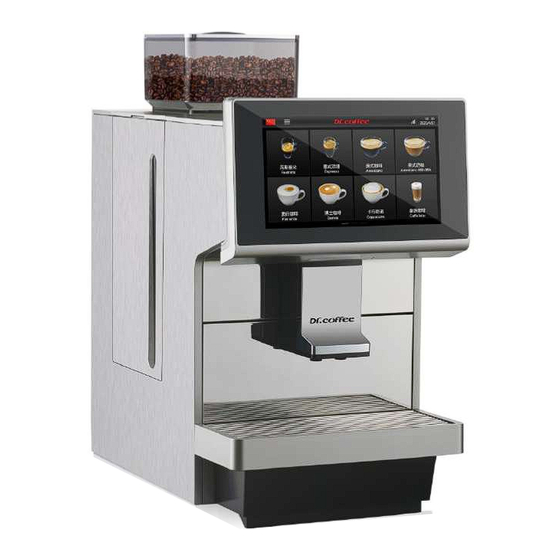
Rev 0.1 Structure Introduction Overview (M12 Plus Front Side) Beans Hopper Water Tank Cover Screen Drinks Outlet Stainless steel Drip Tray Base (M12 Plus Back Side) Switch Socket Water Inlet Tube Drain Pipe Dr.coffee Service Manual... -
Page 10: Internal Components Overview
Steam Magnetic Valve Pump Group Magnetic Valve Pressure Valve Group Front Panel Assembly Body Support Pressure Regulating Valve Brewer Pressure Release Valve Water Inlet Valve Group Flow Meter 1# Base Support Magnetic Valve Water Inlet Assembly Flow Meter 2# Dr.coffee Service Manual... - Page 11 Rev 0.1 Adjust Gear Grinder Main Board Power Board Waste Water Sensor 2# Transformer Dr.coffee Service Manual...
-
Page 12: Schematic Circuit
Rev 0.1 Schematic Circuit M12 Main control board circuit Accumulated motor Reserved 24V interface Pressure relief valve stepper motor HMI connection line Transmission motor Reserved port Connection line DC 24V input line Drip tray detection reed pipe connection line Pinch valve power cord... -
Page 13: M12 Power Board Circuit
Rev 0.1 M12 Power Board Circuit Steam Thermobloak FireWire L Coffee Thermobloak FireWire L Power Firewire L 1# Transformer Line AC 20v 2# Transformer Line AC 20v Power neutral N Dr.coffee Service Manual... -
Page 14: Technical Data
Grounds container capacity 70pcs(10g/pc) Drip Tray About 1.5L 5.1.2 Technical sheet Model M12 Big M12 Plus M12 Big Plus Rated Voltage 220v-240v AC~50/60Hz Rated Power 2900W Plumbing Type G3/4’ to G3/8’ 150cm flexible metal tube Water Pressure Range No pressure Max. -
Page 15: Screenshot Description
Turned on: The name of beverage at the first line is in language set in the menu, the second line is in English. . Turned off: The name of beverage is in language set in the menu only. Dr.coffee Service Manual... -
Page 16: Menu
Tap “Brewer Rinse” to see the interface above “Back or OK” for your choice, machine will proceed to rinse process if no response in 5 seconds. Tap “Brewer Rinse” and hold for 3 seconds entering “Brewer Deep Clean” (see details in user manual) 6.3.2 Milk rinse Dr.coffee Service Manual... -
Page 17: One-Button Maintenance
Tap “Milk Rinse” to see the interface above “Back or OK” for your choice, machine will proceed to rinse process if no response in 5 seconds. Tap “Milk Rinse” and hold for 3 seconds entering “Milk Deep Rinse” (see details in user manual) 6.3.3 One-Button Maintenance Dr.coffee Service Manual... -
Page 18: Service Menu
Wipe Protect Tap “Wipe Protect”, there will be only words “Wipe Protect” with 10 seconds counting down for display wiping. Tap “Wipe Protect” and hold for 3 seconds to enter “Descaling” process. (See details in user manual) Dr.coffee Service Manual... -
Page 19: Information
Total Cup: The quantity of cups under the condition selected (The amount of each kind of beverage is available) Maintenance records Maint. Records: The times amount of maintenance; Soft. Version Mainboard Version: Current Software Version Info of Mainboard; Dr.coffee Service Manual... -
Page 20: Power Off
Tap “Power Off” to see the interface above “Back or Power off” for your choice, machine will proceed the process if no response in 10 seconds. Start rinsing process before power off Tap “Confirm”, start rinsing automatically, screen turned off and power off (press more than 5 seconds to wake up machine) Tap “Return”, return to top level automatically. Dr.coffee Service Manual... -
Page 21: Service Menu
Secondary Password: Secondary level, limited access to Service Menu (Including Drinks Setting, Maintenance, Machines Setting, default password is 1709) Tertiary Password: Tertiary level, limited access to Service (Drinks Setting only default password is 1609) Step 3: Service Menu Interface; Drinks Setting Drinks Setting: Tap the picture of beverage to modify the parameters. Dr.coffee Service Manual... -
Page 22: Drinks Position Changing
” then tap the aim position. Click the image of the drink that needs to be exchanged to accomplish the position exchange of the two drinks. 7.1.2 Delete Drinks Tap” ” to the interface to see the interface below. ❖ Cancel: Cancel this process ❖ Delete this beverage. Dr.coffee Service Manual... -
Page 23: Drinks Parameters Setting
Tap “SAVE”. Picture changing accomplished. ❖ Requirements for U-Disk: ➢ Memory Capacity: No more than 32GB; ➢ Port: USB 1.0 or USB 2.0; ➢ Format : FAT or FAT32; ➢ Pictures should be under Root Directory of U-Disk Dr.coffee Service Manual... -
Page 24: Payment
The weight of this data is calculated according to the “factory default setting”. The data is the experimental value for reference only. If the difference is subject to actual conditions.(Tolerance: ±1g): Comparison Table Grounds Gram 7g-8g 9g-10g 11g-12g 13g-14g 15g-16g Dr.coffee Service Manual... -
Page 25: Pre-Brewing(S)
Unit:S. Setting range: Refer to the prompt on the screen value input interface. 7.1.3.20 Extraction Control Set the extraction control for making drinks. Setting Range: standard; strong; extra strong 7.1.3.21 Temperature Range The temperature for making drinks adjustable:High;Medium;Low Dr.coffee Service Manual... -
Page 26: Order
Back to the previous menu. 7.1.4 Create new beverage Tap” ” to create a new beverage; First step: Follow the instructions on the screen, set the parameters in the required options, define the order of beverages, and then save; Dr.coffee Service Manual... -
Page 27: Maintenance
Re-enter the "Drinks Setting" menu, unlock the newly created drink, set the drink picture, and save the detailed content inside. ❖ Remarks:Save the parameters of "small cup", "medium cup" and "large cup" in the " cup type selection" option.(Otherwise, it may happen that the beverage cannot be prepared normally due to incomplete beverage parameters.) Maintenance Dr.coffee Service Manual... -
Page 28: Brewer Deep Clean
Use professional cleaning tables to do deep clean. Follow the instruction to finish this process. ❖ See details in User Manual. 7.2.3 Descaling Use professional cleaning powder to do descaling. Follow the instruction to finish this process. ❖ See details in User Manual. 7.2.4 Water Draining Dr.coffee Service Manual... -
Page 29: Filter
Replace the Filter:Indicates the operation of replacing the filter element. After clicking "Replace the filter element, the screen will prompt the operation steps to replace the filter element. Cancel the Filter:Indicates to cancel the filter function Filter replacement cycle comparison table:: Water hardness setting 0-75ppm 76-150ppm 151-300ppm >300ppm Filter replacement cycle 400L 300L 200L 100L Dr.coffee Service Manual... -
Page 30: Machine Setting
Brewer Deep Clean Setting (Cups) This indicates how many cups of coffee to make; the machine will automatically prompt you to use the tablets for deep cleaning of the brewing system. Dr.coffee Service Manual... -
Page 31: Time/Date
This indicates the date the coffee machine system is set. Setting Choice: year, month, date. 12/24H This indicates the system for setting the time of the coffee machine system. Setting Choice: 12-hour, 24-hour 7.3.3 Unit Unit: Different units can be selected as needed. Tap “Save” to effect. Dr.coffee Service Manual... -
Page 32: Password
Secondary Password: Secondary level, limited access to Service Menu (Including Drinks Setting, Maintenance, Machines Setting, default password is 1709) Tertiary Password: Tertiary level, limited access to Service (Drinks Setting only default password is 1609) 7.3.5 RGB Setting RGB Setting: Settings of RBG lights. Dr.coffee Service Manual... -
Page 33: Temperature Control Setting
Coffee American Model: Indicates that the temperature control of the steam thermo block has been maintained at the same temperature as the coffee thermo block when the coffee machine is in normal operation or standby state; 7.3.7 Network Setting Network setting:Turn on or Turn off network here. Dr.coffee Service Manual... -
Page 34: Auto Power On/ Off
Click”+”, add automatic on/off time setting. Power-on and power-off setting can be increased by 7 respectively 7.3.9 ECO Mode ECO Mode: In this item, you can choose to turn on or off any of the modes. Tap “Save” to effect. Dr.coffee Service Manual... -
Page 35: Grid Connection
16A mode:Two Thermo-blocks can work at the same time (when making drinks: coffee and milk come out at the same time) 10A mode:Two Thermo-blocks cannot work at the same time (when making drinks: coffee and milk cannot come out at the same time) Dr.coffee Service Manual... -
Page 36: Eng. Setting
Grinding Index: The grinding amount of the grinder can be calibrated. Tap “Save” to effect. About Grounds Calibration: It is the multiple of the Grounds set in drink setting. Set Choice: 0.7~1.3; Default: 1.0 Grounds Gram 7g~8g 9g~10g 11g~12g 13g~14g 15g~16g Dr.coffee Service Manual... -
Page 37: Water Supply
(Note: The actual supply way should be the same with the setting in the machine.) 7.4.4 Factory Setting Factory Setting:Restore the relevant parameters of the coffee machine to the factory default values. Click Save to take effect after restarting the coffee machine. Dr.coffee Service Manual... -
Page 38: Business Setting
Unadjustable Mode:During making beverage, the process cannot be cancelled and the amount of the current drink cannot be adjusted. ( , “ ” , ) Adjustable Mode:During making beverage, you can click Cancel at any time to adjust the amount of the current drink; In the mode click Pop-up adjustment interface Dr.coffee Service Manual... -
Page 39: Monetary Unit
File Size: Less than 1MB; Step 2: Tap the picture to replace, Tap “Save”. Screen Setting changing accomplished. 7.4.5.7 Enter Screen Saver Setting (min) Unit:Minute Range:1~10min; For Example: If set”5 min.” means the Screen Saver will show up. Dr.coffee Service Manual... -
Page 40: Exit Screen Saver Setting (Min)
Memory Capacity: No more than 32GB ; ; Image Size: 764x500 pixels Format: png File Size: Less than 2MB; ➢ Port: USB 1.0 or USB 2.0;(USB 3.0 is not available temporarily ) ➢ Format : FAT or FAT32; Dr.coffee Service Manual... -
Page 41: Parameters Import & Export
Engineer Param. Connect to U-Disk and follow the tips in the interface to import or export the parameters. Export steps: Connect to U-Disk, tap” ”, parameters export accomplished. Import steps: Connect to U-Disk, tap” ”, parameters import accomplished. Dr.coffee Service Manual... -
Page 42: Daily Record
Port: USB 1.0 or USB 2.0;(USB 3.0 is not available temporarily ) ➢ Format : FAT or FAT32; ➢ The format of update program is “.ipk”. The program should be move into a folder named”update_ipk” (This is the only one useful name.) Dr.coffee Service Manual... -
Page 43: Function Switch
If choose“Off” ,it will prompt: “The milk system failure caused by turning off this option is not covered by the warranty. It is recommended to turn on this function.” Time of Mandatory Cleaning Setting The time to remind the milk to be cleaned regularly every day. Default: 18:30 Setting Choice: 00:00~23:59 Dr.coffee Service Manual... -
Page 44: Warning
Showing in the Screen Cause Solutions ➢ The coffee beans in the bean box have Add the appropriate amount of coffee been used up; beans; ➢ Beans stick together ; Mix the beans to avoid sticking together; Dr.coffee Service Manual... -
Page 45: Drip Tray Is Not In Place
This function is only available for customized models Showing in the Screen Cause Solutions ➢ Remove the waste water bucket and Waste water bucket is full empty the water; The sensor is dirty; ➢ Dry up the detective sensor Dr.coffee Service Manual... -
Page 46: Coffee Thermo Block Over-Heated
Wait, as the tips in the Scree “The coffee thermo block is heating up, please Temperature of it is lower than set. wait ...”; ➢ While the coffee thermo block is heating up, no beverage could be made. Dr.coffee Service Manual... -
Page 47: Steam Thermo Block Is Too Low
8.1.12 Environment Temp. Is Too Low Showing in the Screen Cause Solutions ➢ Please power on the machine when the The temperature of the environment is 0℃ temperature of environment is 10 ℃ ~ or lower; 40℃. Dr.coffee Service Manual... -
Page 48: Lack Of Water
It will alarm at the 2000 cup, 7000 cup, ➢ Tap “Later” to ignore, but the yellow 17000 cup, 27000 cup… and so alarm icon will appear at the top on on.( every 10 thousand cups) interface; Turn off, will not alarm. Dr.coffee Service Manual... -
Page 49: Brewer Check Up
Reach the set value, it will alarm “Milk Follow the screen instructions, enter the Deep Clean” service menu bar, find the corresponding The amount of cups could be set in function menu, and perform Milk Deep Maintenance Setting Clean. Dr.coffee Service Manual... -
Page 50: Descaling Required
The network module in the coffee machine the power and restart. is damaged, causing the coffee machine to ➢ Turn off the power and replace new fail to connect to the Internet; network module, then restart machine. Dr.coffee Service Manual... -
Page 51: Trouble Shooting
The Grinder is blocked or overloaded; or something hard in it and remove; The Grinder damages; ➢ Replace a new Grinder; Power PCB damages; ➢ Replace a new Power PCB; Hall sensor group damages; ➢ Replace Hall Sensor. 9.1.4 Brewer System Error Dr.coffee Service Manual... -
Page 52: Hmi Communication Error
➢ Switch off the machine and restart after 30 NTC damages; minutes for cooling down; The temperature is over 180℃; ➢ Replace a new Coffee Thermo Block; 9.1.7 Steam Thermo Block NTC Error Dr.coffee Service Manual... -
Page 53: Coffee Thermo Block Heating Overtime
➢ Replace a new NTC temperature sensor; NTC sensor damages; ➢ Replace a new Steam Thermo block; Steam thermo block damages; 9.1.10 Hot Water Thermo Block Heating Overtime Dr.coffee Service Manual... -
Page 54: Error Without Tips In The Screen
The inlet of Air Intake Valve is blocked; ➢ The pipe of Air Intake Valve is blocked; Check the inlet and the pipe of Air Intake The Air Intake Valve damages; Replace a new Air Intake Valve. Dr.coffee Service Manual... -
Page 55: No Coffee
Check if the connector is loosed; Leaking at the inlet connector of machine to ➢ Dissemble the cover of machine and find out Tap water ; the place leaking; Leaking inside of machine; ➢ Replace the parts leaking; Dr.coffee Service Manual... -
Page 56: Disassembly & Assembly
Rev 0.1 10 Disassembly & Assembly 10.1 Tools Screwdriver (T10) Screwdriver (T20) Millimeter Flat Screwdriver (3.2mm 口径) Thermometer Long nose pliers Electronic weigher Dr.coffee Service Manual... -
Page 57: General Disassembly
Step1: Remove Beans Container Cover, and remove positioned screws with T10 。 Beans Container Step2:Push(Same as Pic. 3)the 8 positions, (same as pic.4) pull it up. Upper Panel ★ NOTE: Handle with care during disassembly to prevent scratches! Dr.coffee Service Manual... -
Page 58: Disassemble Rear Panel
Step 2: (Same as pic.1)push the side cover from the bottom up and remove it, and remove the left side panel. ★ NOTE: Handle with care during disassembly to prevent scratches! Dr.coffee Service Manual... -
Page 59: Disassemble Brewer Unit
Step1:Remove screws with T10(same as pic.1) ,to push the arrow position and take out the baffle ; Step2:Unplug(pic.4)pipe and plug,Remove screw with T20(pic.5) ,take out the brewer, over。 ★ NOTE: 1. Please remove after cooling down to prevent scald! 2. Make sure the screws in correct position. Dr.coffee Service Manual... -
Page 60: Disassemble Pressure Releasing Valve
Step3:Grasp the pressure relief valve block with your hand and pull out the pressure relief valve group in the direction indicated by the arrow (Figure 1). Disassemble the group. ★ Attention: 1、Please cool down the machine before disassembling to prevent burns! Dr.coffee Service Manual... -
Page 61: Disassemble Drive Motor Group
Rev 0.1 10.2.4 Disassemble Drive Motor Group Step 1:Remove(Pic.1)plug here; Step2:Remove the 2 screws with T20(pic.2) ,grab drive motor group push down and take out. ★ Attention: 1、 Please cool down the machine before disassembling to prevent burns! Dr.coffee Service Manual... -
Page 62: Disassemble Pinch Valve
Step1: (Pic.1,2)Unplug all the lines here, take out the connector and unplug milk pipes. Step 2:Remove the 3 screws with T10(Pic.4) ,take out pinch valve and unplug all the pipes here(pic.5). ★ Attention: 1、 Be careful during the disassembly process to prevent scratching your fingers! Dr.coffee Service Manual... -
Page 63: Disassemble Magnetic Valve Group
Step2: (Pic.3)Unplug all the pipes here. ★ Attention: 2、 Be careful during the disassembly process to prevent scratching your fingers! 3、 Take a picture before unplug all pipes in case don’t know how to put it back. Dr.coffee Service Manual... -
Page 64: Disassemble Pump Group
Step 1:[Steam Pump](Pic.1)Remove the spring clip and pull out the water pipe, (pic.2)remove this way, (pic.3)take out water inlet pipe; Step2: (Pic. 4)Unplug the lines. ★ Attention: 1、Be careful during the disassembly process to prevent scratching your fingers! Dr.coffee Service Manual... -
Page 65: Disassemble Flow Meter
Step:First pull out the water guide cover (can be picked up with a screwdriver), then pull up the water guide and unplug the connected water pipe. Disassemble the water inlet valve ★ Attention: 1、Be careful during the disassembly process to prevent scratching your fingers! 2、There may be residual water in the pipe. Please prepare the water container in advance! Dr.coffee Service Manual... -
Page 66: Disassemble Grinder Group
Step3: (Pic.5)Grab the parts of the grinder by hand, take out the whole grinder group upwards, and disassemble the grinder group. ★ Attention: 1、Be careful during the disassembly process to prevent scratching your fingers! 4、 Before removing the grinder group, please empty the residual coffee beans and coffee powder in the grinder! Dr.coffee Service Manual... -
Page 67: Disassemble Thermo Block
★ Attention: 1、Unplug the coffee machine before doing this! 2、Be careful during the disassembly process to prevent scratching your fingers! 5、 Please disassemble the coffee machine after it has cooled down completely, beware of burns.! Dr.coffee Service Manual... -
Page 68: Disassemble Water Inlet Valve
Rev 0.1 10.2.12 Disassemble Water Inlet Valve Step1:Unscrew with T10. Step2:Unplug(pic.3)the wire. Step3:Unplug(Pic.5)plug and pipes; Step4: (Pic7)Push this position,and push water inlet valve to right. Push ★ Attention: 1、 Unplug the coffee machine before doing this! Dr.coffee Service Manual... -
Page 69: Disassemble Power Pcb
★ Attention: 1、Unplug the coffee machine before doing this! 2、 When pulling the cable plug, please press the buckle first and then pull the plug to prevent the terminal from being broken! Dr.coffee Service Manual... -
Page 70: Disassemble Front Panel Group
Step4:Remove the 4 screws with T10(pic.8) ,pull out the plug,make the coffee outlet group is separated from the display group. ★ Attention: 1、The display is made of glass. Please take it lightly during the disassembly process to prevent the glass from breaking! Dr.coffee Service Manual... - Page 71 Rev 0.1 3、 There may be residual water in the pipe, please prepare a water container in advance! Dr.coffee Service Manual...
-
Page 72: Maintenance
Steps: press the milk froth in the connector and silicone parts pull out, take to the next tap rinse and then assembled back into the machine. ★ NOTE: 1. Please be sure to install the installation in place, otherwise it may cause, do not milk foam or milk foam device off the risk! Dr.coffee Service Manual... -
Page 73: Milk Pipe Cleaning
★ NOTE: 1. Do not break the Milk Pipe while assembling, or milk could not be sucked. 2. Do not squeeze the Milk Pipe narrowly when assembling, or milk could not be sucked. Dr.coffee Service Manual... - Page 74 After one day using, please empty coffee grounds and waste water of the machine and clean the machine. To ensure the quality of the coffee, we recommend daily water tank clean and water exchanging. If linked with tap water, drink making is forbidden while the water supply stopped. Dr.coffee Service Manual...
- Page 75 Rev 0.1 Suz ho u Dr. Cof fee Syste m Tech no logy Co. , Ltd Address:No.3 Building,No.55 Taishan Road, New District, Suzhou ,Jiangsu,China Post Code:215163 Tel:400-897-7711 Website:www.dr-coffee.com Dr.coffee Service Manual...
Need help?
Do you have a question about the M12 and is the answer not in the manual?
Questions and answers