Advertisement
Quick Links
Advertisement

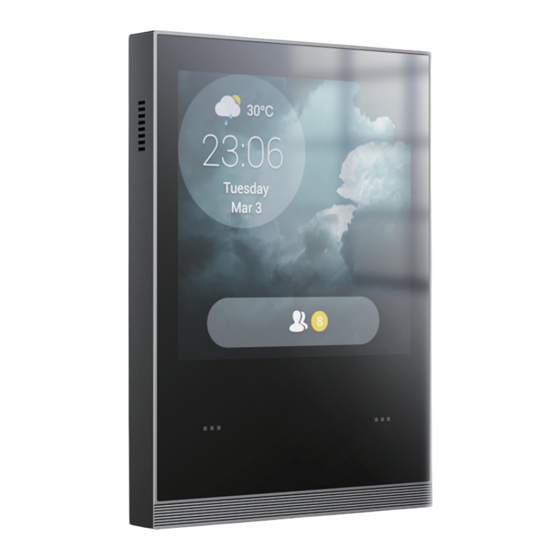
Summary of Contents for akubela HyPanel Plus
- Page 1 Installation Guide For HyPanel Plus Smarter Home Sweeter Life...
- Page 2 Welcome! This guide applies to PS52-R2-EU model of HyPanel Plus. Contents...
- Page 3 Your first time installing this product may take up to 30 minutes. Your first time installing this product may take up to 30 minutes. You’ ll get faster after each installation. You’ ll get faster after each installation.
- Page 4 Warning! The installation procedure involves handling high voltage wiring. Please be careful. To avoid serious personal injury, death, or property damage, turn OFF the power to the circuit and follow all safety precautions before proceeding. Working with electricity can be dangerous. If you are unsure about, or uncomfortable with the installation, seek the help of a qualified electrician.
- Page 5 Flush Mounted Module HyPanel Plus H2 Hex Key M3x20mm Phillips Self Tapping Screw M4x20mm Phillips Machine Screw...
- Page 6 Product dimensions 51.3 86.0 46.5 34.7 11.8 120.0...
- Page 7 Working space Make sure HyPanel Plus is compatible with the location where you want to install it. 50mm 40mm HYPANEL FRONT VIEW A ��mm(� inches) deep electrical box is highly recommended for ease of installation. In some scenarios, especially when the wires can be...
- Page 8 180~260VAC/ 50Hz power required If you are in the ���V country or region, you have to use an isolation transformer to step up ���V voltage to ���~���V before it can be used for HyPanel Plus.
- Page 9 A neutral wire is required for the device to function properly. Support Wi-Fi and Ethernet connections HyPanel Plus can operate with both wireless and wired networks, but we highly recommend using wired networks if you wish to remotely control the device via the BelaHome app or perform...
- Page 10 Warning! Turn OFF the circuit breaker before wiring and proceeding! Always use a voltage detector to verify the power is OFF before wiring and installation!
- Page 11 A Neutral wire (N) typically comes from the wall. The Line wire (L) provides ���-��� Volts of power to the HyPanel Plus. L� and L� are Load wires that connect HyPanel Plus to light bulbs or other devices, e.g., fans and curtain motors.
- Page 12 Connect wires Strip and straighten wires Wires connected to HyPanel Plus should be �.�mm²~ �.�mm²in size and have stripped and straight ends. Remove the plastic sheathing of the wire, and make sure the exposed wire ends measure approximately � mm (�/�� inch) in length.
- Page 13 Connect all wires Always make sure the arrow on the front of the flush mounted module is pointing up.
- Page 14 Plug the wires to the corresponding terminals on the back of the flush mounted module. Tighten screws clockwise with a flat-head screwdriver until wires are secure. RJ45 Double check by gently tugging on each wire. Plug the RJ�� network cable to the Ethernet port if you need to use the wired network.
- Page 15 Select screws Select proper screws fitting your Turn the screws clockwise with electrical box. a screwdriver. Change the torque on the electric Do not fully tighten the screws. screwdriver to �kgf.cm. The screw head must protrude at least � mm (�/� inch) from the wall surface.
- Page 16 Test Connected Devices Turn on the circuit breaker to provide power to the flush mounted module. Press the button on the module to check if the connected devices can work properly. Press the button once, the device connected to L�will be turned on/off . Double-press the button, the device connected to L�...
- Page 17 Install Flush Mounted Module Attach the flush mounted module to the electrical box. The screws should go through the holes on the module. Adjust the module to be level and ensure it is flush against the wall. Tighten the screws to attach the module to the wall, taking care not to over-tightened them.
- Page 18 Install Panel WARNING ! Turn OFF the circuit breaker before you install the panel. Line up the two clips on the flush mounted module with the notches on the panel. Snap the panel into place and press it down.
- Page 19 Install Panel WARNING ! Turn OFF the circuit breaker before you install the panel. Check the panel is properly clipped onto the module and is flush against the wall. Locate the screw hole on the bottom of the panel. There is a screw already in it. ighten the screw with the included H�...
- Page 20 If you need to remove the panel �.Turn the screw with the hex key until the bottom edge of the panel comes loose. �.Press one hand above the panel on the top, and then grab and pull out the panel with the other hand from the bottom edge.
- Page 21 You are done with the HyPanel installation! Start your smart home journey with Akubela now! For help or more assistance, contact us at: https://ticket.akuvox.com/ For videos, guides, and additional product formation, visit us at: https://knowledge.akuvox.com...
- Page 22 YS51000029...


Need help?
Do you have a question about the HyPanel Plus and is the answer not in the manual?
Questions and answers