Advertisement
Quick Links
Advertisement

Related Manuals for Grindex Senior 8110.281


Summary of Contents for Grindex Senior 8110.281
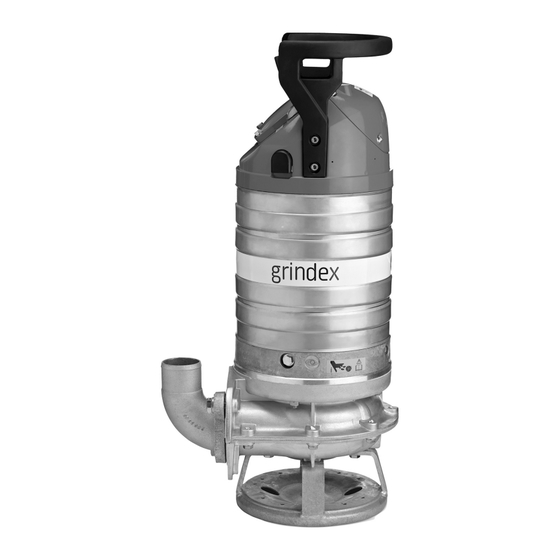
- Page 1 Installation, Operation, and Maintenance Manual 883984_5.0 8110.281 Senior...
- Page 3 Table of Contents Table of Contents 1 Introduction and Safety......................3 1.1 Introduction........................3 1.2 Safety terminology and symbols..................3 1.3 User safety........................4 1.4 Special hazards......................4 1.4.1 Working in temporary installations................4 1.4.2 Biological hazards....................4 1.4.3 Wash the skin and eyes..................5 1.5 Protecting the environment....................5 1.6 End-of-life product disposal...................
- Page 4 Table of Contents 6 Maintenance........................23 6.1 Precautions........................23 6.2 Maintenance guidelines....................23 6.3 Torque values......................24 6.4 Service.........................25 6.4.1 Inspection......................25 6.4.2 Overhaul....................... 26 6.5 Change the oil......................26 6.6 Replace the impeller....................27 6.6.1 Remove the impeller..................... 28 6.6.2 Install the impeller....................29 7 Troubleshooting......................... 31 7.1 General precautions....................
- Page 5 This includes any modification to the equipment or use of parts not provided by Grindex. If there is a question regarding the intended use of the equipment, please contact a Grindex representative before proceeding.
- Page 6 1 Introduction and Safety Special symbols Some hazard categories have specific symbols, as shown in the following table. Electrical hazard Magnetic fields hazard Electrical Hazard: CAUTION: 1.3 User safety All regulations, codes, and health and safety directives must be observed. The site •...
- Page 7 • Clean-up of spills Exceptional sites CAUTION: Radiation Hazard Do NOT send the product to Grindex if it has been exposed to nuclear radiation, unless Grindex has been informed and appropriate actions have been agreed upon. 1.6 End-of-life product disposal Handle and dispose of all waste in compliance with local laws and regulations.
- Page 8 2 Transportation and Storage 2 Transportation and Storage 2.1 Examine the delivery 2.1.1 Examine the package 1. Examine the package for damaged or missing items upon delivery. 2. Record any damaged or missing items on the receipt and freight bill. 3.
- Page 9 2 Transportation and Storage 2.3 Temperature ranges for transportation, handling and storage Handling at freezing temperature At temperatures below freezing, the product and all installation equipment, including the lifting gear, must be handled with extreme care. Make sure that the product is warmed up to a temperature above the freezing point before starting up.
- Page 10 Standard Ex-proof MSHA Drainage Sludge version Senior 8110.281 3.2 Pump design The pump is submersible, and driven by an electric motor. Intended use The product is intended for moving waste water, sludge, raw and clean water. Always follow Technical Reference the limits given in on page 37.
- Page 11 3 Product Description • The level regulator can be set at different operating levels by adjusting the length of cable. • A clamping bracket situated at the lifting handle holds the level regulator cable in place. • If continuous pumping is required, the level regulator can be placed in a special rubber bracket on the discharge connection to eliminate the level regulator function.
- Page 12 3 Product Description 3.5 Motor regulation This product is submersible and therefore exempted from the motor efficiency requirement, in accordance with EU commission regulation 2019/1781 Article 2(2)(e). 8110.281 Senior Installation, Operation, and Maintenance Manual...
- Page 13 4 Installation 4 Installation 4.1 Precautions Before starting work, make sure that the safety instructions have been read and understood. DANGER: Electrical Hazard Before starting work on the unit, make sure that the unit and the control panel are isolated from the power supply and cannot be energized.
- Page 14 4 Installation Figure 1: Settling pump-sump Discharge line requirements The discharge line can be run vertically or horizontally, but must be without sharp bends. Proper horizontal and vertical installation Improper installation with a sharp bend Fasteners • Only use fasteners of the correct size and material. •...
- Page 15 4 Installation Check the Make sure that the phase sequence is correct. For more information, see phase sequence: Pumps with built-in motor protection on page 19. 4.4 Make the electrical connections 4.4.1 General precautions DANGER: Electrical Hazard Before starting work on the unit, make sure that the unit and the control panel are isolated from the power supply and cannot be energized.
- Page 16 4 Installation Motor and short-circuit protection NOTICE: A qualified electrician must select the size of motor protection breakers and fuses. The size must be chosen for the specific motor data such as rated current and starting current. It is important that the short-circuit protection is not over-dimensioned. Over-dimensioned fuses or motor protection breakers decrease the protection for the motor.
- Page 17 4 Installation Ground (earth) conductor length The ground (earth) conductor must be longer than the phase conductors in the junction box of the unit. The table shows how much longer, than the phase conductors, the ground (earth) conductor must be. Pump Extra length of ground conductor 8110.281...
- Page 18 4 Installation 4.4.5 Cable charts Connection locations L1 L2 L3 T1 T2 T3 T4 Starter equipment and main leads (L1, L2, Transformer Ground (earth) Capacitor Functional ground Softstarter Control leads (T1, T2, T3, T4) Level regulator Phase shifter Contactor, start relay or thermal relay Diode Thermal detector in stator Motor cable...
- Page 19 4 Installation Code Description Grey Blue Yellow Stator leads and thermal contacts connection to the terminal plate Terminal plate 8103.181 8104.181 8110.281 8111.281 STATOR LEADS AND THERMAL CONTACTS STATOR LEADS 9 leads 9 leads 12 leads 12leads 12 leads 3 leads 6 leads 6 leads Terminal...
- Page 20 4 Installation Motor cable and starter unit connection to the terminal plate Terminal SYMBOLS AND DENOMINATIONS plate BN=Brown =Terminal plate BK=Black =Screen WH=White 8103.181 =Ground OG=Orange GN=Green =Functional ground 8104.181 GNYE=Green-Yellow =Crimp isolation 8110.281 RD=Red =Socket - Plug GY=Grey 8111.281 BU=Blue YE=Yellow =Inside pump...
- Page 21 4 Installation IEC/EN UL/CSA Wire size 0.5–6 mm 20–10 AWG Torque 3 Nm (2 lbf·ft) 3 Nm (2 lbf·ft) 4.5 Check the phase sequence: Pumps with built-in motor protection ™ Follow this procedure if your product is equipped with the rotation control SMART CAUTION: Crush Hazard The starting jerk can be powerful.
- Page 22 4 Installation Condition Action The pump has a CEE plug with internal phase 1. Pull out the plug. shifter. 2. Shift two phases. 3. Wait until the motor has stopped. 4. Connect the plug. The pump has a phase shifter with an on/off 1.
- Page 23 5 Operation 5 Operation 5.1 Precautions Before taking the unit into operation, check the following: • All recommended safety devices are installed. • The cable and cable entry have not been damaged. • All debris and waste material has been removed. NOTICE: Never operate the pump with the discharge line blocked, or the discharge valve closed.
- Page 24 5 Operation CAUTION: Thermal Hazard The surfaces or parts of the unit may become hot during operation. Allow surfaces to cool before starting work, or wear heat-protective clothing. NOTICE: Make sure that the rotation of the impeller is correct. For more information, see Check the impeller rotation.
- Page 25 6 Maintenance 6 Maintenance 6.1 Precautions Before starting work, make sure that the safety instructions have been read and understood. DANGER: Crush Hazard Moving parts can entangle or crush. Always disconnect and lock out power before servicing to prevent unexpected startup. Failure to do so could result in death or serious injury. DANGER: Inhalation Hazard Before entering the work area, make sure that the atmosphere contains sufficient oxygen and no toxic gases.
- Page 26 6 Maintenance Figure 3: Example of O-ring adjacent surfaces During the reassembly, always make sure that existing index markings are in line. The reassembled drive unit must always be insulation-tested and the reassembled pump must always be test-run before normal operation. 6.3 Torque values All screws and nuts must be lubricated to achieve correct tightening torque.
- Page 27 6 Maintenance Hexagon screws with countersunk heads For hexagon socket head screws with countersunk head, maximum torque for all property classes must be 80% of the values for property class 8.8. Round nuts with set screws Table 6: Set screw, torque Nm (lbf·ft) The torque values are only valid for the set screw, and not for the round nut.
- Page 28 6 Maintenance Service item Action Cable entry 1. Check that the following requirements are met: – Standard pump version: The cable entry must be firmly tightened into its bottom-most position. – The seal sleeve and the washers must conform to the outside diameter of the cables.
- Page 29 6 Maintenance 1. Inspection screw 2. Oil screw Figure 4: Symbols Empty the oil 1. Lay the pump on its side. Lock the pump with supports to prevent it from rolling over. 2. Remove the oil screw. There are two oil screws. Either screw can be used for drainage, but it is easier to drain the oil if both oil screws are removed.
- Page 30 6 Maintenance 6.6.1 Remove the impeller CAUTION: Cutting Hazard Worn parts can have sharp edges. Wear protective clothing. 1. Position the pump on its side. Secure the pump so that it does not roll. 2. Remove the stand and the lower pump housing. 3.
- Page 31 6 Maintenance 6.6.2 Install the impeller 1. Prepare the shaft: a) Polish off any flaws by using a fine emery cloth. The end of the shaft must be clean and free from burrs. b) Coat the inner conical, the outer cylindrical surfaces, and the thread of the conical sleeve with a thin layer of grease.
- Page 32 6 Maintenance c) Tighten the impeller screw. Tightening torque: 22 Nm (16.2 lbf·ft) d) Tighten a further 1/8 turn, 45°. The screw will be loaded to its yield point and the load capacity of the joint will be higher. e) Check that the impeller can rotate freely. 8.
- Page 33 7 Troubleshooting 7 Troubleshooting 7.1 General precautions Before starting work, make sure that the safety instructions have been read and understood. DANGER: Inhalation Hazard Before entering the work area, make sure that the atmosphere contains sufficient oxygen and no toxic gases. 7.2 Electrical troubleshooting DANGER: Electrical Hazard Troubleshooting a live control panel exposes personnel to hazardous voltages.
- Page 34 7 Troubleshooting Cause Remedy The pump does not start Check that: automatically, but can be started • The start level regulator is functioning. Clean or replace if manually. necessary. • All connections are intact. • The relay and contactor coils are intact. •...
- Page 35 7 Troubleshooting Cause Remedy The phase sequence may be 1. Pull out the plug. incorrect. 2. Do one of the following: – Shift two phases by turning two contact pins with a screwdriver NOTICE: Do not take the plug apart. WS002614A Figure 5: CEE plug –...
- Page 36 7 Troubleshooting Cause Remedy The pump is unable to empty the Check that: sump to the stop level. • There are no leaks from the piping and/or discharge connection. • The impeller is not clogged. • The non-return valve(s) are functioning properly. •...
- Page 37 7 Troubleshooting Cause Remedy The motor protection is set too Set the motor protection according to the data plate and if applicable low. the cable chart. The impeller is difficult to rotate • Clean the impeller. by hand. • Clean out the wet well. •...
- Page 38 7 Troubleshooting NOTICE: Do NOT override the motor protection repeatedly if it has tripped. Doing so may result in equipment damage. Cause Remedy ™ The impeller rotates in the wrong • If it is a 3-phase pump without SMART , then transpose two direction.
- Page 39 8 Technical Reference 8 Technical Reference 8.1 Application limits Data Description Media (liquid) temperature Maximum 40°C (104°F) pH of the pumped media (liquid) 5–8 Media (liquid) density 1100 kg/m³ (9.2 lb for each US gal) maximum Depth of immersion Maximum 20 m (65 ft) Other For the specific weight, current, voltage, power ratings, and speed of the pump, see the data plate...
- Page 40 8 Technical Reference Voltage, V Configuration Rated Current, A Starting current, A Power factor, cos φ 0.83 0.79 0.79 0.80 0.75 0.80 0.78 0.79 0.83 0.79 1000 0.73 3-phase, 60 Hz Motor type: • 1,690 rpm • Rated output 4.5 kW (6.0 hp) •...
- Page 41 8 Technical Reference 8.4 Dimensions and weights: 8110 All measurements in the illustration are in millimeters, if not otherwise specified. ISO-G 3A NPT 3-8 NPSM 3-8 ISO-G 4A 75 Hose size NPT 4-8 NPSM 4-8 100 Hose size R160 R160 Weight (kg) Total Weight (kg)
- Page 42 8 Technical Reference Senior P [kW] P [hp] / [kW] H [m] H [ft] / [m] 50 100 150 200 250 300 350 400 450 Q [l/s] WS006883A Q [l/s] / [usgpm] WS006884A Figure 9: 50 Hz Figure 10: 60 Hz 8110.281 Senior Installation, Operation, and Maintenance Manual...
- Page 44 The original instruction is in English. All non-English instructions are translations of the original instruction. © 2019 Grindex Grindex is a trademark of Xylem Inc. or one of its subsidiaries. All other trademarks or registered trademarks are property of their respective owners. 883984_5.0_en-US_2024-11_IOM_8110.281 Senior...
Need help?
Do you have a question about the Senior 8110.281 and is the answer not in the manual?
Questions and answers