Advertisement
Quick Links
Instructions
®
E-Flo
Pumps
Electric drive piston pumps for high volume paint circulation applications. For professional
use only
See page 3 for model description
and page 37 for maximum
working pressure.
Important Safety Instructions
Read all warnings and instructions in this
manual and in the Related Manuals
before using the equipment. Save all
instructions.
DCi 2-Ball
3A7826C
EN
Advertisement

Subscribe to Our Youtube Channel
Related Manuals for Graco E-Flo Y06BK


Summary of Contents for Graco E-Flo Y06BK
- Page 1 Instructions ® E-Flo DCi 2-Ball Pumps 3A7826C Electric drive piston pumps for high volume paint circulation applications. For professional use only See page 3 for model description and page 37 for maximum working pressure. Important Safety Instructions Read all warnings and instructions in this manual and in the Related Manuals before using the equipment.
- Page 2 Startup ....... . 14 Graco Standard Warranty....42 Shutdown.
- Page 3 Models Models The part number for your equipment is printed on the equipment identification label. The part number consists for six alphanumeric digits which are based on pump configuration as shown in the following table. The full pump model numbers and associated motor and lower model numbers are listed in the Pump Matrix on page 20. For motor and lower repair manuals, see Related Manuals on page 2.
- Page 4 Models ATEX, IECEx, JPEx, KCs Y23DA 5 HP 580cc 3UHMW / 2 PTFE Stainless 23:1 Ex, CCC-Ex 3 Xtreme / 2 Leather, Carbon Y25B1 3 HP 290cc ATEX, IECEx, MET, UKEx 25:1 Steel 3 Xtreme / 2 Leather, Carbon ATEX, IECEx, JPEx, KCs Y25D1 3 HP 290cc...
- Page 5 Approvals Approvals Pump Model Pump Approvals YBxxxx YDxxxx 3A7826C...
- Page 6 Warnings Warnings The following warnings are for the setup, use, grounding, maintenance, and repair of this equipment. The exclamation point symbol alerts you to a general warning and the hazard symbols refer to procedure-specific risks. When these symbols appear in the body of this manual or on warning labels, refer back to these Warnings. Product-specific hazard symbols and warnings not covered in this section may appear throughout the body of this manual where applicable.
- Page 7 Warnings WARNING PRESSURIZED EQUIPMENT HAZARD Fluid from the equipment, leaks, or ruptured components can splash in the eyes or on skin and cause serious injury. • Follow the Pressure Relief Procedure when you stop spraying/dispensing and before cleaning, checking, or servicing equipment. •...
- Page 8 Warnings WARNING BURN HAZARD Equipment surfaces and fluid that is heated can become very hot during operation. To avoid severe burns: • Do not touch hot fluid or equipment. PERSONAL PROTECTIVE EQUIPMENT Wear appropriate protective equipment when in the work area to help prevent serious injury, including eye injury, hearing loss, inhalation of toxic fumes, and burns.
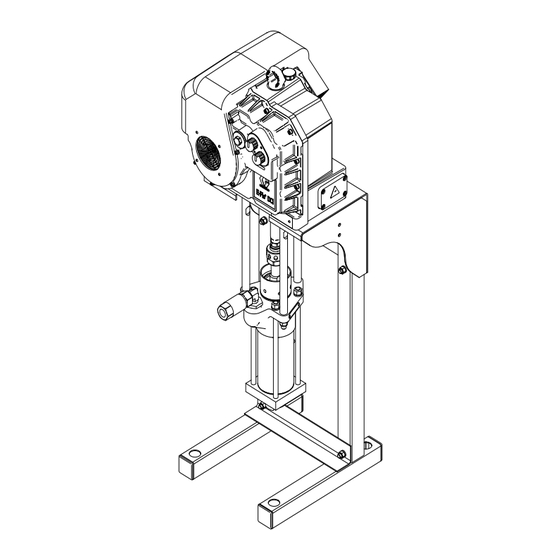
- Page 9 Typical Installation Typical Installation The system accessories shown in F . 1 are not included. Contact your Graco distributor to design a complete system. Rear View Explosion proof conduit seal required within 457 mm (18 in.) of the motor for U.S.
- Page 10 Installation Installation Power Requirements The system requires a dedicated circuit protected with a circuit breaker in each ungrounded phase. Installation of this equipment involves potentially hazardous procedures. Only trained and qualified Model by Voltage Phase personnel who have read and who understand the Horsepower information in this manual should install this 3 HP (2.24 kW) 380–480 Vac 3...
- Page 11 Installation Grounding Wall Mount 1. Purchase a stand mount motor to use the wall bracket. 2. Use the wall mount bracket as a template. The equipment must be grounded to reduce the risk NOTE: The bracket has two mounting hole groups. See of static sparking and electric shock.
- Page 12 Installation Electrical Grounding To maintain grounding continuity when flushing or relieving pressure: Hold metal part of the spray gun or 1. Ensure that the electrical disconnect (A) is shut off valve firmly to the side of a grounded metal pail, then and locked out.
- Page 13 Installation Install the Fill Cap Flush Before Using the Equipment The motor is pre-filled with oil. Replace the shipping plug with the fill cap (FC) before first use. Install fill cap The pump fluid section was tested with lightweight oil, and hand tight.
- Page 14 Operation Operation Pressure Relief Procedure open until you are ready to pressurize the system again. Follow the Pressure Relief Procedure whenever Startup you see this symbol. 1. Follow the motor start up instructions in the motor operation manual. See Related Manuals, page 2 2.
- Page 15 Maintenance Maintenance Preventive Maintenance Change the Oil Schedule Change the oil after a break-in period of 200,000–300,000 cycles. After the break-in period, The operating conditions of your particular system change the oil once a year. determine how often maintenance is required. 1.
- Page 16 Maintenance Add Oil 1. Open the fill cap (FC). 2. Add a compatible oil. See Technical Specifications on page 37. NOTE: The oil capacity is 2.0 quarts (1.9 liters). Do not overfill. 3. Reinstall the fill cap (FC)- Hand tight .
- Page 17 Troubleshooting Troubleshooting 1. Follow the Pressure Relief Procedure on page 14, before checking or repairing the equipment. 2. Check all possible remedies before disassembling the pump. NOTE: The LED on the motor will blink if an error is detected. Refer to the motor manual for Error Code Troubleshooting.
- Page 18 Repair Repair 2. Unscrew the locknuts (20) from the tie rods (12). 3. Separate the lower (2) from the tie rods (12). Stainless Steel Lowers 1. Loosen the coupling nut (16) from the coupling adapter (13), and remove the coupling collar (15). Prepare Equipment for Service 1.
- Page 19 Repair 4. Continue to Carbon Steel Lowers, page 19, or Stainless Steel Lowers, page 19. Carbon Steel Lowers 1. Orient the lower (2) to the motor (1). Position the lower on the tie rods (12). piston rod 2. If you are reusing lock nuts (20) and the nylon of the lock nut is worn or cut, add blue thread locker to the tie rod threads.
- Page 20 Pump Matrix Pump Matrix Y40xxx Y25xxx Pumps with 3 HP motors and 180 cc Lowers Pumps with 3 HP motor and 290 cc lower displacement Pump Model Motor Lower Pump Model Motor Lower Y40BE0 YM1132 236456 Y25B10 YM1132 L290C1 Y40DE0 YM1134 236456 Y25D10...
- Page 21 Pump Matrix Y15xxx Y23xxx Pumps with 3 HP motor and 430 cc lower displacement Pumps with 5 HP motor and 580 cc lower displacement Pump Model Motor Lower Pump Model Motor Lower Y15BD0 YM1132 20B119 Y23BD0 YM1152 20B120 Y15DD0 YM1134 20B119 Y23DD0 YM1154...
- Page 22 Parts Parts Y30x1x, Y25x1x 3A7826C...
- Page 23 Parts Y40xEx, Y30xEx, Y25xEx, Y45xEx 3A7826C...
- Page 24 Parts Y32xxx, Y15xxx, Y12xxx, Y23xxx 3A7826C...
- Page 25 Parts Y06xxx, Y10xxx 3A7826C...
- Page 26 Parts Parts List Part Ref. Description Qty. Motor; see Pump Matrix, page 20 and the motor manual 1a▲ 20A695 Safety Label Lower. See Pump Matrix, page 20 and lower manual. 255143 Mounting Hardware Bracket Kit (includes items 3a and 3b); models Yxxxx1 and Yxxxx2 only Washer (included with item 3) Bolt (included with item 3) 256193...
- Page 27 Dimensions Dimensions Y10BK1 (in.) (cm) 59.2 150.4 17.0 43.2 49.6 126.0 20.4 51.8 27.9 70.9 24.4 11.1 28.2 3A7826C...
- Page 28 Dimensions Y30BE1 (in.) (cm) 59.2 150.4 17.0 43.2 47.7 121.2 20.4 51.8 24.6 62.5 11.5 24.4 11.1 28.2 3A7826C...
- Page 29 Dimensions Y30B11 (in.) (cm) 59.2 150.4 17.0 43.2 45.0 114.3 20.4 51.8 25.8 65.5 14.2 36.1 11.1 28.2 3A7826C...
- Page 30 Dimensions Y32BB1 (in.) (cm) 59.2 150.4 17.0 43.2 48.5 123.2 20.4 51.8 24.5 62.2 10.7 27.2 11.1 28.2 3A7826C...
- Page 31 Performance Charts Performance Charts To find the fluid pressure (psi/bar/MPa) at a specific Performance Chart Key: fluid flow (gpm/lpm) and percentage of maximum force: Maximum Force Percentage 1. Locate the desired fluid flow in the scale at the bottom of the chart. 100% 2.
- Page 32 Performance Charts Y10xxx: Pumps with 5 HP motor and 1000 cc lower displacement Cycles per Minute 1200 (82.7, 8.27) 1000 (68.9, 6.89) (55.2, 5.52) Fluid Pressure Power psi (bar, MPa) (KW) (41.4, 4.14) (27.6, 2.76) (13.8, 1.38) (3.8) (7.6) (11.4) (15.1) (18.9) (22.7)
- Page 33 Performance Charts Y23xxx: Pumps with 5 HP motor and 580 cc lower displacement Cycles per Minute 2500 (172.4, 17.24) 2000 (137.9, 13.7 1500 (103.4, 10.34) Fluid Pressure Power psi (bar, MPa) (KW) 1000 (68.9, 6.89) (34.5, 3.45) (1.9) (3.8) (5.7) (7.6) (9.5) (11.4)
- Page 34 Performance Charts Y30xxx: Pumps with 3 HP motor and 220 cc lower displacement Cycles per Minute 3500 (241.3, 24.13) 3000 (206.8, 20.68) 2500 (172.4, 17.24) 2000 Fluid Pressure Power (137.9, 13.7 psi (bar, MPa) (KW) 1500 (103.4, 10.34) 1000 (68.9, 6.89) (34.5, 3.45) (0.8) (1.5)
- Page 35 Performance Charts Y40xxx: Pumps with 3 HP motor and 180 cc lower displacement Cycles per Minute 4000 (275.8, 27.58) 3500 (241.3, 24.13) 3000 (206.8, 20.68) 2500 (172.4, 17.24) Fluid Pressure Power 2000 psi (bar, MPa) (KW) (137.9, 13.7 1500 (103.4, 10.34) 1000 (68.9, 6.89) (34.5, 3.45)
- Page 36 Performance Charts Y06xxx: Pumps with 3 HP motor and 1000 cc lower displacement Cycles per Minute (48.3, 4.83) (41.4, 4.14) (34.5, 3.45) Fluid Pressure Power (27.6, 2.76) psi (bar, MPa) (KW) (20.7, 2.07) (13.8, 1.38) (6.9, 0.69) (3.8) (7.6) (11.4) (15.1) (18.9) (22.7)
- Page 37 Mounting Hole Patterns Mounting Hole Patterns Mounting Bracket Pattern 17.8 in. (451 mm) 14.5 in. (368 mm) 12.4 in. (314 mm) 9.0 in. (229 mm) 5.4 in. (137 mm) 7.4 in. (187 mm) 5.3 in. (133 mm) 2.0 in. (51 mm) 1.0 in.
- Page 38 Mounting Hole Patterns Floor Stand Mounting Pattern 19.88 in. (505.0 mm) 14.50 in. (368.3 mm) 16.88 in. (428.8 mm) 17.0 in. (431.8 mm) 3A7826C...
- Page 39 Mounting Hole Patterns Technical Specifications E-Flo DCi 2-Ball Pumps Flow Maximum Lower Pump Fluid Inlet Fluid Outlet Models Motor Rating Rate at Fluid Working Displacement Weight Connection Connection 20 cpm Pressure Y40xxx 3 HP (2.24 kW) 180 cc 1.0 gpm 3800 psi 206 lb 1 1/4”...
- Page 40 Wall mount weight ❖ 20 lb (9.1 kg) Oil capacity 2.0 quarts (1.9 liters) Oil specification Graco Part Number 20A933 ISO 460 silicone-free high-pressure synthetic gear oil Wetted Parts See lower manual. Find your lower part number in the Pump Matrix, page 20.
- Page 41 California Proposition 65 California Proposition 65 CALIFORNIA RESIDENTS WARNING: Cancer and reproductive harm. – www.P65warnings.ca.gov. 3A7826C...
- Page 42 With the exception of any special, extended, or limited warranty published by Graco, Graco will, for a period of twelve months from the date of sale, repair or replace any part of the equipment determined by Graco to be defective.
Need help?
Do you have a question about the E-Flo Y06BK and is the answer not in the manual?
Questions and answers