Advertisement
Quick Links
O
NLY PERSONNEL THAT HAVE BEEN TRAINED TO INSTALL
(
SERVICE OR REPAIR
HEREINAFTER
SPECIFIED IN THIS MANUAL SHOULD SERVICE THE EQUIPMENT
MANUFACTURER WILL NOT BE RESPONSIBLE FOR ANY INJURY OR
PROPERTY DAMAGE ARISING FROM IMPROPER SERVICE OR SERVICE
. I
PROCEDURES
F YOU SERVICE THIS UNIT
RESPONSIBILITY FOR ANY INJURY OR PROPERTY DAMAGE WHICH MAY
. I
,
RESULT
N ADDITION
IN JURISDICTIONS THAT REQUIRE ONE OR
MORE LICENSES TO SERVICE THE EQUIPMENT SPECIFIED IN THIS
,
MANUAL
ONLY LICENSED PERSONNEL SHOULD SERVICE THE
. I
EQUIPMENT
MPROPER INSTALLATION
REPAIR OF THE EQUIPMENT SPECIFIED IN THIS MANUAL
,
ATTEMPTING TO INSTALL
ADJUST
EQUIPMENT SPECIFIED IN THIS MANUAL WITHOUT PROPER TRAINING
MAY RESULT IN PRODUCT DAMAGE
.
INJURY OR DEATH
IOG-3008K
05/2021
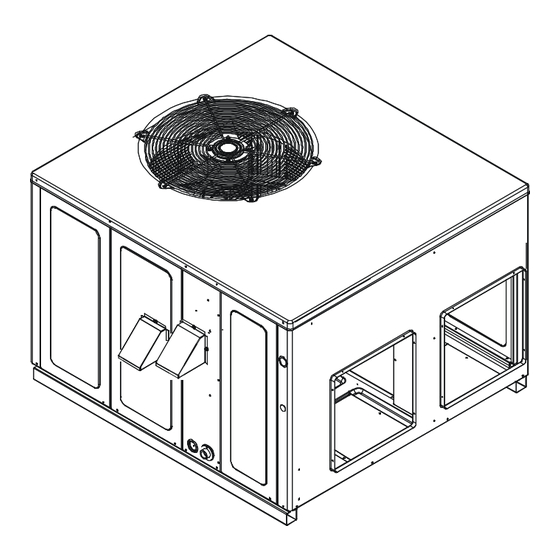
INSTALLATION & OPERATING
INSTRUCTIONS for
A/GPG14M SERIES W/ R410A
SINGLE PACKAGE GAS-ELECTRIC
HEATING & COOLING UNIT
Affix this manual and Users Information Manual adjacent to the unit.
,
ADJUST
, "
")
SERVICE
THE EQUIPMENT
. T
,
YOU ASSUME
,
,
ADJUSTMENT
SERVICING OR
,
OR
,
SERVICE OR REPAIR THE
,
,
PROPERTY DAMAGE
PERSONAL
Goodman Company, L.P.
19001 Kermier Rd., Waller, TX 77484
www.goodmanmfg.com - or - www.amana-hac.com
© 2014-2019, 2021 Goodman Company, L.P.
is a registered trademark of Maytag Corporation or its related companies and is used
This Forced Air Central Unit Design Complies With
Requirements Embodied In The American National
Standard / National Standard of Canada Shown Below.
ANSI Z21.47•CSA-2.3 Central Furnaces.
RECOGNIZE THIS SYMBOL AS A SAFETY
PRECAUTION.
These installation instructions cover the outdoor installa-
tion of self contained package air conditioners and heating
,
units. See the Specification Sheets applicable to your
model for information regarding accessories.
HE
*NOTE: Please contact your distributor or our website
for the applicable Specification Sheets referred to in this
manual.
under license. All rights reserved.
Advertisement

Subscribe to Our Youtube Channel
Related Manuals for Amana GPG14M Series


Summary of Contents for Amana GPG14M Series
- Page 1 INSTALLATION & OPERATING INSTRUCTIONS for A/GPG14M SERIES W/ R410A SINGLE PACKAGE GAS-ELECTRIC HEATING & COOLING UNIT Affix this manual and Users Information Manual adjacent to the unit. This Forced Air Central Unit Design Complies With Requirements Embodied In The American National Standard / National Standard of Canada Shown Below.
- Page 2 INDEX REPLACEMENT PARTS ..........2 Cleaning Flue Passages (Qualified Ordering Parts ............2 Servicer Only) ............21 SAFETY INSTRUCTIONS ..........2 Main Burner Flame (Qualified Servicer Only) ..21 To the Installer ............2 Cleaning Burners ............21 GENERAL INFORMATION ..........5 ACCESSORIES AND FUNCTIONAL PARTS ....22 Transportation Damage ...........5 Sheet Metal Accessories ........22 UNIT LOCATION ..............6 Functional Parts .............22...
- Page 3 WARNING HIS PRODUCT CONTAINS OR PRODUCES A CHEMICAL OR CHEMICALS WHICH CARBON MONOXIDE POISONING HAZARD MAY CAUSE SERIOUS ILLNESS OR DEATH AND WHICH ARE KNOWN TO THE Failure to follow the steps outlined below for each TATE OF ALIFORNIA TO CAUSE CANCER, BIRTH DEFECTS OR OTHER appliance connected to the venting system being placed REPRODUCTIVE HARM.
- Page 4 AVERTISSEMENT FIRE OR EXPLOSION HAZARD RISQUE D'INTOXICATION AU MONOXYDE DE CARBONE Failure to follow the safety warnings exactly could result in Si les étapes décrites ci-dessous ne sont pas suivies pour chacun des appareils raccordés au système de ventilation serious injury, death or property damage. au moment de sa mise en marche, cela peut entraîner une Never test for gas leaks with an open flame.
- Page 5 1. Make notation on delivery receipt of any visible dam- goodmanmfg.com for Goodman® brand products or www. age to shipment or container. amana-hac.com for Amana® brand products. Within either 2. Notify carrier promptly and request an inspection. website, please select the residential or commercial prod- 3.
- Page 6 UNIT LOCATION Ground Level Installations Only: • When the unit is installed on the ground adjacent to the building, a level concrete (or equal) base is rec- WARNING ommended. Prepare a base that is 3” larger than the package unit footprint and a minimum of 3” thick. •...
- Page 7 Roof Curb Installations Only: • Sufficient structural support must be determined prior to locating and mounting the curb and package unit. • Ductwork must be constructed using industry guide- lines. The duct work must be placed into the roof curb before mounting the package unit.
- Page 8 altitudes, the manifold pressure must be within 0.3 inches 5. Use two pipe wrenches when making connection to the W.C. of that listed on the nameplate for the fuel used. At all gas valve to keep it from turning. altitudes and with either fuel, the air temperature rise must 6.
- Page 9 • There will be air in the gas supply line after testing for See below for typical propane gas piping. leaks on a new installation. Therefore, the air must be bled from the line by loosening the ground joint union 5 to 15 PSIG until pure gas is expelled.
- Page 10 ELECTRICAL WIRING Thermostat Location Thermostat Mount the thermostat approximately five feet above the Two-Stage Heating with floor, in an area that has an inside, vibration-free wall and Two-Stage Cooling has good air circulation. Movement of air must not be obstructed by furniture, door, draperies, etc.
- Page 11 For unit protection, use a time delay fuse or hacr circuit mended methods of Air Conditioning Contractors of Ameri- breaker that is in excess of the circuit ampacity, but less than ca Manual D (Residential) or Manual Q (Commercial). All or equal to the maximum overcurrent protection device.
- Page 12 To install the flue hood cover, please refer to the installation 1. Thermostat calls for heat. instructions, included in the flue hood assembly package lo- 2. The induced draft blower energizes for a 15-second cated in the blower compartment. pre-purge. 3.
- Page 13 Two-Stage Models: The fan runs at low cool speed for the off delay period. This allows additional cooling from the indoor coil to be trans- Rollout Protection ferred to the conditioned space. Then, the indoor fan stops. NOTE: A 180-second anti-short cycle is integral to the con- trol and prevents recycling of the compressor.
- Page 14 10. Open the manual gas valve external to the unit. The line pressure supplied to the gas valve must be within the 11. Turn on the electrical power supply to the unit. range specified in the Inlet Gas Supply Pressure table. The 12.
- Page 15 8. Measure the gas supply pressure with burners firing. Two-Stage Models (White-Rodgers 36G54 valve): Close Adjust supply pressure using the Inlet Gas Supply thermostat contacts “R” and “W1” contacts for low heat Pressure table shown below. If supply pressure read- stage heating ONLY;...
- Page 16 Example: Natural gas with a heating value of 1000 BTU per NOTE: Blower speed MUST be set to give the correct air cubic foot and 34 seconds per cubic foot as determined by temperature rise through the unit as marked on the rating Step 2, then: plate.
- Page 17 Two-Stage Models: Unit Shutdown 1. Set the thermostat to lowest setting. 2. Turn off the electrical power supply to the unit. HEATING COOLING 3. Remove the heat exchanger door on the side of the Speed Lead Speed Lead Definition Definition unit by removing screws.
- Page 18 SUPERHEAT the conditioned space. It is the installing contractors respon- sibility to ensure the proper refrigerant sub-cooling at the condenser is adjusted for each application. As the outdoor Checking Superheat ambient temperature rises the sub-cooling decreases and Refrigerant gas is considered superheated whenever its as the outdoor ambient temperature lowers, the sub-cooling temperature is higher than the saturation temperature cor- increases.
- Page 19 Abnormal Operation - Heating A drop in flame signal can be caused by nearly invisible coating on the sensor. Remove the sensor and carefully Internal Control Failure clean with steel wool. If the integrated ignition control in this unit encounters an •...
- Page 20 MAINTENANCE Rollout Limit If the burner flames are not properly drawn into the heat exchanger, the flame rollout protection device will open. Possible causes are restricted or blocked flue passages, blocked or cracked heat exchanger, a failed induced draft blower, or insufficient combustion air. The rollout protection device is a manual reset limit located on the burner bracket.
- Page 21 NOTE: After cleaning, the microamp signal should be stable Main Burner Flame (Qualified Servicer Only) and in the range of 4 - 6 microamps DC. Flames should be stable, soft and blue (dust may cause or- ange tips but must not be yellow). The flames must extend directly outward from the burner without curling, floating or lifting off.
- Page 22 ACCESSORIES AND FUNCTIONAL PARTS Burner Sheet Metal Accessories Burner Additional accessories can be purchased to fit specific appli- Bracket cation needs. Parts and instructions are available from your distributor. Functional Parts FUNCTIONAL PARTS Manifold Auxiliary Limit Switch Flame Roll-out Switch Blower Housing Flame Sensor Circulator Blower Motor...
- Page 23 BLOWER PERFORMANCE DATA - SINGLE PHASE *PG1424040M41** - Rise Range: 25° - 55° T4 COOLING T5 COOLING T1 HEATING SPEED T2 HEATING SPEED T3 HEATING SPEED E.S.P. SPEED SPEED WATTS RISE WATTS RISE WATTS RISE WATTS WATTS 1,050 1,095 1,010 1,060 1,025 *PG1424060M41** - Rise Range: 30°...
- Page 24 BLOWER PERFORMANCE DATA - SINGLE PHASE *PG1436040M41** - Rise Range: 25° - 55° T4 COOLING T5 COOLING T1 HEATING SPEED T2 HEATING SPEED T3 HEATING SPEED E.S.P. SPEED SPEED WATTS RISE WATTS RISE WATTS RISE WATTS WATTS 1,115 1,265 1,305 1,440 1,075 1,230...
- Page 25 BLOWER PERFORMANCE DATA - SINGLE PHASE *PG1448060M41** - Rise Range: 30° - 60° T4 COOLING T5 COOLING T1 HEATING SPEED T2 HEATING SPEED T3 HEATING SPEED E.S.P. SPEED SPEED WATTS RISE WATTS RISE WATTS RISE WATTS WATTS 1,055 1,380 1,415 1,570 1,780 1,000...
- Page 26 BLOWER PERFORMANCE DATA - SINGLE PHASE *PG1461080M41** - Rise Range: 30° - 60° T1 LOW STAGE HEATING T2 HIGH STAGE HEATING T3 LOW STAGE T4 HIGH STAGE T5 COOLING SPEED SPEED HEATING SPEED COOLING SPEED SPEED E.S.P. WATTS RISE WATTS RISE WATTS WATTS...
- Page 27 IGNITION CONTROL DIAGNOSTIC INDICATOR CHART (SINGLE STAGE MODELS ONLY) Red Light Signal Refer to Abnormal Heating or Cooling Operation Sections of this Manual Internal Control Failure 1 Flash External Lockout 2 Flashes Pressure Switch Stuck Open 3 Flashes Pressure Switch Stuck Closed 4 Flashes Thermal Protection Device Open 5 Flashes...
- Page 28 IGNITION CONTROL DIAGNOSTIC INDICATOR CHART (TWO-STAGE MODELS ONLY) Red Light Signal Refer to Abnormal Heating or Cooling Operation Sections of this Manual Internal Control Failure 1 Flash External Lockout 2 Flashes Pressure Switch Stuck Open 3 Flashes Pressure Switch Stuck Closed 4 Flashes Thermal Protection Device Open 5 Flashes...
- Page 29 APPENDIX UNIT DIMENSIONS Unit Dimensions (Inches) Chassis Model Size Height GPG1424***M41** 34 1/2 Medium GPG1430***M41** 34 1/2 Medium POWER WIRE ENTRANCE GPG1436***M41** 34 1/2 Medium 1.375 4.125 GPG1442***M41** 34 1/2 Medium 2.125 42 1/2 Large GPG1448***M41** 42 1/2 Large GPG1461***M41** RETURN 4.75 CONDENSATE DRAIN CONNECTION...
- Page 30 *PG14(24, 30, 36, 42)***M41* * WIRING DIAGRAM HIGH VOLTAGE! DISCONNECT ALL POWER BEFORE SERVICING OR INSTALLING THIS UNIT. MULTIPLE POWER SOURCES MAY BE PRESENT. FAILURE TO DO SO MAY CAUSE PROPERTY DAMAGE, PERSONAL INJURY OR DEATH. COMP CH OPTIONAL CONNECTED AT L1, L2 CH OPTIONAL NOTE 3 SEE NOTE 3...
- Page 31 *PG14(24, 30, 36, 42)***M41* * WIRING DIAGRAM HIGH VOLTAGE! DISCONNECT ALL POWER BEFORE SERVICING OR INSTALLING THIS UNIT. MULTIPLE POWER SOURCES MAY BE PRESENT. FAILURE TO DO SO MAY CAUSE PROPERTY DAMAGE, PERSONAL INJURY OR DEATH. Wiring is subject to change. Always refer to the wiring diagram on the unit for the most up-to-date wiring.
- Page 32 PG1448***M41* * WIRING DIAGRAM HIGH VOLTAGE! DISCONNECT ALL POWER BEFORE SERVICING OR INSTALLING THIS UNIT. MULTIPLE POWER SOURCES MAY BE PRESENT. FAILURE TO DO SO MAY CAUSE PROPERTY DAMAGE, PERSONAL INJURY OR DEATH. COMP CH OPTIONAL CONNECTED AT L1, L2 CH OPTIONAL NOTE 3 SEE NOTE 3...
- Page 33 PG1448***M41* * WIRING DIAGRAM HIGH VOLTAGE! DISCONNECT ALL POWER BEFORE SERVICING OR INSTALLING THIS UNIT. MULTIPLE POWER SOURCES MAY BE PRESENT. FAILURE TO DO SO MAY CAUSE PROPERTY DAMAGE, PERSONAL INJURY OR DEATH. COMPONENT LEGEND SUPPLY VOLTAGE AUXILLARY LIMIT SW ITCH 208-230/1/60 COMP COMPRESSOR...
- Page 34 *PG1461***M41* * WIRING DIAGRAM HIGH VOLTAGE! DISCONNECT ALL POWER BEFORE SERVICING OR INSTALLING THIS UNIT. MULTIPLE POWER SOURCES MAY BE PRESENT. FAILURE TO DO SO MAY CAUSE PROPERTY DAMAGE, PERSONAL INJURY OR DEATH. SEE NOTE 6 SEE NOTE 3 COMP POWER SUPPLY BL BK 208-230/1/60...
- Page 35 *PG1461***M41* * WIRING DIAGRAM HIGH VOLTAGE! DISCONNECT ALL POWER BEFORE SERVICING OR INSTALLING THIS UNIT. MULTIPLE POWER SOURCES MAY BE PRESENT. FAILURE TO DO SO MAY CAUSE PROPERTY DAMAGE, PERSONAL INJURY OR DEATH. FACTOR Y WIRING COM PONENT LEGEND AUXILLARY LIMIT SWITCH LINE VOLTAGE TRANSFORMER HIGH SUPPLY VOLTAGE...
- Page 36 MINIMUM CLEARANCES Clearance in accordance with local installation codes, the requirements of the gas supplier and the manufactur- er’s installation instructions. Dégaugement conforme aux codes d’installation locaux, aux exigences du fournisseur de gaz et aux instructions d’installation du fabricant. 48" MIN 12"...
- Page 37 PACKAGE UNITS - DUAL FUEL & GAS HOMEOWNER’S ROUTINE MAINTENANCE RECOMMENDATIONS We strongly recommend a bi-annual maintenance checkup be performed by a qualified service agency before the heating and cooling seasons begin. Condenser, Evaporator and Induced Draft Motors The bearings on the air circulating blower motor, condenser motor and the combustion fan motor are permanently lubricat- ed and require no further lubrication.
- Page 38 Residential Package - (Indoor Section) Model Number Serial Number ELECTRICAL Line Voltage (Measure L1 and L2 Voltage) L1 - L2 Secondary Voltage (Measure Transformer Output Voltage) R - C Blower Amps Heat Strip 1 - Amps Heat Strip 2 - Amps BLOWER EXTERNAL STATIC PRESSURE Return Air Static Pressure IN.
- Page 39 THIS PAGE LEFT INTENTIONALLY BLANK...
- Page 40 Goodman Company, L.P. 19001 Kermier Rd., Waller, TX 77484 www.goodmanmfg.com - or - www.amana-hac.com © 2014-2019, 2021 Goodman Company, L.P. is a registered trademark of Maytag Corporation or its related companies and is used under license. All rights reserved.
Need help?
Do you have a question about the GPG14M Series and is the answer not in the manual?
Questions and answers