Table of Contents
Advertisement
Quick Links
Operator's Manual
21" LAWN MOWER
Model Nos.
C459-36401
CAUTION: Before using this
product, read this manual
and follow all safety rules
and operating instructions.
Sears Canada Inc., 290 Yonge Street, Toronto, On M5B 2C3
®
Visit our web: sears.ca
• SAFETY
• ASSEMBLY
• OPERATION
• MAINTENANCE
• PARTS LIST
769-09636
1.3.14
Advertisement
Table of Contents

Related Manuals for Craftsman C459-36401


Summary of Contents for Craftsman C459-36401
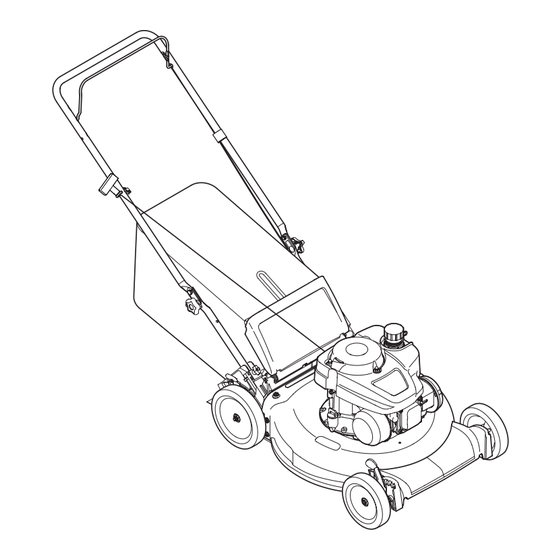
- Page 1 Operator’s Manual ® 21” LAWN MOWER Model Nos. C459-36401 • SAFETY • ASSEMBLY • OPERATION • MAINTENANCE • PARTS LIST CAUTION: Before using this product, read this manual and follow all safety rules and operating instructions. Sears Canada Inc., 290 Yonge Street, Toronto, On M5B 2C3 769-09636 Visit our web: sears.ca...
-
Page 2: Table Of Contents
TABLE OF CONTENTS Safety Instructions ........3 Off-Season Storage . -
Page 3: California Proposition
SAFETY INSTRUCTIONS WARNING DANGER This symbol points out important safety instructions which, if not This machine was built to be operated according to the safe operation followed, could endanger the personal safety and/or property of practices in this manual. As with any type of power equipment, yourself and others. -
Page 4: Slope Operation
SAFETY INSTRUCTIONS • If the equipment should start to vibrate abnormally, stop the engine and • Keep children out of the mowing area and under watchful care of a check immediately for the cause. Vibration is generally a warning of trouble. responsible adult other than the operator. • Shut the engine off and wait until the blade comes to a complete stop before • Be alert and turn mower off if a child enters the area. removing the grass catcher or unclogging the chute. The cutting blade • Before and while moving backwards, look behind and down for small continues to rotate for a few seconds after the blade control is released. children. Never place any part of the body in the blade area until you are sure the • Use extreme care when approaching blind corners, doorways, shrubs, trees, blade has stopped rotating. or other objects that may obscure your vision of a child who may run into the • Never operate mower without proper trail shield, discharge cover, grass mower. catcher, blade control handle or other safety protective devices in place and • Keep children away from hot or running engines. They can suffer burns from working. Never operate mower with damaged safety devices. Failure to do a hot muffler. so can result in personal injury. • Never allow children under 14 years of age to operate this machine. Children • Muffler and engine become hot and can cause a burn. Do not touch. 14 and over should read and understand the instructions and safe operation • Never attempt to make a wheel or cutting height adjustment while the practices in this manual and on the machine and be trained and supervised engine is running. by an adult. -
Page 5: General Service
SAFETY INSTRUCTIONS DO NOT MODIFY ENGINE General Service: • Never run an engine indoors or in a poorly ventilated area. Engine exhaust To avoid serious injury or death, do not modify engine in any way. Tampering contains carbon monoxide, an odorless and deadly gas. with the governor setting can lead to a runaway engine and cause it to operate at unsafe speeds. Never tamper with factory setting of engine •... -
Page 6: Safety Symbols
SAFETY INSTRUCTIONS SAFETY SYMBOLS This page depicts and describes safety symbols that may appear on this product. Read, understand, and follow all instructions on the machine before attempting to assemble and operate. Symbol Description READ THE OPERATOR’S MANUAL(S) Read, understand, and follow all instructions in the manual(s) before attempting to assemble and operate DANGER —... -
Page 7: Slope Gauge
SLOPE GAUGE... -
Page 8: Assembly
ASSEMBLY IMPORTANT: This unit is shipped without gasoline or oil in the engine. Be certain to service engine with gasoline and oil as instructed in the Operation section before starting or running your machine. NOTE: Reference to right and left hand side of the Lawn Mower is observed from the operating position. OPENING CARTON Cut each corner of the carton vertically from top to bottom. Remove all loose parts. Remove loose packing material. REMOVING UNIT FROM CARTON Lift unit from the rear to detach it from underlying carton material and roll unit out of carton. Check carton thoroughly for any other loose parts. Loose Parts In Carton Figure 2 • Grass Catcher • Engine Oil Assembly Attaching The Handle Remove any packing material which may be between upper and lower handles. Remove wing nuts and carriage bolts handle as shown in Figure 1. Do not loosen or remove adjacent hex head screws. While stabilizing mower so it doesn’t move, pivot upper handle up as shown in Figure 2. Do not crimp cable while lifting the handle up. Remove T-bolts from the handle brackets as shown in Figure 3. - Page 9 ASSEMBLY Follow the steps below to complete handle assembly: The rope guide is attached to the right side of the upper handle. Loosen the wing knob which secures the rope guide. Refer to Figure 6. Pull upward on the handle until holes in lower handle (shown in Figure 3 deck cutaway) line up with holes in handle bracket. See Hold blade control against upper handle. Figure 4. Slowly pull starter rope handle from engine and slip starter rope into the rope guide. See Figure 6. Tighten rope guide wing knob. d. Use cable ties to secure blade control cable to lower handle. Figure 4 NOTE: When pulling upward on handle, make sure to not pull handle all the way out. Insert the T-bolts removed in step earlier through the handle Figure 6 brackets and lower handle and tighten securely to secure the handle Attaching the Grass Catcher in place. See Figure 4. Follow steps below to assemble the grass catcher. Make certain bag is turned Reattach wing nuts and carriage bolts removed earlier into lower right side out before assembling (warning label will be on the outside). holes of handle as shown in Figure 5. Place bag over frame so that its black plastic side is at the bottom. Slip plastic channel of grass bag over hooks on the frame. See Figure 7. Figure 5 Figure 7...
-
Page 10: Cutting Height
ASSEMBLY Follow steps below to attach grass catcher: IMPORTANT: All wheels must be placed in the same position. For rough or uneven lawns, move each height adjustment lever to a higher position. This will prevent you Lift rear discharge door. from cutting the grass too close to the ground. Place grass catcher into the slots in the handle brackets as shown in Handle Pitch Figure 8. Let go of discharge door so that it rests on the grass catcher. For convenience of operation, you may adjust the pitch of the handle as follows: To remove grass catcher, lift rear discharge door on the mower. Lift grass catcher up Remove wing nuts and carriage bolts from handle. See Figure 11. and off the slots in the handle brackets. Release rear discharge door to allow it to close rear opening of mower. Position the handle in one of the three positions that is most comfortable. See Figure 10 inset. Secure into position with wing nuts and carriage bolts removed earlier. Figure 8 Adjustments Figure 10 Cutting Height There is a cutting height adjustment lever located above the front and rear right wheel. Pull the height adjustment lever outward towards wheel (unit will tend to fall when lever is moved outward). See Figure 9. Move lever to desired position for a change in cutting height. See Figure 9. Release lever towards deck. Lower Higher Higher Lower Figure 9... -
Page 11: Cutting Height Adjustment Lever
OPERATION Blade Control Recoil Starter Gas Cap Grass Catcher Primer (if equipped) Air Cleaner Cutting Height Adjustment Lever Oil Fill Cap Cutting Height Adjustment Lever Oil Drain Figure 12 Blade Control Primer (If Equipped) The blade control is attached to the upper handle of the mower. Depress and The primer is located on the left side of the engine, next to the air cleaner. Pressing squeeze it against the upper handle to operate the unit. Release it to stop engine the primer forces fuel directly into the engine’s carburetor to aid in starting the and blade. engine. WARNING Oil Drain This blade control is a safety device. -
Page 12: Oil Recommendations
OPERATION Gas & Oil Remove the oil filler cap/dipstick. If the level is low, slowly add oil to the upper limit on the dipstick. See Figure 14. NOTE: The engine is shipped without gasoline or oil in the engine. Running the Replace and tighten cap/dipstick firmly before starting engine. -
Page 13: To Start Engine
OPERATION Using Your Lawn Mower Adding Fuel Be sure lawn is clear of stones, sticks, wire, or other objects which could damage CAUTION lawn mower or engine. Such objects could be accidently thrown by the mower in An adult should fuel this engine. NEVER allow children to refuel the engine. any direction and cause serious personal injury to the operator and others. Gasoline (fuel) vapors are highly flammable and can explode. Fuel vapors can spread and be ignited by a spark or flame many feet away from engine. WARNING To prevent injury or death from fuel fires, follow these instructions: The operation of any lawn mower can result in foreign objects being... -
Page 14: Service And Maintenance
SERVICE AND MAINTENANCE MAINTENANCE SCHEDULE Follow the maintenance schedule given below. This chart describes service WARNING guidelines only. Use the Service Log column to keep track of completed Before performing any type of maintenance/service, disengage all controls maintenance tasks. To locate the nearest Sears Service Center or to schedule service, and stop the engine. Wait until all moving parts have come to a complete simply contact Sears at 1-800-4-MY-HOME®. stop. Disconnect spark plug wire and ground it against the engine to prevent unintended starting. -
Page 15: Air Filter Service
SERVICE AND MAINTENANCE Air Filter Service WARNING Always stop engine, disconnect spark plug wire, and ground against engine WARNING before performing any type of maintenance on your machine. Never use gasoline or low flash point solvents for cleaning the air filter Oil Service element. -
Page 16: Fuel Filter Service
SERVICE AND MAINTENANCE Spark Plug Fuel Filter Spark Plug Boot Figure 18 Figure 20 Measure the plug gap with a feeler gauge. Correct as necessary by bending Grasp new fuel filter from shouldered end and insert it completely to the side electrode. See Figure 19. The gap should be set to 0.030 in. shoulder into the tank outlet. See Figure 21 inset. Replace fuel line and hose clamp. Electrode 0.030 in. Figure 19 Check that the spark plug washer is in good condition and thread the spark plug in by hand to prevent cross-threading. Fuel Filter After the spark plug is seated, tighten with a spark plug wrench to compress the washer. NOTE: When installing a new spark plug, tighten 1/2 turn after the spark plug seats to compress the washer. When reinstalling a used spark plug, Figure 21 tighten 1/8-1/4 turn after the spark plug seats to compress the washer. Clean Engine IMPORTANT: The spark plug must be securely tightened. An improperly tightened spark plug can become very hot and may damage the engine. -
Page 17: Blade Care
SERVICE AND MAINTENANCE LUBRICATION Place blade bell support on the blade. Align notches on the blade bell support with small holes in blade. Blade Control Replace hex bolt and tighten hex bolt to torque: 450 in. lbs. min., 600 in. lbs. Lubricate pivot points on the blade control at least once a season with light oil. This max. control must operate freely in both directions. See Figure 12. To ensure safe operation of your mower, periodically check the blade bolt for correct Blade Care torque. Storage WARNING When removing the cutting blade for sharpening or replacement, protect CAUTION your hands with a pair of heavy gloves or use a heavy rag to hold the blade. Failure to use a fuel stabilizing additive such as or completely STA-BIL®... -
Page 18: Troubleshooting
TROUBLESHOOTING WARNING Disconnect the spark plug wire and ground it against the engine to prevent unintended starting. Before performing any type of maintenance/service, disengage all controls and stop the engine. Wait until all moving parts have come to a complete stop. Always wear safety glasses during operation or while performing any adjustments or repairs. -
Page 19: Warranty
WARRANTY General: Craftsman products are warranted to be free from defects in materials or workmanship for a specific time period as set-out below (the “Warranty Period”). Warranties extend to the original purchaser of a Craftsman product only. Purchases made through an online auction or through any website other than www.sears.ca are excluded. The relevant Warranty Period commences on the original date of purchase. Within this period, Sears Canada, Inc. will, at its sole option, repair or replace any products or components which fail in normal use. Such repairs or replacement will be made at no charge to the customer for parts or labor, provided that the customer shall be responsible for any transportation cost. Exclusions: This warranty does not cover failures due to normal wear, abuse, misuse, neglect (including but not limited to the use of stale fuel, dirt, abrasives, moisture, rust, corrosion, or any adverse reaction due to improper storage or use habits), improper maintenance or failure to follow maintenance guidelines and/or instructions, failure to operate the product in accordance with the owner’s manual or any additional instructions or information provided at the time of purchase or in subsequent communications with the original purchaser, accident or unauthorized alterations or repairs made or attempted by others. Also excluded from warranty coverage – except as provided below - are the following: pre-delivery set-up or in home service, maintenance, adjustments, components subject to wear including but not limited to: cosmetic components, belts, blades, blade adapters, bulbs, tires, filters, guide bars, lubricants, seats, grips, shear pins, recoil assy’s, saw chains and bars, trimmer lines and spools, spark plugs, starter ropers and tines, and discoloration resulting from ultraviolet light. Any product missing the model and/or serial number identification label will be disqualified from coverage under this warranty. Repairs: Repairs conducted within the Warranty Period will be warranted until the end of the original Warranty Period. Disclaimers: THE WARRANTIES AND REMEDIES CONTAINED HEREIN ARE EXCLUSIVE AND IN LIEU OF ALL OTHER WARRANTIES, WHETHER ORAL OR WRITTEN (OTHER THAN AS STATED HEREIN), AND WHETHER EXPRESS, IMPLIED OR STATUTORY, INCLUDING BUT NOT LIMITED TO ANY. THIS WARRANTY GIVES YOU SPECIFIC LEGAL RIGHTS, WHICH MAY VARY FROM PROVINCE TO PROVINCE. IN NO EVENT SHALL SEARS BE LIABLE FOR ANY INCIDENTAL, SPECIAL, INDIRECT OR CONSEQUENTIAL DAMAGES, WHETHER RESULTING FROM THE USE, MISUSE OR INABILITY TO USE THE PRODUCT OR FROM DEFECTS IN THE PRODUCT. THE EXCLUSIONS IN THIS PARAGRAPH SHALL NOT APPLY IN JURISDICATIONS WHERE APPLICABLE LAW DOES NOT ALLOW FOR THE EXCLUSION OF INCIDENTAL OR CONSEQUENTIAL DAMAGES. IN SUCH JURISDICTIONS, THIS PARAGRAPH SHALL NOT APPLY, BUT THE REMAINING PROVISIONS OF THIS DOCUMENT SHALL REMAIN VALID. Sears retains the exclusive right to repair or replace the product or offer a full refund of the purchase price at its sole discretion. SUCH REMEDY SHALL BE YOUR SOLE AND EXCLUSIVE REMEDY FOR ANY BREACH OF WARRANTY. Customer Responsibilities: In additional to complying with all suggested maintenance guidelines and instructions, customers’ obligations shall include but shall not be limited to: operating the product in accordance with the owner’s manual or any additional instructions or information provided at the time of purchase or in subsequent communications to the purchaser from time to time, exhibit reasonable care in the use, operation, maintenance, general upkeep and storage of the product. Failure to comply with these requirements will void any applicable warranty. List of Applicable Warranty Periods: The following list contains the applicable Warranty Period for your Craftsman product and is based on a combination of the type of product or component and the intended and actual use of the product or component: 90 days: Craftsman products intended for use or actually used for commercial, institutional, professional or income-producing purposes. 2 years: Craftsman riding lawn mowers, yard and garden tractors, walk behind mowers, tillers, brush cutters, snow blowers, handheld blowers, backpack blowers, hedge trimmers and electrical products for noncommercial, nonprofessional, non-institutional, or non-income-producing use, except for those components which are part of engine systems manufactured by third party engine manufacturers for which the purchase has received an separate warranty with product information supplied at the time of purchase. 1 year: Craftsman power cutters, stump grinders, pole pruners, gas chain saws, electric chain saws, trimmer attachments, lawn & garden tractor attachments, baggers and pole saws for noncommercial, nonprofessional, non-institutional, or non-income-producing use. 90 days: All defective batteries, which will be replaced during this 90-day Warranty Period. 60 days: Additional Warranty Period of 60 days will apply to adjustments and worn products or components BUT DOES NOT INCLUDE WEAR OR ADJUSTMENTS for products used for commercial, institutional, professional or income-producing purposes. Wear items include but are not limited to: belts, blades, tires, spark plugs, air filters, chains, shear bolts, skid plates, scraper bars, drift cutters, ropes, tines, collection bags and pulleys. -
Page 20: Manufacturer's Warranty Coverage
FEDERAL and/or CALIFORNIA EMISSION CONTROL WARRANTY STATEMENT YOUR WARRANTY RIGHTS AND OBLIGATIONS MTD Consumer Group Inc, the United States Environmental Protection Agency (EPA), and for those products certified for sale in the state of California, the California Air Resources Board (CARB) are pleased to explain the emission control system (ECS) warranty on your 2013- 2014 small off-road spark-ignited engine and equipment (outdoor equipment). -
Page 21: Warranted Parts
Add-on or modified parts that are not exempted by the Air Resources Board may not be used. The use of any non-exempted add-on or modified parts by the ultimate purchaser will be grounds for disallowing a warranty claim. MTD Consumer Group Inc will not be liable to warrant failures of warranted parts caused by the use of a non-exempted add-on or modified part. - Page 22 02488 Trademarks of Sears Brands Management Corp. used under license by Sears Canada Marque déposée / Marque de commerce de Sears Brands Management Corp. utilisée en vertu d’une licence de Sears Canada...
-
Page 23: 1-800-4-My-Home
Notes... - Page 24 Notes...
Need help?
Do you have a question about the C459-36401 and is the answer not in the manual?
Questions and answers