Advertisement
Quick Links
1
重点
校对项
认证图标
A
1.物料编码
单位表述
产地表述
2.版面尺寸
变更要求
3.材质标注
B
4.颜色标注
5.客户型号
6.产品名称
C
7.产品参数
8.电压功率
D
9.单位符号
10.认证标志
11.回型标志
E
12.ROHS标志
13.警语警语
及字高
F
14.控制面板
1.文字图案印刷颜色为:
及功能
2.该说明书的幅面大小为:
3.该说明书的装订方式为: 钉装
15.目录及
4.说明书警语及认证标志应满足CE/UL标准,CE:警语部分大写字母高度不低于3mm,CE标志不低于5mm,WEEE标志不低于7mm;
页码
UL:大写字母字高不小于1/12"(2.11mm),小写字母字高不小于1/16"(1.6mm),"IMPORTANT SAFEGUARDS","SAVE
THESE INSTRUCTIONS"等词,其字高不小于3/16"(4.8mm),IMPORTANT SAFEGUARDS 必须在最前面。
5.产品应符合QMG-J53.021《产品说明书技术条件》的有关要求。
G
16.商标LOGO
6.有ROHS指令要求的物料应符合美的企业标准QML-J11.006《产品中限制使用有害物质的技术标准》。
A0:功能描述修订频率与铭牌保持一致-麦影涛-20240513
标 记 处数
更改 文件号
H
制 图
设 计
校 对
会 签
1
2
标准元素核对表(此表仅用于印刷品制作过程核对标准内容,非印刷内容)
大于5mm
大于5mm
大于5mm 大于5mm 大于7mm
V~
Hz
直流电:
交流电:
频率:
MADE IN CHINA
Made in China
图纸变更需要核实变更内容点以及涉及的物料和MO单,尤其关注92的在途MO单
Warning notices: Before using this product, please read this manual carefully and keep it for future
reference. The design and speci cations are subject to change without prior notice for product
improvement. Consult with your dealer or manufacturer for details.
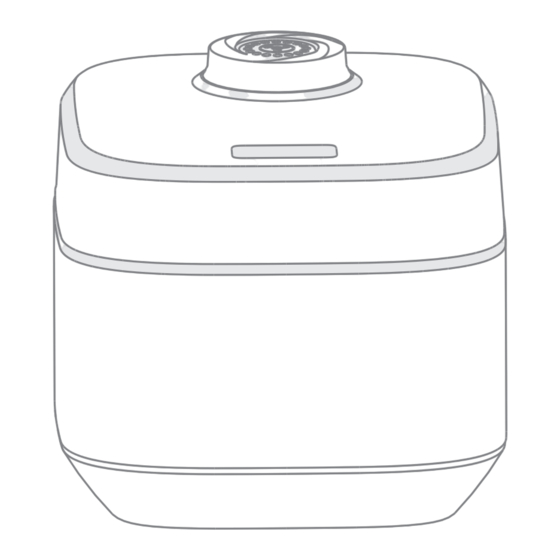
The diagram above is just for reference. Please take the appearance of the actual product as the standard.
黑色
,印刷字体需清晰可见,文字不能粘到一起;
A5
签 字
日 期
麦影涛
卢灿飞
审 核
古广君
-
-- - -
标 准化
陈福贞
古广君
审 定
日 期
2024-02-20
--
- - -
2
3
0000000
0 0 0 0 0 0
ETL有C或US或C+US
UL只有C+US或无
W
mL/L
A
Pa/k Pa/MPa 长度:mm/cm/m 时间:s/min/h 重量:kg
功率:
容量:
电流:
压强:
Made in P.R.C
USER MANUAL
技术要求(版本号:B,2023-06)
,未注直线尺寸公差应符合GB/T1804-v;
70P以下为钉装,70P以上为胶装(特殊要求除外)
;[
电饭煲
说明书
K
1
3
4
5
GS图标无高度要求,印刷可见即可
RICE COOKER
MRD100T1BDG
]
编码 22061070001181
MB-RC350W-0501
材料: 80g双胶纸
1:1
广东美的生活电器制造有限公司
1
5
4
6
22
PAP
A
说明书、保修卡类
B
C
D
E
F
G
H
6
Advertisement

Subscribe to Our Youtube Channel
Related Manuals for Midea MRD100T1BDG


Summary of Contents for Midea MRD100T1BDG
- Page 1 9.单位符号 RICE COOKER 10.认证标志 USER MANUAL MRD100T1BDG 11.回型标志 Warning notices: Before using this product, please read this manual carefully and keep it for future reference. The design and speci cations are subject to change without prior notice for product improvement. Consult with your dealer or manufacturer for details.
- Page 2 RICE COOKER USER MANUAL MRD100T1BDG Warning notices: Before using this product, please read this manual carefully and keep it for future reference. The design and speci cations are subject to change without prior notice for product improvement. Consult with your dealer or manufacturer for details.
- Page 3 THANK YOU LETTER Thank you for choosing Midea! Before using your new Midea product, please read this manual thoroughly to ensure that you know how to operate the features and functions that your new appliance offers in a safe way.
- Page 4 SAFETY INSTRUCTIONS Intended Use The following safety guidelines are intended to prevent unforeseen risks or damage from unsafe or incorrect operation of the appliance. Please check the packaging and appliance on arrival to make sure everything is intact to ensure safe operation. If you nd any damage, please contact the retailer or dealer.
- Page 5 SAVE THESE INSTRUCTIONS CAUTION Read Rules for Safe Operation and Instructions Carefully. ● This electric cooker can only be heated with the original ● inner pot. For products with metal steamer, the steamer can not be used as a separate container to avoid overheating, plastic melting or even fire.
- Page 6 For products with hot water cooking function, please ● follow the instructions in the Quick Start Guide; do not cook with hot water for products without hot water cooking function, otherwise the temperature judgement of the thermostat will be affected, resulting in poor cooking effect.
- Page 7 WARNING During operation, do not cover the steam valve with ● cloth, and placing the product near flammable materials is strictly prohibited. When using the product, keep it away from window curtains, drapes, door curtains or similar materials to prevent causing a fire. Do not use this pot to make food that is easy to block ●...
- Page 8 When maintenance or parts replacement is necessary, ● please deliver the product to the authorized professional service centre for maintenance of Midea. To avoid hidden dangers caused by improper maintenance or improper selection of accessories. The plug should be thoroughly inserted into the socket ●...
- Page 9 The appliance is for household use only. ● Do not use the appliance when connected to a timer or ● an independent remote control system. During the operation of the appliance, certain surface ● may become hot and cause high temperature. Please pay attention to these areas to avoid burns.
- Page 10 SPECIFICATIONS Product Model MRD100T1BDG Voltage 220-240V~ Frequency 50/60Hz Power 605-720W Capacity 1.0L...
- Page 11 PRODUCT OVERVIEW Component Name Steam valve Operation panel Open button Cover removal button Removable cover (front) Upper cover Steamer Cooker body Inner pot Power cord socket Parts List Power cord Standing rice spoon Measurement cup Manual Steamer NOTE All the pictures in this manual are for explanation purpose only. Any discrepancy between the real object and the illustration in the drawing shall be subject to the real subject.
- Page 12 OPERATION INSTRUCTIONS Operation Part Display Screen DELAY MENU START Button KEEP WARM/ START Button CANCEL Button NOTE Sleep Sate, the product automatically enters sleep state if there is no operation in 5 minutes, the nixie tube displays [- -], and all other indicator lights turn off. In sleep state, you can press any key to exit the state.
- Page 13 Function Description (For specific functions, please refer to the actual panel for selective reference) JASMINE RICE 1. Using the included measuring cup, add the uncooked rice to be cooked into the inner pot. 2. Wash the rice, remove excess starch, and pour away the water; repeat this at least 2 times until the rice washing water becomes 3.
- Page 14 BROWN RICE 1. Using the included measuring cup, add the uncooked rice to be cooked into the inner pot. 2. Wash the rice, remove excess starch, and pour away the water; repeat this at least 2 times until the rice washing water becomes 3.
- Page 15 MIXED RICE 1. Using the included measuring cup, put the mixed rice to be cooked into a basin and soak in hot water for 2-3 hours. 2. Add the soaked mixed rice to the inner pot. 3. Wash mixed rice, remove excess starch, and pour away the water; repeat this operation at least 2 times until the rice washing water becomes clear.
- Page 16 CRISPY RICE 1. Using the included measuring cup, add the uncooked rice to be cooked into the inner pot. 2. Wash the rice, remove excess starch, and pour away the water; repeat this at least 2 times until the rice washing water becomes 3.
- Page 17 CONGEE 1. Using the included measuring cup, add the uncooked rice to be cooked into the inner pot. 2. Wash the rice, remove excess starch, and pour away the water; repeat this at least 2 times until the rice washing water becomes 3.
- Page 18 STEAM 1. Add water to the inner pot according to the STEAM water level of the inner pot. 2. Wipe the moisture on the outer surface of the inner pot and place the inner pot into the cooker. Make sure that there are no foreign objects on the bottom where the cooker is in contact with the inner pot.
- Page 19 SOUP 1. Add ingredients to the inner pot and add appropriate water as needed. 2. Wipe the moisture on the outer surface of the inner pot and place the inner pot into the cooker. Make sure that there are no foreign objects on the bottom where the cooker is in contact with the inner pot, and then close the lid.
- Page 20 STEW 1. Add ingredients to the inner pot and add appropriate water as needed. 2. Wipe the moisture on the outer surface of the inner pot and place the inner pot into the cooker. Make sure that there are no foreign objects on the bottom where the cooker is in contact with the inner pot, and then close the lid.
- Page 21 QUICK RICE 1. Using the included measuring cup, add the uncooked rice to be cooked into the inner pot. 2. Wash the rice, remove excess starch, and pour away the water; repeat this at least 2 times until the rice washing water becomes 3.
- Page 22 WHITE RICE 1. Using the included measuring cup, add the uncooked rice to be cooked into the inner pot. 2. Wash the rice, remove excess starch, and pour away the water; repeat this at least 2 times until the rice washing water becomes 3.
- Page 23 DELAY START JASMINE RICE, BROWN RICE, MIXED RICE, CRISPY RICE, CONGEE, STEAM, SOUP 1. Using the included measuring cup, add the uncooked rice to be cooked into the inner pot. 2. Wash the rice, remove excess starch, and pour away the water; repeat this at least 2 times until the rice washing water becomes 3.
- Page 24 NOTE 1. STEW and KEEP WARM do not support Delay Start. The delay time refers to the cooking end time. Taking the delay for 8 hours as an example, cooking will be completed after 8 hours. It is recommended that the delay time should not exceed 12 hours, or the rice may have a peculiar smell.
- Page 25 NOTE 1. [0h] means the keep-warm time is less than 1 hour, [1h] will be displayed after 1 hour, [2h] will be displayed after 2 hours, and so on. 2. The cooker can keep warm for up to 24 hours. 3.
- Page 26 CLEANING AND MAINTENANCE Make sure that the product is not powered on during cleaning and maintenance. Remove The Cover Tip: For the first time use, you can simply clean it according to the following steps. Subsequent cleaning can be carried out regularly according to the usage. 1 Remove the cover After cleaning Press the red button to remove the...
- Page 27 TROUBLESHOOTING Operation of your appliance can lead to errors and malfunctions. The following tables contain possible causes and notes for resolving an error message or malfunction. It is recommended to read the tables carefully below in order to save your time and money that may cost for calling to the service center.
- Page 28 When an error code appears on the display, you can check and handle it according to the following list. If the problem cannot be solved, please contact after-sales service. Indicator Error Solution Possible cause status display Bottom sensor open circuit Bottom sensor short circuit IGBT sensor open...
- Page 29 Midea may constitute trademark infringement or unfair competition in violation of relevant laws. This manual is created by Midea and Midea reserves all copyrights thereof. No entity or individual may use, duplicate, modify, distribute in whole or in part this manual, or bundle or sell with other products without the prior written consent of Midea.
- Page 30 European Economic Area. Further information are provided on request. You can contact our Data Protection Officer via MideaDPO@midea.com. To exercise your rights such as right to object your personal date being processed for direct marketing purposes, please contact us via...
Need help?
Do you have a question about the MRD100T1BDG and is the answer not in the manual?
Questions and answers