Table of Contents
Advertisement
Available languages
Available languages
Quick Links
RICE COOKER
USER MANUAL
CRD30LB3APW
Warning notices: Before using this product, please read this manual carefully and keep it for future reference.
The design and specifications are subject to change without prior notice for product improvement.
Consult with your dealer or manufacturer for details.
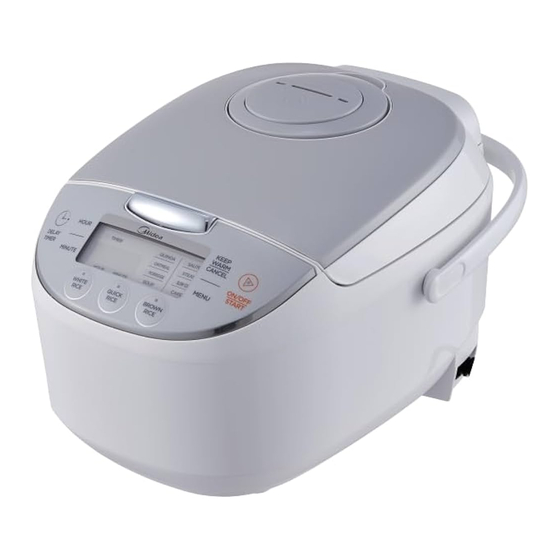
The diagram above is just for reference. Please take the appearance of the actual product as the standard.
Advertisement
Chapters
Table of Contents

Subscribe to Our Youtube Channel
Related Manuals for Midea CRD30LB3APW


Summary of Contents for Midea CRD30LB3APW
- Page 1 RICE COOKER USER MANUAL CRD30LB3APW Warning notices: Before using this product, please read this manual carefully and keep it for future reference. The design and specifications are subject to change without prior notice for product improvement. Consult with your dealer or manufacturer for details.
-
Page 2: Table Of Contents
THANK YOU LETTER Thank you for choosing Midea! Before using your new Midea product, please read this manual thoroughly to ensure that you know how to operate the features and functions that your new appliance offers in a safe way. -
Page 3: Safety Instructions
SAFETY INSTRUCTIONS Intended Use The following safety guidelines are intended to prevent unforeseen risks or damage from unsafe or incorrect operation of the appliance. Please check the packaging and appliance on arrival to make sure everything is intact to ensure safe operation. If y damage, please contact the retailer or dealer. - Page 4 IMPORTANT SAFEGUARDS When using electrical appliances, basic safety precautions should always be followed including the following: • Read all instructions. • Do not touch hot surfaces. Use handles or knobs. • To protect against electrical shock do not immerse cord, plugs, or (state specific part or parts in question) in water or other liquid.
- Page 5 • Do Not Immerse In Water. • CAUTION : To Reduce The Risk Of Electric Shock, Cook Only In Removable Container. • Intended for countertop use only. • WARNING: Spilled food can cause serious burns. Keep appliance and cord away from children. Never drape cord over edge of counter, never use outlet below counter, and never use with an extension cord.
-
Page 6: Specifications
SPECIFICATIONS Product Model CRD30LB3APW Voltage 120V~ Power 619W Frequency 60Hz Circuit Principle Diagram Conne 120V~60Hz cting Temperaturefuse line power Display Black board panel Heatingplate Blue Bottom sensor White Top cover sensor Black... -
Page 7: Product Overview
PRODUCT OVERVIEW Component Name Cover Uncovering Button Control Panel Handle Main Unit Power Cord Parts List Inner Pot Steam Tray Rice Measuring Rice Spatula Soup Ladle NOTE All the pictures in this manual are for explanation purpose only. Any discrepancy between the real object and the illustration in the drawing shall be subject to the real subject. -
Page 8: Quick Start Guide
QUICK START GUIDE Instructions for Use Wipe dry the exterior of cooking pot with cloth and place in the body; rotate the pot around for 2-3 times to ensure close attachment between the pot bottom and heating plate; press the lid until you hear a click. Do not place the cooking pot on other stoves for heating to avoid deformation due to high temperature;... -
Page 9: Operation Instructions
OPERATION INSTRUCTIONS Operation Part Icon Button Function description ON/OFF • Turns the cooker on/off and to begin a function. /START • Keep Warm is perfect for keeping food warm and KEEP WARM ready to serve. Press once to cancel and to manual /CANCEL set to Keep Warm. - Page 10 Before First Use 1. Read all instructions and important safeguards. 2. Remove all packaging materials and check that all items have been received in good condition. 3. Tear up all plastic bags and dispose of properly as they can pose a risk to children. 4.
- Page 11 Troubleshooting Rice is too dry/hard after cooking. If your rice is dry or hard/chewy when the cooker switches to KEEP WARM, additional water and cooking time will soften the rice. Depending on how dry your rice is, add 1/2 to 1 cup of water and stir through. Close the lid and press the WHITE RICE button. When cooker switches to KEEP WARM mode, open the lid and stir the rice to check the consistency.
- Page 12 HELPFUL HINTS • If you misplace the measuring cup, a 3/4 standard US cup is an exact replacement. • To add more flavor to rice, try substituting a favorite meat or vegetable broth or stock. The ratio of broth/stock to rice will be the same as water to rice. •...
- Page 13 Cooking Rice RICE WATER APPROX. COOKING UNCOOKED LINE COOKED TIMES RICE (inside pot) RICE YIELD White Rice: 39-44 Min. 2 Cups* Line 2 4 Cups* Brown Rice: 72-77 Min. White Rice: 39-48 Min. 3 Cups* Line 3 6 Cups* Brown Rice: 75-80 Min. White Rice: 46-52 Min.
- Page 14 Using Delay Timer 1. Using the provided measuring cup, add rice to the inner pot. 2. Rinse rice to remove excess starch. Drain. 3. Fill with water to the line which corresponds to the number of cups of rice being cooked.
- Page 15 Quick Rice 1. Using the provided measuring cup, add rice to the inner pot 2. Rinse rice to remove excess starch. Drain. 3. Fill with water to the line which corresponds to the number of cups of rice being cooked. 4.
- Page 16 Quinoa 1. Using the provided measuring cup, add quinoa to the inner pot. 2. Rinse quinoa to remove excess starch. Drain. 3. Fill with water to the line which corresponds to the number of cups of rice being cooked. 4. Place the inner pot into the cooker. 5.
- Page 17 Oatmeal 1. Follow packaging instructions for suggested oatmeal/water ratio, add oatmeal and water to the inner pot. 2. Place the inner pot into the cooker. 3. Close the lid securely. 4. Plug into an available 120V AC outlet. 5. Press /ON/OFF/START to turn the cooker on.
- Page 18 Steaming Tables Meat Steaming Table Safe Internal Meat Steaming Time Temperature Fish 25 Min. 140° Chicken 30 Min. 165° Pork 30 Min. 160° Medium = 25 Min. Medium-Well = 30 Min. Beef 160° Well = 33 Min. HELPFUL HINTS • Since most vegetables only absorb a small amount of water, there is no need to increase the amount of water with a larger serving of vegetables.
- Page 19 * When steaming, recommends using 2 cups of water with the provided measuring cup. NOTE • Altitude, humidity and outside temperature will affect cooking times. • These steaming charts are for reference only. Actual cooking times may vary. Sauté 1. Add ingredients to be sauteed or browned to the inner pot. 2.
- Page 20 8. Once the selected time has passed, cooker will beep and switch to Keep WARM. Digital display will show the number of hours the cooker has been on KEEP WARM beginning with “0”. 9. Once food is finished, the cooker will beep and automatically switch to its KEEP WARM setting.
-
Page 21: Cleaning And Maintenance
CLEANING AND MAINTENANCE • Wipe the heat preservation cover with • Wipe dry the water in wet cloth and do not wash with water. condensation collector with dry cloth. • Clean the multi-cooker with a damp • Clean the water on heating plate (if cloth. - Page 22 Cover Plate Cleaning Methods Press here Clean the cover plate Open the cover, remove the cover plate Install the plate Disassembly, Cleaning and Assembly of Steam Valve. NOTE The valve should be cleaned frequently to ensure smooth venting. Please clean when the appliance cools down to avoid burns.
- Page 23 • Drawing of opening it. • Clean it with water after opening. • Align the valve cover with the slot of • Press down to install the steam valve. valve seat, close the steam valve in accordance with the instructions, installation completed when heard “Click”...
-
Page 24: Troubleshooting
TROUBLESHOOTING Operation of your appliance can lead to errors and malfunctions. The following tables contain possible causes and notes for resolving an error message or malfunction. It is recommended to read the tables carefully below in order to save your time and money that may cost for calling to the service center. -
Page 25: Trademarks, Copyrights And Legal Statement
Midea may constitute trademark infringement or unfair competition in violation of relevant laws. This manual is created by Midea and Midea reserves all copyrights thereof. No entity or individual may use, duplicate, modify, distribute in whole or in part this manual, or bundle or sell with other products without the prior written consent of Midea. -
Page 26: Data Protection Notice
European Economic Area. Further information are provided on request. You can contact our Data Protection Officer via MideaDPO@midea.com. To exercise your rights such as right to object your personal date being processed for direct marketing purposes, please contact us via... - Page 28 LETTRE DE REMERCIEMENTS Merci d'avoir choisi Midea ! Avant d'utiliser votre nouveau produit Midea, merci de lire attentivement ce manuel afin de vous assurer d’être à même d’utiliser les caractéristiques et fonctions de votre nouvel appareil en toute sécurité. SOMMAIRE...
-
Page 29: Consignes De Securite
CONSIGNES DE SECURITE Usage prévu Les consignes de sécurité qui suivent ont pour but de prévenir les risques ou les dommages imprévus résultant d'une utilisation dangereuse ou incorrecte de l'appareil. Merci de vérifier l'emballage et l'appareil à réception afin de vous assurer que tout est intact, cela afin de garantir un fonctionnement sûr. - Page 30 CONSIGNES IMPORTANTES DE SECURITE Lors de l'utilisation d'appareils électriques, il convient de toujours respecter les mesures de sécurité de base, notamment les suivantes : • Lire toutes les instructions. • Ne pas toucher les surfaces chaudes. Utiliser les poignées ou les boutons. •...
- Page 31 • Commencer toujours par brancher la fiche sur l'appareil, puis brancher le cordon sur la prise murale. Pour débrancher l'appareil, mettre n'importe quelle commande sur "off", puis retirer la fiche de la prise murale. • Ne pas utiliser l'appareil à d'autres fins que celles prévues.
-
Page 32: Specifications
SPECIFICATIONS Modèle du Produit CRD30LB3APW Tension 120V~ Puissance 619W Fréquence 60Hz Schéma de Principe du Circuit Ligne 120V~60Hz Fusible conne Rouge xion Panneau Carte Noir d’Affich d’alime ntation Plaque chauffante Bleu Rouge Capteur du fond Blanc Capteur du Noir couvercle... -
Page 33: Vue D'ensemble Du Produit
VUE D’ENSEMBLE DU PRODUIT Noms des Composants Couvercle Bouton d’ouverture Panneau de Poignée Commandes Unité Principale Cordon d’Alimentation Liste des Pièces Récipient Plateau Gobelet de Gobelet de Louche à Intérieur Vapeur Mesure du Riz Mesure du Riz Soupe REMARQUE Toutes les images de ce manuel sont fournies à titre d'explication uniquement. Toute divergence entre l'objet réel et l'illustration du dessin sera soumise à... -
Page 34: Guide De Demarrage Rapide
GUIDE DE DEMARRAGE RAPIDE Instructions pour l’Utilisation Essuyer l'extérieur du récipient avec un chiffon et le placer dans l’unité principale ; faire tourner le récipient 2 ou 3 fois pour assurer une bonne fixation entre le fond du récipient et la plaque chauffante ; appuyer sur le couvercle jusqu'à ce que vous entendiez un déclic. -
Page 35: Instructions Sur Le Fonctionnement
INSTRUCTIONS SUR LE FONCTIONNEMENT Fonctionnement Icone Bouton Description de la Fonction ON/OFF • Allumer et d'éteindre l'appareil et de lancer une /DEMAR fonction. • Le maintien au chaud est idéal pour garder les MAINTIEN AU aliments chauds et prêts à être servis. Appuyer une CHAUD fois sur la touche pour annuler et pour régler /ANNULER... - Page 36 Avant la Première Utilisation 1. Lire toutes les instructions et les mesures de protection importantes. 2. Retirer tous les matériaux d'emballage et vérifier que tous les articles ont été reçus en bon état. 3. Déchirer tous les sacs en plastique et les jeter correctement, car ils peuvent présenter un risque pour les enfants.
- Page 37 Dépannage Le riz est trop sec/dur après la cuisson. Si votre riz est sec ou dur à mâcher lorsque le cuiseur passe en mode KEEP WARM, l'ajout d'eau et de temps de cuisson permettra de ramollir le riz. Selon le degré de sécheresse du riz, ajouter 1/2 à...
- Page 38 CONSEILS UTILES • Si vous égarez le gobelet de mesure, d’une tasse américaine standard le remplacera parfaitement. • Pour donner plus de saveur au riz, essayer d’ajouter votre bouillon de viande ou de légumes préféré. Le rapport entre le bouillon et le riz sera le même que celui entre l'eau et le riz.
- Page 39 Cuisson du Riz LIGNE D’EAU RIZ RENDEMENT TEMPS DE RIZ NON CUIT (dans le RIZ APPROX. CUISSON récipient) CUIT Riz Blanc : 39-44 Min. 2 Tasses* Ligne 2 4 Tasses* Riz Brun : 72-77 Min. Riz Blanc : 39-48 Min. 3 Tasses* Ligne 3 6 Tasses*...
- Page 40 Utilisation de la Minuterie Différée 1. A l'aide du gobelet gradué fourni, verser le riz dans le récipient intérieur. 2. Rincer le riz pour éliminer l'excès d'amidon. Egoutter. 3. Remplir d'eau jusqu'à la ligne correspondant au nombre de tasses de riz à cuire. 4.
- Page 41 Riz Rapide 1. A l'aide du gobelet gradué fourni, verser le riz dans le récipient intérieur. 2. Rincer le riz pour éliminer l'excès d'amidon. Egoutter. 3. Remplir d'eau jusqu'à la ligne correspondant au nombre de tasses de riz à cuire. 4.
- Page 42 Quinoa 1. A l'aide du gobelet gradué fourni, verser le quinoa dans le récipient intérieur. 2. Rincer le quinoa pour éliminer l'excès d'amidon. Egoutter. 3. Remplir d'eau jusqu'à la ligne correspondant au nombre de tasses de riz à cuire. 4. Placer le récipient intérieur dans le cuiseur. 5.
- Page 43 Flocons d’Avoine 1. Suivre les instructions de l'emballage pour le rapport avoine/eau suggéré, ajouter l'avoine et l'eau dans le récipient intérieur. 2. Placer le récipient intérieur dans le cuiseur. 3. Bien fermer le couvercle. 4. Brancher l'appareil sur une prise de courant alternatif de 120 V CA. 5.
- Page 44 Tableau de Cuisson à la Vapeur Tableau de Cuisson de la Viande à la Vapeur Safe Internal Viande Steaming Time Temperature Poisson 25 Min. 140° Poulet 30 Min. 165° Porc 30 Min. 160° Moyen = 25 Min. Moyen-Saisi = 30 Min. Bœuf 160°...
- Page 45 * Pour la cuisson à la vapeur, il est recommandé d'utiliser 2 tasses d'eau à l'aide du gobelet gradué fourni. REMARQUE • L'altitude, l'humidité et la température extérieure influent sur les temps de cuisson. • Ces tableaux de cuisson à la vapeur sont donnés à titre indicatif. Les temps de cuisson réels peuvent varier.
- Page 46 8. Une fois le temps sélectionné écoulé, l'appareil émet un signal sonore et passe en mode KEEP WARM. L'affichage numérique indique le nombre d'heures pendant lesquelles le cuiseur a été en mode KEEP WARM, en commençant par "0". 9. Lorsque les aliments sont terminés, le cuiseur émet un signal sonore et passe automatiquement en mode KEEP WARM.
-
Page 47: Nettoyage Et Entretien
NETTOYAGE ET ENTRETIEN • Essuyer le couvercle de préservation de • Essuyer l'eau contenue dans le collecteur la chaleur avec un chiffon humide et ne de condensation avec un chiffon sec. pas le laver à l'eau. • Nettoyer le cuiseur avec un chiffon •... - Page 48 Méthodes de Nettoyage de la Plaque de Recouvrement Appuyer ici Nettoyer la plaque de recouvrement Ouvrir le couvercle, retirer la plaque de recouvrement Installer la plaque Démontage, Nettoyage et Assemblage d'une Soupape à Vapeur. REMARQUE La soupape doit être nettoyée fréquemment pour assurer une bonne ventilation. Le nettoyage doit être effectué...
- Page 49 • Dessin de l’ouverture • La nettoyer à l'eau après ouverture. • Aligner le couvercle de la soupape avec • Appuyer pour installer la soupape à la fente du siège de la soupape, fermer la vapeur. soupape à vapeur conformément aux instructions, l'installation est terminée lorsque l'on entend un "clic".
-
Page 50: Dépannage
DÉPANNAGE L'utilisation de votre appareil peut entraîner des erreurs et des dysfonctionnements. Les tableaux suivants contiennent les causes possibles et des conseils pour résoudre un message d'erreur ou un dysfonctionnement. Il est recommandé de lire attentivement les tableaux ci-dessous afin d'économiser le temps et l'argent que pourrait coûter un appel au centre de service. -
Page 51: Marques, Droits D'auteur Et Mentions Legales
Le logo , les marques verbales, le nom commercial, l'habillage commercial et toutes les versions de ces éléments sont des actifs précieux de Midea Group et/ou de ses filiales ("Midea"), auxquels Midea appartient en tant que marques commerciales, droits d'auteur et autres droits de propriété intellectuelle, ainsi que l’intégralité du fonds de commerce dérivé... -
Page 52: Avis Sur La Protection Des Donnees
Economique Européen. De plus amples informations sont fournies sur demande. Vous pouvez contacter notre Délégué à la Protection des Données à l'adresse MideaDPO@midea.com. Pour exercer vos droits, tels que le droit d'opposition au traitement de vos données personnelles à... - Page 53 N° d’Intervention Date Midea offre au propriétaire de ce produit une GARANTIE D'UN AN, à compter de la date d'achat, contre tous les défauts de fabrication en termes de matériaux et de main-d'œuvre. La carte de garantie doit être présentée aux centres de service/distributeurs agréés avec la facture d'achat pour faire valoir la garantie.
Need help?
Do you have a question about the CRD30LB3APW and is the answer not in the manual?
Questions and answers