Advertisement
Quick Links
Detailed User Manual
Step 1A: Getting Started
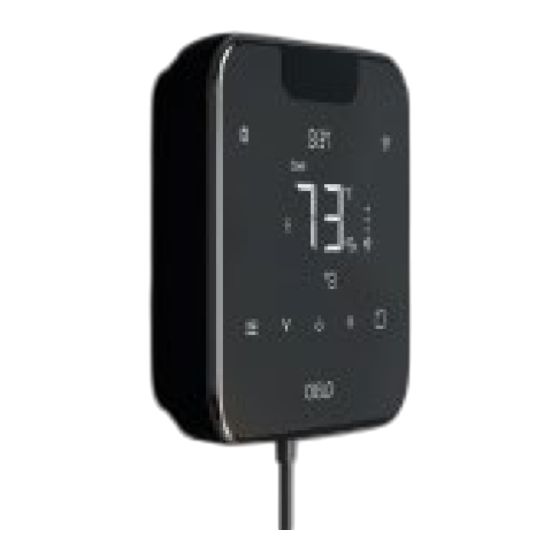
Cielo Breez Max can be mounted on a wall using the backplate or placed on a table using the
table stand (both included in the box).
Before finalizing the placement, it is recommended to first power up, register, and test the device
to ensure signals can easily reach the AC.
For optimal placement and control:
Make sure Breez Max is in the line of sight of your air conditioner or heat pump.
•
To avoid deviated sensor readings, do not place Breez Max where it may be exposed
•
to excessive
sunlight or other heat sources.
Note: It is strongly advised that whenever there is a need to use the remote control for AC/heat
pump, point it towards Breez Max while performing any action. This way, your AC/heat pump
and Cielo Home app will always be in sync.
Powering Up Options
Breez Max can be powered up using a 5V adapter (always use the provided power adapter and
USB cable for optimal results).
Advertisement

Related Manuals for Cielo Breez Max


Summary of Contents for Cielo Breez Max
- Page 1 Detailed User Manual Step 1A: Getting Started Cielo Breez Max can be mounted on a wall using the backplate or placed on a table using the table stand (both included in the box). Before finalizing the placement, it is recommended to first power up, register, and test the device to ensure signals can easily reach the AC.
- Page 2 Please DO NOT use any other voltage level to power up Breez Max. Please choose ONLY ONE power-up option, i.e., either 5V OR 24/12V. Instructions for Wired Connection Step 1: Switch off the power by using the circuit breaker. This is very important for your safety.
- Page 3 Step 4: Cielo Breez Max has two terminals marked as Rc and C on its backplate. Insert red wire into Rc and black wire into C from the side (press the terminal block buttons for ease of insertion). Step 5: Align your Cielo Breez Max with the backplate and press gently to fix it properly.
- Page 4 Note: Make sure IP isolation or client isolation is turned OFF on your Wi-Fi router. Step 2: App Installation & Registration Install the ‘Cielo Home’ app from the App Store. Log in to the app if you already have an account; otherwise, create one using the sign-up option.
- Page 5 You may disable it later. Local Network Access permission is a requirement for iOS 14.0 onwards to • successfully register the device. Open the Cielo Home app, tap ‘Add Device’ on the home screen, and select Breez Max from the list of devices.
- Page 6 Follow the steps to successfully pair your Breez Max with your phone. Step 1: Make sure your Breez Max is powered on. Step 2: Make sure your phone’s Bluetooth is turned on. Tap ‘Next’. Step 3: Wait for Cielo Breez Max to appear on the screen. Then, tap ‘Connect’.
- Page 7 Note: In case Breez Max does not appear, touch and hold the Power and Temperature Up buttons simultaneously for 6 seconds. The Bluetooth icon on the screen should start blinking, and the app will automatically move to the next screen.
- Page 8 Step 6: Get hold of your AC remote and tap ‘Next’. Step 7: Point your AC remote at Breez Max and press the remote’s ‘Power button’ once. It will start the configuration process. Step 8: The configuration screen will display your detected remote control. Tap ‘Send a test...
- Page 9 Your remote is now successfully paired with Breez Max. Tap on ‘Done’. Registration process is complete. Enjoy your smart air conditioning! Your Home Screen Your home screen shows the real-time status of all your Cielo devices. A registered Cielo device can show either of the 2 statuses outlined in circles: Green - Device is online.
- Page 10 Enjoy Unlimited Functionalities...
- Page 11 Configuring the Right Remote Control for Your AC Breez Max auto-detects the relevant remote control for your AC during the registration process. You can also configure your AC remote manually. For manual selection, follow these steps: A: Go to settings by tapping the ‘Settings’ icon on the control screen.
- Page 13 Quick Tip: Remote control model number is usually found on the back side of the remote control. Know Your Breez Max Adjusting the temperature of your AC: Use the up or down button to set the temperature of your choice.
- Page 14 Touch and hold the Temperature Up and Down buttons simultaneously until the lock icon on the top right of the screen turns solid/disappears. Resetting the Wi-Fi of Breez Max: Touch and hold the Temperature Up and Power buttons simultaneously until the Wi-Fi icon disappears and the Bluetooth icon starts blinking.
- Page 15 Step 4A: Setting up Schedules for Your Heating and Cooling 1. Setting up a Custom Schedule Step 1: On the Home screen, tap on the Air-Conditioner / Heat Pump you want to schedule. Step 2: Tap on ‘Schedule’ in the navigation bar. Step 3: Tap on '+ Add Schedule'.
- Page 16 Step 7: Tap on ‘Save’ to set up the schedule. Once the schedule is set, it will appear on the schedule tab. You can turn it On/Off by toggling the slider against the schedule.
- Page 17 2. Scheduling a Preset Step 1: On the Home screen, tap on the Air-Conditioner / Heat Pump you want to schedule. Step 2: Tap on ‘Schedule’ in the navigation bar. Step 3: Tap on '+ Add Schedule'.
- Page 18 Step 4: Tap on ‘Preset Schedule’. Step 5: Select the time/days you want to set the schedule for choose whether you want to set it as a repeat schedule. Step 6: Select the Preset you want to schedule.
- Page 19 Step 7: Tap on 'Save' to set up the schedule.
- Page 20 3. Deleting/Editing a schedule Step 1: From the device control screen, tap on ‘Schedule’ in the navigation bar. Step 2: In the 'Schedule' tab, you will see all your set schedules. Step 3: Swipe left on the schedule you want to edit or delete until both options for Edit/Delete appear.
- Page 21 You can set up comfy temperature mode for your air conditioner/heat pump by performing these steps via Cielo Home app: Step 1: On the Home screen, tap on the air conditioner/heat pump you want to set comfy temperature mode on.
- Page 22 Step 4: Tap on 'Add Template' under the Comfy Temperature heading. Step 5: Select what actions to perform if the temperature falls below or goes above the set range, e.g. turning the AC off or on, changing its mode, temperature, fan speed, and swing position to help it get back into the preferred temperature range.
- Page 24 Note: You can set up multiple Comfy settings through Comfy templates. Each of the templates can be turned 'On' or 'Off' from the toggle next to its name. You can have a different Comfy Mode for the morning, a different mode for the afternoon, and so on. Step 7: You can turn Comfy Mode On/Off from the app control screen.
- Page 26 Falls Below a Pre-set Value) You can set up comfy humidity mode for your air conditioner/heat pump by performing these steps via Cielo Home app: Step 1: On the Home screen, tap on the air conditioner/heat pump you want to set comfy humidity mode on.
- Page 27 Step 6: 'Comfy Humidity' is now set. You can turn Comfy Mode 'On' or 'Off' from the toggle next to the name of the Comfy Mode. Once the device triggers the defined comfy humidity mode actions, you will get a notification in your app timeline.
- Page 29 Step 4D: Setting up Comfy Max You can set up Comfy Max for your air conditioner/heat pump by performing these steps via Cielo Home app: Step 1: On the Home screen, tap on the air conditioner/heat pump you want to set comfy max on.
- Page 30 Step 4: Tap on ‘Add Template’ to set up Comfy Max. Step 5: Choose your preferred temperature window, and select whether you want the fan to run after your desired cooling temperature is reached. Add a name for this template and tap on ‘Done’.
- Page 32 Before You Arrive and Turn It off After You Have Left the Pre-set Location) You can configure location-based control for your Air-Conditioner/Heat Pump by performing these steps via the Cielo Home app: Step 1: On the Home screen, tap on the Air-Conditioner/Heat Pump you want to control through location controls.
- Page 33 AC runs within that range) You can set up temperature range control for your Air-Conditioner / Heat Pump by performing these steps via Cielo Home app: Step 1: On the Home screen, tap on the Air-Conditioner / Heat Pump you want to set temperature range control on.
- Page 34 Step 4: Toggle the slider to enable Range Control, as shown in the red box. Step 5: Choose your preferred temperature range to operate the AC in. Tap on 'Done'. Step 6: Now the device control screen temperature slider will be restricted to the temperature range specified.
- Page 35 Note: Setting a temperature range will disable all schedules, location controls, and comfy mode in case the selected temperature range conflicts with the previously set values. These modes can be set later again within the specified temperature range. If you have a Preset outside the set temperature range, you'll have to edit the preset in order to enable temperature range control.
- Page 36 Step 4: You will see your current air filter status of the AC being used with the Device since registration (or since the last cleaning). When the range is about to fill up, manually remove the AC’s air filter and clean it. Once done, place the filter back into the AC. Tap on ‘I have cleaned the air filter’.
- Page 37 Step 4H: Adding Siri Shortcuts to Cielo Home Step 1: On the Home screen, tap on the Air-Conditioner/Heat Pump you want to add Siri Shortcuts for. Step 2: Tap on ‘eSaver’ in the navigation bar. Step 3: Tap on ‘Siri Shortcuts’.
- Page 38 Step 4: Tap on 'Create Shortcut' to make a new Siri Shortcut. Step 5: Choose whether you want to add "Preset" as a shortcut or select "Custom" and enter the desired AC settings. You can set the AC operating mode, temperature set point, and fan speed. Tap on ‘Done’.
- Page 40 Step 4I: Checking Usage History Step 1: On the Home screen, tap on the Air-Conditioner/Heat Pump you want to check Usage history for. Step 2: On the Control screen, Tap on 'History'. Step 3: Your 30-day usage summary should appear on the screen. Tap on any day to learn more details about your detailed usage history.
- Page 41 Step 4K: Editing a preset Step 1: From the device control screen, tap on the ‘Settings’ icon on the top right corner. Step 2: Tap on ‘Preset’. Step 3: Select the Preset you want to edit. Step 4: Make your desired changes and tap on the ‘Done’ button. Your Preset has been updated successfully.
- Page 42 Step 4L: Change Appliance (Manufacturer/Model Number) Step 1: On the Home screen, tap on the Breez Max device you want to change the appliance for. Step 2: Tap on the ‘Settings’ icon on the top right. Step 3: Tap on ‘Change Appliance’.
- Page 43 Step 4: Tap on 'Manual Configuration'. Step 5: Tap on the 'Manufacturer' and select the appropriate AC manufacturer from the drop- down list. Step 6: Tap on 'Remote Model' and select your remote model from the drop-down list. In this case, 'Model 1 (Celsius)'.
- Page 44 Step 7: Tap on 'Confirm' once you have selected the correct AC manufacturer and remote model. Step 8: Once selected, send a test On/Off command to your AC. Once the AC accepts the command, tap on 'Done'.
- Page 45 Step 4M: Changing Device Name (e.g. bedroom, lounge etc.) Step 1: On the Home screen, tap on the Air-Conditioner / Heat Pump you want to change the name of. Step 2: Tap on the ‘Settings’ icon on the top right. Step 3: Tap on ‘Device Preferences’.
- Page 46 Step 4N: Switch temperature units between Centigrade and Fahrenheit Step 1: On the Home screen, tap on the Air-Conditioner / Heat Pump you want to change the units of. Step 2: Tap on the ‘Settings’ icon on the top right. Step 3: Tap on ‘Device Preferences’.
- Page 47 Step 4: Tap on the C to F toggle against 'Temperature Unit'. Step 5: Your device's temperature units are changed successfully from Fahrenheit to Celsius.
- Page 48 Step 4O: Enable or disable the touch control function on Breez Max Step 1: On the Home screen, tap on the Breez Max device you want to lock/unlock. Step 2: Tap on the ‘Settings’ icon on the top right. Step 3: Tap on ‘Device Preferences’.
- Page 50 Step 4P: Breez Max Device Display Settings Switching Breez Max Display ON/OFF or Adjusting the Brightness of the Screen Step 1: On the Home screen, tap on the Breez Max device you want to turn the display On/Off for. Step 2: Tap on the ‘Settings’ icon on the top right.
- Page 51 Step 4Q: Calibrate Room Temperature (Shown on Device) Step 1: On the Home screen, tap on the Air-Conditioner / Heat Pump you want to calibrate. Step 2: Tap on the ‘Settings’ icon on the top right. Step 3: Tap on ‘Device Preferences’.
- Page 52 Step 4: Tap on 'Calibration'. Step 5: Adjust the temperature as required. Step 6: Tap on 'Done'. Your device has now been calibrated.
- Page 53 Step 4R: Calibrate Room Humidity (Shown on Device) Step 1: On the Home screen, tap on the Air-Conditioner / Heat Pump you want to calibrate. Step 2: Tap on the ‘Settings’ icon on the top right. Step 3: Tap on ‘Device Preferences’.
- Page 54 Step 4: Tap on 'Calibration'. Step 5: Tap on 'Temperature'. Step 6: From the drop-down menu, tap on 'Humidity'. Adjust the humidity as required. Step 7: Tap on 'Done'. Your device has now been calibrated.
- Page 56 Step 4S: Changing Wi-Fi Step 1: On the Home screen, tap on the Breez Max device you want to change the Wi-Fi of. Step 2: Tap on the ‘Settings’ icon on the top right. Step 3: Tap on ‘Device Wi-Fi’.
- Page 57 Step 4T: Sync AC State (e.g. AC is ON and App is showing it OFF) Step 1: On the Home screen, tap on the Breez Max device you want to sync with your AC. Step 2: Tap on the ‘Settings’ icon on the top right.
- Page 59 To create a group in app, follow these steps: Step 1: On the Home screen, tap on the Breez Max device you want to move to a group. Step 2: Tap on the ‘Settings’ icon on the top right.
- Page 61 Step 5: Tap on ‘Add’ to create a group. Step 6/7: Give your group a name (e.g. Ground floor, First floor, Basement, etc.) and choose an icon. Step 8: Group is created successfully.
- Page 63 2. Adding a Device to a group Step 1: On the Home screen, tap on the Breez Max device you want to move to a group. Step 2: Tap on the ‘Settings’ icon on the top right. Step 3: Tap on ‘Device Preferences’.
- Page 65 Step 5: On the Groups Home screen, you will see a list of all active groups. Tap on the group you wish to move the device to. Step 6/7 : You will see a checkmark next to the group name. Tap on ‘Done’ . Step 8 : Tap on ‘OK’.
- Page 67 4. Editing a group Step 1: Tap on ‘Settings’ icon of the group you wish to edit. Step 2: In group settings, tap on ‘Edit Group’. You can change the icon and name of the group you desire. Step 3: Tap on 'Done'. 5.
- Page 68 Step 4V: Removing your Device Step 1: On the Home screen, tap on the Breez Max device you want to delete. Step 2: Tap on the ‘Settings’ icon on the top right. Step 3: Tap on ‘Remove Device’. Step 4: Tap on 'Remove' on the pop-up. Your device is now removed.
Need help?
Do you have a question about the Breez Max and is the answer not in the manual?
Questions and answers