Advertisement
Quick Links
TUBULAR HEATER INSTRUCTION MANUAL
TUBULAR HEATER INSTRUCTION MANUAL
Model Number
Tubular Heater :OSTH1, OSTH2, OSTH3, OSTH4, OSTH5, OSTH6
Tubular Heater :OSTH1, OSTH2, OSTH3, OSTH4, OSTH5, OSTH6
D READ THE MANUAL CAREFULLY BEFORE USING, AND KKEP THE MANUAL WELL.
DISPOSAL
D READ THE MANUAL CAREFULLY BEFORE USING, AND KKEP THE MANUAL WELL.
This symbol indicates that this product must not be placed in general household waste. It should be sent
DISPOSAL
recycling facility for recovery, check Local Authorities for details.
This symbol indicates that this product must not be placed in general household waste. It should be sent
By responsible recycling and separating this product from other household waste it will help protect the e
recycling facility for recovery, check Local Authorities for details.
human health, as the volume of waste sent to incinerators or land-fills will be reduced and natural resourc
By responsible recycling and separating this product from other household waste it will help protect the e
TUBULAR HEATERS
Tubular Heater : OSTH1AT, OSTH2AT , OSTH3AT, OSTH4AT
OSTH1AT/2AT/3AT/4AT with thermostat
Tubular Heater : OSTH1AT, OSTH2AT , OSTH3AT, OSTH4AT
Model Number
www.osily.co.uk
OSTH1/2/3/4/5/6
PS-V2 - 0923
Advertisement

Subscribe to Our Youtube Channel
Related Manuals for osily OSTH1AT


Summary of Contents for osily OSTH1AT
- Page 1 PS-V2 - 0923 TUBULAR HEATERS TUBULAR HEATER INSTRUCTION MANUAL TUBULAR HEATER INSTRUCTION MANUAL Tubular Heater : OSTH1AT, OSTH2AT , OSTH3AT, OSTH4AT Model Number OSTH1AT/2AT/3AT/4AT with thermostat Tubular Heater : OSTH1AT, OSTH2AT , OSTH3AT, OSTH4AT Tubular Heater :OSTH1, OSTH2, OSTH3, OSTH4, OSTH5, OSTH6...
- Page 2 Please ensure that the heater has been disconnected from the power supply and has cooled down completely prior to cleaning, Wipe with a damp cloth, then finish by drying with a soft cloth. DO NOT use abrasive cleaning powders, or metal polishes on any part of the tubular heater as this will cause damage. www.osily.co.uk...
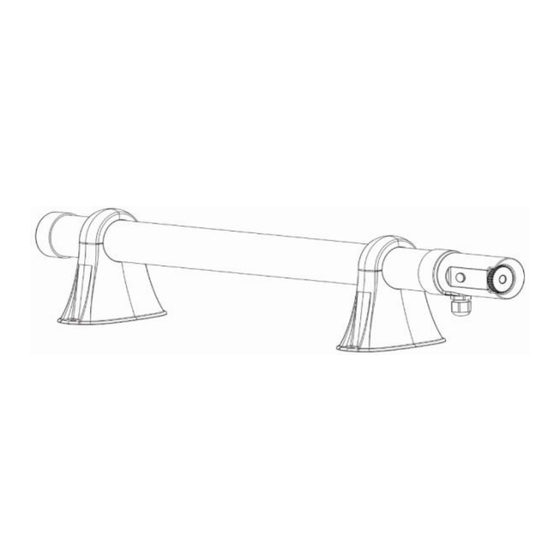
- Page 3 Make sure that any causes of overheating, such as obstructions, are removed and plug the appliance in again. Please switch off when not in use Step 1. Install the bracket as the picture below. 5.Installation for tubular heaters Model Numbers OSTH1AT/2AT/3AT/4AT Installation for Tubular Heater Model Numbers OSTH1/2/3/4/5/6 Step 1.
- Page 4 AND YELLOW. Connect the BROWN wire to the terminal marked ‘L’ or coloured RED. Connect the BLUE wire to the terminal marked ‘N’ or coloured BLACK. Tubular Heater Specification PART NO. POWER ELECTRICAL SUPPLY IP RATING PRODUCT LENGTH (MM) PRODUCT PACK SIZE (MM) OSTH1AT 220-240V, 50Hz IP44 510mm 555x100x85 OSTH2AT 220-240V, 50Hz IP44 710mm...
- Page 5 PS-V2 - 0923 Optional Protective Wire Guards The tubular heaters surface can be protected by purchasing the optional Osily Protective wire Guard – Part number OSTH1C - Fits OSTH1AT & OSTH1 OSTH2C - Fits OSTH2AT & OSTH2 OSTH3C - Fits OSTH3AT & OSTH3 OSTH4C - Fits OSTH4AT &...
Need help?
Do you have a question about the OSTH1AT and is the answer not in the manual?
Questions and answers