Advertisement
Available languages
Available languages
Quick Links
Advertisement

Subscribe to Our Youtube Channel
Related Manuals for Timotion ergoCentric upCentric UPMOD-3L


Summary of Contents for Timotion ergoCentric upCentric UPMOD-3L
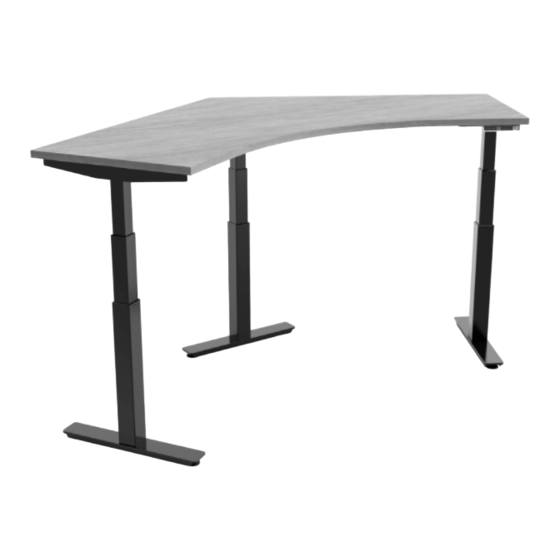
- Page 1 UPMOD-3L Owner’s manual Guide de l’utilisateur ergoCentric ®...
- Page 2 English Introduction ..................2 Specifications .................2 Standard features .................3 Important information ..............5 Safety instructions .................6 Parts ....................7 Assembly instructions ..............8 Preparing the tabletop ............8 Assembling your table .............8 Retrofitting onto existing work surface ........9 Getting started ................12 Troubleshooting ................14 Disposal guidance ..............18 Warranty ..................
- Page 3 upCentric UPMOD-3L ® Introduction Standard features The upCentric electric height adjustable table allows users to easily adjust Presettable memory positions ® their work surface to the optimal working height and to alternate between upCentric electric height adjustable tables come standard with 4 presettable ® seated and standing positions throughout the work day, reducing backaches, memory positions, allowing you to set customized seated and standing table pains, stress and tension, and improving circulation throughout the body. heights, and to quickly adjust to these positions when changing between seated to standing positions. See page 12 for instructions on setting memory positions. Moving the upCentric table is intuitive with the easy-to-use up/down control.
- Page 4 Important information Gyro-sensor anti-collision system Every upCentric electric height adjustable table has a built in gyro-sensor ® based anti-collision system. This patented anti-collision system uses precision • Always make sure all screws are tightened before gyroscope technology, allowing for three axis collision detection. use of the table and after moving or transporting. • D uty cycle of the frame for desk is 10 %, This sensor provides enhanced safety to help prevent user injury and max. 2 minutes operating / min. 18 minutes stop.
- Page 5 Safety instructions Parts Before installation/re-installation Make sure that the table is being installed as described in the “Assembly instructions” section of this owner’s manual. When installing and using electrical equipment, basic s afety precautions should always be followed to avoid a risk of fire, electric shock, or injury to persons: If the power cord is damaged it must be replaced. 2. Do not open any electrical components ( control box, motor housing, handset ). 3. Never drop or insert any object into any opening. 4. M ake sure the correct tools and assembly parts are used when assembling the system.
- Page 6 Assembly instructions Retrofitting onto existing work surface Preparing the tabletop Step 2b: Different shapes of work surfaces Step 1: Lay protective matting / sheet on floor or work surface 120º wing shaped table to protect the tabletop surface. • Position left and right legs at both ends of the work surface, centered front to back, 0.5"- 1"...
- Page 7 Step 3: Align handset ( H ) along the front edge of Step 5: Attach All cables to the control box: the tabletop, 1"- 3" from the desired corner, • Plug the AC cable ( G ) into the port marked AC and attach handset to the tabletop with • Plug the wires from the legs ( K ) into the ports 2 x screws ( D ). marked M1 and M2 • Plug the wire from the handset ( H ) into the port marked H Step 6: Bundle all loose cables together and zip tie together using zip ties ( L ). Attach zip ties ( L ) to tabletop using screws ( C ).
- Page 8 Getting started How to disable a maximum height limit Move the table to the maximum height limit. The first time a table is assembled, the legs must be synchronized before use. Press and hold the button while simultaneously pressing button 4 times. A beeping sound will notify you that the process has completed. Note: You must press the button at the same time on the first How to synchronize press and you must continue to hold the button the entire time, or this setting will not work.
- Page 9 Switching between metric and imperial units Synchronize table legs Press memory buttons ❶ ❷ and ❹ for 5 seconds. Prior to performing any troubleshooting, perform a re-synchronization. The handset display will show “C-I”. On occasion, the table may require a re-sync for a variety of reasons. This is normal. • Ensure there are no obstructions for the desk to move vertically. c - i • Press and hold at the same time. For metric: Press ❷, the handset display will show “C”...
- Page 10 Issue: No movement at all Issue: Wires are damaged • Perform re-sync ( see page 15 ). • Document the damage and request new AC cable, handset, or leg as required. • Is green light on Control Box on? If it is, this mean there is power going to the table. Issue: Handset and control box are not working • Does the handset light up and display correctly? • Unplug everything from control box for 10 seconds, then plug back in. • If the Control Box has power and the handset appears to be working, • Perform re-sync ( see page 15 ). unplug both items and reconnect ensuring all wires are secure. • If it lights up green, this means there is power going to the table.
- Page 11 Disposal guidance Warranty claims ergoCentric will repair or replace any product or materials, covered by upCentric height adjustable tables may be disposed by dividing them ® this warranty, found to be defective or inferior within the warranted period. into different waste groups for recycling or combustion. This warranty includes the cost of labour and shipping. Claims are to be made directly to ergoCentric or to the authorized representative from We recommend that the upCentric is disassembled as much as possible whom the product was purchased. Product or materials, for which a claim before disposal. Main groups within sorting of waste: metal, plastic, has been made, must be made available for inspection by an authorized...
- Page 12 upCentric UPMOD-3L ® Introduction Caractéristiques standard La table électrique à hauteur réglable upCentric permet aux utilisateurs Positions mémorisées préréglables ® de régler facilement leur surface de travail à la hauteur optimale et d'alterner Les tables électriques à hauteur réglable upCentric sont toutes équipées ®...
- Page 13 Informations importantes Dans ces cas, l'affichage de la hauteur peut être ajusté de manière à ce que la hauteur de départ soit cohérente par rapport à la plus basse hauteur réelle du plan de travail. Voir page 30 pour les instructions. • Veillez toujours à ce que toutes les vis soient bien serrées avant d'utiliser la table ainsi qu’après son déplacement ou son transport. 2.
- Page 14 Instructions de sécurité 11. Assurez-vous qu'aucune personne ni aucun objet ne risque de heurter la table lors du réglage vers le haut ou vers le bas. 12. Si le boîtier de commande ou les pieds produisent des odeurs ou Avant l'installation-la réinstallation font des bruits inhabituels, débranchez immédiatement la table de Assurez-vous que la table est installée comme décrit dans la section l'alimentation électrique. « Instructions de montage » du présent manuel. Lors de l'installation et de l'utilisation d'un équipement électrique, des précautions de sécurité de base Pièces doivent toujours être prises pour éviter tout risque d'incendie, de décharge...
- Page 15 Instructions de montage Assemblage d’une surface de travail existante Préparation de la table Étape 2b : Surfaces de travail de différentes formes Table d’angle à 120 º Étape 1 : posez un tapis ou un drap de protection sur le sol ou la surface • P lacez le pied droit et le pied gauche de la table de travail pour protéger la surface de la table. aux extrémités de la surface de travail, centrés entre l’avant et l’arrière, à une distance de 1 cm à 2,5 cm Étape 2 : posez soigneusement le plateau de la table sur la surface de travail,...
- Page 16 Étape 3 : alignez le combiné ( H ) le long du bord Étape 5 : fixez tous les câbles au boîtier de commande : avant de la table, à une distance de • Branchez le câble CA ( G ) dans le port marqué AC 1 à 3 pouces du coin souhaité, et fixez • Branchez les fils des pieds ( K ) dans les ports marqués M1 et M2 le combiné à la table avec deux vis ( D ). • Branchez le fil du combiné ( H ) dans le port marqué H Étape 6 : rassemblez tous les câbles détachés et attachez-les à l'aide des attaches ( L ). Fixez les attaches ( L ) au plateau de table à l'aide de vis ( C ). Étape 4 : Fixez le boîtier de commande ( F ) au plateau de table à l’aide de 2 vis ( C ). Placez-le idéalement à la gauche ou à la droite du Étape 7 : fixez les patins ( J ) aux pieds ( K ) à l'aide de boulons ( A ). pied central, la prise du câble de courant alternatif orientée vers l’arrière.
- Page 17 Pour commencer Comment désactiver une limite de hauteur maximale Placez la table à la hauteur maximale. Lors du premier assemblage de la table, les pieds doivent être synchronisés Appuyez sur le bouton et maintenez-le enfoncé tout en appuyant avant l'utilisation. simultanément sur le bouton 4 fois. Un signal sonore vous indiquera que le processus est terminé. Note : vous devez appuyer simultanément sur lors de la pression initiale et vous devez continuer à maintenir le bouton enfoncé pendant Comment synchroniser tout ce temps, sinon ce réglage ne fonctionnera pas.
- Page 18 Passage des unités impériales aux unités métriques Synchroniser les pieds de la table Appuyez sur les boutons de mémoire ❶ ❷ et ❹ pendant 5 secondes. Avant de procéder à un dépannage, effectuez une resynchronisation. L'écran du combiné affichera “C-I”. À l'occasion, la table peut nécessiter une resynchronisation pour diverses raisons. Ceci est normal. • Assurez-vous qu'il n'y a pas d'obstacle au déplacement vertical c - i de la table. • Appuyez et maintenez en même temps. Pour le système métrique : appuyez sur ❷, l'écran du combiné affichera “C”...
- Page 19 Problème : pas de mouvement du tout • S'il y a des problèmes de dommages internes, le pied devra être remplacé. • Effectuez la resynchronisation ( voir page 33 ). • Si le produit a été ouvert et que le boîtier du moteur est ouvert, • Le voyant vert de la boîte de contrôle est-il allumé? ignorez l’autocollant qui indique que la garantie est nulle. Si c'est le cas, cela signifie que l'alimentation électrique fonctionne et que le courant arrive à la table. Problème : le boîtier de commande est fissuré • Le combiné s'allume-t-il et s'affiche-t-il correctement? ou endommagé • Si le boîtier de contrôle est sous tension et que le combiné semble • Notez les dommages et demandez un nouveau boîtier de contrôle fonctionner, débranchez les deux éléments et rebranchez-les en vous à...
- Page 20 Problème : le cadre présente une fuite de lubrifiant ergoCentric Seating Systems garantit par la présente toutes ses tables et tous ses accessoires contre les défauts et les défaillances fonctionnelles au bas d'un pied des matériaux. • Le cadre a peut-être été trop lubrifié et le lubrifiant excédentaire fuit. Ces garanties ne s'appliquent pas aux produits qui doivent être remplacés • Cette situation ne causera aucun problème mécanique au cadre en raison d'une usure normale, d'une négligence, d'un abus ou d'un et celui-ci continuera à...
- Page 21 Notes Pour une aide technique Prière de contacter ergoCentric : • Téléphone : 1 866 GET ERGO (438-3746) • Courriel : service@ergocentric.com upCentric – UPMOD-3L Owner's Manual | Guide de l’utilisateur ®...
- Page 22 Notes...
- Page 23 ® ph: | Tél. : 1 866 GET ERGO (438-3746) | 905 696-6800 fx: | Téléc. : 1 800 848-5190 | 905 696-0899 service@ergocentric.com ergocentric.com ergoCentric and upCentric are registered trademarks of ergoCentric Inc. ® ® TiMOTION is a registered trademark of TiMOTION Technology Co. Ltd 12/23 v9 ®...
Need help?
Do you have a question about the ergoCentric upCentric UPMOD-3L and is the answer not in the manual?
Questions and answers