
Related Manuals for Magic Chef URBANLiving UBLCD6W


Summary of Contents for Magic Chef URBANLiving UBLCD6W
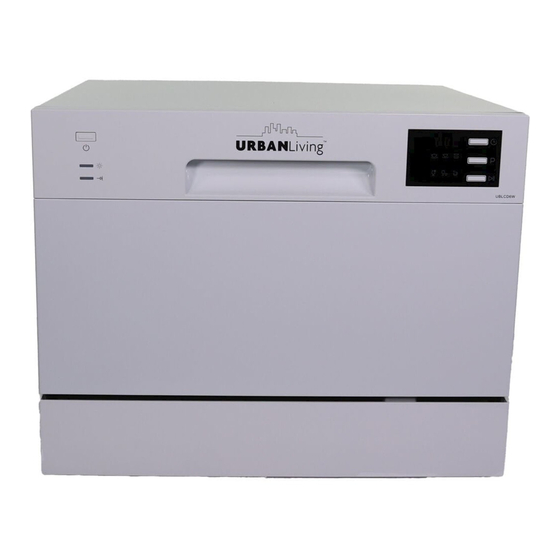
- Page 1 URBANLiving ™ Countertop Dishwasher User Guide Please read this manual carefully before using the air fryer and keep it for future reference. urbanlivingappliance.com MODEL # UBLCD6W...
- Page 2 PRODUCT REGISTRATION Thank you for purchasing this Urban Living product. The first step to protect your new product is to complete the product registration on our website at urbanlivingappliance.com/register. The benefits of registering your product include the following: 1. Registering your product will allow us to contact you regarding a safety notification or product update. 2.
- Page 3 CONTENTS PRODUCT REGISTRATION ........... . . 2 IMPORTANT SAFETY INSTRUCTIONS .
- Page 4 IMPORTANT SAFETY INSTRUCTIONS This manual contains Safety Instructions, Installation and Operating Instructions, and Troubleshooting Tips. Please carefully read this manual before using your countertop dishwasher for instructions on how to use and maintain the product properly. Be sure to follow the safety instructions to avoid injury or damage to the product. Keep this manual.
- Page 5 When disposing of or removing from service, be sure to remove the door from the front of the unit. When loading items to be washed, place sharp items so that they are not likely to damage the door seal WARNING: Knives and other utensils with sharp points must be loaded in the basket with their points down or placed in a horizontal position.
- Page 6 SPECIFICATIONS Height 17.2” (438mm) Width 21.7” (550 mm) Depth 19.7” (500 mm) Voltage 120V AC Water Pressure 5.80-145.04psi (0.04-1.0MPa) Hot Water Temperature 120 °F (49 °C) Power Supply 5.7A Total (Heater – 5A, Motor - .7A) Capacity 6 Place Settings...
- Page 7 PARTS AND FEATURES CONTROL PANEL Figure 1 Power Button Display Program Select Button Rinse Aid Warning Light Program Indicator Start/Pause Button Program End Indicator Delay Button INSIDE AND REAR OF DISHWASHER Figure 2 Inside of Dishwasher Rear of Dishwasher Detergent Dispenser Rinse Aid Dispenser Basket Cutlery Basket...
- Page 8 Inlet Port Connection Faucet Adapter Locking Collar Quick Connect Connection Faucet Washer Inlet Hose Connection Drain Port Connection Pressure Relief Valve Drain Hose Connection Quick Connect Connection Faucet Adapter Connection...
- Page 9 INSTALLATION INSTRUCTIONS WARNING: Electrical Shock Hazard - Disconnect electrical power before installing dishwasher. Failure to do so can result in electrical shock or death. Installation of water supply pipes or electrical outlets should be performed by qualified professionals. Set up the dishwasher on a countertop with a minimum clearance of 17.75” to the cabinet above and so the appliance is not overhanging the edge of the countertop.
- Page 10 Power Cord Drain Port Connection Faucet Adapter Connection Inlet Port Quick Connect Connection Locking Collar Drain Port Faucet Adapter Inlet Hose Connection Inlet Port Connection Faucet Washer Drain Hose Connection Quick Connect Connection Pressure Relief Valve Screw the faucet adapter (Figure 4, h) onto or into the faucet tap, depending on the style of the faucet. Check for leaks (use Teflon tape to eliminate if necessary).
- Page 11 BEFORE USE FILLING THE RINSE AID DISPENSER The rinse aid is released during the final rinse to prevent water droplets that can leave spots and streaks from forming on your dishes. It also improves drying by allowing water to sheet off the dishes. Your dishwasher is designed to use liquid rinse aids.
- Page 12 DETERGENT DISPENSER Dishwasher detergent is necessary to remove food from dishes and help move it out of the dishwasher. Only use detergents that are specifically made for dishwashers. Fill the detergent dispenser before the start of each wash per the instructions provided in the Wash Cycle Table. Your dishwasher uses less detergent and rinse aid then conventional dishwashers.
- Page 13 NOTE: See Wash Cycle Table for more information on amount of detergent to use. NOTE: Water hardness and how soiled dishes are can vary the amount of detergent needed. LOADING THE DISHWASHER NOTE: DO NOT wash items that are not listed as dishwasher safe. NOTE: Some types of glasses may become dull after a large number of washes.
- Page 14 Figure 9 DOE: 4 place settings Cups Glasses Saucers Fruit Bowls Serving Bowls Bread and Butter Plates Dinner Plates Oval Platters Cutlery Basket Cutlery should be placed handles down in the cutlery basket, unless it is a sharp Figure 10 object such as a knife.
- Page 15 It is possible to change the wash program if needed. If the dishwasher has just been started and only run for a short time, you can change the cycle if needed by pressing "Start/Pause", then press the "Program Select Button" for about 3 seconds, which will put the dishwasher in Stand By.
- Page 16 The display lights indicate the status of the Wash Cycle. Program Indicator lights off: Stand-by Non-blinking Program Indicator lights: Paused Blinking lights: Running If the dishwasher is standing by without any operation, it will turn off automatically after 30 minutes. NOTE: WASH CYCLE TABLE indicates Rinse Aid Dispenser should be filled.
- Page 17 USING THE DELAY FEATURE The start of the dishwasher can be delayed between 1 and 24 hours, using one hour increments. To utilize this feature: Press “ON/OFF” button to “ON” position Press “PROGRAM” button Press “DELAY” button once for each hour of delay. Press again after 24 hours to reset. (e.g.
- Page 18 CARE AND MAINTENANCE FILTER SYSTEM The filters prevent food remnants and other objects from getting inside Figure 11 the pump. The filter system consists of three parts (Refer to Figure 11): a Coarse filter (a), a Fine filter (b), and a Main filter (c). Coarse Filter: Larger items that could block the drain are trapped in the coarse filter.
- Page 19 To re-assemble and replace the filter assembly, follow above directions in reverse order. CAUTION: Inspect the filters every time the dishwasher has been used. WARNING: Improper replacement of the filter may reduce the performance level of the appliance and damage dishes and utensils.
- Page 20 CLEANING THE SPRAY ARMS Figure 15 The spray arms can be easily removed for periodic cleaning of the nozzles, to prevent possible clogging. Wash them under running water and carefully replace them, checking that their rotary movement is in no way impeded. Grasp the middle of the spray arm and pull upwards to remove it.
- Page 21 TROUBLESHOOTING Problem Possible Causes What to Do Fuse blown or circuit Replace fuse or reset circuit breaker. Remove any other ap- breaker tripped. pliances sharing the same circuit with the dishwasher. Make sure the dishwasher is turned on and the door is Dishwasher does Power supply not closed securely.
- Page 22 Improper wash Select a more intensive program. Refer to “Wash Cycle program selected. Table”. Not enough detergent Use more detergent, or change your detergent. was dispensed. Items are blocking the Rearrange the items so that the spray arms can rotate freely. path of spray arms.
- Page 23 LIMITED WARRANTY MC Appliance Corporation warrants each new Countertop Dishwasher to be free from defects in material and workmanship, and agrees to remedy any such defect or to furnish a new part(s), at the company’s option, for any part(s) of the unit that has failed during the warranty period.
- Page 24 ™ URBANLiving Urban Living TM is a trademark of CNA International, Inc. d/b/a MC Appliance Corporation urbanlivingappliance.com Printed in China...
Need help?
Do you have a question about the URBANLiving UBLCD6W and is the answer not in the manual?
Questions and answers