Advertisement
Quick Links
Assembly Instructions
BUNDLE - LEONA DINING & BENCH COLLECTION
5PCS
SKU 1050W (Rustic), 1050B (Brown), 1050P (Pine)
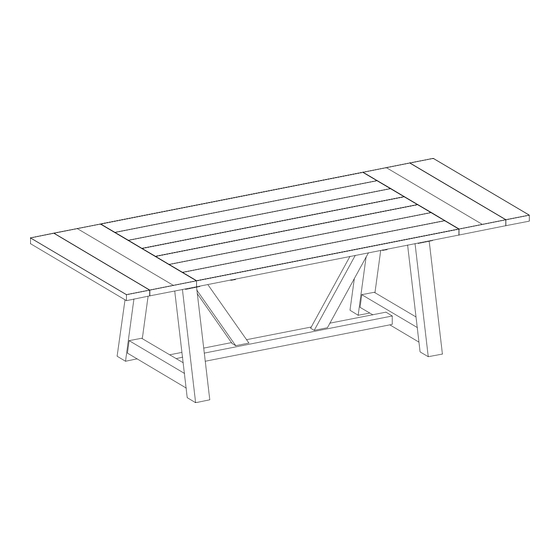
1x LEONA FARMHOUSE EXT. TABLE
2x LEONA FARMHOUSE BENCH
2x LEONA FARMHOUSE SIDE CHAIR
See following pages for individual
component assembly instructions
Advertisement

Related Manuals for World Market LEONA 1050W


Summary of Contents for World Market LEONA 1050W
- Page 1 Assembly Instructions BUNDLE - LEONA DINING & BENCH COLLECTION 5PCS SKU 1050W (Rustic), 1050B (Brown), 1050P (Pine) 1x LEONA FARMHOUSE EXT. TABLE 2x LEONA FARMHOUSE BENCH 2x LEONA FARMHOUSE SIDE CHAIR See following pages for individual component assembly instructions...
- Page 2 Thank you for your purchase. If you have any questions pertaining to the assembly of this furniture piece, please contact the nearest World Market store. If you are not near a store, please call our customer service call center toll free at 877-967-5362 for assistance.
- Page 3 Component List LABEL PICTURE DESCRIPTION Table Top Extension Panel Stretcher 1 Stretcher 2 Hardware List LABEL DESCRIPTION Hanger Bolt Ø8 x 80mm M8 x 7mm D Washer 29 x 15 x 8mm Long Bolt M8 x 90mm Short Bolt M8 x 60mm Spring Washer M8 x 14mm Flat Washer...
- Page 4 Assemble on a clean non-marring surface (such as the product’s packing foam). Do not discard any packaging until the product has been fully assembled. In case of missing parts, please contact your nearest World Market store or call our customer service call center at 1-877-967-5362.
- Page 5 Assembly Steps Step 1 (H-5) Short Bolt x 2 (H-4) Long Bolt x 2 (H-6) Spring Washer x 4 (H-7) Flat Washer x 4 (T-2) Allen Key x1 Make sure Bolt are fully tightened as shown 1. Using a second person to assist you, place Table Top (A) upside down onto a padded, non-marring surface.
- Page 6 Assembly Steps Step 2 (H-1) Hanger Bolt x 2 Make sure Hanger Bolt are fully as shown. Insert Hanger Bolt (H-1) into both Leg (C) assemblies as shown and tighten by hand. Note: DO NOT use any tools to tighten Hanger Bolt (H-1). Step 3 (H-3) D Washer x 2 (H-6) Spring Washer x 2...
- Page 7 Assembly Steps Step 4 (H-4) Long Bolt x 8 (H-6) Spring Washer x 8 (H-7) Flat Washer x 8 (T-2) Allen Key x 1 Make sure Bolt are fully tightened as shown 1. Secure both Leg (B) assemblies to Table Top (A) by using Long Bolts (H-4), Spring Washers (H-6) and Flat Washers (H-7) with Allen Key (T-2), stacking the hardware in the order as shown.
- Page 8 Assembly Steps Step 6 Open the latches on the underside of ends of the table. Pull end rails out and place leaf extensions as shown. After extension panel is inserted close and turn latches to lock in place. NOTE STICKER UNDER TABLE Note: Do not lift table by ends.
- Page 9 Thank you for your purchase. If you have any questions pertaining to the assembly of this furniture piece, please contact the nearest World Market store. If you are not near a store, please call our customer service call center toll free at 877-967-5362 for assistance.
- Page 10 Component List LABEL PICTURE DESCRIPTION Big hole Back Medium hole Seat Right Leg Left Leg Small tenon Right Stretcher Medium tenon Small tenon Left Stretcher Big tenon Hardware List LABEL DESCRIPTION Short Bolt M8 x 40mm Long Bolt M8 x 90mm Spring Washer M8 x 14mm Flat Washer...
- Page 11 Assemble on a clean non-marring surface (such as the product’s packing foam). Do not discard any packaging until the product has been fully assembled. In case of missing parts, please contact your nearest World Market store or call our customer service call center at 1-877-967-5362.
- Page 12 Assembly Steps Step 1 (H-1) Short Bolt x 3 (H-2) Long Bolt x 4 (H-3) Spring Washer x 7 (H-4) Flat Washer x 7 (T-1) Allen Key x 1 Ensure Allen Bolt are fully tightened as down Position Back (A) onto a padded, no-marring surface such as a table top for ease of assembly. Position Seat (B) onto Back (A) as shown.
- Page 13 Assembly Steps Step 3 (H-4) Flat Washer x 4 (H-5) Screw x 2 (H-6) Nut x 4 (H-3) Spring Washer x 4 (T-2) Open Wrench Ensure Allen Nut are fully tightened as down (T-3) Phillips Screwdriver x 1 Ensure Allen Screw are fully tightened as down Position Legs (C/D) to Seat (B) and Right and Left Stretchers (E/F) as shown in illustration.
- Page 14 Assembly Steps Step 5 Assembly is now complete and the product is ready for use. NOTE: Hardware may loosen over time. Periodically check that all connections remain tight and adjust as needed. PAGE 6...
- Page 15 Thank you for your purchase. If you have any questions pertaining to the assembly of this furniture piece, please contact the nearest World Market store. If you are not near a store, please call our customer service call center toll free at 877-967-5362 for assistance.
- Page 16 Component List QTY. LABEL PICTURE DESCRIPTION FRONT Bench Top FRONT FRONT Stretcher 1 FRONT Stretcher 2 Hardware List LABEL QTY. DESCRIPTION Hanger Bolt Ø8 x 80mm M8 x 7mm D Washer 29 x 15 x 8mm Allen Bolt M8 x 50mm Spring Washer M8 x 14mm Flat Washer...
- Page 17 Assemble on a clean non-marring surface (such as the product’s packing foam). Do not discard any packaging until the product has been fully assembled. In case of missing parts, please contact your nearest World Market store or call our customer service call center at 1-877-967-5362.
- Page 18 Assembly Steps Step 1 Make sure Hanger Bolts (H-1) Hanger Bolt x 6 are fully tightened as shown. Place both Legs (B) onto a padded, non-maring surface with holes facing up. Insert Hanger Bolts (H-1) into 3 receiving holes per Leg (B) and tighten by hand. Note: DO NOT use any tools to tighten Hanger Bolts (H-1).
- Page 19 Assembly Steps Step 3 T -2 T -2 (H-4) Allen Bolt x 8 (H-5) Spring Washer x 8 (H-6) Flat Washer x 8 (T-2) Allen Key x 1 Ensure Allen Bolts are fully tightened as shown. 1. Position Stretcher 2 (D) with Stretcher 1 (C) and Bench Top (A) as illustrated. Secure Stretcher 2 (D) to assembly using Allen Bolts (H-4), Spring Washers (H-5) and Flat Washers (H-6), stacking the hardware in the order as shown.
- Page 20 Warnings All products sold at World Market are not for commercial use and are intended for residential use only. WARNING: Small parts are a choking hazard. Adult supervision is required before, during and after assembly. Care & Maintenance DO NOT put hot items directly on furniture surface.
- Page 21 Customer Service Call Center, Toll Free at 877-967-5362. For valid warranty claims, World Market will repair or replace the product, or offer a full or par�al credit, in the sole discre�on of World Market. This LIMITED ONE-YEAR WARRANTY gives you specific legal rights and you may also have other rights which vary from state to state.
Need help?
Do you have a question about the LEONA 1050W and is the answer not in the manual?
Questions and answers