Table of Contents
Advertisement
Assembly Instructions
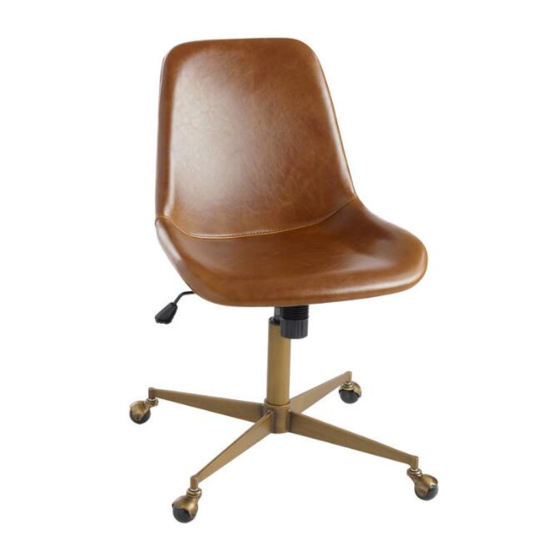
TYLER BI-CAST OFFICE CHAIR
SKU 575119 / 542938
THANK YOU FOR YOUR PURCHASE. IF YOU HAVE ANY QUESTIONS
PERTAINING TO THE ASSEMBLY OF THIS FURNITURE PIECE, PLEASE CONTACT
THE NEAREST COST PLUS WORLD MARKET STORE.
IF YOU ARE NOT NEAR A STORE, PLEASE CALL OUR CUSTOMER SERVICE CALL
CENTER TOLL FREE AT 877- 967-5362 FOR ASSISTANCE.
NOT FOR COMMERCIAL USE.
02/28/2019
Page 1
Advertisement
Table of Contents

Related Manuals for World Market TYLER BI-CAST 575119


Summary of Contents for World Market TYLER BI-CAST 575119
- Page 1 THANK YOU FOR YOUR PURCHASE. IF YOU HAVE ANY QUESTIONS PERTAINING TO THE ASSEMBLY OF THIS FURNITURE PIECE, PLEASE CONTACT THE NEAREST COST PLUS WORLD MARKET STORE. IF YOU ARE NOT NEAR A STORE, PLEASE CALL OUR CUSTOMER SERVICE CALL CENTER TOLL FREE AT 877- 967-5362 FOR ASSISTANCE.
-
Page 2: Component List
Component List LABEL DESCRIPTION Seat Lift Mechanism Gas Lift Base Caster Hardware List LABEL DESCRIPTION Large Allen Bolt 6x35mm Small Allen Bolt 6x25mm Spring Washer Flat Washer Tool List LABEL DESCRIPTION Allen Key 02/28/2019 Page 2... -
Page 3: Assembly Preparation
Assembly Preparation Before Beginning: Unpack all hardware bags and components to ensure you have all parts- Read instructions, cover to cover- Have 2 adults on hand for assembly- Do not assemble on flooring or carpet- Assemble on a clean non-marring surface (packing foam)- Save all packaging until finished- In case of missing parts, please contact your nearest Cost Plus World Market store or call our customer service call center at call 1-877-967-5362. -
Page 4: Assembly Steps
Assembly Steps Step 1 Insert Caster (E) to Base (D) as shown. Step 2 Remove and discard sticker Remove and discard Remove and discard plastic cap from Gas Lift (C). Insert Gas Lift (C) into the center hole of Base (D) as shown. 02/28/2019 Page 4... - Page 5 Assembly Steps Step 3 Carefully turn over Seat (A) so that the bottom is flat and faces upward as shown. Remove the protective sheet before attaching Lift Mechanism (B). Step 4 Front Align front holes on Lift Mechanism (B) to pre-threaded front holes on Seat (A). Attach the front of Lift Mechanism (B) using Large Allen Bolts (H-1), Spring Washers (H-3) and Flat Washers (H-4), stacking hardware in the order as shown.
- Page 6 Assembly Steps Step 5 Align back holes on Lift Mechanism (B) to pre-threaded front holes on Seat (A). Attach the back of Lift Mechanism (B) using Small Allen Bolts (H-2), Spring Washers (H-3) and Flat Washers (H-4), stacking hardware in the order as shown. Fully tighten ALL Allen Bolts from Steps 4 and 5 using Allen Key (T-1).
- Page 7 Operating Instructions Function Instruction # 1 To Adjust Seat Height: While seated, lean forward and reach under the right side of the chair to find the handle. Lift the handle and raise your body up slightly to allow the chair to rise to the desired height. Once desired height is reached, release handle to lock chair at desired height.
- Page 8 Operating Instructions Function Instruction # 2 To Operate Tilt Lockout: While seated, reach under the right side of the chair to find the height-adjustment handle. Pull the handle all the way out (away from the gas lift) to allow the chair to tilt backwards. To lock the chair in the upright or vertical position, sit upright and push the handle in towards the gas lift.
- Page 9 Operating Instructions Tension Knob Function Instruction # 3 To Adjust Chair Reclining Tension: From the seated position, reach under the front center of the chair, grasp the Tension Knob and turn it counter-clockwise to tighten the tilt mechanism for added tension. Turn the Tension Knob clockwise to loosen the tilt mechanism for less tension.
- Page 10 Operating Instructions Function Instruction # 4 360-degree Swivel: The chair swivels freely clockwise or counter-clockwise. 02/28/2019 Page 10...
-
Page 11: Care And Maintenance
Care & Maintenance Do not put hot items directly on furniture surface. Do not clean furniture with harsh cleansers or polish. Do not place furniture in direct sunlight. Do not place furniture near heating or cooling vents. Do not write on furniture without a padded barrier to protect the surface. Do not place furniture outside.
Need help?
Do you have a question about the TYLER BI-CAST 575119 and is the answer not in the manual?
Questions and answers