Advertisement
Quick Links
Xtender,
battery charger and transfer system.
User manual
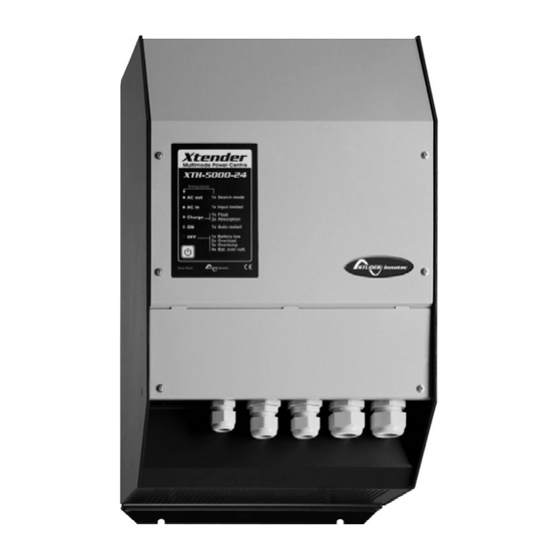
XTH 3000-12
XTH 5000-24
XTH 6000-48
XTH 8000-48
Temperature sensor
Command module
STUDER Innotec 2009 – V3.2.0
51L
Unit
combining
XTM 1500-12
XTM 2000-12
XTM 2400-24
XTM 3500-24
XTM 2600-48
XTM 4000-48
BTS-01
RCM-10
inverter,
Advertisement

Related Manuals for Studer Xtender Series


Summary of Contents for Studer Xtender Series
- Page 1 Xtender, battery charger and transfer system. User manual XTH 3000-12 XTM 1500-12 XTH 5000-24 XTM 2000-12 XTH 6000-48 XTM 2400-24 XTH 8000-48 XTM 3500-24 XTM 2600-48 XTM 4000-48 Temperature sensor BTS-01 Command module RCM-10 STUDER Innotec 2009 – V3.2.0...
- Page 3 STUDER Innotec Xtender SUMMARY INTRODUCTION ........................... 3 GENERAL INFORMATION ........................3 Operating instructions ........................3 Conventions ............................4 Quality and warranty ........................4 2.3.1 Exclusion of warranty ........................4 ...
- Page 4 STUDER Innotec Xtender 6.2.4 Battery charger ........................... 21 6.2.5 Limiting the input current by limiting the charger current ............ 22 6.2.6 The inverter as source backup (“Smart Boost” function) ............. 23 6.2.7 Input current controlled by input voltage................24 ...
- Page 5 It contains all the necessary information relating to the functioning of the inverters / chargers in the Xtender series. The setting up of such a system requires special expertise and may only be carried out by qualified personnel familiar with the applicable local regulations.
- Page 6 The accidental ingress of liquids into the device or oxidation resulting from condensation Damage resulting from falls or mechanical shocks Modifications carried out without the explicit authorisation of Studer Innotec Nuts or screws that have not been tightened sufficiently during the installation or maintenance Damage due to atmospheric surge voltage (lightning) V.3.2.0...
- Page 7 The placement, commissioning, use, maintenance and servicing of the Xtender cannot be the subject of monitoring by Studer Innotec. For this reasons we assume no responsibility and liability for damage, costs or losses resulting from an installation that does not conform to the instructions, defective functioning or deficient maintenance.
- Page 8 STUDER Innotec Xtender In the event of use in motorised vehicles, the Xtender must be protected from dust, splash water and any other humid condition. It must also be protected from vibration by installing absorbent parts. 2.4.2 Precautions for using the batteries Lead-acid or gel batteries produce a highly explosive gas with normal use.
- Page 9 STUDER Innotec Xtender It must not be situated directly above the battery or in a cabinet with it. No easily inflammable material should be placed directly underneath or close to the Xtender. Ventilation apertures must always remain clear and be at least 15cm from any obstacle that may affect the ventilation of the equipment according to fig.
- Page 10 STUDER Innotec Xtender In all cases, the PE conductor for the equipment must at least be connected to the PE for all equipment in protection class I upstream and downstream of the Xtender (equipotential bonding). It is mandatory that the legislation in force for the application concerned be adhered to.
- Page 11 STUDER Innotec Xtender 3.6.2 Device connection compartment The unit’s connection compartment must remain permanently closed when in operation. It is imperative to close the protection cap on the connection terminals after each intervention in the device. After opening, check that all sources of AC and DC voltage (batteries) have been disconnected or put out of service.
- Page 12 See chap.6.4.3 – p.29 Connector battery See chapter 6.4.2 – p. 28. Temp. Sens temperature sensor Only connect the original Studer BTS-01 sensor Double connector See chapter 4.5.9 – p. 17. connecting peripherals such as The two termination switches (4) for the Com.
- Page 13 STUDER Innotec Xtender HOICE OF SYSTEM The Xtender may be used in different system types, each of which must meet the standards and particular requirements associated with the application or site of installation. Only an appropriately qualified installer can advise you effectively on the applicable standards with regard to the various systems and the country concerned.
- Page 14 STUDER Innotec Xtender The Xtender can be operated with any earthing system. In all cases it is imperative that the protective earth be connected in compliance with the applicable standards and regulations. The information, notes, recommendations and diagram mentioned in this manual are subject to local installation regulations in every case.
- Page 15 STUDER Innotec Xtender ECOMMENDATIONS FOR DIMENSIONING THE SYSTEM 4.3.1 Dimensioning the battery The battery capacity is dimensioned according to the requirements of the user – that is 5 to 10 times its average daily consumption. The discharge depth of the battery will therefore be limited and the service life of the battery will be extended.
- Page 16 STUDER Innotec Xtender IRING DIAGRAMS The diagrams shown in the appendix of this document are subsidiary. The applicable local installation regulations and standards must be adhered to. The elements referred to with an uppercase letter denote the alternate current (AC) part.
- Page 17 STUDER Innotec Xtender The clamps must be carefully fixed and tightened sufficiently to guarantee minimum loss. Insufficient tightening may cause dangerous heating at the connection point. For safety reasons, we recommend an annual check on the tightness of all connections.
- Page 18 If the factory settings are modified, the new values must be entered on the configuration table on p. 41 of this manual. The default values proposed by Studer Innotec are the usual values for lead acid battery or gel batteries (VRLA or AGM).
- Page 19 The communication bus will be used to interconnect other Xtender inverters in the case of a multi- unit application or to connect other types of users who have the proprietary protocol of Studer Innotec. In these cases, the installation must be switched off using the main “ON/OFF” button (1) to connect the units via the communication bus.
- Page 20 STUDER Innotec Xtender 4.5.11 Connecting the remote command module RCM10 (XTM only) The remote command module RCM10 can be “hot plugged” on connector “RCM-10” (15) without stopping the operation of the system. A contact free of potential (1) can be connected between terminals 1 and 2.
- Page 21 STUDER Innotec Xtender 6 DESCRIPTION AND FUNCTIONING IRCUIT DIAGRAM User manual V.3.2.0...
- Page 22 STUDER Innotec Xtender ESCRIPTION OF THE MAIN FUNCTIONS 6.2.1 Inverter The Xtender is equipped with a high-performance inverter which supplies a perfect and very precise sine wave. Any unit designed for the 230 V/50 Hz electrical grid may connect to it without any problem, up to the rated power out of your Xtender.
- Page 23 STUDER Innotec Xtender When the generator stops, the change from transfer mode to inverter mode normally takes place without any interruption of the output voltage . The interruption will be 40 ms in the event of the immediate loss of input voltage at “AC IN” provided the UPS mode {1435} is not deactivated.
- Page 24 STUDER Innotec Xtender case the LED “charge” (4) goes out. The consumers must ensure that they have average consumption that is less than the power of the source (generator or public grid) in order to avoid a complete discharge of the battery. These situations are set out in the figure below.
- Page 25 STUDER Innotec Xtender output to ensure that the battery is charged. Once the charge current decreases by going into “power sharing” mode, the indicator (45) flashes. The limit value of the input current is set by the configuration {1107} and may be adjusted via the RCC-02/03 remote control.
- Page 26 STUDER Innotec Xtender 6.2.7 Input current controlled by input voltage When AC sources with variable power are connected to the Xtender's ACin, a particular parameter setting insure a permanent availability of the nominal power at the Xtender's output thanks to the Smartboost function. It's notably the case with "Dynawatt" 230Vac alternator coupled with variable speed traction engines.
- Page 27 STUDER Innotec Xtender These dry contacts are programmed by default for the following functions: Contact no. 1 (AUX 1): The contact has a function of automatic start of generator (two wires). The contact will be activated when the battery voltage is below a value, during a given time fixed by parameters {1247/48}/{1250/51}/{1253/54} The contact will be deactivated or when the charge cycle has reached floating, or when the "Aux.
- Page 28 STUDER Innotec Xtender When multi-unit system is commissioned, the software's version of every units will be automatically checked and units may refuse to start in case of incompatibility. If so, an upgrade of every units is be required with the RCC-02/03 and the last software version available by the manufacturer.
- Page 29 STUDER Innotec Xtender 6.3.3 Combined system It is possible to combine a three-phase system with one or several phases made up of 2 or 3 Xtenders in parallel. An example of cabling is given at fig. 15. A combination of more than one inverter on only one (or two) phase is also possible. for example, it’s possible to build up one powerful phase for the most single phase consumer and the 2 other...
- Page 30 STUDER Innotec Xtender The two remote control models are delivered with a 2 m cable by default. Cables of specific lengths (5 m, 20 m and 50 m) can be ordered. The article no. is as follows: CAB-RJ45-xx. The length in metres is specified as xx Up to 3 RCC-02/03 remote controls can be connected in series on the communication bus of one Xtender or an Xtender multi-inverter system.
- Page 31 STUDER Innotec Xtender 6.4.3 Remote control Module RCM-10 The optional remote control module for XTM range gives the possibility to have the 2 following function: Main ON/OFF (1) see chap.7.1 below. This operation can only be controlled by a potential free contact.
- Page 32 STUDER Innotec Xtender ISPLAY AND CONTROL PANEL The Xtender has a ON/OFF button and light indicators at the front of the unit, allowing clear identification of the operating mode. (41) The ON/OFF button allows the start-up or complete stop of the system. In the systems comprising several units, each unit is started or stopped individually.
- Page 33 STUDER Innotec Xtender Indicated alarm Comment If the device has not yet stopped, it is recommended to disconnect all non-priority consumers and/or start up the generator. If the Xtender has stopped it will restart (Imminent) stoppage as a automatically when the battery voltage has reached the result of low battery voltage.
- Page 34 Xtender does not require any special maintenance. 9 PRODUCT RECYCLING The model of the Xtender series conform to the European directive 2002/95/EC on hazardous substances and does not contain the following elements: lead, cadmium, mercury, hexavalent chrome, PBB or PBDE.
- Page 35 STUDER Innotec Xtender 10 EC DECLARATION OF CONFORMITY The inverter and accessories described in this manual comply with the following directive and standards: Dir. 89/336/EEC: EN 61000-6-1, EN 61000-6-3, EN 55014, EN 55022, EN 61000-3-2, 62040-2, LVD 2006/95/ EEC : EN 62040-1-1, EN 50091-2, EN 60950-1.
- Page 36 STUDER Innotec Xtender 11 COMMENTS OF APPENDIX DRAWINGS Fig. Description and comment Dimensioning table for the downstream protection device (F). This table helps to size the Xtender upstream and downstream protection devices. Due to the source assistance function, it should be outlined that the downstream protection can be of higher gauge than the upstream one.
- Page 37 STUDER Innotec Xtender Fig. Description and comment Fixed single-phase installation with connection by plug to a three-phase source – AC part Highlight(s): The connection of the neutral upstream and downstream of the 'Xtender (C) is prohibited in this configuration (presence of a plug upstream). See also chapter 4.2 – p.
- Page 38 Xtender. Correct dimensioning of the batteries is essential for trouble free operation of the system. See chapter 4.3.1 – p. 13. Communications cable. Only an original cable supplied by Studer Communication Innotec may be used. The total length of the communications cable...
- Page 39 STUDER Innotec Xtender 13 FIGURE ELEMENT'S (AC PART) Elem. Description Comment The section is determined by means of the maximum current at source Input supply and the protection device (H). In multi-unit systems, cables (A) of the cable same phase must have the same length and section (see comment fig.
- Page 40 Main switch Connector battery See chapter 6.4.2 – p. 28. Temp. Sens temperature sensor Only connect the original Studer BTS- 01 sensor Double connector See chapter 4.5.9 – p. 17. connecting peripherals such as The two termination switches (4) for Com.
- Page 41 STUDER Innotec Xtender Pos. Denomination Description Comment Connection terminals for the See chapter 4.5.7 - p. 17. AC Input alternative power supply Note: It is imperative that the PE (generator or public network) terminal be connected. Connection terminals for the See chapter 4.5.6 - p.
- Page 42 STUDER Innotec Xtender Pos. Denomination Description Comments Light indicator This indicator is glowing continuously when an showing alternative voltage of 230V is present at the device AC out presence of a output. It flashes when the device is in “load search”...
- Page 43 STUDER Innotec Xtender 17 TABLE OF STANDARD CONFIGURATIONS No. of Fact. Mod. Denomination / description Units config. value value 1107 Maximum current of the AC source 1108 Under voltage of the empty battery V/cell 1.93 1109 Sub-voltage of the charged battery V/cell 1.75...
- Page 44 STUDER Innotec Xtender No. of Fact. Mod. Denomination / description Units config. value value 1261 Auxiliary contact 1 activated by power 2 1262 Power 2 above which auxiliary contact 1 is activated 1263 Duration of power 2 for activating auxiliary contact 1 min.
- Page 45 STUDER Innotec Xtender 18 TECHNICAL DATA – XTH **** concerns -01 model (120Vac range) (for all models except the XTH 8000-48) Model XTH 3000-12 XTH 5000-24 XTH 6000-48 XTH 8000-48 Inverter Rated battery voltage 12 V 24 V 48 V...
- Page 46 STUDER Innotec Xtender Model XTH 3000-12 XTH 5000-24 XTH 6000-48 XTH 8000-48 General data 2 independent contacts 16 A - 250 Vac (potential-free 3 points) Auxiliary contacts ****2 independent contacts 16 A - 140 Vac (potential-free 3 points) Maximum transfer relay current...
- Page 47 STUDER Innotec Xtender 19 TECHNICAL DATA – XTM **** concerns -01 model (120Vac range) XTM model 1500-12 2000-12 2400-24 3500-24 2600-48 4000-48 Inverter Rated battery voltage Input voltage range 9.5 - 17V 19 - 34V 38 - 68V Continuous power @ 25 °C...
- Page 48 STUDER Innotec Xtender XTM model 1500-12 2000-12 2400-24 3500-24 2600-48 4000-48 General data 2 independent contacts 16 A - 250 Vac (potential-free 3 points) Auxiliary contacts ****2 independent contacts 16 A - 140 Vac (potential-free 3 points) Maximum transfer relay...
- Page 49 STUDER Innotec Xtender 20 NOTES User manual V.3.2.0...
- Page 50 STUDER Innotec Rue des Casernes 57 1950 Sion – Switzerland Tél : +41(0) 27 205 60 80 Fax : +41(0) 27 205 60 88 info@studer-innotec.com www.studer-innotec.com...
Need help?
Do you have a question about the Xtender Series and is the answer not in the manual?
Questions and answers