Download Print this page
Saramonic Ultra 01 User Manual

Saramonic Ultra 01 User Manual

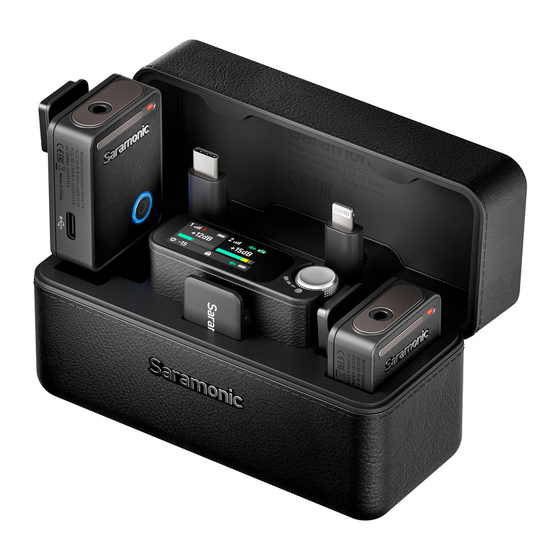
Ultimate 2-channel wireless microphone system

Advertisement

Quick Links

Ultimate 2-channel Wireless
Microphone System
双通道旗舰无线麦克风系统
Saramonic Ultra
User Manual
⽤户⼿册

Advertisement

loading
Need help?

Need help?

Do you have a question about the Ultra 01 and is the answer not in the manual?

Questions and answers

Summary of Contents for Saramonic Ultra 01

  • Page 1 Ultimate 2-channel Wireless Microphone System 双通道旗舰无线麦克风系统 Saramonic Ultra User Manual ⽤户⼿册...
  • Page 2 (some packages retailer for help or email us at: info@saramonic. do not include this lavalier microphone; please refer to the actual package purchased) . The receiver has a 3.5 mm multi-functional output,...
  • Page 3 Saramonic Ultra 02 (White) USB-C to USB-C Data Cable ×1 Transmitter ×2 3.5 mm TRS to TRS Audio Cable ×1 Receiver ×1 Lightning Adapter ×1 Charging Case ×1 USB-C Adapter ×1 USB-C to USB-C Data Cable ×1 Fur Windshield ×2 3.5 mm TRS to TRS Audio Cable...
  • Page 4 Product Structure Magnet ×1 Transmitter (TX) External Antenna ×1 Accessories (Sold Separately) Adapter for Connecting SONY Camera Lavalier Microphone ❶ Power Button • Press and hold for 2 seconds to power on or off. • Press once to mute or unmute the transmitter.
  • Page 5 shut down after 10 minutes. ❽ 3.5 mm TRS Input • When multiple functions are activated on the For connecting an external lavalier transmitter, its indicator will give priority to microphone. displaying only one feature. The indicator is prioritized as follows:charging > low battery ❾...
  • Page 6 Charging Case ❸ Overload Indicator It will glow solid red when the sound pressure level of the recording exceeds the designed value. And it will turn off if there is no overload volume for 1 second. ❹ External Antenna Port For inserting the external antenna provided.
  • Page 7 Operation Guide Note Placing Transmitter 1. Please charge the charging case as soon as ❶ The transmitter with an in-built microphone possible when its indicator flashes red (not pulse). In that case, the charging case holds can be used with a fur windshield for a low battery (<10%) that is unavailable for capturing clear audio outdoors or in a charging the transmitters and receiver.
  • Page 8 . Additionally, the adapters support charging the phone when connected to power. Pairing Transmitters and Receiver The transmitters and receiver in the Saramonic Ultra system have been paired successfully by default. Therefore, the transmitters and receiver iOS Lightning USB-C will be paired once they are powered on.
  • Page 9 Tap the icon in the upper left corner, then Go to More Settings > Sound Modes,select tap “Saramonic Ultra Device Management” Low Gain Mode. In this mode, the maximum to enter the receiver (RX) and transmitter (TX) sound pressure level can reach 130 dB, control page.
  • Page 10 The top of the Home Screen indicates transmitter status. Indicates battery levels and Indicates the current wireless charging status of the receiver. signal strength between the transmitter 1 (TX1) or the transmitter 2 (TX2) and the Quick Settings: On the Home Screen, press receiver.
  • Page 11 Menus Overview Main Menu Sub Menu Description If there is no operation within 20 seconds on Signal from the menus, the touchscreen will automatically return left and right Mono to the Home Screen. channel are identical. Transmitter Settings Menu The left and right channel outputs Slide down from the top of the left side of correspond to...
  • Page 12 Captures high- Adjust the Original fidelity audio. receiver gain between -15 Reduces ambient to +15 dB. The Vocal noise and default value Boost improves voice is 0 dB. Then intelligibility. receiver gain can be adjusted in The receiver headset mode removes low only.
  • Page 13 Tap Pairing to Speaker connect the enable the Disabled receiver with the speaker. transmitters. ettings Speaker Time If TX1's status Speaker indicator glows disable the Enabled solid blue, TX1 speaker. code Disp Pairing is successfully Tap to turn paired with the on or off the receiver.
  • Page 14 “Auto Recording” mode so that the recording is only applicable to the onboard transmitter can start recording audio as soon recording of the Saramonic Ultra transmitter as it is switched on. To activate the “Auto and will not affect the recording format of the Recording”...
  • Page 15 Input Level 0 dB attenuation) 130 dB SPL(In low gain mode, the Max SPL can reach 130 dB. Please Max SPL connect to the Saramonic App and set the low gain mode on this app) Storage 8 GB Port for Reading...
  • Page 16 Weight Power Supply In-built lithium-ion battery 45.5 × 33.5 × 15 mm (L In-built Battery 465 mAh Dimensions × W × H, clip height not Capacity included) Battery Life Approx. 6 hours IP Rating IPX5 Approx. 1.5 hours ( via Operating Charging Time charging case or USB-C...
  • Page 17 USB-C 转 USB-C 数据线 ×1 效去除杂⾳和背景噪声。Saramonic Ultra 发射器 抗⽔性能达到了 IPX5 级,在恶劣的环境中也⼀样 Lightning 转接头 ×1 表现出⾊。 防⻛⽑套 ×2 Saramonic Ultra 集 32-bit 浮点内录、时间码、 外置天线 ×1 和先进的设置功能于⼀体,其专业性提升⾄⼀个 全新的⾼度。32-bit 浮点内录功能⽀持发射器独 ⽴录制⾳频,可实现录⾳⽂件实时存档。搭配时 间码功能,⽤户在后期制作中可快速实现⾳频完 Saramonic Ultra 02 ( 白⾊) 美同步。 接收器⾃带 1.1 ⼨触控彩屏, 无线信号强度、 发射器...
  • Page 18 防⻛⽑套 ×2 防⻛⽑套 ×2 外置天线 ×1 外置天线 ×1 Saramonic Ultra 05 ( ⿊⾊) Saramonic Ultra 03 ( ⿊⾊) 发射器 ×1 发射器 ×2 接收器 ×1 接收器 ×1 3.5 mm TRS 转 TRS ⾳频线 ×1 充电盒 ×1 USB-C 转接头 ×1 领夹⻨ ×2 磁吸⽚...
  • Page 19 产品结构 ❸ 录音指示灯 状态 指示灯 发射器(TX) 静⾳模式开启 红灯闪烁 内录模式 红灯常亮 内录无法开启 红灯闪烁三次后熄灭 • 读取内录的录⾳⽂件时,内录将无法开启。 • 指示灯优先级:静⾳>内录。 当发射器放⼊充电盒内充电时,其录⾳指 示灯⽤作充电指示灯。 ❶ 电源按键 • ⻓按 2 秒开机或关机。 • 短按开启或关闭静⾳。 状态 指示灯 • 当接收器连接⼿机时,双击发射器电源按键可 控制⼿机拍摄(适⽤于⽀持⾳量键控制拍照的 充电中 红灯常亮 ⼿机)。 充满电 熄灭 ❷ 指示灯状态 状态 指示灯 ❹...
  • Page 20 接收器(RX) ❼ 3.5 mm 多功能输出⼝ ⽀持单声道 / ⽴体声 / 安全⾳轨 / ⽿⻨ / ⽿ 机五种模式,在接收器设置菜单中点击输出模 式即可切换。默认模式为单声道。详情请参考 “接收器触摸屏设置”。 ❽ 充电触点 与充电盒触点连接后即可充电。 ❾ 连接触点 使⽤标配的 Lightning / USB-C 转接头,可将 接收器连接⾄⼿机、电脑等移动设备。 ❿ USB-C 充电⼝ 可接⼊标配的 USB-C 转 USB-C 数据线给接 收器充电。 ❶ 触摸屏 显示无线信号强度、降噪、发射器与接收器的 充电盒...
  • Page 21 操作指南 • 充电盒未接⼊电源(⾮充电状态)时,打开充 电盒或在盒内放⼊产品后,该指示灯将显示充 发射器佩戴 电盒当前电量。 ❶ 在户外录⾳或有⻛的环境下,若想要更清晰的 充电盒电量 指示灯 录⾳效果,可将防⻛⽑套安装⾄发射器内置⻨ 克⻛上。 若外接领夹⻨, 需连接⾄发射器的 3.5 0 ⾄ 10% 红灯闪烁(不呼吸) mm TRS 输⼊孔。 10 ⾄ 33% 红灯常亮 34% ⾄ 76% 橙灯常亮 77% ⾄ 100% ⽩灯常亮 注意 1. 指示灯呈红灯闪烁(不呼吸)时,充电盒电量 < 10%,此时充电盒无法给产品充电,请尽快 给充电盒充电。 2.
  • Page 22 发射器与接收器对码 ❷ 启动 Saramonic 应⽤程序 , 点击 即可开始录 ⾳。 Saramonic Ultra 系统内的发射器与接收器出⼚默 认已配对。发射器与接收器开机后会⾃动对码。 对码成功后,发射器的状态指示灯均呈蓝灯常亮。 若发射器与接收器断开,可通过以下两种⽅式对 码: ⽅法⼀:充电盒⾃动对码 将发射器和接收器放进充电盒 5 秒后,将⾃动对 码成功。 ⽅法⼆:⼿动对码 ❸ 点击屏幕左上角 ,然后点击“Saramonic Ultra 设备管理”即可进⼊接收器(RX)、发 ❶ 发射器在关机状态下,⻓按电源按键 5 秒,其 射器(TX)控制⻚⾯。 指示灯呈蓝灯快闪进⼊配对模式。 ❷ ⻓按接收器电源键 2 秒将接收器开机,在接收 器屏幕向左滑动进⼊设置菜单⻚⾯,选择对码 菜单,点击对码。 ❸...
  • Page 23 ❹ 点击更多设置 > 声⾳模式,选择低增益模式, 表示发射器已开启降噪功能。 最大声压级可达到 130 dB,轻松避免爆⾳与 失真,显著提升录⾳质量。 显示发射器的电量、充电状态。 主界⾯中间显示发射器音量状态 +12dB 显示⻨克⻛增益。 +15dB 显示实时输⼊⾳量。 连接相机使⽤ 表示发射器已静⾳。 使⽤标配的 3.5 mm TRS 转 TRS ⾳频线将接收器 的 3.5 mm 多功能输出⼝连接⾄相机、混⾳器等 设备,发射器录制的⾳频将传输⾄接收器连接的 主界⾯下⽅显示接收器状态 相机。 显示输出模式,可在接收器菜单中 设置为单声道 / ⽴体声 / 安全⾳轨 / ⽿⻨ / ⽿机输出模式。详情请参 考“菜单⻚⾯预览→设置菜单”。...
  • Page 24 菜单预览 主菜单 子菜单 说明 进⼊菜单界⾯后,如果超过 20 秒不操作,将⾃动 左右声道输出的内 跳转回主界⾯。 单声道 容⼀致。 发射器设置菜单 左右声道输出分别 • 在主界⾯左侧下滑进⼊发射器 1(TX1)设置界 ⽴体声 对应发射器 1 和发 射器 2 两个声源。 ⾯,在主界⾯右侧下滑进⼊发射器(TX2)设 置界⾯。点击相应图标可控制静⾳、降噪及录 右声道的输出增 ⾳。 益⽐左声道⼩ 6 安全⾳轨 dB,以防声⾳过 TX 1 输出模式 输出音量 爆。 +12dB +15dB 接收器上的 3.5 静音...
  • Page 25 ⾃动增益 点击 图标开启 点击可开启 / 关 关闭 ⾃动增益。 闭时间码。时间码 开启后,发射器⾃ ⾃动增益开启后, 动打开内录,录⾳ ⻨克⻛增益将根据 ⽂件⾃带时间码信 实时输⼊⾳量大⼩ 息。 麦克风增益 自动增益 声音模式 ⾃动增益 ⾃动变化,⾳量大 开启 时增益变⼩,⾳量 可选择帧率 ⼩时增益变大。点 为 23.98fps、 击 图标关闭⾃ 24fps、25fps、 动增益。 帧率设置 29.97DF 、 29.97fps、 原声 采取⾼保真拾⾳。 外放 时间码 对码 30fps。...
  • Page 26 录⾮常宽的⾳量级别范围,即使声⾳超过 0 dB, • 录⾳满 30 分钟后将⾃动分割⽂件,便于快速 录制的⾳频也不会失真或过曝 查找想要的录⾳⽚段。 • 录⾳⽂件默认命名格式为 “年 - ⽉ - ⽇ - 时 - 注 : 32 位浮点仅适⽤于 Saramonic Ultra 的板载录⾳, 分 - 秒 .WAV”,最⾼⽀持 999 个录⾳⽂件。 不⽀持改变相机的录制格式。 • 内置 EMMC 芯⽚可保存约 8 GB 的⾳频⽂件, 时间码模式...
  • Page 27 咪头信噪⽐ > 90 dB ⾳频输⼊接⼝ 内置⻨克⻛,3.5 mm TRS -30 ⾄ -42 dBv ( ⻨克⻛输 参考⾳频输⼊电平 ⼊,0 dB 衰减 ) 130 dB SPL(低增益模式 时,最大声压级可达到 130 最大声压级 dB。请连接 Saramonic App,在该软件上设置低增 益模式) 内置存储空间 8 GB ⽂件读取接⼝ USB-C 接⼝ 供电⽅式 内置锂电池供电 内置电池容量 495 mAh 续航时⻓...
  • Page 28 接收器(RX) 充电接⼝ USB-C 接⼝ 可供循环充电次数 >1 次(2*TX+1*RX) 传输⽅式 2.4 GHz 数字频段 重量 210.5g 信号调制 GFSK 117 × 48.5 × 62.4 mm ( ⻓ 尺⼨ 天线类型 PIFA 天线 × 宽 × ⾼ ) ⼀拖二:300 m(有外置天 ⼯作温度 0° C ⾄ 50° C 操作距离...

This manual is also suitable for:

Ultra 02Ultra 03Ultra 04Ultra05Ultra 06