Advertisement
- 1 Packing List
- 2 Basic Parameters
- 3 Product Introduction
- 4 Installation of Dust Collection Charging Station
- 5 How to Use
- 6 Maintenance
-
7
Troubleshooting
- 7.1 Unable to charge
- 7.2 Abnormal behavior
- 7.3 The vacuum made a strange noise while cleaning
- 7.4 Impairment of cleaning ability or ash drop
- 7.5 Unable to connect to APP
- 7.6 Please check whether the radar is stuck
- 7.7 Please check the crash barrier
- 7.8 Please check the main brush
- 7.9 Please check the main wheel
- 7.10 Two in one tank removed
- 7.11 Low battery, start recharging
- 7.12 Abnormal sounds coming from the fan
- 8 Safety Instructions
- 9 Documents / Resources
Packing List

Accessories installed on the sweep and towing robot

These fittings are installed on the dust collecting charging pile


Tip: replace regularly. Dust bag is consumable, it can not be recycled, please
Basic Parameters
Basic parameters
| Product name | Intelligent Cleaning Robot |
| Product model | Q6 Pro |
| Product dimensions | 349×100×353mm |
| Input of sweeping and mopping robot | 24V⎓1.2A |
| Rated power of sweeping and mopping robot | 50W |
| Operating voltage of sweeping and mopping robot | 14.4V |
| Battery type | Lithium ion battery pack |
| Wireless connection | Wi-Fi IEEE 802.11b/g/n 2.4GHz Incompatible for 5G |
Dust collection Charging Pile
| Output of dust collection charging pile | 24V⎓1.2A |
| Rated power of dust collection charging pile | 950W |
| Product dimensions | 250×210×350mm |
Complete Machine
| Net weight | About 7.8 kg |
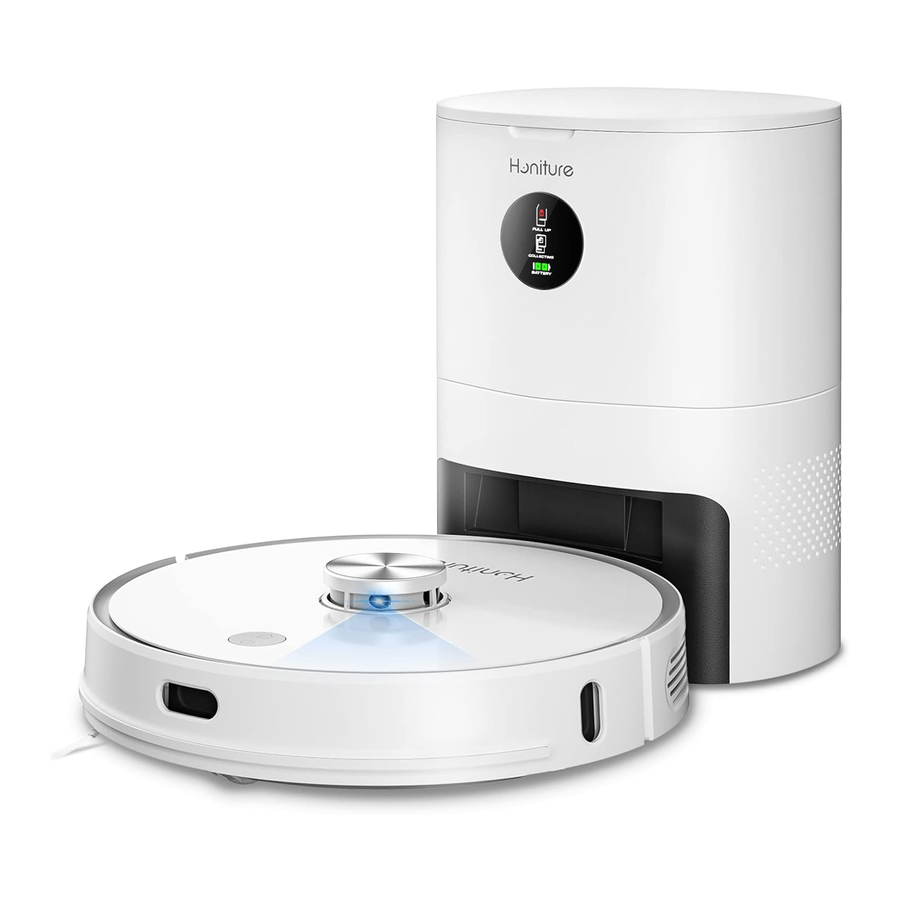
Product Introduction
Robot introduction
 Recharge
- Short-press to start the recharge
 On and off / global cleaning
- Short-press to start the global cleaning/pause. Press and hold for 3 seconds to turn on or off the machine.
Tips: In the course of recharging, fixed-point cleaning orglobal cleaning, short-press any key to bring the machine to pause.

- Infrared sensor
- Laser lidar cover
- Laser lidar
- Anti-collision strip
- Recharge button / indicator
- Power button / indicator
- Infrared sensor
- Bumpera

- Mop cloth assembly
- Main brush cover
- Main brush
- Side wheel
- Battery
- Side brush
- Caster
- Clif sensor

- Charging electrode tip
- Wall-following ( position sensitive detector )
- Reset button ( Press and hold for 1 second to restart Press and hold for 3 seconds to restore the factory settings )
- Dust bin release button
Indicator reminder
*Breath: Gradually on and off in 4 seconds.
*Slowly flash: On for 0.7 seconds, off for 0.8 seconds.
*Faster flash: On for 0.1 seconds, off for 0.2 seconds.
| The machine status | (networked / disconnected) | Recharge indicator light status |
| Standby | Long bright blue light | Put out |
| Charging | Blue light breath | Put out |
| Suspended | Blue light is slow | Put out |
| Cleaning | Long bright blue light | Put out |
| Recharge | Put out | Orange light long on |
| Abnormal | Red light fast flash | Light Off |
| Turned off | Blue light fast flash | Light Off |
| Wi-Fi not connected | Blue light slow flash | Light Off |
| Wi-Fi not connected | Blue light long bright | Light Off |
| Wi-Fi being connected | Blue light long bright | Light Off |
Dust Collection Charging Pile

- Upper cover ( Open the upper cover, Install / remove the dust )
- Dust bag chamber
- Screen
- Infrared lens
- Charging and dust collection sensing head / Charging and dust collection sensing
- Suction inlet ( Suck the trash in the machine into the dust inlet )
Indicator reminder

Tip: The dust bag is consumble. One bag is installed on the robot, and additional two bags are provided in package. After use-up, you need to make a purchase through the designated official channel. Product abnormalities and damages caused by the use ofconsumables from unofficial channel are not covered within the warranty.
Installation of Dust Collection Charging Station
Install the Dust Collection Charging Pile


To prevent the risk of your robot falling downstairs, ensure that the charging station is placed at least 4 feet (1.2 metres) away from stairs.
Notice:
- Put in a place with good wifi signal.
- Less obstacles, the wider the better.
- Do not bundle the cords and stretch them along the wall.
Please stay away from the stairs to prevent the robot from accidentally falling down due to insufficient map information at the beginning of startup. Please place it in an environment with good Wi-Fi signal.
How to Use
USE

Remove the Limit Bar
Put the sweeping and mopping robot on the flat indoor ground, and remove the protection device of limit bar at both ends of the front bumper.
Remove the protective film
Please remove the protective film from the surface before use.
Charing of the Sweeping and Mopping Robot
Press and hold the button automatically. The robot enters the ready state once fully charged. for 3 seconds to start the sweeping and mopping robot, and then short-press the button to make the robot recharge

Switching to mopping mode
- Open the lid of the tank and fill it with water from the inlet shown in the picture.

- Put 2-IN-1 dust and water container back into the sweeper.

- Attach the mop to the mop bracket and fasten the velocity tightly.
![]()
- Press the buttons on both sides of the mop bracket and then install the mop assembly below the dust box.
![]()


- Please fill water from the inlet as seen on the drawing.
- Press the buttons on both sides of the mop bracket and then install the mop assembly below the dust box.
- Because the outlet is small, water seepage needs a certain time. You can also wet the mop and put it on the sweeper.
- Do not add detergent to the water used in the mop in order to avoid corrosion of the water tank caused by certain chemical detergents.
How to connect to the APP
- Scan the QR code, download and install the APP. Users who have already installed the APP will directly enter the device connection page.
- Users can download and install the HonySmart APP by searching for it on Google Play or Apple Store.
- Open the homepage of the APP, click " + " in the upper right corner of the page, and add devices according to the prompts of the APP.
![]()

Note: slightly different from the above description. Please follow the current instructions in the APP. Due to APP upgrades and updates, the actual operation may be
Reset Wi Fi
At the same time, long press the key and the key for 3 seconds, and a voice message will be heard indicating that the Wi-Fi has been reset. Power indicator is slowly flashing blue, and the robot will enter the state of waiting for connection.
Note: robot will enter the state of waiting for connection. Only support Wi-Fi 2.4 GHz Network. Incompatible for 5G and the
 iOS 10.0 and above
 Android 8.0 and above
Note:
- Please put the robot and charging base in a place with good WIFI signal.
- Make sure that the power is turned on.
- Ensure the mobile phone connected has turned on the Bluetooth.
Description of buttons and basic functions
| State | Button | Operating | LED indicator | Response |
| Turn off |  | Press and hold the button for 3 seconds to turn off themachine | The power indicator blinksin white after blinking in blue slowly for 5 seconds | The sweeping and mopping robot enters the standby state. |
| Turn on | | Short press the button to turn on the machine | Start the whole-house cleaning. | |
| When the robot is still | | Press the button for 3 seconds | The power indicator will blink in blue quickly for 5 seconds and then go out | The machine will turn off. |
| In the process of cleaning | | Short press the button | The sweeping and mopping robot will pause. | |
| In the process of cleaning | - | Automatically |
| |
| In the process of cleaning |  | Short press the button |
| |
| In the process of cleaning | - | Automatically |
| |
| Add water to the water tank or clean the mop cloth mid way |  | Short press the button |
| |
| Set the Cleaning Mode | - |
| ||
| Failure State | - | When the sweeping and mopping robot is abnormal, it will give a voice prompt and the power indicator will blink in orange |
|
Maintenance
Replace the Dust Bag
When the dust bag is full, the "FULL UP" sign is keeping high brightness, and app notice is given. Please replace the dust bag in time. The" COLLECTING " sign will be high brightness while the collector is working. When the host is fully charged, the mark of "BATTERY" is all green and high brightness, battery power is less than or equal to 50%, just a half mark is high britghtness.
- Open the uppe cover
![]()
- Pull up the litfing handle of the dust bag and take outthe dust bag
![]()
- Throwa way the used dust bag
![]()


- Install a new dust bag
![]()
- Make sure that the dust bag is installed in place
![]()
- Close the upper cover
![]()


Clean the Dust Passage
If the " FULL UP "sign, The "COLLECTING" sign and the "BATTERY " sign all is twinkling after the dust bag is replaced, it is recommended to pull out the power plug and reverse the dust collection charging pile to check whether there are foreign maaters blocking the dust passage.
If the dust passage is blocked, refer to the figure below and remove the transparent cover of the dust passage with a screwdriver to remove foreign matters.

- Transparent cover of dust passage
- Dust passage
Clean the Infrared Lens/Charging and Dust Collection Sensor Head
Wipe them gently with a clean, soft, dry cloth. It is recommended to clean them once a month.

- Infrared lens
- Charging and dust collection sensor head
Clean the Filter Screen of the Fan
The Filter screen of the fan is below the dust bag. If there is dust accumulation, wipe it gently with a clean, soft, dry cloth. It is recommended to clean them once a month.

- Fan filter screen
Clean the Main Brush
The main brush is consumable and should be cleaned at least once a week. It is recommended to replace the main brush every 6-12 months to ensure the cleaning effect.
- Reverse the sweeping and mopping robot, press the snap on the main brush cover, and remove the main brush cover and the main brush.
Note: avoid hitting when reversing the robot to prevent damage to the lidar.
![]()
- Main brush cover
- Main brush
- Cut off the hair wound on the main brush with the cleaning knife, and then clean the main brush withthe cleaning brush at the other end of the cleaning knife.
![]()
- Replace the main brush and the main brush cover. Press and fasten the snap.
![]()


Clean/Replace the Side Brush
- Remove the side brush with a screwdriver.
![]()
- Replace the side brush after cleaning, or install a new side brush.
![]()


Tips: The side brush is consumable. lt is recommendrd to replace it every 3-6 month to ensure the cleaning effect.
Clean the Sensors
It is recommended to use a clean, soft, dry cloth to wipe each sensor gently every week to ensure the normal use of the machine.
Sweeping and Mopping Robot
Cliff sensor *4
Infrared sensor *3
Charging electrode tip *2
Wall-following position sensitive detector *1

- Wall-following position sensitive detector
- Infrared sensor
- Cliff sensor
- Infrared sensor
- Charging electrode tip
- Infrared sensor
Dust Collection Charging Pile
Infrared lens *2
Charging and dust collection sensor head *2

- Infrare lens
- Charging and dust collection sensor head
Battery Maintenance
- The sweeping and mopping robot has a built-in high-performance rechargeable lithium-ion battery pack. In order to maintain battery performance, please keep the battery pack charged every day.
- If the machine will not be used for a long time, please turn it off and store properly. Charge it at least every three months to avoid battery damage due to over discharge.
Clean the Two-in-one Water Tank
- Press and hold the release button of the two-in-one water tank and at the same time pull it outwards.

- Water tank cover / water injection port
- Dust bin
- Dust bin snap
- Release button of two-in-one water tank
- Open the dust bin by pressing the dust bin snap.
![]()
- Remove the filter screen clip.
![]()
- Take out the filter screen.
![]()
- Filter screen clip
- Filter screen
- Remove the debris on the filter screen and screen clip with a cleaning brush.
Tips: every 3-6 weeks. Please make a purchase through the official channel. The filter screen is consumable. It is recommended to replace it every 3-6 weeks. Please make a purchase through the official channel.
![]()
- Turn on the tap to clean the dust bin.
![]()
- Open the water tank cover and inject an appropriate amount of water.
Tips: It is suggested to use pure water without any cleaning agent.
![]()
- Please remove the water tank fittings from the machine according to the illustration and reverse it, remove the mop or replace it.


Tips:
- If the mop is too dirty, it will affect the effect of mopping, please clean it in time.
- Be sure to remove the mop for cleaning and screw it dry before installation. It is forbidden to clean on the two in one water tank.
- The mop is a consumable and it is recommended to replace it every 3-6 weeks.
Power failure restart
When the button is not responding or can not be turned off, reset the button with the pin length for one second, and the robot will restart the power.
Troubleshooting
When there is any abnormality in the operation of the main engine, the power indicator will flash red. When some faults occur, the host will issue a voice prompt. Please refer to the table below to try to solve the problem.
| Voice prompt / malfunction | Possibly reasons | solution ways |
Unable to charge |
|
|
| Recharge failed, dust collecting charging pile was not found | The dust collecting charging pile is sheltered or too far away | Please put the dust collecting charging pile in the open area. Please put the main machine near the dust collecting charging pile to try |
Abnormal behavior | Abnormal program | Press the reset button to power off and restart |
The vacuum made a strange noise while cleaning | Main brush/side brush or main wheel wound foreign body | Please clean the body of the vacuum after shut down |
Impairment of cleaning ability or ash drop | The dust bin is full or the filter screen is blocked or the main brush is entangled | Please clean the dust bin, the filter screen and the main brush in time |
Unable to connect to APP | WIFI network abnormality or WIFI password error or APP abnormality | Please ensure that the main engine is in the area with good WIFI signal, Re-enter WIFl password or reset WIFl. Update the APP and try again |
| Recharge failed, dust collecting charging pile was not found | The dust collecting charging pile is sheltered or too far away | Please put the dust collecting charging pile in the open area. Please put the main machine near the dust collecting charging pile to try |
| Excessive leakage of water from the mopping module / water tank | The tank cover is not in place and the water output is adjusted to the maximum | Please confirm that the tank cover has been installed in place and adjust the appropriate amount of water in the APP. Fill the tank and letit stand to check whether there s any damage or leakage |
| During cleaning, the battery is low and the charge is returned but the sweep is not continued | The main engine is in Do Not Disturb mode or manually recharge | Please confirm in the APP that the main engine is not in Do Not Disturb mode, and there will be no continuous scanning in this mode. Manually charge back or manually put the main engine back to the dust collecting charging pile, the machine will not continue to sweep |
| Unable to return to dust collecting charging pileafter fixed point cleaning or moving position | The robot rearranges or is too far away from the charging pile | After fixed point cleaning or long-distance moving, the robot will regenerate the map. If the dust collecting charging pile is too far away, it may not be able to charge back automatically. Please manually put the host back to the dust collecting charging pile for charging |
| The mop module does not produce water or little water | The water tank is short of water or the mop is too dirty or the mop bracket is not installed in place. | Please check whether there is water in the water tank. Please clean the mop. Please install the mop correctly according to the the instructions. Check whether the outlet hole is blocked by foreign matter, pay attention to add clean waterwithout impurities |
Please check whether the radar is stuck | The laser radar is blocked or jammed | Remove the occlusion or move the main engine to an open area and restart |
Please check the crash barrier | Collision sensor stuck | Clean up the foreign body around the crash barrier or remove the main engine |
| Wipe the cliff sensor and activate away from the danger area | The cliff sensor is triggered after starting the main engine | Wipe the cliff sensor and move to a flat and spacious start |
Please check the main brush | Brush get stuck | Clean the main brush, or remove the main engine |
Please check the main wheel | Main wheel get stuck | Clean the main wheel, or remove the main engine |
Two in one tank removed | The two-in-one tank was taken out | Please install the two-in-one water tank and strainer, and confirm that the strainer and two-in-one water tank are installed in place |
Low battery, start recharging | Low power during cleaning | Power is low, please charge it before use |
Abnormal sounds coming from the fan | Fan abnormal | Please try turning off the machine and restarting it |
| Please wipe the TOF detector along the right wall | TOF detector anomalies along the wall | Please wipe clean the TOF detector along the wall |
| The radar cap is not moving | The radar cap is stuck | The radar is pinned or stuck, please move to another area and start again Radar protection: Do not allow children, pets or other heavy objects to stand on the sweeper to avoid radar damage caused by squeezing the radar cover. Man-caused damage is not covered by the warranty |
| Damaged or uninstalled batteries | Abnormal battery during charging | If the battery temperature is too high or too low, please wait until the battery temperature is normal before using |
| Unable to start up | Low battery power or abnormal ambient temperature | The battery is low, please charge it before use; The ambient temperature is too low (below 0) or too high (above 50%), please use in 0° ~40℃ environment |
| Voice prompt/malfunction | Possibly reasons | Solution ways |
| Dust failure | Dust bag leakage or not installed in place, Overheat protection or failure of fan starting | Please install the dust bag correctly. Try dust collection again after 30 minutes. If it cannot be solved. please contact customer service |
| Dust bag is full or blocked | Dust bag is full or blocked | Change the dust bag, and timely clean the dust collection charging pile (dust suction port, dust passage, fan filter screen, etc.) |
Safety Instructions
Use Restrictions
- Plastic bags are dangerous. Please keep them away from infants and children as they may pose a choking hazard.
- This product is only intended to be used to clean floors in residential households.
- Do not use this product outdoors (such as open balconies), on surfaces other than floors (such as sofas) or in commercial/industrial environments.
- Do not use this product on a suspended platform, suchasa balcony, which does not have any guardrails.
- Do not operate this product if the environment above 40 degrees Celsius, below 0 degrees Celsius or when any liquid or sticky material is present on the ground. Before using please remove any wires on the ground to avoid dragging the wires when the robot is running.
- Please put away the fragile items and sundries (such as vases, plasticbags, etc.), to avoid the damage of valuables due to the obstruction or collision of the device during operation.
- Do not allow persons (including children) who lack physical, intellectual or experience or common sense to use this product without supervision or guidance from someone capable of properly operating this product.
- Do not allow children to use this deviceasa toy.
- Do not place the main brush cleaner in an area accessible to children.
- Do not let human or pet hair, fingers near the suction portwhenthe mainmachineisin operation.
- Do not use this productto dean anyburning objects (such as unextinguished cigarette butts).
- Do not allow the device to absorb hard or sharpobjects (such as decoration waste, glass, nails, etc)
- Do not use the laser sensor protection cover, the main engine cover and the collision buffer as handles to carry the machine.
- To deanand maintain the machine and dust collection charging dock, the operator mustturnit off firstly and pull the plug from the socket and disconnect the power.
- Do not soak the main machine and dust collection dock in water or clean with water.
- Do not use a wet cloth or any liquid to wipe any part of the product.
- Do not mop on a carpet environment.
- Please use the product in accordance with the instructions of the manual. Any damage or injury caused by improper use shall be borne by the user.
Battery and Charging
- It is forbidden to burn products even when they are severely damaged, as the batteries may explode.
- Do not use any third party batteries, chargers and charging piles.
- Do not disassemble, repair or modify the battery or charging pile without authorization.
- Do not place the charging pile near the heat source (such as radiator).
- Do not wipe or clean the shrapnel of the charging pile with wet cloth or hands.
- Do not throw away the discarded battery at will. It should be disposed of by a professional recycling institution.
- If the powercord is damaged, it must be replaced by a professionalfom the manufacturer, its maintenance department or similar departmentin order to avoid danger.
- lf you need to transport the product, please ensure that the mainframe is switched off and it is recommended to use the original packaging box.
- Do not pour water into the device or immerse the device in water.
- If not used for a long time, please tum off the mainframe after full charge and put it in a cool and dry place, and charge it at least once every 3 months to avoid damage to the battery due to over-discharge.
- To remove the battery, use the right tools. First remove the bottom cover screw, then open the bottom cover of the product, unplug the battery connecting terminal and remove the battery from the battery box.
- The battery must be removed from the appliance before it is discarded.
- When the battery is removed, the appliance must be powered off.
- If the symbol for detachable supply unit is used, its meaning shall be explained.-symbollEC60417-6181.
- For the purposes of recharging the battery, only use the detachable supply unit provided with this appliance.
Documents / ResourcesDownload manual
Here you can download full pdf version of manual, it may contain additional safety instructions, warranty information, FCC rules, etc.
Advertisement


Need help?
Do you have a question about the Q6 Pro and is the answer not in the manual?
Questions and answers