Musical Fidelity NU-VISTA Series, NU-VISTA UNI PSU Manual
- Manual (19 pages) ,
- Installation manual (17 pages) ,
- Installation manual (11 pages)
Advertisement
Instructions for use
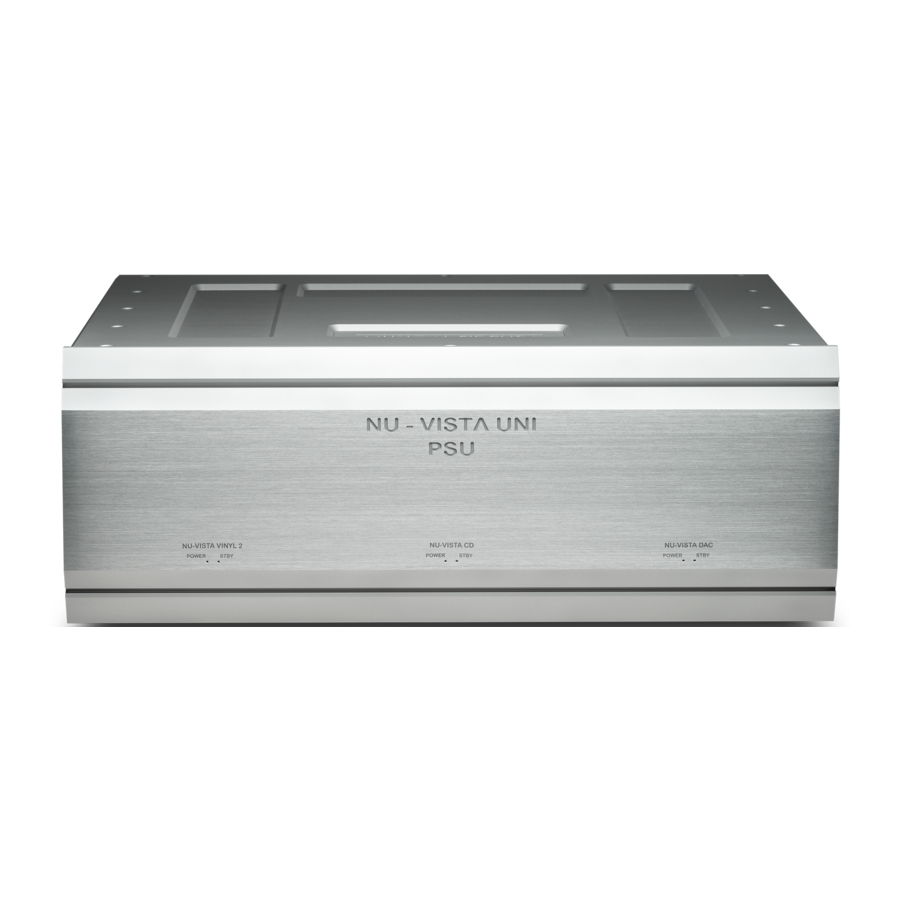
The Nu-Vista UNI PSU is a very special high-quality power supply for the Nu-Vista source devices: the Nu-Vista DAC, Nu-Vista Vinyl 2 and a new soon to be released Nu-Vista CD player.
The Nu-Vista UNI PSU displays our continued development of our Super Silent Power Transformers. Each output employs its own independent toroidal encapsulated power transformer.
Industrial grade power sockets with EMI filter and DC blocker stop interferences and eliminate transformer hum. Each transformer is purpose designed for the respective source device, with low core saturation and extremely low electromagnetic radiation. Using special technology with shielding between windings, DC blocking circuitry and also a complex power filter the Nu-Vista UNI PSU provides clean, independent voltage for your devices.
This will achieve better noise performance, by moving the AC mains power supply from the main unit and build it into another matching box. We are taking advantage of the extra space to set up mains and output filtering a step above what is usually possible in one-box-solutions.
The connected Nu-Vista source devices are each connected using three special power cables and you can continue to turn them on and off using the on/off buttons on the Nu-Vista Vinyl 2, DAC or CD themselves. No extra controls or manipulation necessary on the Nu-Vista UNI PSU. This gives you freedom of placing the NuVista UNI PSU as far away from the source devices as possible. You don't need to be able to reach the UNI PSU in day-to-day use.
Used properly and carefully, it should give many years of outstanding musical reproduction. Dust regularly with a soft duster or soft brush, but be careful when using cleaning or polishing agents - they may harm the surface finish.
If there are any questions about the audio system, please consult the dealer, who is there to help and advise.
INSTALLATION
Cleaning
Before cleaning the unit, switch off power at the mains switch and remove the mains plug from the wall socket. Clean the cabinets using a moist cloth. Using solvents, white spirit or thinners is not advised, as they could damage the surface finish.
Setting up
Position the Nu-Vista UNI PSU on a stable, horizontal surface where there is no risk of it being knocked. Make sure ALL units involved are switched off and unplugged from mains supply before making or removing any connections.

During normal operation, the unit dissipates an appreciable quantity of power at all times, and it is important that it is well ventilated. The top and bottom are perforated to allow the smooth flow of heat through the unit. However, the unit must not be enclosed in a cabinet or placed where the ventilation holes are impeded as this could result in excessive heat build-up.
The Nu-Vista UNI PSU must be protected from humidity – if the unit is moved from a cold place to a warm room, leave the unit for an hour or so to allow sufficient time for the moisture to evaporate.
Mains Power Connections
The Nu-Vista UNI PSU is supplied with a standard IEC mains cable which plugs into the IEC socket at the back of the unit.
Power Connections to Nu-Vista Vinyl 2, DAC, CD
Each of the Nu-Vista source devices have their independent vertically arranged power connection strips (see Facilities & Connections).
Connect the 5-pin XLR cable between the CONTROL output on the Nu-Vista UNI PSU and the CONTROL input on the Nu-Vista Vinyl 2, DAC or CD.
Connect both 7-pin XLR cables between the LH POWER & RH POWER outputs on the Nu-Vista UNI PSU and the LH POWER & RH POWER inputs on the Nu-Vista Vinyl 2, DAC or CD.
Example for Nu-Vista DAC connection using Nu-Vista UNI PSU:

Example for Nu-Vista Vinyl 2 power connection using Nu-Vista UNI PSU:

- Only switch the Nu-Vista UNI PSU on using the ON/OFF switch on the back panel once ALL connections are made.
- Only connect or disconnect power cables when the ON/OFF switch on the Nu-Vista UNI PSU is set to OFF!
- If the LH and RH POWER cables are wrongly or not connected, the Nu-Vista Vinyl 2, DAC or CD display will show "Output DC present" and mute the unit. Turn all the Nu-Vista devices off and check correct cabling again.
- When using the Nu-Vista UNI PSU to power your Nu-Vista DAC, Vinyl 2 or CD, these unit's mains inputs should not be connected!
Mounting optional Spike Feet
The Nu-Vista UNI PSU can optionally be used with spike feet. We recommend to ask a second person to help you lift the Nu-Vista UNI PSU for mounting the feet or felt pads.
If you want to use the standard mounted feet, you can attach the big felt pads to those feet (remove the small rubber feet first if necessary).
To mount the spike feet, screw the threaded rods into the spike feet so that the allen key side is inside the foot (this way, when you want to remove the foot from the amplifier again, you can unscrew the foot and then unscrew the threaded rod from the amplifier with an allen key, should it be too tight to unscrew by hand). Then screw the feet into the amplifier (remove the small rubber feet first if necessary). Attach the small felt pads to the bottom of the spike feet cups and place these cups under the spike feet.
FACILITIES & CONNECTIONS

- NU-VISTA VINYL 2 POWER / STANDBY button
- NU-VISTA CD POWER / STANDBY button
- NU-VISTA DAC POWER / STANDBY button

- NU-VISTA DAC RH POWER output
- NU-VISTA DAC CONTROL output
- NU-VISTA DAC LH POWER output
- NU-VISTA CD RH POWER output
- NU-VISTA CD CONTROL output
- NU-VISTA CD LH POWER output
- NU-VISTA VINYL 2 RH POWER output
- NU-VISTA VINYL 2 CONTROL output
- NU-VISTA VINYL 2 LH POWER output
- ON/OFF switch
- 230/120V selector
- MAINS IEC socket
SPECIFICATIONS
| Input power supply | 230V/115V selectable on the back panel, AC 50/60Hz |
| Power consumption | 150 Watts maximum, <0.5 W in standby (orange LEDs STANDBY) |
LH POWER - output voltages
| LH POWER - output voltages Voltage for heating the tubes | 16V DC |
| Positive voltage for audio circuits | + 34V DC |
| Negative voltage for audio circuits | - 34V DC |
RH POWER - output voltages
| Voltage for heating the tubes | 16V DC |
| Positive voltage for audio circuits | + 34V DC |
| Negative voltage for audio circuits | - 34V DC |
CONTROL - Output voltages
| Standby voltage | 5V DC |
| Voltage for control circuits and display | 12V DC |
| Control signals | PWR_OK, PWR_ON |
Weight
| Unit only, unboxed | 24,5 kg |
Maximum Dimensions
| Nu-Vista UNI PSU (WxHxD) | 483 x 187,5 x 480 mm |
Standard accessories
| 1x IEC type mains lead | 10-Amp type |
| 1x LH power cable (1m length) | 5-pin XLR |
| 1x RH power cable (1m length) | 5-pin XLR |
| 1x Control power cable (1m length) | 7-pin XLR |
| 4x Spike Foot | |
| 4x Spike Foot Cup | |
| 4x Spike Foot Screw | |
| 4x Felt pad for Spike Foot Cup | |
| 4x Felt pad for Standard Foot | |
Musical Fidelity reserves the right to make improvements which may result in specification or feature changes without notice.
SAFETY INFORMATION
(U.K. only)
This unit is supplied in the U.K. with mains lead fitted with a moulded 13 amp plug. If, for any reason, it is necessary to remove the plug, please remove the fuse holder and dispose of the plug safely, out of reach of children.
It must not be plugged into a mains outlet.
The wires in the mains lead supplied with this appliance are coloured in accordance with the following code:
Green and yellow - Earth
Blue - Neutral
Brown - Live

This appliance MUST be earthed
As the colours of the wires of the mains lead of this appliance may not correspond with the coloured markings identifying the terminals in the plug, proceed as follows:
- The wire which is coloured green-and-yellow must be connected to the terminal in the plug which is marked with the letter E or coloured green or green-and-yellow, or by the earth symbol:
![]()
- The wire which is coloured brown must be connected to the terminal which is marked with the letter L or coloured red.
- The wire which is coloured blue must be connected to the terminal which is marked with the letter N or coloured black.
- If connecting to a BS1363 plug, a 13 amp fuse must be used.

ANY MODIFICATIONS TO THIS PRODUCT NOT EXPRESSLY APPROVED BY MUSICAL FIDELITY WHO IS THE PARTY RESPONSIBLE FOR STANDARDS COMPLIANCE COULD VOID THE USER'S AUTHORITY TO OPERATE THIS EQUIPMENT.
GENERAL ADVICE
Installation, Precautions & User Information
This new Nu-Vista UNI PSU is designed and built to provide trouble-free performance, but as with all electronic devices it is necessary to observe a few precautions:
- Heed all warnings shown on the back of the product.
- Only connect the Nu-Vista UNI PSU to a mains outlet having the same voltage as marked at the back of the unit.
- Always ensure that when disconnecting and reconnecting your audio equipment the mains supply is switched off.
- Position the mains lead and signal interconnects where they are not likely to be walked on or trapped by items placed on them.
- Do not use near water, or place water-filled containers on the Nu-Vista UNI PSU, for example, a flower vase or potted plants.If water does spill inside, immediately pull out the mains plug from the wall socket and inform your dealer, who should then check the unit before further use. Entry of liquid into the Nu-Vista UNI PSU is dangerous, and may cause electric shock or fire hazard.
- Do not place the unit near direct heat sources such as radiators, direct sunlight or other equipment.
- Do not remove any covers or try to gain access to the inside. There are no internal adjustments or fuses you can replace yourself. Refer all service work to an authorised Musical Fidelity agent.
* Note: Unauthorised opening of the equipment will invalidate any warranty claim. - Dust regularly with a soft cloth or soft brush but be careful when using cleaning or polishing agents - they may harm the surface finish.
The electronics in modern hi-fi equipment is complex and may, therefore, be adversely affected or damaged by lightning. For protection of the audio system during electrical storms, remove the mains plugs.
If after-sales service is required, to help the dealer identify the Nu-Vista UNI PSU please quote the serial number located on the rear panel of the unit.
Documents / Resources
References
Download manual
Here you can download full pdf version of manual, it may contain additional safety instructions, warranty information, FCC rules, etc.
Download Musical Fidelity NU-VISTA Series, NU-VISTA UNI PSU Manual
Advertisement


Need help?
Do you have a question about the NU-VISTA Series and is the answer not in the manual?
Questions and answers