Advertisement
Introduction
Maybe you are familiar with 3D printing technology or have purchased Anycubic printers before. However, we still highly recommend you read this manual carefully, as the installation techniques and precautions can help you avoid any unnecessary damage or frustration. Please visit https://support.anycubic.com to contact us if you have any questions. You can also learn more information from the website, such as software, videos, models.
Anycubic support center

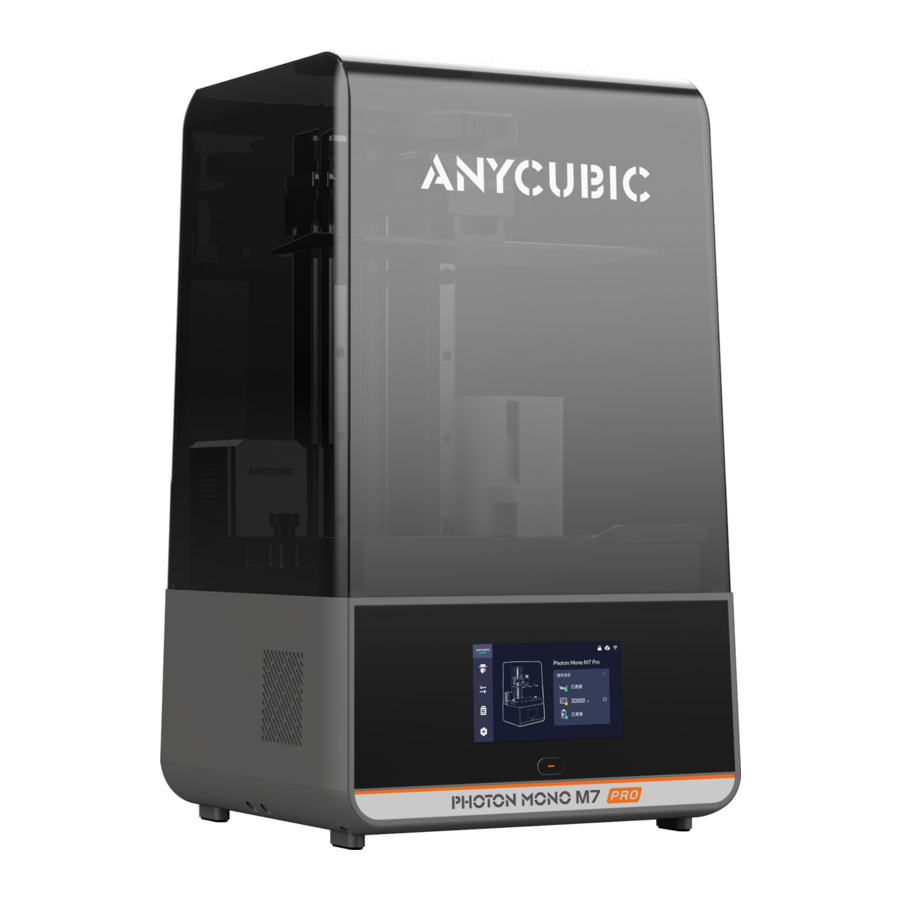
Product Overview

Auto-fill Unit

*Indicators: Green light indicates the connection of the main module. Red light indicates that the resin in the bottle is insufficient.
Air Purifier

In the Box

Technical Specification
Operating System
| System | Photon Mono M7 Pro |
| Touch Screen | 5-inch Capacitive Screen |
| Software | Anycubic Photon Workshop (also compatible with other software) |
| Connectivity | USB Drive, WIFI |
Specifications
| LCD screen | 10.1 inch 14K |
| Light source | COB light |
| XY Resolution | 13312* 5120 |
| Z axis Accuracy | 0.01 mm |
| Suggested Layer Thickness | 0.01 - 0.15 mm |
Physical Dimensions
| Dimension | 310 mm(L) *315 mm(W) *520 mm(H) |
| Build volume | 223.64 mm(L) *126.48 mm(W) *230 mm(H) |
| Weight | 12.8 kg |
WiFi
| Frequency Range | 2.4 G (2.400-2.4835 GHz) |
| Work Mode | AP, STA, AP+STA mode |
Recommended Print Parameters
| Parameters Group |  Default Resin_Normal Default Resin_Normal |  Default Resin_Fast Default Resin_Fast |  High Speed Resin High Speed Resin |
| Layer Thickness | 0.05 mm | 0.1 mm | 0.1 mm |
| Normal Exposure Time | 1.8 s | 2.2 s | 1.4 s |
| Off Time | 0.5 s | ||
| Bottom Exposure Time | 25 s | 25 s | 15 s |
| Bottom Layers | 5 | 3 | 3 |
| Z Lift Distance | 8 mm | 4 mm | 4 mm |
| Z Lift Speed | 6 mm/s | 15 mm/s | 15 mm/s |
| Z Retract Speed | 6 mm/s | 15 mm/s | 15 mm/s |
| Anti-alias | 1 | ||
| Notice |
| ||
 apply to the model whose hollowed thickness is no more than
 only apply to Anycubic high speed resin.
Menu Directory
Home menu

Print
Print:

File Details:

Tools
Move Z:

Exposure:

Vat Cleaning:

Advanced:

Advanced-Smart resin vat:

Advanced-Load & Unload:

Advanced-Air Purifier:

When you enable "connect to Air Purifier", the connection of auto-fill unit will be disabled. To use the auto-feeding and unloading functions, please turn off air purifier connection first.
Advanced-Equipment self-test:

Information
Print logs:

Device:

Version:

Settings
Cloud:

Network:

Language:

Guide:

Preparations
- Unbox, and take out the machine and its accessories.
- Install the screen protector.
- Peel off the protective film Clean the LCD screen
![]()
- Peel off the film
![]()
![]()
- Align the locating holes Squeeze out the air bubbles
![]()
- Peel off the film
![]()

- Peel off the protective film Clean the LCD screen


- Check the input mode of power voltage first. The one shown as "230" is suitable for 200V-240V; and the other one shown as "115" is suitable for 1001/-120V. Then, connect to the power adapter, flip the rocket switch to ON position and hold down the start button for 2s.


- Set the system language and choose "Global' server. Then, complete the on-screen setup steps.


- Install the print platform.
- Push the platform onto the platform carrier
![]()
- Tighten the knob
![]()
- Push the platform onto the platform carrier


- Install the WiFi antenna.
![]()

- Install the resin vat.
- Put resin vat with its feet stuck in locating holes
![]()
- Tighten the two knobs
![]()
- Put resin vat with its feet stuck in locating holes


- Install the auto-fill unit (optional)
- Secure the main module
![]()
- Use Anycubic 1kg resin bottle
![]()
![]()
![]()
- Secure the main module


 Attention:
- It is suggested to use the resin with a viscosity below 4000pcs, and place the resin bottle behind or on the right side of the printer.
- Never vigorously shake or turn over the resin bottle when the cap part is installed. If the inside of the cap is stained by resin, please immediately clean it to avoid malfunction or damage to auto-fill unit.
- Prepare the air purifier (optional).
- Remove the package of carbon
![]()
- Remove the package of carbon

File Upload
USB
- Use Anycubic Photon Workshop software to process the 3D model file. The installer and instructions is saved in the USB drive.
- When you set the parameters in Anycubic Photon Workshop, there are three groups of parameter which can be apply to the print with different needs.

Choose the parameter group according to the personal requirement
- Default Resin_Normal
Apply to the Anycubic resin with normal printing speed. If the print object needs high accuracy, please modify the anti-alias level as 16 and the image blur as 3. - Default Resin _ Fast
Apply to the Anycubic resin with fast printing speed. The layer thickness is 0.1 mm. Optimizing the Z-axis motion control increases the print speed. - High Speed Resin
Only apply to the Anycubic high speed resin with the fastest printing speed. The layer thickness is 0.1 mm. Optimizing the Z-axis motion control increases the print speed.
Notice for parameter group :
:
- The parameters apply to the model whose hollowed thickness is no more than2mm.
- The parameters must work with the ACF release film this printer provided toavoid print failure. The film can be used to print 45000 layers.
- Save the sliced file to USB drive.
- Then, insert the USB drive to the printer.
USB drive:
- It is recommended that use the USB drive we provide. If you are using your own USB drive, please ensure that it is formatted to FAT/FAT 32 and has a memory size of less than 64G.
- To ensure proper file reading, please put print files in the root directory of USB drive.
Cloud
Please connect the printer to Anycubic App first for remote uploading and monitoring.
- Connect to the network.


- Please search "Anycubic" in App Store or Goolge Play, or scan the QR code on the printer, to download Anycubic App. Then, sign up and sign in.
![]()

- Add a printer in Anycubic App.


- Search model or upload the model files.
- Search model

- Upload the model files


Print Test
Resin Preparations
*The release film on the resin vat is consumable. Please pay attention to the status of release film on the touch screen and replace the film timely. Please check the release film carefully before and after every printing. If the film is broken, replace it immediately to avoid further damage to the machine.
- Make sure to wear a mask and gloves (to avoid direct skin contact with the resin), slowly pour resin into the vat, and make sure it is within the vat's maximum scale.


- Enable the automatic feeding (optional). Please install the auto-fill unit before using.


TIPS: When using resin with a viscosity over 500cps at room temperature (25ºC), the resin bottle may experience slight deflation or inflation due to pressure changes. This is normal and does not affect loading and unloading.
- Insert the air purifier (optional). There are two methods to turn off the purifier:
- Enable the connection of air purifier on the touch screen and then press the power button of purifier
- Unplug the air purifier.
- Insert the purifier and it will start
![]()
- Enable the connection of air purifier
![]()
- Press its power button
![]()
- Insert the purifier and it will start


- When the ambient temperature is below 20 ºC, it may cause the detachment of printed bottom or partial loss of printed objects. You can enhance the printing effect by enabling preprint heating. Enable preprint heating. The printing starts when the resin temperature reaches 25 ºC.


Attention:
- Material circulation is enabled by default during heating process.
- When the resin vat heats up for a long time, its surface temperature becomes high. Avoid touching the resin vat without protection after heating.
- Put on the cover.
Print File
Print USB drive file

Remote print

Before printing
- Before printing, the printer checks the hardware condition, resin volume and residue before each print job. When there is an error, the printer will pop up the error QR code. Please scan the code and follow the guide.
![]()
Platform Detection
Before printing, check whether the print platform is installed.
Residue Detection
Before printing, check if there are the solid residues* in the resin vat. If residues are detected, please clean the vat and check again.
*solid residue: height![]() 3mm, cross section
3mm, cross section![]() 9mm2
9mm2
Resin Detection
Before printing, check whether the resin in the vat is sufficient to finish the print job. Usually, the required volume is a little more than the volume estimated by the slice software.
If the auto-feeding is enabled, the equipment will automatically replenish the resin when it detects the resin insufficiency.

 3mm, cross section
- If the in the bottle is insufficient, the printer will pop up warning. Please refill or replace the resin bottle timely.


- The feeding before printing can be skipped. If skipped at this time, it will not occur during printing.
- You can choose to skip heating if necessary. Please be cautious, as low ambient temperature and insufficient heating time may lead to print failure.
In Printing
Failure detection: During printing, the printer automatically monitors the conditions which may cause print failure to avoid wasting resin or damaging to the printer. When the printer detects an abnormal condition, it will pause the print job automatically and pop up the error report. Please check the sliced file and the model according to the report. The failure detection is enabled by default.
Bottom non-stick detection
It checks whether the model sticks to the print platform.
When the printer detects that the model does not stick the platform, please check the bottom exposure time of the sliced file.
Off compensation: When the exposure area is large during printing, due to the surface tension and the resin characteristic, there may be problems such as delay of Z-axis or delay of resin reflowing, resulting print failure.
The function is enabled by default.
Intelligent release: The function can improve the printing success rate by optimizing algorithm. Enabling intelligent release while printing with the default resin _ normal parameter group can also increase printing speed.
The function is disabled by default.
Before printing, the functions can be enabled/disabled in the print function interface.

After Printing
- After printing, remove the platform when resin stop dropping from the platform. Remove the model by metal scraper and then wash it with 95% alcohol or other detergent. After cleaning and drying, proceed with postcuring and any other necessary post processing of the model.
- After printing, click "Unload" to recycle the resin. Use a plastic scraper to guide resin to the output of the auto-fill unit, facilitating the unloading process. However, if the printing fails, do not enable the unloading function to prevent the auto-fill unit from blocking or being damaged.


- When the printing fails, resin may be cured partially in the vat. Please set to Vat Cleaning and remove the residue. Otherwise, it may cause damage to the release film or LCD screen.


- Please pour out the remaining resin through a front spout of the vat, and filter it by a funnel. Do not pour out the resin through the back side of the vat to avoid the damage to the resin vat.


Resin Exposure Range Finder
"R_E_R_F" is an abbreviation for "Resin Exposure Range Finder". This function is used to find out the optimal exposure parameters for different resins.
- Import the R E R F file which is saved on USB drive into the slicing software. There are eight models in the file. The exposure time for model 1 is equal to "normal exposure time (s)" of the file, and the exposure time for other models will be increased by an increment of 0.25 s. For example:
The numbers on the models indicate the order


- According to the personal requirement, adjust the exposure time of the models by modifying "normal exposure time (s) " of the file. When exposure time for Model No. 1 is changed, the exposure time for other models will be increased by an increment of 0.25 s. For example, when normal exposure time is set to 1.5 s, the exposure time for Model No.1-8 is: 1.5 / 1.75 / 2/ 2.25 / 2.5 / 2.75 / 3/ 3.25
- After printing, remove and clean the models. Compare the print effect of models and choose the model's exposure time that meets your needs as the print parameter. Take a comparison of model A&B as an example.

- Model A has more holes and fewer cylinder. If you print by the parameter of model A, more details of model can be printed with high risk of failure.
- Model B has fewer holes and more cylinder. If you print by the parameter of model B, model may be printed successfully yet with some details lost.
In addition, you can compare the bridges, needles or other parts to choose a proper model and find the parameter. If none of them can be chose, adjusting the "normal exposure time (s) " is suggested.
Notice: DO NOT change the file name of "R_E_R_F", because Anycubic 3D printer can only recognize THIS file name to run this function. Also, do not name other file as "R_E_R_F".
Maintenance
Scan the QR code for the leveling tutorial

Leveling
The printer has been designed requiring no leveling for the first use. However, please relevel the printer in the following scenarios:
- The print platform has been fallen to the ground.
- Changing new print platform or LCD screen.
- The printed object sticks to the resin vat instead of the print platform.
Please follow the steps below to install and re-level.
- Install the print platform.
- Loosen the four leveling screws
![]()
- Push the platform onto the platform carrier
![]()
- Tighten the knob
![]()
- Loosen the four leveling screws


- Leveling.
- Place the leveling paper (included) on the LCD screen
![]()
- Click "Z-axis Home"
![]()
- Lower Z axis by 1 mm
![]()
- If the print platform shakes with light press, lower Z axis by 0.1 mm each time
![]()
- Lower until there is resistance when pulling out the leveling paper, hold the platform and tighten the four screws
![]()
- Place the leveling paper (included) on the LCD screen


- Check whether the leveling is successful. If it does not match the result shown below, please loosen the four leveling screws and follow the step 2 to re-level.
- Click "Check Leveling'
![]()
- When you pull the leveling paper, there is a significant resistance or it cannot be pulled out
![]()
- Click "Check Leveling'


Resin Vat Maintenance
- Remove the cured resin from release film: Set Vat Cleaning and then remove the cured resin sheet to protect the film. Do not use sharp objects to scrape off the residues on the film.


- Remove the liquid resin from resin vat: If there is only liquid resin in the vat, pour out the resin and then follow the steps of circulation cleaning to clean the vat.


- Release film replacement: The statistics of print layers are shown in Home menu. Please check them and replace release film timely to avoid print failure or even the damage to printer.


- If you do not use the resin for over 48H, store it in an airtight container away from light.
- If resin is stained on the resin vat, wipe it off timely. Never immerse the smart resin vat in water, alcohol or other cleaning solvent to avoid the damage.
- It is suggested to use non-flexible resin with a viscosity below 1000 cps.
Replace Peristaltic Pump Pipe
It is suggested to replace peristaltic pump pipe after 1000H of circulation.
- Put on gloves.
- Remove the used peristaltic pump pipe.
- Loosen 2 screws on the back
![]()
- Remove the front cover
![]()
- Cut off two zip ties
![]()
- Remove the pump pipe
![]()
- Loosen 2 screws on the back


- Install a new peristaltic pump pipe.
- Insert a new pump pipe
![]()
- Secure the bottom of pipe with 2 zip ties
![]()
- Grease the pipe and shaft
![]()
- Put on the front cover
![]()
- Tighten 2 screws on the back
![]()
- Reset the circulation time
![]()
- Insert a new pump pipe


Please fully insert the new pump pipe to the bottom to ensure proper installation.
Firmware Upgrade

- USB upgrade: Visit the official website to download the firmware and save it onto a USB drive that doesn't have any other version of firmware.
Then, insert the USB drive to printer to upgrade. - OTA upgrade: If the network is connected, directly upgrade by OTA.
Z-axis Maintenance
If Z axis makes a noisy sound, please apply lubricant to Z lead screw.

Cleaning
- Clean the print platform: Clean platform with alcohol and paper towel.
- Protect LCD screen: If there is resin being cured on the screen protector, please replace the protector immediately.
- Clean the body of printer: Clean the body of the printer with alcohol.
FAQ
Complete the initial trouble shooting steps by referring to the following proposed solutions, or contact our technical support for additional assistance.
Model do not stick to platform
- Bottom exposure time is insufficient. Please increase the exposure time.
- Contact area between the model and platform is small. Please add a raft.
Layer separation or splitting
- The machine is not stable during printing.
- The release film is not tight enough or needs a replacement.
- The printing platform or resin vat is not tightened.
- The lift speed is too fast.
- The model is hollowed without punching.
Layer shift
- Add supports.
- Reduce the lift speed.
Floccules left in resin vat or attached to models
- The exposure time is too long. Reduce the normal exposure time and bottom exposure time.
Cloud connection
WIFI connection is failed
- WiFi name or password is wrong. Please reset the network and reconnect.
- The WiFi network is unavailable. Join an available network. Then, reset the network and reconnect.
Fail to add printer in App
- Check "Server Location". Users in mainland Chinese please select "China", users in other countries and regions please select "Global".
Auto feeding & Unloading
The printer prompts that resin in the vat is not enough before printing.
- The auto-fill unit has a poor connection to the printer. Please reinstall the auto-fill unit and then click "OK"
- The auto-fill unit has been malfunctioned because resin entered in the air pipe.
The resin in the bottle is sufficient, but the printer prompts no resin in the bottle.
- The cap part has a poor connection to the printer. Please reinsert the cap part wire.
The resin liquid level reaches the needles of the auto-fill unit. However, when you click "unload", the printer immediately prompts that unloading completes.
- The thumb screws securing the resin vat are not tightened. Please stop unloading and tighten the thumb screws.
The green light of auto-fill unit is off and load, unload as well as auto-feed option is invalid.
- Check whether the air purifier connection is enabled. Enter into "Tools"- " Advanced" -"Air Purifier", and disable "connect to air purifier".
Under normal usage and service, the products have a warranty period of up to one year. Please visit Anycubic support center (support.anycubic.com/en) to report any issues with Anycubic products. Our professional after-sale service team would respond within 24 hours and solve the issues.
Safety Instructions
Always follow the safety instructions during assembly and usage, to avoid unnecessary damage to the 3D printer or individual injury.
 | Please contact our Customer Service if you have any issues after receiving the products. |
 | In case of emergency, please immediately cut off the power of the 3D printer and contact our technical support. |
 | UV light is harmful to the eyes; please avoid direct contact. When operating, wear protective equipment such as anti-UV goggles and gloves. |
 | Anycubic 3D printer includes components that can cause injury. |
 | When the smart resin vat heats up for a long time, its surface temperature becomes high. Avoid touching the resin vat without protection after heating. |
 | Be cautious when using the scraper, and make sure to orient the sharp parts of machine and tool away from people. |
 | Keep the Anycubic 3D printer and its accessories out of the reach of children. |
 | Vapors or fumes may be irritating at operating temperatures. Always use the Anycubic 3D printer in an open and well ventilated area. |
 | Do not expose Anycubic 3D printer to any water or rain environment. |
 | Use Anycubic 3D printer in an environment with a temperature of 5C-40C and a humidity of 20%-80%. For optimal performance, do not exceed this range. Also, avoid direct sunlight exposure. |
 | Do not disassemble Anycubic 3D printer, please contact technical support if you have any questions. |
Documents / Resources
References
Download manual
Here you can download full pdf version of manual, it may contain additional safety instructions, warranty information, FCC rules, etc.
Advertisement


Need help?
Do you have a question about the Photon Mono M7 Pro and is the answer not in the manual?
Questions and answers