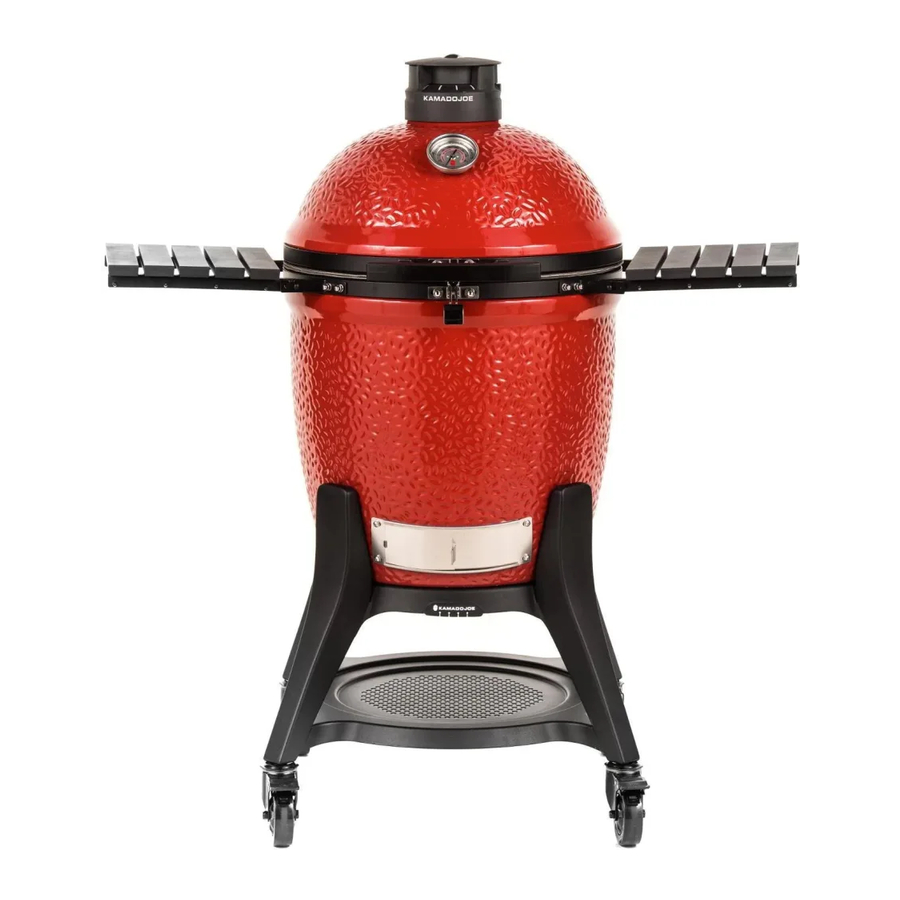
Kamado Joe Classic III KJ15040921 / KJ15040721 Manual
- Owner's manual (44 pages) ,
- Manual (23 pages)
Advertisement
ASSEMBLY


| NO. | QTY. | DESCRIPTION | NO. | QTY. | DESCRIPTION |
| 1 | 1 | KONTROL TOWER TOP VENT | 15 | 1 | ASH TOOL |
| 2 | 1 | GRILL DOME | 16 | 1 | GRILL GRIPPER |
| 3 | 2 | HALF MOON COOKING GRATES | 17 | 1 | GRILL BASE |
| 4 | 1 | ACCESSORY RACK | 18 | 4 | LEGS |
| 5 | 2 | CERAMIC HEAT DEFLECTORS | 19 | 1 | TOP PLATE |
| 6 | 1 | 3-TIER DIVIDE & CONQUER® | 20 | 1 | BOTTOM PLATE |
| 7 | 1 | SLōROLLER | 21 | 2 | LOCKING SWIVEL CASTERS |
| 8 | 1 | STAINLESS STEEL FIREBOX RING | 22 | 2 | NON-LOCKING SWIVEL CASTERS |
| 9 | 1 | CHARCOAL BASKET | 23 | 1 | HINGE DISENGAGEMENT TOOL KIT |
| 10 | 5 | AMP CERAMIC FIREBOX | 24 | 1 | FRONT HANDLE |
| 11 | 1 | FIREBOX BASE | 25 | 2 | RIGHT SIDE SHELF BRACKETS |
| 12 | 1 | SLIDE-OUT ASH DRAWER | 26 | 2 | LEFT SIDE SHELF BRACKETS |
| 13 | 1 | LEFT SIDE SHELF | 27 | 1 | CAST IRON GRATE |
| 14 | 1 | RIGHT SIDE SHELF | 28 | 3 | CERAMIC FEET (ONLY INCLUDED ON SOME MODELS) |
BEFORE ASSEMBLY READ ALL INSTRUCTIONS CAREFULLY
- Assemble on a clean flat surface.
- Recommend assembling on cardboard to avoid residue on floors or scratches.
- Gloves recommended for assembly.
- Tools needed: 5mm, 6mm Allen wrench, 10mm wrench, and #17 wrench provided.
- Approximate assembly time: 30 minutes.
- Recommend two people assemble to increase ease and reduce assembly time.
- Actual product may differ from picture shown.
- It is possible that some assembly steps have been completed in the factory.


GRILL SET UP
UNBOXING
- Cut the plastic bands and remove the top and side panels of the shipping container.
- Set all boxes and packing materials aside.
- Open the dome of the grill and remove all internal components. Use caution and handle the components with care. The ceramic is breakable.
LIFTING METHOD
Once the internal components of the grill have been removed, lift the grill out of the container and into the cart or table or stand. Before lifting, ensure all band and hinge nuts are snug and secure.
- Due to the weight of the grill, lifting the grill requires two or more people to perform this task.
- Lift the grill by using the rear hinge and front lower opening as lifting points. Wear protective gloves when lifting and use extreme caution, some components may be sharp.
- DO NOT LIFT the grill by the side shelf tabs
- DO NOT LIFT the grill without two or more people
SETTING UP
Set grill up on solid, flat surface with adequate wind shelter. Do not move grill while hot, and do not leave unattended during operation.
This appliance is designed for use outdoors, away from any flammable materials. It is important that there are no overhead obstructions and that there is a minimum distance of 10 feet (3 m) from the side or rear of the appliance. It is important that the ventilation openings of the appliance are not obstructed. The barbecue must be used on a level, stable surface. The appliance should be protected from direct drafts and positioned or protected against direct penetration by any trickling water (e.g. rain).
BUILT IN GUIDE
IMPORTANT INSTALL NOTES:
Please use this as a general guide for installing your Kamado Joe into a built-in outdoor kitchen or grill table. We highly recommend that the actual grill being installed be measured. Drawing is not to scale.
Table should be fixed on the ground or wall. Non-flammable building materials are required for construction.
TABLE REQUIREMENTS:
MATERIALS: Ensure the materials used are non-combustible and can handle high temperatures.
BASE: Ensure the Kamado Joe ceramic feet are used to create an air gap underneath the base of the grill. Do NOT place the grill directly on the table surface without an air gap.
ACCESS: Ensure there is front access so that the Ash Drawer is not blocked.
CLEARANCE: Ensure there is space between the top of the table and the edge of the grill. The table top SHOULD NOT make direct contact with the grill.
| Classic II | Classic III | Big Joe II | Big Joe III | |
| KJ23NRHC | KJ15040721 | BJ24NRHC | KJ15040821 | |
| A | 30.3 | 30.3 | 35.6 | 35.6 |
| B | 26.9 | 26.9 | 31.8 | 31.8 |
| C | 22.3 | 22.3 | 27.6 | 27.6 |
| D | 31.2 | 34.1 | 35.3 | 38.5 |
| E | 14.3 | 14.3 | 15.2 | 15.2 |
| F | 16.9 | 19.8 | 20.1 | 23.3 |
| G | 8.6 | 11.5 | 11.3 | 14.5 |
| H | 17 | 17 | 21.5 | 21.5 |
| I | 1.6 | 1.6 | 3.6 | 3.6 |
| J | 30.3 | 30.3 | 35.6 | 35.6 |
| K | 26.9 | 26.9 | 31.8 | 31.8 |
| L | 22.3 | 22.3 | 27.6 | 27.6 |
| M | 7.8 | 7.8 | 11.7 | 11.7 |
| N | 14.4 | 17.3 | 17.6 | 20.8 |
| O | 22.8 | 22.8 | 28.1 | 28.1 |
| P | 4.7 | 4.7 | 5.2 | 5.2 |
| Q | 3.6 | 3.6 | 5.6 | 5.6 |
| R | 9.3 | 9.3 | 13.2 | 13.2 |
SIDE VIEW

OPEN CLEARANCE

TOP VIEW

Slō Roller

WHAT IS IT?
Crafted from unrivaled innovation, the SlōRoller transforms a Kamado Joe® into one of the world's most optimal smokers. By distributing smoke in rolling, recirculating waves, the SlōRoller surrounds food in clouds of decadent smoke while evenly distributing heat, resulting in enhanced flavor and reduced hot spots. Discover endless versatility for your Kamado Joe® charcoal grilling experience.
HOW TO USE IT?
Only use the SlōRoller when you are smoking in your Kamado Joe®. The SlōRoller is only intended for cooks at temperatures between 150F(65C) and 300F(149C). Using the SlōRoller at temperatures above 300F(149C) can result in damage to your product. Easily insert by removing the heat deflectors and replace it with the SlōRoller. The Divide & Conquer Rack and cooking grates are placed on top.
Operating Instructions
INITIAL HEATING
Kamado Joe manufactures its products with care. Pre-Seasoning IS NOT required for the first use of your Kamado Joe. We do however recommend the steps below for your first heating.
- Ensure all hardware is tight before starting the grill. Ensure to check all bands, hinge, shelf brackets, and latch hardware.
- Wash cooking grates with mild dish detergent and allow to dry.
- Start grill by following the LIGHTING instructions. Build a small / medium sized fire.
- Do not use more than 3 LBS / 1.36 KGS of charcoal.
- Always put charcoal on charcoal tray or in charcoal basket.
- Keep grill under 400 F (204 C) for 1 hour for the first burn or cook.
- After the first hour, you may shut down the grill.
- HINGE: You may notice your hinge has lost some tension, please refer to the hinge adjustment section of this manual to check the tightness of your hinge. Regular adjustments are completely normal.
- LATCH: You may notice your front latch doesn't align completely or needs the tension to be adjusted, please refer to the latch adjustment section of this manual to check the alignment and tension of your latch. Regular adjustments are completely normal.
- BANDS: You may notice your bands have lost some tension, please refer to the bands adjustment section of this manual to check the tightness of your bands. Regular adjustments are completely normal.
- CERAMIC: After the first cook, you may notice light cracking in the porcelain. This is called crazing and is part of the natural porcelain characteristic.
LIGHTING INSTRUCTIONS
- Before you cook, use the ash tool to stir up the remaining charcoal in the firebox to remove all the loose ash. Loose ash will fall through the fire grate or charcoal basket and into the ash drawer.
- Remove the ash drawer and dispose of all loose ash. Dispose of cold ashes by placing them in aluminum foil, soaking with water, and discarding in a non-combustible container.
- Add charcoal to firebox and light using one or two fire starters.
- Leave dome and bottom vent fully open for 10 minutes. Allow for charcoal to ignite.
- After charcoal has ignited, close the dome.
- Begin to close and adjust the top vent and bottom vent when temperature is within 50 target temperature.
- Because your ceramic Kamado Joe is so insulating, it can take some time to fully preheat. Give your grill 20 – 60 minutes to stabilize the temperature and heat the ceramics before you start cooking.
 NOTE: Because ceramic retains heat so well, only increase your grill temperature slightly and slowly. It's much easier to increase the heat slightly, than it is to bring the temperature down after an overshoot.
MAINTAINING TEMPERATURE
AIRFLOW:
In order to control the temperature of your grill, you need to control the amount of air flow to the fire. By opening and closing the top and bottom dampers, you can adjust the temperature of your grill.
- MORE AIR = MORE HEAT (open the vents)
- LESS AIR = LESS HEAT (close the vents)
CHARCOAL:
The amount of charcoal used when grilling can also greatly impact your ability to control temperature. The more charcoal that ignites, the hotter the grill can be.
- MORE CHARCOAL = MORE HEAT
- LESS CHARCOAL = LESS HEAT
TEMPERATURE MAINTENANCE NOTES:
- Adjustments to the vents / dampers are not immediate. Be patient, allow 10–15 minutes from a vent adjustment for a temperature change to take effect.
- Because ceramic retains heat so well, only increase your grill temperature slightly and slowly. It's much easier to increase the heat slightly, than it is to bring the temperature down after an overshoot.
COOKING TIPS
BURPING the GRILL:
When cooking above 350 F (175 C), carefully open the grill lid 2-3 inches (5-8 cm) and "burp" the grill for approximately 5 seconds each time you lift the dome. This will prevent a flash-back - a surge of white- hot heat caused by a rush of oxygen.
LIQUIDS: Do not spill liquids inside or on the grill while it is hot.
SIDE SHELVES

Do not set hot items on the side shelves.
SHUT DOWN
- When finished cooking, close the bottom vent completely.
- Clean your grill grates with a grate scraper or damp rag. Use CAUTION, they will be hot.
- Once temperature falls below 400 F (205 C), close the top vent.
- Do not cover or clean the grill until the dome is cool to the touch (115F / 45C).
- Please review the cleaning and care instructions for further cleaning steps.
GRATE LIFTER
Use your grate lifter to handle your cooking grates.

Cooking grates can be HOT! Use the grill gripper to re-position the cooking grates throughout your cook.
NOTE: The grates should be as close together as possible.

Cleaning and Care
EVERY COOK
Your Kamado Joe grill is made of quality materials, so general care and maintenance is minimal. The best way to protect your Kamado Joe from the elements is with a grill cover.
- Before cleaning, ensure your grill has completely cooled and all charcoal has been extinguished.
- Use the ash tool to stir up the remaining charcoal in the firebox to remove all the loose ash. Loose ash will fall through the fire grate or charcoal basket and into the ash drawer.
- Remove the ash drawer and dispose of all loose ash. Dispose of cold ashes by placing them in aluminum foil, soaking with water, and discarding in a non-combustible container.
- Wipe down the outside of your grill with a damp rag to remove any spilled ingredients and debris. Do not excessively scrub the gasket, this can cause damage. The gasket will be cleaned through natural heat cycling when you use your grill.
- Cover your grill with a grill cover and store in a cool, dry place.
NOTE: When your heat deflectors get dirty during normal use, flip them over, with the dirty side down, for the next cook. The heat from the fire will self-clean that side of the deflector plate.
SELF CLEANING
It is recommended to complete these steps as needed. Cleaning frequency will vary depending on how often you use your Kamado Joe and your environment. If mold or mildew appears inside of your grill, it is recommended to complete the self cleaning steps below. This process will burn off any unwanted residue from the inside of your grill. After you complete the steps below, before cooking again, use a soft bristle brush on the ceramics and heat deflectors to remove any residue.
- Remove the cooking grates and wash with a mild dish detergent. The cooking grates will stay removed during this cleaning session.
- Add charcoal and light the grill.
- Install the Divide & Conquer flexible cooking rack. Place the accessory X-rack in the top position with both heat deflector panels on the X-rack. Place the heat deflectors with the dirty side down, facing the fire. There should be a large air gap around the heat deflectors.
- Open the top and bottom air vents fully and let the temperature inside the grill rise to 600°F (315°C) with the dome closed.
- Hold the temperature at around 600°F (315°C) for 15-20 minutes or until no visible smoke is present.
- Close the bottom vent fully. Once temperature falls below 400F (205C), close the top vent completely.
- Allow the grill to shut down.
DEEP CLEANING
Once or twice a year, you should do a more thorough cleaning of the inside of the grill.
- Before cleaning, ensure your grill has completely cooled and all charcoal has been extinguished.
- Remove the internal components and remove any residual ash or debris that has collected between the grill body and the internal components.
- Use a plastic bristle brush to clean the inside ceramic surface.
- Scoop or vacuum debris from the bottom of the grill.
- Wipe down the hinge and exterior of your grill.
- Replace all internal components and get ready for your next cook.
Adjustments
HINGE ADJUSTMENTS
The Air Lift Hinge on your Kamado Joe is already pre - adjusted for ideal balance and stability. Follow these instructions for any additional adjustment to suit your personal preferences.

Air Lift Hinge is under high tension. Do NOT attempt to disassemble the hinge from your grill without the proper hardware. See the "disengagement tool" section below.
- Open the dome of your grill.
- Place a 17mm wrench on the "adjustment nut" on top of the spring retainer (see Inset 1).
- TO MAKE DOME EASIER TO RAISE: Rotate the 17 mm wrench clockwise as shown. Remove the wrench and check the dome action for every full rotation of the nut.
- TO MAKE DOME FEEL HEAVIER: Rotate the nut counter-clockwise. Remove the wrench and check the dome action for every full rotation of the nut.
- Do not ever tighten the adjustment nut so that it contacts the nut under the connector (see Inset 1).
HINGE SAFETY - DISENGAGEMENT TOOL
Do not attempt to disassemble the hinge or loosen the bands from your grill without the disengagement tool kit installed. The hinge is under EXTREME tension and can be very dangerous. The disengagement tool was provided with the purchase of your Kamado Joe.
TO INSTALL:

- Place the spacer, then the washer, then the hex nut on the spring retainer on the bottom side of the hinge.
- Installing the disengagement tool will release all tension on the spring and allow you to remove both the hinge and the bands safely from the grill.
LATCH ADJUSTMENTS
The latch on your Kamado Joe is already preset for an ideal tension. However, if your dome is too challenging or too easy to latch (if it almost unlatches itself), follow these instructions for any additional adjustments to suit your personal preferences.
- To tighten or loosen the latch setting, use a small Allen wrench.
- Place the Allen wrench into the top of the latch and raise or lower the catch bracket.
- This will tighten or loosen the latch setting.


The latch on your Kamado Joe is also adjustable left to right, if you notice the latch needs further alignment, simply loosen the acorn nuts that hold your latch onto the grill and slide the top or bottom of the latch to the left or right.

BAND ADJUSTMENTS
Check the position and tightness of the bands once or twice a year, sometimes an adjustment may be needed.

Use an 8mm allen wrench and a 17 mm wrench to make sure the band connector nut is tight on your bands. You can find the band connector on the rear of your grill. You should not be able to turn the Allen wrench easily while holding the nut in place. If this nut is loose, tighten it firmly.
If a band is not centered on the gasket material, loosen the band enough to push it back in place. You can place a block of wood on top of the band and lightly tap the wood with a hammer until the band is in position. Tighten the band connector as listed above.
NEED ASSISTANCE? CONTACT US
Our warranty terms may change from time to time. For an updated version of our warranty, visit www.kamadojoe.com/pages/warranty. For assistance or to request an updated copy of our warranty, contact us at the below.
North America
North America
Kamado Joe ®
Premier Specialty Brands, LLC
5367 New Peachtree Road, Suite 150,
Chamblee, GA 30341
https://www.kamadojoe.com/pages/support
European Union
Kamado Joe Europe
Lange Voorhout 86, 2514 EJ
Den Haag, Netherlands
https://international.kamadojoe.com/pages/support
United Kingdom
Kamado Joe UK Limited
Cheyenne House West Street,
Farnham GU9 7EQ
https://international.kamadojoe.com/pages/support
Australia & New Zealand
Please contact your retailer.
FOR OUTDOOR USE ONLY. NOT FOR COMMERCIAL USE.

- This manual contains important information necessary for the proper assembly and safe use of the appliance.
- Read and follow all warnings and instructions before assembling and using the appliance.
- Keep this manual for future reference.
 CARBON MONOXIDE HAZARD
Failure to follow these instructions could result in fire, explosion or burn hazard which could cause property damage, personal injury, or death.
- Burning wood chips, wood chunks, wood pellets, charcoal and propane gives off carbon monoxide, which has no odor and can cause death.
- DO NOT burn wood chips, wood chunks, wood pellets, charcoal or propane inside homes, vehicles, tents, garages or any enclosed areas.
- Do not use the barbecue in a confined and/or habitable space e.g. houses, tents, caravans, motor homes, boats. Danger of carbon monoxide poisoning fatality.
- USE ONLY OUTDOORS where it is well ventilated.
- FOLLOW THESE GUIDELINES TO PREVENT THIS COLORLESS, ODORLESS GAS FROM POISONING YOU, YOUR FAMILY OR OTHERS.
- Know the symptoms of carbon monoxide poisoning: headache, dizziness, weakness, nausea, vomiting, sleepiness, and confusion. Carbon monoxide reduces the blood's ability to carry oxygen. Low blood oxygen levels can result in loss of consciousness and death.
- See a doctor if you or others develop cold or flu-like symptoms while cooking or in the vicinity of this appliance. Carbon monoxide poisoning, which can easily be mistaken for a cold or flu, is often detected too late.
- Alcohol consumption and drug use increase the effects of carbon monoxide poisoning.
- Carbon monoxide is especially toxic to mother and child during pregnancy, infants, the elderly, smokers, and people with blood or circulatory system problems, such as anemia, or heart disease.
![]()

WARNINGS AND IMPORTANT SAFEGUARDS
READ ALL INSTRUCTIONS
- Do not leave grill unattended.
- Grill is for OUTDOOR HOUSEHOLD USE ONLY.
- Do not use indoors!
- Use charcoal for fuel only.
- Do not use grill in high winds!
- Close lid and dampers to help suffocate flame.
- Do not alter this grill in any manner.
- Do not exceed a temperature of 750°F (398°C) or more.
- Always use grill in accordance with all applicable local, state and federal fire codes.
- Potential damage to grill or harm to user may result from failure to follow warnings.
- Never use inside enclosed areas such as patios, garages, buildings, or tents.
- Never use inside or on recreational vehicles or boats.
- Do not use the barbecue in a confined and/or habitable space e.g. houses, tents, caravans, motor homes, boats.
![danger]() Danger of carbon monoxide poisoning fatality.
Danger of carbon monoxide poisoning fatality. - Maintain a minimum distance of 3m (10ft) from overhead construction, walls, rails or other structures.
- Keep a minimum 3m (10ft) clearance of all combustible materials such as wood, dry plants, grass, brush, paper.
- Never operate grill under overhead construction such as roof coverings, carports, awnings, or overhangs. (SEE STRUCTURAL PROXIMITY REQUIREMENTS).
- Keep grill clear and free from combustible materials such as gasoline and other flammable vapors and liquids.
- Use grill on a level, non-combustible, stable surface such as dirt, concrete, brick, or rock. An asphalt surface (blacktop) may not be acceptable for this purpose.
- Do not use grill on wooden or flammable surfaces.
- Grill MUST be on the ground. Do not place grill on tables or counters. Do NOT move grill across uneven surfaces.
 Danger of carbon monoxide poisoning fatality.
- Grill should only be rolled on smooth surface.
- Grill should never be rolled up/down stairs or uneven surface.
- Never use grill as a heater (READ CARBON MONOXIDE HAZARD).
- Never use grill for anything other than its intended use. This grill is NOT for commercial use.
- Keep a fire extinguisher accessible at all times while operating grill.
- When cooking with oil or grease, have a type BC or ABC fire extinguisher readily available.
- In the event of an oil or grease fire do not attempt to extinguish with water. Immediately call the fire department. A type BC or ABC fire extinguisher may, in some circumstances, contain the fire.
- Before each use check all nuts, screws, and bolts to make sure they are tight and secure.
- Use of alcohol, prescription, or non-prescription drugs may impair user's ability to properly assemble or safely operate grill.
- Keep children and pets away from grill at all times. Do NOT allow children to use grill. Close supervision is necessary when children or pets are in the area where grill is being used.
- Do NOT allow anyone to conduct activities around grill during or following its use until it has cooled.
- DO NOT bump or impact the grill to prevent personal harm, damage to grill, or spillage/splashing of hot cooking liquid.
- Extreme caution must be used when moving an appliance containing hot oil or other hot liquids.
- Never move grill when in use. Allow grill to cool completely (below 115°F or 45°C) before moving or storing.
- The grill is HOT while in use and will remain HOT for a period of time afterwards and during cooling process. Use CAUTION. Wear protective gloves/mitts.
- Do not touch HOT surfaces. Use handles or knobs.
- Never use glass, plastic, or ceramic cookware in grill. Never place empty cookware in grill while in use.
- Accessory attachments not supplied by Kamado Joe® are not recommended and may cause injury.
- Do not store grill with hot ashes or charcoal inside grill. Store only when fire is completely out and all surfaces are cold.
- Be careful when removing food from grill. All surfaces are HOT and may cause burns. Use protective gloves/mitts or long, sturdy, cooking tools for protection from hot surfaces or splatter from cooking liquids.
- Grill is hot during use. Keep face and body away from door(s) and vents. Steam and hot air are expelled during use.
- DO NOT obstruct flow of combustion and ventilation.
- Do not cover cooking racks with metal foil. This will trap heat and may cause damage to the grill.
- Never leave HOT coals or ashes unattended.
- Do not remove ash drawer while ashes and charcoal are HOT.
- Grill has an open flame. Keep hands, hair, and face away from flame. Do NOT lean over grill when lighting. Loose hair and clothing may catch fire.
- Use protective gloves when handling this grill or working with fire. Use protective gloves or long, sturdy fireplace tools when adding wood or charcoal.
- Air dampers are HOT while the grill is in use and during cooling; wear protective gloves when adjusting.
- Top vent and lower damper is HOT while grill is in use and during cooling; wear protective gloves when adjusting.
- Cooking grate is HOT while the grill is in use and during cooling; use extreme caution, if you touch the cooking grate, wear protective gloves or use a sturdy long handled tool.
- Do not cook before the charcoal has a coating of ash.
- The barbecue should be heated up and the fuel should be kept red hot for at least 30mins prior to the first cook.
- Never use charcoal lighting fluid, gasoline, alcohol or other highly volatile fluids to ignite charcoal. These fluids can explode and cause injury or death.
- Never overfill charcoal grate. This can cause serious injury as well as damage to the grill.
- Never use more than the recommended amount of charcoal (see below).
![]()
This barbecue will become very hot, do not move it during operation.![]()
Keep children and pets away.![]()
Do not use spirit or petrol for lighting or re-lighting! Use only firelighters complying to EN 1860-3!- Never add additional lighter fluid once charcoal has ignited. Follow directions on lighter fluid container.
- Dispose of cold ashes by placing them in aluminum foil, soaking with water, and discarding in a non-combustible container.
- Keep lid open during the lighting process.
- When cooking above 350°F (175°C), carefully and slowly open the grill lid 2-3 inches (5-8 cm) and "burp" the grill for 5 seconds each time you lift the dome. This will prevent flashback – a surge of white-hot heat caused by a rush of oxygen.
DO NOT EXCEED A TOTAL OF 6 LBS / 2.7 KGS OF CHARCOAL FOR MAIN FIREBOX
STRUCTURAL PROXIMITY REQUIREMENTS

Maintain a minimum distance of 10 ft (3m) from rear, sides and top of grill to all overhead construction, walls, rails or other combustible construction materials.
Maintain a minimum distance of 10 ft (3 m) from all combustible and flammable materials such as, wood, plants, grass, brush, paper, gasoline, or canvas.
This clearance provides adequate space for proper combustion, air circulation and venting. Grill should not be used on combustible materials like wood decks or other combustible materials.
Documents / Resources
References
Download manual
Here you can download full pdf version of manual, it may contain additional safety instructions, warranty information, FCC rules, etc.
Download Kamado Joe Classic III KJ15040921 / KJ15040721 Manual
Advertisement


Need help?
Do you have a question about the Classic III KJ15040921 and is the answer not in the manual?
Questions and answers