ResMed AirMini Manual
- User manual (302 pages) ,
- Clinical manual (35 pages) ,
- Faq (32 pages)
Advertisement
- 1 General warnings and cautions
- 2 Welcome
- 3 At a glance
- 4 Product Overview
- 5 AirMini app system requirements
- 6 Therapy information
- 7 Comfort features
- 8 Setting up the product
- 9 Connecting machine and smart device
- 10 Starting therapy
- 11 Stopping therapy
- 12 Using clinical mode
- 13 Navigating the Sleep screen
- 14 Viewing therapy data
- 15 Viewing information about the product
- 16 Cleaning and maintenance
- 17 Traveling
- 18 Troubleshooting
- 19 Technical specifications
- 20 Symbols
- 21 Servicing
- 22 Documents / Resources
General warnings and cautions

- Make sure that you arrange the air tubing so that it will not twist around the head or neck.
- Keep the power cord away from hot surfaces.
- Make sure the power cord and plug are in good condition and the equipment is not damaged.
- If you notice any unexplained changes in the performance of the machine, if it is making unusual sounds, if the machine or the power supply are dropped or mishandled, or if the enclosure is broken, discontinue use and contact your care provider or your ResMed Service Center.
- Do not open or modify the machine. There are no user serviceable parts inside. Repairs and servicing should only be performed by an authorized ResMed service agent.
![]()
Beware of electrocution. Do not immerse the machine, power supply or power cord in water. If liquids are spilled into or onto the machine, unplug the machine and let the parts dry. Always unplug the machine before cleaning and make sure that all parts are dry before plugging it back in.![]()
Do not use with oxygen. Any sources of oxygen must be located more than 1 m away from the machine to avoid risk of fire and burns.- Do not perform any maintenance tasks while the machine is in operation.
- Use only AirMini masks and accessories that allow for normal breathing to avoid asphyxiation.
- The use of accessories other than those specified for the machine is not recommended. This may result in increased electromagnetic emissions or decreased immunity of the machine and result in improper operation.
- The machine should not be used adjacent to or stacked with other equipment. If adjacent or stacked use is necessary, the machine should be observed to verify normal operation in the configuration in which it will be used.
- The F20, N20 and P10 connectors for AirMini are fitted with vents. The F20 connector for AirMini is also fitted with an AAV. The AAV and vents have specific safety functions to prevent carbon dioxide build-up in the mask and should be kept clean and clear. The connectors should not be used if the vent or AAV are damaged as they will not be able to perform their safety functions. The connectors should be replaced if the valves of the vent or AAV are damaged, distorted or torn.
- The machine is not intended to be operated by persons (including children) with reduced physical, sensory or mental capabilities without adequate supervision by a person responsible for the patient's safety.
- The device has not been tested or certified for use in the vicinity of X-ray, CT or MRI equipment. Do not bring the device within 13 ft (4 m) of X-ray or CT equipment. Never bring the device into an MR environment.
- The air tubing, AAV and vent system have specific safety functions. The air tubing should not be worn if the AAV is damaged as it will not be able to perform its safety function. The air tubing should be replaced if the AAV is damaged, distorted or torn. The vent system should be kept clean.


- Use only ResMed AirMini parts, masks and accessories with the machine. Non-ResMed AirMini parts may reduce the effectiveness of the treatment, may result in excess carbon dioxide rebreathing and/or damage the machine. For compatibility information, refer to www.resmed.com for more information.
- Blocking the air tubing and/or air inlet of the machine while in operation could lead to overheating of the machine.
- Keep the area around the machine dry, clean and clear of anything (eg, clothes, pillows or bedding) that could block the air inlet or cover the power supply unit.
- Do not use bleach, chlorine, alcohol, or aromatic-based solutions, moisturizing or antibacterial soaps or scented oils to clean the machine or air tubing. These solutions may cause damage and reduce the life of the products.
- Do not insert any USB cable into the machine or attempt to plug the power supply unit into a USB device. This may cause damage to the machine or USB device.
Welcome
The AirMini system combines ResMed's AirMini self-adjusting pressure machine, masks and the AirMini app.
Read this entire guide before using the machine.
- In the US, Federal law restricts this device to sale by or on the order of a physician.
- The AirMini app is not intended for remote titration, and all changes to therapy settings modify an existing prescribed setting. A physician should be consulted for any prescription changes.
Security
Built-in AirMini and AirMini app security features, steps patients take to protect their smart devices against malware, and software and firmware updates will help safeguard patient privacy, protect patients' smart devices and ensure optimal performance.
Security features
The AirMini and the AirMini app use security features to help protect patient privacy and prevent unauthorized access to patient data. These include:
- Use of a quick response (QR) code to establish trust between the AirMini and the AirMini app
- Unique keys for each mobile device and AirMini pairing
- Application-level encryption for the transmission of data, in addition to Bluetooth® security
- Encryption of data stored within the AirMini app
- Server-side authentication for AirMini firmware upgrades
Protecting patients' smart devices against malware helps keep their personal information and sleep data safe and secure. ResMed recommends the following:
- Advise patients to enable personal identification number (PIN) or fingerprint security on their smart devices. Refer patients to their smart device user instructions for information on enabling either feature.
- Advise patients to avoid unsafe modification of their smart device operating systems.
- Advise patients to consider enabling remote data wipe on their smart devices by referring them to their smart device user instructions. Remote data wipe is a function available on smart devices for remotely erasing personal data in the event that a device is lost or stolen.
- Advise patients to keep their operating systems up to date with security patches.
Software and firmware updates
To ensure optimal performance, ResMed recommends that software and firmware versions be kept up to date.
Once a firmware update becomes available for AirMini, a message will appear on the user's smart device when the AirMini app is accessed.
Advise patients to follow the on-screen prompts to install software and firmware updates.
Indications for use
AirMini
The AirMini self-adjusting system is indicated for the treatment of obstructive sleep apnea (OSA) in patients (female patients with mild to moderate OSA when using AutoSet for Her treatment mode) weighing more than 66 lb (30 kg).
It is intended for home and hospital use.
AirMini app
The AirMini app is a mobile application for patients to remotely operate a prescribed compatible ResMed machine and transfer, analyze and display usage and therapeutic information. The AirMini app also allows healthcare professionals to remotely configure compatible OSA therapy devices.
Contraindications
Positive airway pressure therapy may be contraindicated in some patients with the following preexisting conditions:
- severe bullous lung disease
- pneumothorax
- pathologically low blood pressure
- dehydration
- cerebrospinal fluid leak, recent cranial surgery, or trauma.
Adverse effects
Patients should report unusual chest pain, severe headache, or increased breathlessness to their prescribing physician. An acute upper respiratory tract infection may require temporary discontinuation of treatment.
The following side effects may arise during the course of therapy with the device:
- drying of the nose, mouth, or throat
- nosebleed
- bloating
- ear or sinus discomfort
- eye irritation
- skin rashes.
At a glance
The AirMini system includes the AirMini machine, a power supply unit, a drawstring bag, and one of the following:
- AirMini setup pack - F20: air tubing and F20 connector
- AirMini setup pack - N20: air tubing, N20 connector, HumidX and HumidX Plus
- AirMini mask pack for P10: air tubing, AirFit P10 for AirMini mask (M), P10 cushion (S), P10 cushion (L), HumidX, HumidX Plus and AirFit P10 headgear clips
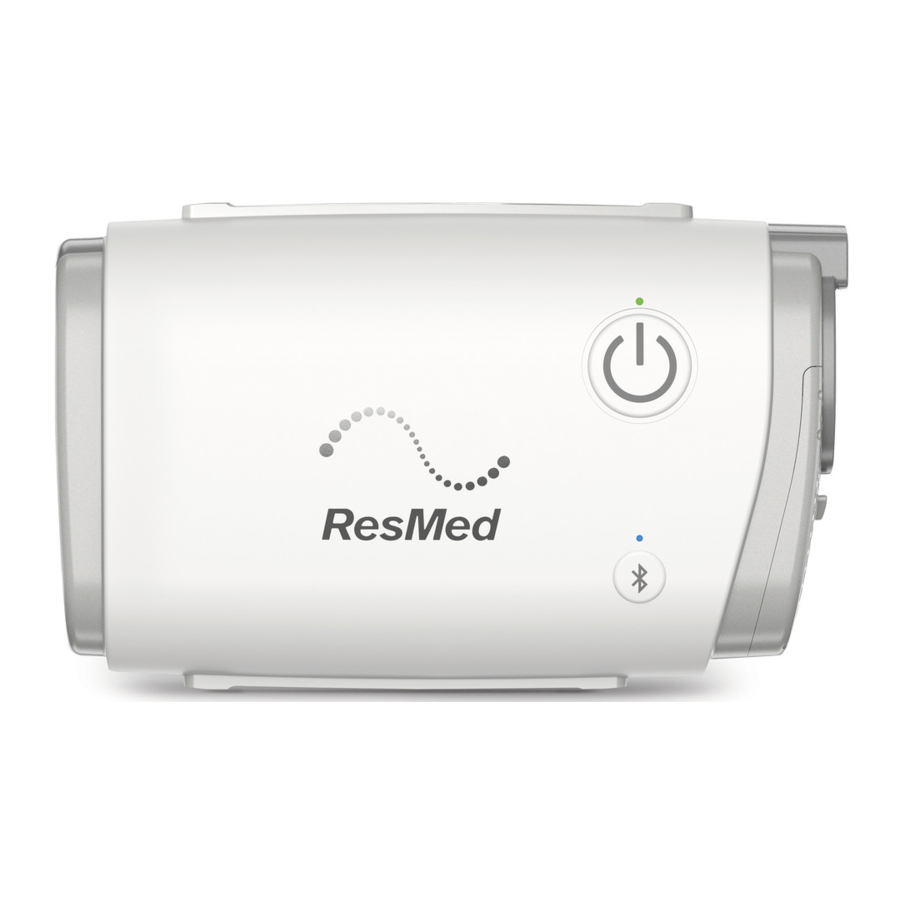
Product Overview
The AirMini system is comprised of the AirMini machine and one mask pack.

- AirMini machine
- F20 connector for AirMini and air tubing
- N20 connector for AirMini and air tubing
- AirFit P10 for AirMini and tubing
- Start/Stop button
- Power inlet
- Air outlet
- Air filter cover
- Bluetooth button
- 20W power supply unit
- F20 connector for AirMini
- Vent
- Vent module
- Anti Asphyxia Valve (AAV)
- N20 connector for AirMini
- AirFit P10 for AirMini
- Heat moisture exchanger - HumidX (blue) and HumidX Plus (gray)
- AirMini tubing
The AirMini machine is compatible with ResMed's F20 and N20 series masks and with the AirFit P10 for AirMini. Ensure that all parts and accessories used with the machine are compatible. For compatibility information, refer to www.resmed.com for more information.
The AirMini machine is also designed to work with ResMed's AirMini app. While the AirMini app is not required to operate the machine, it is essential to clinicians for accessing, viewing and configuring therapy settings.
AirMini app system requirements
Refer to ResMed.com/AirMini app for a list of smart devices compatible with the AirMini app.
In addition, Android operating system version 4.4 (minimum) is required.
See Using clinical mode, Using the device settings menu and AirMini app Dashboard for information about the AirMini app.
Therapy information
AutoSet mode
The treatment pressure required by the patient may vary due to changes in sleep state, body position and airway resistance. In AutoSet mode, the machine provides only that amount of pressure required to maintain upper airway patency.
The machine analyzes the state of the patient's upper airway on a breath-by-breath basis and delivers pressure within the allowed range according to the degree of obstruction. The AutoSet algorithm adjusts treatment pressure as a function of three parameters: inspiratory flow limitation, snore, and apnea.
Normal airway
When the patient is breathing normally, the inspiratory flow measured by the machine as a function of time shows a typically rounded curve for each breath.

Flow limitation
As the upper airway begins to collapse, the shape of the inspiratory flow-time curve changes. The AirMini recognizes and treats traditional as well as less common flow-limited breath wave forms.

Snore
Snoring is sound generated by vibrations of the walls of the upper airway. It is often preceded by flow limitation or a partial obstruction of the airway.

Apnea
The enhanced AutoSet algorithm detects both obstructive and central apneas. If an apnea occurs, the machine responds appropriately.
Obstructive apnea
An obstructive apnea is when the upper airway becomes severely limited or completely obstructed. AutoSet generally prevents obstructive apneas from occurring by responding to flow limitation and snoring. If an obstructive apnea occurs, the machine will respond by increasing pressure.

Central apnea
During a central apnea, the airway will remain open, but there is no flow. When a central apnea is detected, the machine responds appropriately by not increasing pressure.

AutoSet for Her mode
AutoSet for Her mode is based on key aspects of ResMed's AutoSet algorithm and delivers therapeutic responses tailored to the characteristics of female OSA patients.
The AutoSet for Her is similar to ResMed's AutoSet algorithm with the following modifications:
- Reduced rate of pressure increments designed to help prevent arousals.
- Slower pressure decays.
- Treats apneas up to 12 cm H2O (12 hPa) and continues to respond to flow limitation and snore up to 20 cm H2O (20 hPa).
- Minimum pressure (Min. Pressure) that adjusts according to the frequency of apneas:
If two apneas occur within a minute, the pressure reached in response to the second apnea will become the new minimum treatment pressure until the next treatment session.

Patients who use AutoSet for Her will still get the benefits of ResMed's AutoSet technology including improved sensitivity to flow-limitation and Central Sleep Apnea Detection with Forced Oscillation Technique.
CPAP mode
In CPAP mode, a fixed pressure is delivered—with optional Expiratory Pressure Relief (EPR).
Comfort features
Ramp Time
Designed to make the beginning of treatment more comfortable, Ramp Time is the period during which the pressure increases from a low start pressure to the prescribed treatment pressure. Ramp Time is available in all modes.
In AutoSet and AutoSet for Her mode, ramp time defines the period during which the pressure gradually increases from a lower more comfortable start pressure to the minimum treatment pressure before the auto-adjusting algorithm commences.

In CPAP mode, the pressure increases from a low pressure (Start Pressure) to the prescribed treatment pressure.
Ramp Time can be set to Off, 5 to 45 minutes or Auto. When Ramp Time is set to Auto, the machine will detect sleep onset and then gradually increase from the start pressure to the minimum treatment pressure at a rate of 1 cm H2O (1 hPa) per minute. However, if sleep onset is not detected, the machine will reach the target pressure within 30 minutes.
Expiratory Pressure Relief
Designed to make therapy more comfortable, Expiratory Pressure Relief (EPR) maintains optimal treatment for the patient during inhalation and reduces the delivered mask pressure during exhalation.
| EPR | On—EPR is enabled. Off—EPR is disabled and not visible in Patient Mode. |
The following settings are only available if EPR is On:
| EPR Type | Full Time—If set to Full Time, EPR is enabled for the whole therapy session. Ramp Only—If set to Ramp Only, EPR is only enabled during ramp time. |
| EPR Level | 1, 2, 3 cm H2O (1, 2, 3 hPa) |
When EPR is enabled, the delivered pressure will not drop below a minimum pressure of 4 cm H2O (4 hPa), regardless of the settings.
AutoSet Response
For patients who are sensitive to faster changes in pressure during therapy, AutoSet Response can be set to either Standard or Soft. If set to soft, patients will receive gentler pressure rises during therapy.
Patients who use the AutoSet Response feature will still get the benefits of ResMed's AutoSet technology including improved sensitivity to flow-limitation and CSA Detection with Forced Oscillation Technique.
SmartStart
When SmartStart is turned on, therapy starts automatically when the patient breathes into their mask.
SmartStop
When SmartStop is turned on, once the patient removes their mask, therapy stops automatically after a few seconds.
HumidX and HumidX Plus
The HumidX and HumidX Plus are waterless humidifiers. They are designed to provide more comfort by improving the moisture level in the air the patient breathes and offering relief from possible dryness.
The HumidX is a good starting point for finding the right level of humidification. The HumidX Plus will improve the humidity level further. It is useful when the ambient humidity level is very low. For example, at high altitudes or on an aircraft.
The HumidX and HumidX Plus can be used with the N20 connector for AirMini and AirFit P10 for AirMini only.
Note: The HumidX and HumidX Plus must be replaced within 30 days of opening the HumidX/HumidX Plus pack.
Setting up the product
Before setting up the machine, ensure that the selected mask is compatible and that it is correctly positioned on the patient's face. The machine is compatible with ResMed's F20 and N20 series masks and with the P10 for AirMini. Refer to the mask device compatibility list on www.resmed.com for more information. Refer to the mask user guide for fitting information.
See Using clinical mode for information on preparing to use the AirMini app with a smart device.
Setting up the machine

- Plug the power supply unit to the machine and the power outlet.
The connector has an angled edge so that the power cord can only be inserted into the machine one way. - Connect the gray end of the air tubing firmly to the air outlet.
Adding optional humidification
For N20 or AirFit P10 for AirMini only:
To insert the HumidX or HumidX Plus:
- Open the connector by gently twisting it.
![]()
- Hold the HumidX/HumidX Plus with the colored side pointing down and insert it.
![]()
- Gently push together the connector and twist until it locks in place.
![]()


Connect the mask

Attach the connector to the mask.
Connecting machine and smart device
Before connecting the AirMini machine to a smart device, ensure that the latest version of the AirMini app is installed on the smart device. If not, the app can be downloaded on Google Play.

- Ensure that the AirMini machine is set up correctly and plugged into a power source.
Refer to the machine user guide for additional information on setup. - On the smart device, enable Bluetooth.
Refer to the smart device user guide for instructions on enabling Bluetooth. - Open the AirMini app and follow the on-screen prompts to pair with the AirMini machine.
- On the AirMini machine, press the Bluetooth button
![]() when prompted by the AirMini app.
when prompted by the AirMini app.
When the light on the AirMini machine starts to flash blue![]() , Bluetooth is enabled on the machine and ready to connect.
, Bluetooth is enabled on the machine and ready to connect. - On the smart device, tap Connect.
When the AirMini machine is discovered, the machine name appears in the machine selection list. - Select the machine name from the list to connect.
- The first time you open the AirMini app, you will be asked to consent to the use of cookies and to accept ResMed's Terms and Conditions and Privacy Policy.
Check the boxes on the Welcome screen and then tap Continue. - The first time you pair the AirMini machine with the smart device, you will need to perform the authentication procedure.
When prompted by the AirMini app, begin the authentication process by tapping Scan code. You will be prompted by the AirMini app to allow the use of the smart device's camera and to position the machine's QR code within the camera's viewing frame.
Note: The QR code is located on the back of the AirMini machine.
Alternatively, you can authenticate by entering the four-digit key located on the back of the machine. - Tap Continue.
When successfully connected, the Bluetooth connection icon![]() is displayed in the top right corner of the AirMini app.
is displayed in the top right corner of the AirMini app.
Notes:
- As long as the AirMini is plugged into a power source, it is turned on and in standby mode.
- If the AirMini is plugged into a power source, leaving Bluetooth enabled on the smart device ensures that each time the smart device comes within the vicinity of the AirMini, connection will occur automatically.
- You should only pair a smart device with one machine at a time.
| Bluetooth status indicators | ||
 | Bluetooth indicator light is flashing blue | The AirMini machine is in discoverable mode and ready for pairing. |
 | Bluetooth indicator light is constantly blue | The AirMini machine is connected to a smart device. |
 | Bluetooth indicator light is constantly white (airplane mode) | Bluetooth is disabled on your AirMini machine. |
| Bluetooth indicator light is off | The AirMini machine is not connected to a smart device. | |
Note: Once therapy starts, the indicator light will start to fade.
Starting therapy
- Fit the patient's mask as instructed in the mask user guide.
- Start therapy using one of the following methods:
Using the AirMini machine:
Press the start/stop button ![]() on the machine. Or, if SmartStart is enabled, the machine will start automatically when the patient breathes into their mask normally.
on the machine. Or, if SmartStart is enabled, the machine will start automatically when the patient breathes into their mask normally.
Using the AirMini app:
- Tap Sleep in the Navigation drawer. The Sleep screen opens.
- Tap Therapy. The Therapy screen opens.
- Tap START to start therapy.
Stopping therapy
Stop therapy using one of the following methods:
Using the AirMini machine:
Press the start/stop button ![]() on the machine. Or, if SmartStop is enabled, the machine will stop automatically when the patient removes their mask.
on the machine. Or, if SmartStop is enabled, the machine will stop automatically when the patient removes their mask.
Using the AirMini app:
Tap STOP on the Sleep screen.
Using clinical mode
In clinical mode, ResMed's AirMini app acts as the clinical menu and as the patient's user interface. You can access, view and change therapy and machine settings using the AirMini app.
Note: Data sent through Bluetooth is encrypted.
Accessing clinical mode

To access clinical mode from the Welcome screen:
On the Welcome screen, hold one finger on the ResMed logo and one finger on the AirMini logo simultaneously for 3 seconds.
Note: This option is only visible until the terms and conditions have been accepted. Once they are accepted, it is no longer possible to access clinical mode from the Welcome screen.
Clinical mode opens.

To access clinical mode from the Bluetooth screen:
On the Bluetooth screen, hold one finger on the ResMed logo and one finger on the AirMini logo simultaneously for 3 seconds.
Note: Tap the Bluetooth icon in top, right corner of the Dashboard to open the Bluetooth screen.
Note: When setting up a patient for the first time, you must pair and connect a smart device through Bluetooth to the AirMini machine. See Connecting machine and smart device for information on pairing.
Exiting clinical mode
To exit clinical mode, open the Navigation drawer and tap Exit.
Using the device settings menu
In clinical mode (machine settings) you can scroll through clinical settings and change them as required.
Adjusting the clinical settings
The following clinical settings must be configured for each patient individually and should be periodically reassessed to ensure optimal therapy:
| Therapy | |||||
| Parameter | Description | Mode | Range | ||
| AutoSet | AutoSet for Her | CPAP | |||
| Mode | Sets the therapy mode available on the machine. |  | | | |
| Max Pressure | Sets the upper limit of treatment pressure. | | | Min–20 cm H2O (Min–20 hPa), 0.2 cm H2O (0.2 hPa) increments | |
| Min Pressure | Sets the lower limit of treatment pressure. | | | 4–Max cm H 2 O (hPa), 0.2 cm H2O (hPa) increments | |
| Set Pressure | Sets the fixed treatment pressure. | | 4–20 cm H 2 O (4–20 hPa), 0.2 cm H2O (0.2 hPa) increments | ||
| Comfort | |||||
| Parameter | Description | Mode | Range | ||
| AutoSet | AutoSet for Her | CPAP | |||
| Response | Sets the rate of pressure rises during therapy. | | Standard / Soft | ||
| Ramp Time | If Auto is selected, the machine will detect sleep onset and automatically rise to the prescribed treatment pressure. | | | | Off / 5–45 mins / Auto |
| Start Pressure | Sets the pressure at the start of ramp time, up to treatment pressure. | | | | 4–Set pressure (CPAP), 0.2 cm H2O (0.2 hPa) increments 4–Min pressure (AutoSet and AutoSet for Her), 0.2 cm H2O (0.2 hPa) increments |
| EPR | Enable / disable EPR. | | | | On / Off |
| EPR Type | Available when EPR is enabled. | | | | Full Time / Ramp Only |
| EPR Level | Sets the EPR value. | | | | 1 / 2 / 3 cm H2O (1 / 2 / 3 hPa) |
| Options | |||||
| Parameter | Description | Selection | |||
| SmartStart | If you switch the feature on, the machine will start automatically when the patient breathes into their mask. | Off / On | |||
| SmartStop | If you switch the feature on, the machine will stop automatically when the patient removes their mask. | Off / On | |||
| Configuration | |||||
| Parameter | Description | Selection | |||
| Pressure Units | Sets the unit in which pressure is displayed | cm H2O / hPa | |||
| Other options | |||||
| Button | Description | ||||
| Therapy/Mask Fit | Launches the Sleep screen, which provides access to mask fit and therapy functions. | ||||
| Restore default settings | Tapping the Restore default settings button opens a confirmation dialog. Once you confirm that you want to restore default settings, factory default clinical settings will be restored. Note: Default language, date and time settings will not be restored. | ||||
| Erase data | Tapping the Erase data button opens a confirmation dialog. Once you confirm that you want to erase data, information stored on the AirMini machine will be erased. Note: Settings, date, time and machine run hours will not be erased. | ||||
To change a setting:
- Tap the parameter you want to adjust.
- Use the spinner (or switches) to choose the required setting.
- Repeat this process for each parameter to be changed.
- Tap Apply changes to save your changes and to send the new settings to the machine.
The LED on the machine blinks three times to indicate the settings have been changed. - Open the Navigation drawer and tap Exit to exit clinical mode.
A confirmation dialog appears. - Tap Exit.
- To start therapy, go to the Sleep screen and tap START
![]() .
.
To enable or disable EPR or to switch SmartStart or SmartStop on or off:
- Slide the on or off switches for the parameter you want to enable, disable or switch on or off.
- Tap Apply changes to save your changes and to send the new settings to the machine.
- To exit clinical mode, open the Navigation drawer and tap Exit.
A confirmation dialog appears. - Tap < Exit.
- To start therapy, go to the Sleep screen and tap START
![]() .
.
Navigating the Sleep screen
Functions in the Sleep screen are arranged in two sections, Mask Fit and Therapy.
Mask Fit provides access to mask fit and Therapy provides patient access to therapy functions and comfort settings.
Running mask fit
- Advise the patient to fit their mask as described in the mask user guide.
- Tap Sleep in the Navigation drawer.
The Sleep screen opens. - Tap Mask Fit
![]() .
.
The Mask Fit screen opens. - In the Mask Fit screen, tap START Mask fit.
The machine starts blowing air. - Advise the patient to adjust the mask, mask cushion and headgear until a Good mask seal result is achieved.
- To stop mask fit, tap STOP Mask fit.
 .
.Viewing therapy data
The Dashboard provides a snapshot of the patient's therapy data including sleep score, usage hours, mask seal, events per hour, mask on/off events and air pressure delivered during the majority of the previous night of sleep.
Note: The displayed air pressure is equal to or less than the highest pressure level of the air delivered to the patient by the AirMini during 95 percent of the patient's therapy the previous night.
To access the Dashboard, tap the Dashboard icon ![]() in the Navigation drawer.
in the Navigation drawer.
Viewing information about the product
The About AirMini machine screen provides the following information about the AirMini:
- Total usage hours– the total number of hours the AirMini has been operated
- Firmware version– the current firmware version installed on the AirMini
- Last synced– the length of time since the smart device was last synchronized with the AirMini
To access the About AirMini machine screen, select About AirMini machine from the More menu.
Cleaning and maintenance
It is important that the AirMini machine is cleaned regularly to ensure optimal therapy. The following sections will help with disassembling, cleaning and replacing parts.
- As part of good hygiene, always follow cleaning instructions. Some cleaning products may damage the air tubing and affect its function, or leave harmful residual vapours that could be inhaled if not rinsed thoroughly.
- The AirMini connectors and AirFit P10 for AirMini contain a vent system to prevent carbon dioxide build-up in the mask. The vent system must be kept clean and clear of contamination in order to function correctly. Blocking or modifying the vent system may result in excessive carbon dioxide rebreathing.
- Regularly clean your AirMini tubing, connectors and mask components to receive optimal therapy and to prevent the growth of germs that can adversely affect your health.
- Regularly inspect the HumidX/HumidX Plus and follow the cleaning and maintenance instructions to prevent the growth of germs that can adversely affect your health.
If any visible deterioration of a system component is apparent (cracking, discoloration, tears etc.), the component should be discarded and replaced.
Disassembling components
The following sections provide instructions for disassembling components before cleaning.
Removing the connector

For F20 and N20 only:
Remove the connector from the mask by pressing the side buttons and pulling the connector away.
Disconnecting the tubing

For F20 only
Disconnect the F20 connector from the AirMini tubing by gently twisting it and pulling it apart.

For N20 and AirFit P10 for AirMini only
Disconnect the vent module from the AirMini tubing by gently twisting it and pulling it apart.
Removing the HumidX or HumidX Plus
For N20 and AirFit P10 for AirMini only:
- Disconnect the mask tube from the vent module by gently twisting it and pulling it apart.
![]()
- If a HumidX or HumidX Plus is being used, remove it from the vent module.
![]()


Note: The HumidX and HumidX Plus cannot be washed.
Disconnecting the AirMini tubing
Disconnect the AirMini tubing from the machine by pressing the side buttons on the cuff and pulling it away.
Unplugging the machine

Unplug the power supply unit from the power outlet and the machine.
Note: For mask disassembly instructions, refer to the mask user guide.
Cleaning and replacing parts
After detaching all components according to the disassembly instructions, ensure that the HumidX or HumidX Plus is removed and stored in a clean, dry location.
Inspecting the HumidX or HumidX Plus
- Inspect the HumidX or HumidX Plus daily for any signs of damage or blockages caused by dirt or dust.
- Replace the HumidX or HumidX Plus within 30 days after opening it.
- Store the HumidX or HumidX Plus in a clean, dry location when it is not being used.
Note: The HumidX and HumidX Plus cannot be washed.
Cleaning the tubing
- Clean and check the AirMini tubing each week. AirMini tubing should be replaced at least every six months.
- Wash the AirMini tubing in warm water using a mild, liquid detergent. For example, Ultra Joy dishwashing liquid.
- Rinse the AirMini tubing thoroughly and allow it to dry out of direct sunlight and heat.
- Check the AirMini tubing and replace it if there are any holes, tears or cracks.
Note: Do not wash the AirMini tubing in a dish washer or washing machine.
Cleaning the F20 connector
- Clean and check the F20 connector daily. The connector should be replaced at least every six months.
- Wash the F20 connector in warm water using a mild, liquid detergent. For example, Ultra Joy dishwashing liquid.
- Clean the F20 connector with a soft-bristled brush, paying particular attention to the vent holes.
![]()
- Rinse the F20 connector thoroughly under running water.
- Shake the F20 connector to remove excess water.
- Allow the F20 connector to dry out of direct sunlight and heat.
- Ensure that there is no dirt or dust in the vent holes.

Note: Do not wash the F20 connector in a dish washer or washing machine.
Cleaning the N20 connector
- Clean and check the N20 connector daily. The connector should be replaced at least every six months.
- Wash the N20 connector in warm water using a mild, liquid detergent. For example, Ultra Joy dishwashing liquid.
- Clean the N20 connector with a soft-bristled brush, paying particular attention to the vent holes inside the connector.
![]()
- Rinse the N20 connector thoroughly under running water.
- Shake the N20 connector to remove excess water.
- Allow the N20 connector to dry out of direct sunlight and heat.
- Ensure that there is no dirt or dust in the vent holes.

Note: Do not wash the N20 connector in a dish washer or washing machine.
Cleaning the AirFit P10 for the unit
Refer to your mask guide for cleaning instructions.
Replacing the air filter
Replace the air filter at least every 6 months. It cannot be washed. Check and replace it more often if there are any holes or blockages caused by dirt or dust.
To change the air filter:
- Slide the air filter cover off and remove the old air filter.
![]()
- Insert a new air filter and replace the air filter cover.
![]()


Notes:
- Ensure that the air filter cover is fitted at all times to prevent water and dust from entering the machine.
- The use of a ResMed-approved hypoallergenic filter will result in a small reduction in the accuracy of the delivered pressure at high leaks.
Cleaning the product
Wipe the exterior of the AirMini machine with a dry cloth each week.
Reprocessing
If the AirMini machine is used by multiple patients, the AirMini air tubing as well as the HumidX must be discarded and replaced because they cannot be disinfected.
Cleaning masks
For mask cleaning instructions, refer to the mask user guide.
Traveling
Patients can take their AirMini machine wherever they go.
Advise patients to take an appropriate power adapter for the region of travel. For information on purchasing an adapter, contact a ResMed representative.
Traveling by airplane
Some airlines do not classify medical equipment as carry-on luggage and therefore, the AirMini might not count toward carry-on luggage limits. Advise patients to check with their airline to determine their policies.
The AirMini machine can be used on an airplane because it meets Federal Aviation Administration (FAA) requirements.
Air travel compliance letters can be downloaded and printed from www.resmed.com.
To use the AirMini machine on an airplane:
- Advise patients that they cannot use the AirMini app on an airplane.
- Because the AirMini app cannot be used on an airplane, advise patients to disable Bluetooth (or to enter airplane mode). While connected to power, patients should disable Bluetooth by pressing and holding the Bluetooth button
![]() on the AirMini machine for at least 10 seconds, or until the indicator light is white.
on the AirMini machine for at least 10 seconds, or until the indicator light is white. - Advise patients to use the Start/Stop button
![]() on the AirMini machine to start therapy.
on the AirMini machine to start therapy. - Advise patients to press the Bluetooth button
![]() to reconnect Bluetooth (or exit airplane mode) once their air travel is complete.
to reconnect Bluetooth (or exit airplane mode) once their air travel is complete.
Troubleshooting
If you experience problems, try the following suggestions. If you are not able to fix the problem, contact your local ResMed dealer or ResMed office. If you experience problems with the AirMini machine, do not open it.
| Problem/possible cause | Solution |
| A Bluetooth connection cannot be established. | |
| Bluetooth may be disabled. | Ensure that Bluetooth is enabled on the patient's smart device  . .Check the AirMini machine to determine whether Bluetooth is enabled. When the Bluetooth indicator light on the machine flashes blue  , the machine is ready for pairing. , the machine is ready for pairing.Reconnect and pair the AirMini machine with the patient's smart device. Refer to Connecting machine and smart device for more information. If these solutions do not resolve the issue, try restarting the patient's smart device. If a Bluetooth connection between the patient's AirMini machine and the AirMini app cannot be established, advise the patient that therapy can be started manually by pressing the Start/Stop button  on the AirMini machine. on the AirMini machine. |
| The Bluetooth connection may be poor. | Ensure that the AirMini machine is placed away from potential sources of interference such as microwaves, wireless local area network (WLAN) routers or cordless phones. If a Bluetooth connection between the patient's AirMini machine and the AirMini app cannot be established, advise the patient that therapy can be started manually by pressing the Start/Stop button on the AirMini machine. |
| The AirMini machine may be in airplane mode. | If a white light  shows on the AirMini machine, the machine is in airplane mode. shows on the AirMini machine, the machine is in airplane mode.To disable airplane mode, press the Bluetooth button  on the machine for at least 3 seconds. on the machine for at least 3 seconds.Once airplane mode has been disabled and the light on the machine begins to flash blue , Bluetooth is enabled on the machine and the machine is ready for pairing. |
| The patient's smart device may be in airplane mode. | Turn off airplane mode on the patient's smart device. If airplane mode cannot be disabled, advise the patient that therapy can be started manually by pressing the Start/Stop button on the AirMini machine. |
| The Bluetooth indicator light on the AirMini machine is constantly white. It is not possible to pair to the machine. | |
| Bluetooth is disabled. Turn off airplane mode on the patient's smart device. | Press the Bluetooth button on the AirMini machine for at least 3 seconds. When the Bluetooth indicator light on the machine flashes blue , the machine is ready for pairing. |
| The patient's therapy data has not been transmitted. | |
| Bluetooth may be disabled. | Ensure that Bluetooth is enabled on the patient's smart device . Ensure that Bluetooth is enabled on the AirMini machine by pressing the Bluetooth button on the machine. The Bluetooth light on the machine should then flash blue .Reconnect and pair the AirMini machine with the patient's smart device. Refer to Connecting machine and smart device for more information. If these solutions do not resolve the issue, try restarting the patient's smart device. |
| The patient's smart device may be in airplane mode. | Turn off airplane mode on the patient's smart device. |
| Air is leaking from around the patient's mask or the mask is too noisy. | |
| The patient's mask may be fitted incorrectly. | Ensure that the patient's mask is fitted correctly. Refer to the mask user guide for fitting instructions or perform the mask fit function using the AirMini app to check the patient's mask fit and seal. |
| The AirMini system may be assembled incorrectly. | Ensure that the AirMini system is assembled correctly. Refer to Setup for more information. |
| The patient feels that the air pressure in their mask is too low or that they are not getting enough air. | |
| Ramp may be in progress. | Use the AirMini app to confirm that the Ramp Time comfort feature has been enabled. If so, advise the patient to wait for air pressure to build up or to turn off the Ramp Time feature using the AirMini app. |
| The HumidX or vent might be blocked. | Inspect the HumidX and vent for blockages or damage. |
| The HumidX may be wet. | The HumidX should be dry when starting therapy. Determine whether the HumidX is wet and replace it if necessary. |
| Ramp start pressure may be too low. | Increase ramp start pressure using the AirMini app. |
| The patient feels that too much air is being delivered from the AirMini machine. | |
| The Ramp Time feature may be turned off. | Turn on the Ramp Time feature using the AirMini app. |
| Therapy will not start. | |
| Power may not be connected. | Connect the power supply unit and ensure that the plug is fully inserted. The green indicator light on the power supply unit should be illuminated. Ensure that the green indicator light above the Start/Stop button on the AirMini machine is also illuminated. |
| Therapy has stopped. | |
| The air tubing may be disconnected. | Ensure that the air tubing is properly connected. Press the Start/Stop button on the AirMini machine to continue therapy. |
| The patient may be experiencing high mask leak while the SmartStop feature is enabled. | Ensure that the patient's mask is fitted correctly. Perform the mask fit function using the AirMini app to check the patient's mask fit and seal. Alternatively, disable the SmartStop feature using the AirMini app. |
| It isn't possible to scan the QR code to pair with the AirMini machine. | |
| The camera is not focused or broken, or the QR code label is damaged. | Pair the AirMini machine manually by entering into the patient's smart device the four-digit key found on the back of the machine. |
| The light above the Start/Stop button on the AirMini is flashing green. | |
| An error has occurred on the AirMini machine. | Unplug the AirMini machine, wait a few seconds, and then plug it back in. |
| The patient is experiencing dryness or has a dry or blocked nose. | |
| The patient's mask may be fitted incorrectly. | Adjust and refit the patient's mask to improve the seal. Ensure that no air is leaking from it. Refer to the mask user guide for fitting instructions or perform the mask fit function using the AirMini app to check the patient's mask fit and seal. If the patient's mask fit is good, advise the patient to try the HumidX Plus. |
| Humidification may be required. | Advise the patient to try therapy with the HumidX. |
| The patient is using the HumidX or HumidX Plus and is getting uncomfortable droplets of water on their nose, mask or air tubing. | |
| The humidity level is too high. | If the patient is using the HumidX, advise them to remove it and try therapy without humidification. If the patient is using the HumidX Plus, advise them to try the HumidX instead. This will help to reduce the water droplets. |
| Note: The patient may need to use the HumidX or HumidX Plus when ambient humidity conditions change. | |
| The AirMini machine appears in the machine selection list, but it is not possible to establish a connection. | |
| The AirMini machine name was not selected in the machine selection list. | Tap the device name in the machine selection list to confirm that you want to connect to that machine. |
Technical specifications
| Power supply unit | |||
| AC input range: | 100–240V, 50–60Hz 115V, 400Hz (nominal for aircraft use) | ||
| DC output: | 24V  0.83A 0.83A | ||
| Typical power consumption: | 6.3W | ||
| Peak power consumption: | 27W | ||
| If power is interrupted during therapy, the machine will automatically restart therapy when power is restored. | |||
| AirMini power | |||
| Standby power consumption: | 1 W | ||
| Environmental conditions | |||
| Operating temperature: | +41°F to +95°F (+5°C to +35°C) Note: Under extreme ambient temperature conditions (104°F/40°C) the air and parts of the tubing near the mask may reach temperatures up to 109°F/43°C. These parts of the tubing are not in contact with the user and the machine remains safe under these extreme conditions. | ||
| Operating humidity: | 10 to 95% relative humidity, non-condensing | ||
| Operating altitude: | Sea level to 8,500' (2,591 m); air pressure range 1013 hPa to 738 hPa | ||
| Storage and transport temperature: | -13°F to + 158°F (-25°C to + 70°C) | ||
| Storage and transport humidity: | 5 to 95% relative humidity, non-condensing | ||
| Sensors | |||
| Pressure sensor: | Internally located at device outlet, analog gauge pressure type, -5 to +45 cm H2O (hPa) | ||
| Flow sensor: | Internally located at device inlet, digital mass flow type, -70 to +110 L/min | ||
| Maximum single fault steady pressure Machine will shut down in the presence of a single fault if the steady state pressure exceeds 30 cm H2O (30 hPa) for more than 6 sec or 40 cm H2O (40 hPa) for more than 1 sec. | |||
| Sound | |||
| Declared dual-number noise emission values in accordance with ISO 4871:1996 | |||
| Pressure level measured according to ISO 80601-2-70:2015 (CPAP mode) | 30 dBA with uncertainty of 2 dBA | ||
| Power level measured according to ISO 80601-2-70:2015 (CPAP mode) | 38 dBA with uncertainty of 2 dBA | ||
| The A-weighted sound pressure level measured according to ISO 17510:2015: | |||
| Air tubing connected to AirMini F20 connector with mask | 19 dBA with uncertainty of 3 dBA | ||
| Air tubing connected to AirMini N20 or P10 connectors with mask | 17 dBA with uncertainty of 3 dBA | ||
| The A-weighted sound power level measured according to ISO 17510:2015: | |||
| Air tubing connected to AirMini F20 connector with mask | 27 dBA with uncertainty of 3 dBA | ||
| Air tubing connected to the AirMini N20 or P10 connectors with mask | 25 dBA with uncertainty of 3 dBA | ||
| AirMini machine | |||
| Dimensions: | 5.4" (W) x 3.3" (D) x 2.1"(H) 136 mm (W) x 84 mm (D) x 52 mm (H) | ||
| Weight: | 300g (10.6 oz) | ||
| Housing construction: | Flame retardant engineering thermoplastic | ||
| Air outlet: | Proprietry connector, 16mm inner diameter. Not compatible with EN ISO 5356-1 connectors. | ||
| Air filter | |||
| Standard: | Material: Polyester non woven fiber Average arrestance: >75% for ~7 micron dust | ||
| Hypoallergenic: | Material: Acrylic and polypropylene fibers in a polypropylene carrier Efficiency: >98% for ~7-8 micron dust; >80% for ~0.5 micron dust | ||
| AirMini air tubing | |||
| Material: | Flexible plastic | ||
| Length: | 6'2" (1.9 m) | ||
| Inner diameter: | 0.6" (15 mm) | ||
| Aircraft use ResMed confirms that machine meets the Federal Aviation Administration (FAA) requirements (RTCA/DO-160, section 21, category M) for all phases of air travel. | |||
| Wireless technology | |||
| Technology used: | Bluetooth | ||
| Connection types: | SPP, iAP2, GATT | ||
| Frequency: | 2402 to 2480 MHz | ||
| Max RF power output: | +4 dBm | ||
| Operating range: | 10 m (Class 2) | ||
| It is recommended that the machine is at a minimum distance of 0.43" (1.1 cm) from the body during operation. Not applicable to masks, air tubing or accessories. | |||
| Operating pressure range | |||
| AutoSet, AutoSet For Her, CPAP: | 4 to 20 cm H2O (4 to 20 hPa) | ||
| Design life | |||
| Machine, power supply unit: | 5 years | ||
| Air tubing, connectors: | 6 months | ||
| HumidX: | 30 days | ||
| Pneumatic flow path | |||
 |
| ||
| General The patient is an intended operator. | |||
| Pressure flow curve (ISO17510:2015) | |||
 | Pressure [cm H2O (hPa)] | Flow [L/min] | |
| 4 | 21 | ||
| 8 | 26 | ||
| 12 | 29 | ||
| 16 | 31 | ||
| 20 | 33 | ||
| Displayed values | |||
| Value | Range | Display resolution | |
| Pressure sensor at air outlet: Mask pressure | 4-20 cm H2O (4-20 hPa) | 0.1 cm H2O (0.1 hPa) | |
| Inspiratory and expiratory resistance with AAV open to atmosphere (ISO 17510:2015) | F20 connector | ||
| Inspiration at 50L/min | 0.7 cm H2O (hPa) | ||
| Expiration at 50L/min | 0.5 cm H2O (hPa) | ||
| AAV Pressures (ISO17510:2015) | F20 connector | ||
| Open-to-atmosphere pressure | 0.9 cm H2O (hPa) | ||
| Closed-to-atmosphere pressure | 1.0 cm H2 O (hPa) | ||
| Measurement system uncertainties In accordance with ISO 80601-2-70:2015 the measurement uncertainty of the manufacturer's test equipment is: | |||
| For measures of flow | ± 1.5 L/min or ± 2.7% of reading (whichever is greater) | ||
| For measures of static pressure | ± 0.15 cm H2O (0.15 hPa) | ||
| For measures of dynamic pressure | ± 0.27 cm H2O (0.15 hPa) | ||
| For measures of volume (< 100 mL) | ± 5 mL or 6% of reading (whichever is greater) | ||
| For measures of volume (≥ 100 mL) | ± 20 mL or 3% of reading (whichever is greater) | ||
| For measures of time | ± 10 ms | ||
| Note: ISO 80601-2-70:2015 stated accuracies and test results provided in this manual for these items already include the relevant measurement uncertainty from the table above. | |||
| Pressure accuracy | |||
| Maximum static pressure variation at 10 cm H2O (10 hPa) according to ISO 80601-2-70:2015: | |||
| Tested with full face mask: ±0.5 cm H20 (0.5 hPa) | |||
| Maximum dynamic pressure variation according to ISO 80601-2-70:2015 | |||
| Machine with full face mask | |||
| Pressure [cm H2O (hPa)] | 10 BPM | 15 BPM | 20 BPM |
| 4 | 0.5 | 0.7 | 1.0 |
| 8 | 0.5 | 0.7 | 1.0 |
| 12 | 0.5 | 0.7 | 1.0 |
| 16 | 0.5 | 0.7 | 1.0 |
| 20 | 0.5 | 0.7 | 1.0 |
| Flow (maximum) at set pressures The following are measured accordingly to ISO 80601-2-70:2015 at the end of the specified air tubing: | |||
| Pressure cm H2O (hPa) | AirMini machine and AirMini air tubing L/min (including uncertainty) | ||
| 4 | 119 | ||
| 8 | 116 | ||
| 12 | 112 | ||
| 16 | 108 | ||
| 20 | 105 | ||
| Electromagnetic emissions The following are measured accordingly to ISO 80601-2-70:2015 at the end of the specified air tubing: | |||
| Emissions test | Compliance | ||
| RF emissions CISPR 11 | Class B | ||
| Harmonic Emissions IEC 61000-3-2 | Class A | ||
| Voltage Fluctuations/Flicker Emissions IEC 61000-3-3 | Complies | ||
| Electromagnetic immunity | |||
| Immunity test | Compliance level | ||
| Electrostatic discharge (ESD) IEC 61000-4-2 | ±8 kV contact ±15 kV air | ||
| Electrical fast transient/burst IEC 61000-4-4 | ±2 kV ±1 kV for input/output lines | ||
| Surge | ±1 kV differential mode | ||
| IEC 61000-4-5 | ±2 kV common mode | ||
| Voltage dips, short interruptions and voltage variations on power supply input lines IEC 61000-4-11 | 100V 240V | ||
| Power frequency (50/60 Hz) magnetic field IEC 61000-4-8 | 30 A/m | ||
| Conducted RF IEC 61000-4-6 | 3 Vrms 150 kHz to 80 MHz | ||
| Radiated RF IEC 61000-4-3 | |||
| Frequency (MHz) | Immunity test level (V/m) | Frequency (MHz) | Immunity test level (V/m) |
| 80 MHz – 2.5 GHz | 10 | 930 | 28 |
| 385 | 27 | 1720 | 28 |
| 450 | 28 | 1845 | 28 |
| 710 | 9 | 1970 | 28 |
| 745 | 9 | 2450 | 28 |
| 780 | 9 | 5240 | 9 |
| 810 | 28 | 5500 | 9 |
| 870 | 28 | 5785 | 9 |
| Note: Portable and mobile RF communications equipment should be used no closer to any part of the machine, including cables, than the recommended 30 cm separation distance. | |||
Notes:
- The manufacturer reserves the right to change these specifications without notice.
- The mask system does not contain PVC, DEHP or phthalates.
- This product is not made with natural rubber latex.
Symbols
The following symbols may appear on the product or packaging.
 Indicates a warning or caution.
  Manufacturer.
  European Authorized Representative.
  Batch code.
  Catalog number.
  Serial number.
  Device number.
  On / Off.
  Protected against finger sized objects and against dripping water when tilted up to 15 degrees from specified orientation.
  Direct current.
  Type BF applied part.
  Class II equipment.
  Humidity limitation.
  Temperature limitation.
  Non-ionising radiation.
  Bluetooth.
  Prescription only (In the US, Federal law restricts these devices to sale by or on the order of a physician).
  Operating altitude.
  Atmospheric pressure limitation.
  MR unsafe (do not use in the vicinity of an MRI device).
  Do not use if package is damaged.
Servicing
The AirMini machine is intended to provide safe and reliable operation when operated in accordance with the instructions provided by ResMed. ResMed recommends that the AirMini machine be inspected and serviced by an authorized ResMed Service Centre if there is any sign of wear or concern with device function. Otherwise, service and inspection of the products generally should not be required during their design life.
ResMed Ltd
1 Elizabeth Macarthur Drive
Bella Vista NSW 2153
Australia
Distributed by
ResMed Corp 9001 Spectrum Center Boulevard San Diego CA 92123 USA
 ResMed (UK) Ltd 96 Jubilee Ave Milton Park Abingdon
Oxfordshire OX14 4RW UK
Documents / Resources
References
![www.resmed.com]() Sleep apnea and COPD - learn about symptoms and treatment | ResMed
Sleep apnea and COPD - learn about symptoms and treatment | ResMed![resmed.com]() Sleep apnea and COPD - learn about symptoms and treatment | ResMed
Sleep apnea and COPD - learn about symptoms and treatment | ResMed![play.google.com]() Google Play
Google Play![resmed.com]() Sleep apnea and COPD - learn about symptoms and treatment | ResMed
Sleep apnea and COPD - learn about symptoms and treatment | ResMed
Download manual
Here you can download full pdf version of manual, it may contain additional safety instructions, warranty information, FCC rules, etc.
Advertisement


Need help?
Do you have a question about the AirMini and is the answer not in the manual?
Questions and answers