Advertisement
DESCRIPTION
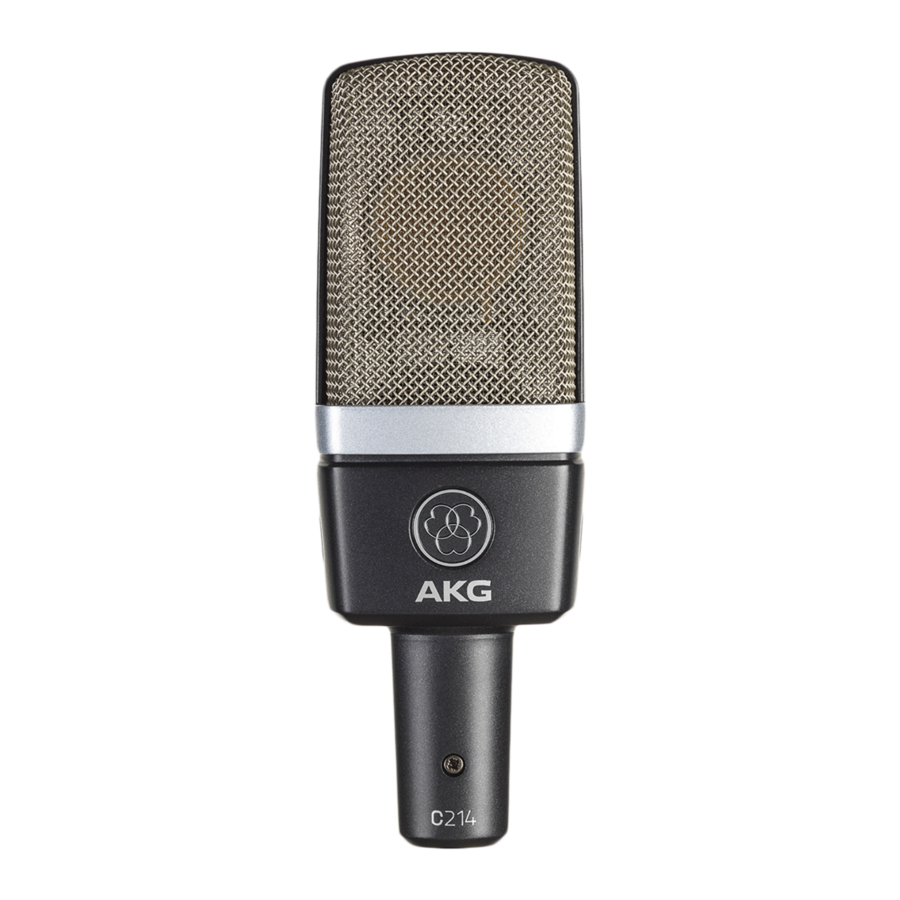
Package content
- C214
- H85: shock mount
- W214: foam windscreen
- High quality carrying case for microphone and standard accessories
Stereo-Sets
- 2 x C214
- 2 x SA60: Stand adapter
- 2 x H85: Shock mount
- High quality carrying case for microphone and standard accessories
Check that the package contains all the parts given above. If anything is missing, please contact your AKG dealer.
Optional Accessories
Optional accessories can be found at www.akg.com. Your dealer will be happy to advise you.
Brief Description
This large diaphragm condenser microphone has been designed on the basis of feed back from sound engineers who have used the C12, C12 A, C414 EB, C414 B-ULS, C414 B-TL II, and C414 XLII microphones in recording studios around the world for years.
Using hand-selected state-of-the-art, reliable components as well as advanced manufacturing processes, the C214 meets the highest professional standards and will withstand severe handling in the recording studio for many years.
The electronic circuitry of the microphone has been redesigned to achieve maximum dynamic range and a flat frequency response. Low self-noise and high headroom add up to a dynamic range of 143 dB (A-weighted).
The transducer element uses advanced backplate technology and a diaphragm that is gold-sputtered on one side only to prevent local shorting to the back electrode even at extremely high sound pressure levels.
The all-metal body ensures efficient rejection of RF interference so you can use the microphone near transmitter stations, along with wireless microphones or other communications equipment.
Controls
The C214 provides selector switches for the preattenuation pad and bass cut filter.
Preattenuation Pad

Figure 1: Preattenuation Pad
The selector switch on the left-hand side of the microphone lets you increase the microphone's headroom by 20 dB for distortion-free recordings of very loud sound sources or close to sound sources.
The preattenuation pad prevents the microphones output level, particularly at low frequencies, to overload the mixer input.
Bass Cut Filter

Figure 2: Bass Cut Filter
Rumbling or wind noise may cause distortion at very low frequencies. The microphone's switchable bass cut filter reduces this low-end distortion.
The filter takes effect under 160 Hz and filters 6 dB/octave. The bass cut also minimizes the proximity effect that may arise in close-miking applications (less than 6 inches (15 cm)).
Stereo pairs
Realistic stereo recordings require microphones with outstanding performance and excellent quality. They also require consistent performance and accurate localization throughout the entire frequency range from the pair of microphones.
Therefore, every factory-matched pair of 0214 is created from thousands of individual microphones selected by AKG's sophisticated computer-aided matching method.
The C214 matched stereo pairs thus provide the highest possible correlation over the microphones' entire frequency range and virtually identical sensitivity for stunning, three-dimensional recordings.
POWER SUPPLY
The 0214 provides low self-noise (just 13 dB(A)) yet high headroom. The microphone requires a phantom power source providing 12 to 52 V as per IEC 61938.
 Risk of damage
Do not connect the microphone to any power supply other than a phantom power source (input with phantom power or external IEC 61938 standard phantom power supply) with a floating connector, using a balanced cable with studio grade connectors to IEC 268-12 only. This is the only way to ensure safe and reliable operation.
USING THE MICROPHONE
Introduction
Besides offering high headroom, minimum distortion, as well as temperature and humidity resistant construction, the microphone is suited for a uniquely wide range of applications.
The C214 features a smooth frequency response similar to the typical sound of AKG large diaphragm microphones.
You can use the C214 for most musical instruments in the studio and on stage. With its cardioid polar pattern, the microphone will give excellent results in a multiplicity of recording situations, particularly, in close miking.
Bass Cut Filter
The selectable bass cut filter will effectively cancel out any unwanted noise such as fan noise from air conditioning systems or low-frequency noise due to floor vibrations, handling noise, etc. without affecting the sound of the recorded voice or instrument on tape.
Preattenuation Pad
The selectable 20 dB-preattenuation pad allows you to increase the microphone's headroom from 136 to 156 dB SPL. Remember to check that the equipment connected to the microphone (microphone preamp, mixer input, recorder input) can handle the maximum output level of the microphone without causing distortion.
Stand Mounting
The supplied H85 shock mount has a standard 3/8" thread insert so you can mount the microphone on almost every commercial stand or suspension with a 3/8" thread.
To fix the shock mount on a stand with a 5/8" thread, remove the thread insert and screw the shock mount directly on the stand.
To remove the shock mount from the microphone, rotate the bayonet-type lock at the lower end of the shock mount CCW to the point that the shock mount unlocks.
Hints on Microphone Placement
We recommend the 0214 for the following applications:
| Sound source | Studio | Stage |
| Lead/solo vocals | ●● | |
| Backing vocals/choir | ●● | ●● |
| Speech | ●● | |
| Acoustic guitar | ●● | ●● |
| Electric guitar | ●● | ●● |
| Electric bass | ● | ● |
| Double bass | ●● | ●● |
| Violin | ●● | ● |
| Cello | ●● | ● |
| Zither | ● | ●● |
| Grand piano (classical music) | ●● | ●● |
| Piano (rock & jazz) | ●● | ●● |
| Organ | ●● | ● |
| Trumpet | ●● | ●● |
| Trombone | ●● | ● |
| French horn | ●● | ●● |
| Tuba | ●● | ● |
| Saxophone | ●● | ●● |
| Flute | ●● | ●● |
| Clarinet | ●● | ●● |
| Kick drum | ●● | ● |
| Toms | ● | ● |
| Cymbals | ●● | ●● |
| Bongos, congas | ●● | ●● |
●● Highly recommended
● Recommended
As an introduction to the "science of making good recordings", the following sections describe some proven miking techniques.
Lead Vocals

Figure 3: Solo vocalist
Working distance: 6 to 12 in. (15 to 30 cm)
Bass cut: ON
For best results, be sure to use a pop screen, e.g. the PF80 from AKG. If no pop screen is available, use at least the supplied W214 windscreen.
To give the talent better control of their own voice, we recommend adding the talent's audio track to their headphone monitor signal.
Choir/Backing Vocals

Figure 4: Backing vocalists sharing a single microphone
To mic up a large choir we recommend using a pair of microphones plus one spot microphone each for the soprano, alto, tenor, and bass sections.
In rooms with perfect acoustics, using just a pair of high quality microphones is a proven way to get superb-sounding recordings.
Backing vocals/technique 1:
If enough tracks are available, we recommend overdubbing each voice separately. (See Lead Vocals).
Backing vocals/technique 2:
If only one or two tracks are available for backing vocals, use one microphone each for two or three vocalists maximum.
Place the vocalists in a semicircle in front of the microphone.
Violin, Viola

Figure 5: Violin
Solo violin:
Direct the microphone to the f holes from a height of 6 to 8 feet (1.8 to 2.5 m) above the floor.
Large string sections:
Use a combination of a pair of microphones in an XY, ORTF, or other stereo configuration and close-in spot microphones.
Viola:
Direct the microphone to the f holes from a height of 7 to 10 feet (2.2 to 3 m) above the floor.
Double bass/CelIo

Figure 6: Double bass
Double bass:
Align the microphone with one of the f holes from a distance of about 16 in. (40 cm). If you need to record the double bass together with an ensemble, place the microphone closer to the instrument to prevent leakage from other instruments into the microphone.
Cello/technique 1:
Refer to "Double bass" above.
Cello/technique 2:
Use a close-in microphone as in technique 1 above plus a distant microphone. Set the level of the close-in microphone approx. 20 dB lower than the distant mic level.
Acoustic Guitar

Figure 7: Miking an acoustic guitar with a single C214
Place the microphone 20 to 40 in. (0.5 to 1 m) away from the guitar and aim it obliquely at a point between the sound hole and neck.
Using two microphones gives you even better control of the sound.
Point a C214 at the sound hole from a distance of one to two feet (30 to 60 cm).
Place a small diaphragm microphone (e.g., a C451 B) 20 to 40 in. (0.5 to 1 m) away from the guitar and align it with a point between the sound hole and neck.
Flute

Figure 8: Miking the flute with a single microphone
We recommend using two microphones.
Direct Microphone 1 toward the player's mouth at an angle from above (little breath noise), and Microphone 2 at the instrument from the side.
If you prefer to use a single microphone, place the microphone as mic 1 above at a distance of about 7 to 8 1/2 ft. (2 to 2.5 m) above the floor.
Clarinet

Figure 9: Clarinet
Point the microphone at the lowest key. To minimize key noise, place the microphone a little ways to the side of the instrument.
Tenor Saxophone / Soprano Saxophone

Aim the microphone at the middle of the instrument from a distance of about 2 to 3 1/2 ft. (50 cm to 1 m).
Trumpet/Trombone

Place the microphone about 1 ft. (30 cm) in front of the instrument, slightly off the bell axis. Switch on one of the preattenuation pads. Using the supplied wind screen will help reduce blowing noise.
Grand and Upright Pianos

Figure 14: Grand piano
Grand piano:
Aim a single C214 or an XY or ORTF pair of C214s at the middle strings from a height of 5 to 7 ft. (1.5 to 2 m).
For a rock/pop sound, place two C214s roughly 8 to 16 in. (20 to 40 cm) above the strings. Align mic 1 with the treble strings and mic 2 with the bass strings, both at a point about 6 in. (15 cm) behind the dampers.

Figure 15: Upright piano
Use the same technique as for the grand. Open the lid and have the microphones "peek into the instrument" from above.
Electric Guitar/Bass

Figure 16: Electric guitar
Electric guitar:
Position the microphone 3 to 6 in. (8 to 15 cm) in front of the speaker, aiming at a point off the speaker diaphragm center. Use the bass cut and a preattenuation pad. You may want to use an additional distant microphone.
Electric bass:
Use the same technique as for the electric guitar. You can use a DI box to add the direct signal of the line output on the bass amp to the microphone signal.
Drums

Figure 17: Drums
Overhead miking:
Place two C214s in an AB or XY configuration about 2 3/4 to 4 ft. (80 to 120 cm) above the drummer's head. This technique will pick up the entire kit, delivering a highly natural sound. Use little or no EQ!
Hanging and floor toms:
Use one microphone for each tom or for every two toms, aligning the microphone with the rim of the top head at a distance of 2 to 4 in. (5 to 10 cm).
To reduce leakage from other instruments, attenuate the HF range above 10 kHz using the channel EQ(s).
Kick drum:
Be sure to switch the preattenuation pad in (-20 dB) because the kick drum may produce extremely high sound pressure levels.
Place the microphone right inside the shell.
For a dry, "click" type sound with lots of attack, position the microphone near the head, at an angle of 45 degrees.
For a fatter sound, place the microphone closer to the front head or outside the shell, up to 6 in. (15 cm) from the opening in the front head.
CLEANING
Microphone
Use a soft cloth moistened with water to clean the surface of the microphone body.
Wind screen
Wash the foam wind screen in soap suds. Do not use the wind screen before it has dried completely.
TECHNICAL DATA
| Type: | 1-inch large diaphragm backplate pressure gradient microphone |
| Polar pattern: | cardioid |
| Open-circuit sensitivity: | 20 mV/Pa (-34 dBV) |
| Frequency range: | 20 to 20,000 Hz (see frequency response graphs) |
| Impedance: | ≤ 200 ohms |
| Recommended load impedance: | ≥ 1000 ohms |
| Bass cut filter slope: | 6 dB/octave at 160 Hz |
| Preattenuation Pad: | 0/-20 dB (switchable) |
| Equivalent noise level to IEC 60268-4 (A-weighted): | 13 dB(A) (0 dB preattenuation) |
| Signal/noise ratio re 1 Pa (A-weighted): | 81 dB |
| Max. SPL for 0.5% THD: | 136/156 dB SPL (0/-20 dB) |
| Dynamic range (A-weighted): | 123/143 dB (0/-20 dB) |
| Environment: | temperature: -10°C to +60°C R.H.: 95% (+20°C), 85% (+60°C) |
| Powering: | 12 to 52 V phantom power to IEC 61938 |
| Current consumption: | <2mA |
| Connector: | IEC standard 3-pin XLR |
| Dimensions: | 54 x 43 x 160 mm / 2.1 X 1.7 X 6.3 in. |
| Net weight: | 290 g / 10.2 oz. |
Frequency Response C214

Polar Diagram C214

SAFETY
Risk of damage
Please make sure that the piece of equipment your microphone will be connected to fulfills the safety regulations in force in your country and is fitted with a ground lead.
For more information visit www.akg.com
Documents / ResourcesDownload manual
Here you can download full pdf version of manual, it may contain additional safety instructions, warranty information, FCC rules, etc.
Advertisement


Need help?
Do you have a question about the AKG C214 and is the answer not in the manual?
Questions and answers