LaCie Rugged RAID Pro - External Hard Drive Manual
- User manual (26 pages) ,
- Manual (25 pages)
Advertisement
Introduction
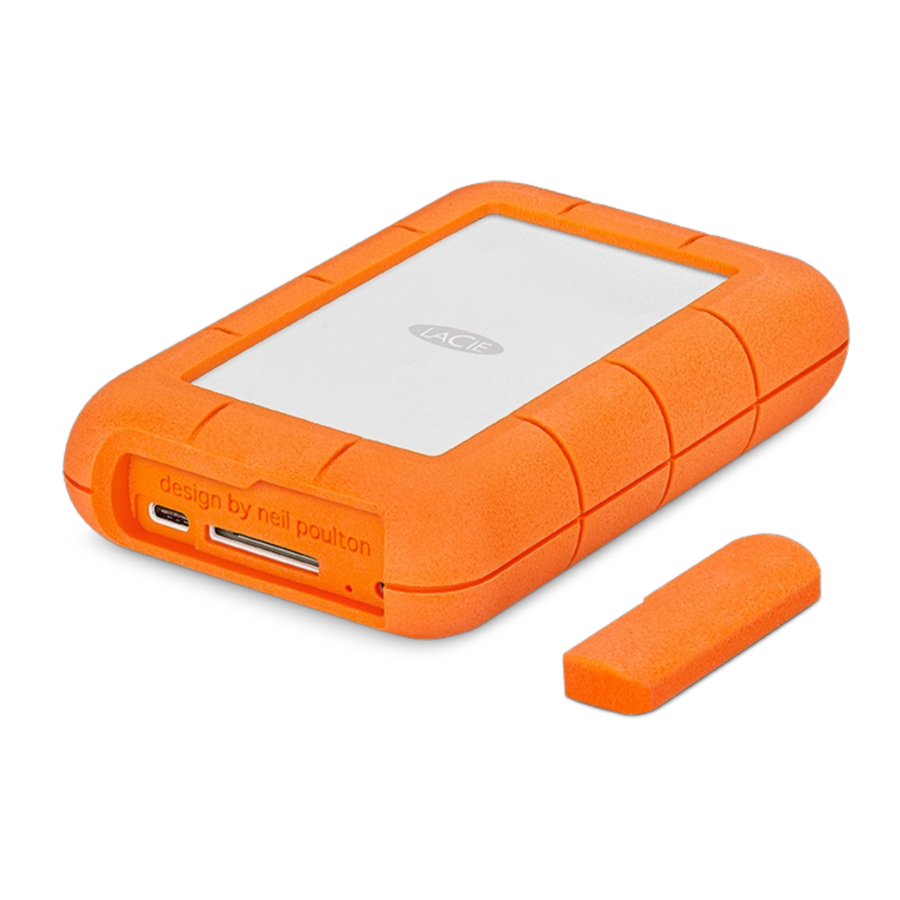
Thanks to its embedded SD card reader, Rugged RAID Pro will ease the backup of your content in the field. Thinner and lighter than its predecessor and configurable with LaCie RAID Manager, this drive is a versatile travel companion for busy videographers and professional photographers.
This user manual provides instructions on how to set up your Rugged RAID Pro.
For common questions and answers about your hard drive, see Frequently Asked Questions or visit LaCie customer support.
Box content
- LaCie Rugged® RAID Pro
- USB-C (USB 3.1 Gen 2) cable
- Removable cover and spare
- Power supply (for use when USB connection is not powering device)
- Quick Install Guide
 Save your packaging. If you experience problems with your hard drive and want to exchange it, the hard drive must be returned in its original packaging. |
Minimum system requirements
Ports
Use the included cable to connect your LaCie device to a computer with a USB-C port.
Operating system
Go to Operating System Requirements for Seagate Hardware & Software.
Minimum free disk space
600MB recommended.
Storage and RAID management
LaCie Rugged RAID Pro storage is managed by LaCie Toolkit. See the Toolkit user manual for details.
The LaCie RAID Manager software is used to change the RAID configuration for the device. See the LaCie RAID Manager for 2-Bay Devices user manual for details.
Views
Remove the port protector to view the ports and LEDs.

- Status LED-Indicates Rugged RAID Pro's status. See LED Status and Power.
- Power LED-Blinks if Rugged RAID Pro is not receiving enough power from the USB connection to your computer, requiring the use of the included power supply. See LED Status and Power.
- Power input-Connect the power cable to this port if needed. Use only the power cable included with your LaCie Rugged RAID Pro. Attaching third-party or other LaCie power cables with incorrect voltage can damage the device. See LED Status and Power.
- USB-C (USB 3.1 Gen 1) port-Connect the Rugged RAID Pro to a computer. See Getting Connected.
- Secure Digital (SD) card slot-Use your file browser to manually copy files to and from SD cards. You can also let Toolkit's automated import feature quickly copy files to Rugged RAID Pro from any inserted SD card. For details on automated import, see the Toolkit user manual
- RAID pinhole-Use the pinhole when confirming a change to your RAID level. See Manage RAID.
 Attach the port protector when transporting LaCie Rugged RAID Pro. Attach the port protector when transporting LaCie Rugged RAID Pro. |
Specifications
Enclosure dimensions
| Side | Dimensions (mm / in) |
| Width | 30 / 1.181 |
| Height | 140.12 / 5.517 |
| Length | 91 / 3.583 |
Enclosure weight (with 4TB HDD)
Weight (kg / lbs)
0.446 / 0.981
Electrical
Power supply: 5.4V 2A
Use only the power supply provided with your Rugged RAID Pro. Power supplies from third- party devices and other LaCie products can damage your Rugged RAID Pro.
Your device might get warm
Your device might feel warm to the touch when copying or moving a large number of files. These conditions are normal. Your device will return to a regular temperature after it's finished copying.
Conditions that lead to a higher ambient temperature may affect performance, for example:
- Leaving the device in direct sunlight for a limited period of time.
- Leaving the device in a hot enclosed space, such as a car on a hot day.
Extended exposure to extreme weather, heat or water will harm the product and/or permanently damage it. All such actions void the warranty.
Ingress Protection rating
The Ingress Protection (IP) rating is a standard for defining the types of protection supported by equipment and devices. The two-digit code for IP lets users know the conditions that the device can withstand. The two digits are independent, with each number representing a different level of protection.
LaCie Rugged RAID Pro is rated IP 54.
5: Dust protected-Ingress of dust is not entirely prevented, but it must not enter in sufficient quantity to interfere with the satisfactory operation of the equipment.
4: Spraying of water-Water splashing against the enclosure from any direction shall have no harmful effect, utilizing either: a) an oscillating fixture, or b) a spray nozzle with no shield.
LaCie Rugged RAID Pro has also been tested for the following:
- Drop resistance-Dropped from heights up to 1.2 meters / 4 feet (in non-operating mode).
- Crush resistance-Driven over by an approximately 1-ton car (1000kg / 2205 lbs).
LED Status and Power
Status LED behavior
The status LED below the protective casing indicates the status of Rugged RAID Pro.

| LED | State |
| On | The device is ready. |
| Blinking | The device is being accessed. |
| Fast blinking | A drive is not ready or has failed. |
| Off | Device inactive because it's turned off or in power-saving mode. |
Contact LaCie technical support if:
- The status LED remains off while the device is connected to a power supply and to your computer. Confirm that Rugged RAID Pro is not in power-saving mode before contacting LaCie technical support.
- The status LED continues to blink rapidly. One or both of your hard drives may have failed. Do not swap one or both hard drives onsite or in the field. Doing so will void Rugged RAID Pro's warranty.
Power LED behavior
Rugged RAID Pro is designed to operate using power from the connection to your computer. If the connection isn't delivering enough power for Rugged RAID Pro to operate, the power LED below the protective casing blinks.

If the power LED light is blinking, connect the power cable to Rugged RAID Pro and then connect the power supply to a live power outlet.

Power-saving mode
Your Rugged RAID Pro can conserve energy by entering power-saving mode. Managed by your computer, power-saving mode can extend the life of the hard drives by sparing them from working during extended periods of inactivity.
Operating system
You can initiate power-saving mode on your computer by performing one of the following:
- Placing the host computer in sleep mode.
- Mac OS-Go to System Preferences > Energy Saver to enable sleep mode for hard drives.
- Windows-Go to Control Panel > Hardware > Power Options > Choose a power plan > Change advanced power settings. Click on Hard disk and Turn off the hard disk after. Choose the time to spin down USB hard drives.
To exit power-saving mode, review the table below:
| Entering power-saving mode | Exiting power-saving mode |
| The host computer placed the product into powersaving mode due to inactivity. | Access the Rugged RAID Pro's volume on the host computer. For example, copy files to its volume. |
| The computer is in sleep mode. | Wake up the computer. |
Note on ejecting the volume and power-saving mode-Rugged RAID Pro enters power-saving mode when its volumes are ejected and the device remains connected to the computer. To access Rugged RAID Pro's volumes, unplug the interface cable from the computer and reconnect it.
Cables and Connectors
USB-C protocols
USB is a serial input/output technology for connecting peripheral devices to a computer. USB-C is the latest implementation of this standard and it provides higher bandwidth and new power management features.
USB-C supports many protocols:
| Thunderbolt 3 | transfer rates up to 40Gb/s |
| USB-C 3.1 Gen 2 | transfer rates up to 10Gb/s |
| USB-C 3.1 Gen 1 | transfer rates up to 5Gb/s |
| SuperSpeed USB 3.0 | transfer rates up to 5Gb/s |
| Hi-Speed USB 2.0 | transfer rates up to 480Mb/s |
The USB-C port on the LaCie Rugged RAID Pro is USB 3.1 Gen 1. You can connect your Rugged RAID Pro to any USB-C port on your computer.
Cables
Use the USB-C cable to connect LaCie Rugged RAID Pro to a USB-C port on your computer.

Getting Connected
STEP 1 – Connect the USB cable
Use the USB-C cable to connect LaCie Rugged RAID Pro to your computer's USB-C port.

STEP 2 – Check for power
LaCie Rugged RAID Pro is designed to operate using power from the USB connection to your computer. If the USB connection isn't delivering enough power for Rugged RAID Pro to operate, the power LED blinks.

If the LED light is blinking, connect the power cable to Rugged RAID Pro and then connect the power supply to a live power outlet.

STEP 3 - Set up LaCie Rugged RAID Pro
The setup process lets you:
| Register your device | Get the most from your device with easy access to information and support. |
| Install LaCie Toolkit | Manage backup plans, mirror folders, imports from memory cards, and more. |
| Download LaCie RAID Manager | Change RAID levels to optimize Rugged RAID Pro for capacity/speed or protection. |
- Using a file manager such as File Explorer or Finder, open LaCie Rugged RAID Pro and launch Start Here Win or Start Here Mac.

- Follow the onscreen instructions.

| Your computer must be connected to the internet to install Toolkit. | |
| Learn more about Toolkit | |
| Toolkit provides useful tools that let you easily:
For details on Toolkit features, see the LaCie Toolkit user manual. | |
| Learn more about LaCie RAID Manager | |
| Your LaCie Rugged RAID Pro can be configured as RAID 0, RAID 1, or JBOD. Use LaCie RAID Manager to switch RAID levels. For more information, see the LaCie RAID Manager for 2-Bay Devices user manual. |
Storage format
LaCie Rugged RAID Pro is delivered preformatted as exFAT for compatibility with both Windows and Mac computers. The dual disks are configured for optimal performance using RAID 0. You can change the configuration to RAID 1, which protects data in case one disk fails. Use LaCie RAID Manager to make changes to the RAID. To learn more about RAID levels and changing RAID levels, see Manage RAID.
Manage RAID
LaCie RAID Manager manages the RAID configuration for your LaCie Rugged RAID Pro and provides important firmware updates and notifications. You may have already installed LaCie RAID Manager as part of your initial setup. If LaCie RAID Manager is not installed on your computer, you can download and install the app:
- On the computer that will connect to the Rugged RAID Pro, go to www.lacie.com/support/lrm.
- Download LaCie RAID Manager for Windows or Mac.
- Launch the Installer.
- Follow the on-screen instructions to complete the installation.
The process automatically installs a driver that allows LaCie RAID Manager to detect the device and manage RAID arrays.
RAID levels
LaCie Rugged RAID Pro can be configured as RAID 0, RAID 1, or JBOD. Each RAID level has its own advantages:
| RAID level | Capacity | Protection | Speed | Factory default |
| RAID 0 | 100% | None | Excellent | Yes |
| RAID 1 | 50% | Excellent | Good | No |
RAID 0-Data is not duplicated on both hard drives in RAID 0. This results in faster transfers and more storage, since the full capacity of both drives can be used to store unique data. However, RAID 0 lacks a very important feature: data protection. If a hard drive fails, all data in the array is lost.
RAID 1-RAID 1 provides greater safety since data is duplicated on each disk in the array. If a single disk fails, the data remains available on the other disk. However, this comes at a cost-since the same data is written to each drive, copying data takes longer and overall storage capacity is reduced by 50%. RAID 1 is a good choice when safety is more important than speed or disk space.
JBOD-"JBOD" stands for "Just a Bunch of Disks", meaning that your two drives have not been configured as an array and operate as two independent disks.
Launch LaCie RAID Manager
Administrator users
Users with administrator privileges for the computer can launch LaCie RAID Manager without signing into the application.
Standard users
A standard (non-adminstrator) user launching LaCie RAID Manager is prompted to sign in with administrator credentials. An administrator should launch the application to prepare the device for a standard user.
Changing RAID levels
To change RAID levels, confirm that Rugged RAID Pro is connected to your computer and powered. You'll need a thin, pointed object such as the end of a paperclip to confirm the RAID change.
| All files are deleted from Rugged RAID Pro when you modify the array. |
- Launch LaCie RAID Manager.
- Click Array in the sidebar, and then click Modify.
- Choose the RAID level you want to configure and click Next.
- Confirm that you want to modify the array by clicking Modify.
- At the prompt, insert the pointed end of the paperclip into the RAID pinhole and use it to press the RAID button inside. A message confirms that the array has been modified.
LaCie RAID Manager device and app management
For other LaCie RAID Manager functions, see the LaCie RAID Manager for 2-Bay Devices user manual.
Safely Remove Device From Your Computer
Always eject a storage drive from your computer before physically disconnecting it. Your computer must perform filing and housekeeping operations on the drive before it is removed. Therefore, if you unplug the drive without using the operating system's software, your files can become corrupt or damaged.
Windows
Use the Safely Remove tool to eject a device.
- Click the Safely Remove Hardware icon in your Windows System Tray to view the devices you can eject.
- If you don't see the Safely Remove Hardware icon, click the Show hidden icons arrow in the system tray to display all icons in the notification area.
- In the list of devices, choose the device you want to eject. Windows displays a notification when it is safe to remove the device.
- Disconnect the device from the computer.
Mac
There are several ways you can eject your device from a Mac. See below for two options.
Eject via Finder window
- Open a Finder window.
- On the sidebar, go to Devices and locate the drive you want to eject. Click the eject symbol to the right of the drive name.
- Once the device disappears from the sidebar or, the Finder window closes, you can disconnect the interface cable from your Mac.
Eject via Desktop
- Select the desktop icon for your device and drag it to the Trash.
- When the device icon is no longer visible on your desktop, you can physically disconnect the device from your Mac.
Optional Formatting and Partitioning
Your device is preformatted exFAT (Extended File Allocation Table) for compatibility with both Mac and Windows computers.
Choosing a file system format
When choosing a file system format, consider whether compatibility or performance is more important in your everyday use of the drive.
- Compatibility -You need a cross-platform format because you connect your drive to both PCs and Macs.
- Performance-You connect your drive with only one type of computer, so you can optimize file copy performance by formatting the drive in the native file system for your computer operating system.
Compatibility with both Windows and Macs
exFAT is a lightweight file system compatible with all versions of Windows and modern versions of macOS. If you use your drive with both PCs and Macs, format your drive in exFAT. While exFAT offers crossplatform access to both computers, keep in mind the following:
- exFAT is not compatible or recommended for built-in backup utilities such as File History (Windows) and Time Machine (macOS). If you want to use one of these backup utilities, you should format the drive in the native file system for the computer running the utility.
- exFAT is not a journaled file system, which means it can be more susceptible to data corruption when errors occur or the drive is not disconnected properly from the computer.
Optimized performance for Windows
NTFS (New Technology File System) is a proprietary journaling file system for Windows. macOS can read NTFS volumes, but it can't natively write to them. This means your Mac can copy files from an NTFS formatted drive, but it can't add files to or remove files from the drive. If you need more versatility than this one-way transfer with Macs, consider exFAT.
Optimized performance for macOS
Apple offers two proprietary file systems.
Mac OS Extended (also known as Heirarchical File System Plus or HFS+) is an Apple file system used since 1998 for mechanical and hybrid internal drives. macOS Sierra (version 10.12) and earlier use HFS+ by default.
APFS (Apple File System) is an Apple file system optimized for solid state drives (SSDs) and flash-based storage systems, though it also works with hard disk drives (HDDs). It was first introduced with the release of macOS High Sierra (version 10.13). APFS can only be read by Macs running High Sierra or later.
When choosing between Apple file systems, consider the following:
- Windows cannot natively read or write to APFS or HFS+ volumes. If you need cross-platform compatibility, you should format the drive in exFAT.
- If you intend to use your drive with Time Machine:
- The default format for macOS Big Sur (version 11) and later is APFS.
- The default format for macOS Catalina (version 10.15) and earlier is HFS+.
- If you intend to use your drive to move files between Macs running older OS versions, consider formatting your drive in HFS+ rather than APFS.
- macOS file systems and Android: Formatting your drive for macOS may not be supported with connections to Android mobile devices.
Learn more
For additional considerations when choosing a file system format, see File System Format Comparisions.
Formatting instructions
For instructions on formatting your drive, see How to format your drive.
Frequently Asked Questions
For help setting up and using your LaCie hard drive, review the frequently asked questions below. For additional support resources, go to LaCie customer support.
Hard drive icon
Why does the hard drive icon not appear on my desktop (Mac)?
Is your Finder configured to hide hard drives on the desktop?
Go to Finder and then check Preferences > General tab > Show these items on the desktop. Confirm that Hard Disks is selected.
Is your hard drive mounting in the operating system?
Open Disk Utility at Go > Utilities > Disk Utility. If the hard drive is listed in the left-hand column, check your Finder preferences to see why it is not displayed on the desktop (review the question above).
Does your computer's configuration meet the minimum system requirements for use with this hard drive?
For detailed information on supported operating systems, please see the following knowledge base article.
Did you follow the correct installation steps for your operating system?
Review the installation steps in Getting Connected.
Why does the hard drive icon not appear in Computer (Windows)?
Is the hard drive listed in Device Manager?
All drives appear in at least one place in Device Manager.
Type Device Manager in Search to launch it. Look in the Disk Drives section and, if necessary, click the Plus (+) icon to view the full list of devices. If you're uncertain that your drive is listed, safely unplug it and then reconnect it. The entry that changes is your LaCie hard drive.
Is your hard drive listed next to an unusual icon?
Windows Device Manager usually provides information about failures with peripherals. While the Device Manager can assist with troubleshooting most problems, it may not display the exact cause or provide a precise solution.
An unusual icon next to the hard drive can reveal a problem. For example, instead of the normal icon based on the type of device, it has an exclamation point, question mark or an X. Right click this icon and then choose Properties. The General tab provides a potential reason why the device is not working as expected.
File transfers
Why are my file transfers slow?
Are both ends of the USB cable firmly attached?
Review troubleshooting tips for cable connections below:
- Check both ends of the USB cable and make sure that they are fully seated in their respective ports.
- Try disconnecting the cable, waiting 10 seconds, and then reconnecting it.
- Try a different USB cable.
Are there other USB devices connected to the same port or hub?
Disconnect other USB devices and see if the hard drive's performance improves.
File transfer error messages
Why did I get an error message telling me that the drive has been disconnected when coming out of sleep mode?
Ignore this message since the drive remounts on the desktop despite the pop-up. LaCie drives conserve power by spinning down when you set your computer to sleep mode. When the computer awakes from sleep mode, the drive may not have enough time to spin up, causing the pop-up to appear.
Why did I get an "Error -50" message while copying to a FAT32 volume?
When copying files or folders from a computer to a FAT32 volume, certain characters in the names cannot be copied. These characters include, but are not limited to: ? < > / \:
Check your files and folders to ensure that these characters are not in the names.
If this is a recurring problem or you cannot find files with incompatible characters, consider reformatting the drive to NTFS (Windows users) or HFS+ (Mac users). See Optional Formatting and Partitioning.
Using a USB hub for USB devices
Can I use my hard drive with a USB hub?
Yes, the hard drive can be connected to a USB hub. If you use a hub and encounter detection problems, slower than normal transfer rates, random disconnection from your computer or other unusual issues, try connecting the hard drive directly to the computer's USB port.
Some USB hubs are less than efficient with power management, which can be problematic for connected devices. In such a case, you may have to use LaCie Rugged RAID Pro's included power supply or consider substituting a powered USB hub with its own power cable.
Provided USB cable
Can I use my hard drive with a longer cable?
Yes, provided it is certified according to USB standards. However, LaCie recommends using the cable shipped with your hard drive for the best results. If you use a longer cable and experience problems with detection, transfer rates or disconnection, use the original cable included with your hard drive.
USB 3.0 ports
Will my hard drive's USB 3.1 Gen 1 port work with my computer's USB 3.0 (Type A) port?
Yes, the device is compatible with USB 3.0 ports, however, the product does not include a cable with a USB Type A connector. Transfer rates are much slower with USB 3.0.
Seagate Technology LLC
47488 Kato Road
Fremont, CA 94538
USA
Seagate Technology NL B.V.
Koolhovenlaan 1
1119 NB Schiphol-Rijk
The Netherlands
Seagate Technology NL B.V. (UK Branch)
Jubilee House, Globe Park, 3rd Ave,
Marlow SL7 1EY
UK
Seagate Singapore International Headquarters Pte. Ltd.
90 Woodlands Avenue 7
Singapore 737911
Documents / Resources
References
Download manual
Here you can download full pdf version of manual, it may contain additional safety instructions, warranty information, FCC rules, etc.
Advertisement


Need help?
Do you have a question about the Rugged RAID Pro and is the answer not in the manual?
Questions and answers