ProTeam GoFit 3, 1076620 - Backpack Vacuum Manual
- Owner's manual (20 pages) ,
- Owner's manual (17 pages) ,
- Owner's manual (18 pages)
Advertisement
- 1 INSPECTION
- 2 INTRODUCTION
- 3 OVERVIEW OF COMPONENTS
- 4 QUICK START
- 5 HARNESS HEIGHT ADJUSTMENT
- 6 BACKPACK ERGONOMICS
- 7 WEARING THE BACKPACK VACUUM
- 8 INTERCHANGEABLE HARNESS PADS
- 9 BLOWING FEATURE
- 10 EXTENSION CORD RETENTION
- 11 OPERATING THE BACKPACK VACUUM
- 12 FILTER MAINTENANCE
- 13 RECOMMENDED PREVENTIVE MAINTENANCE
- 14 IMPORTANT SAFETY INSTRUCTIONS
- 15 Documents / Resources
Go to www.proteam.emerson.com to register your new vacuum.
INSPECTION
Carefully unpack and inspect your new ProTeam vacuum for shipping damage. Each unit is tested and thoroughly inspected before shipping. For instructions regarding any shipping damage, contact ProTeam immediately (866) 888-2168. All returns must have a Return Authorization Number (RAN).
This manual has important information for the use and safe operation of the vacuum cleaners. Read this manual carefully before starting the machine. Keep this manual available at all times and instruct all operators to read this manual. If instructions are not followed, an injury may occur or equipment, furniture, or other property may become damaged.
The contents of this manual are based on the latest product information available at the time of publication. ProTeam reserves the right to make changes or improvements to its machines or components without notice.
The products described in this manual are intended for commercial use.
INTRODUCTION
MOTOR
Electric thru-flow vacuum motors must never be used in applications in which wet or moist conditions are involved, where dry chemicals or other volatile materials are present, or where airflow may be restricted or blocked. Such motors are designed to permit the vacuumed air to pass over the electrical wiring to cool it. Therefore, any liquid (including water), dry chemical, or other foreign substance which would come in contact with electrical conductors could cause combustion (depending on volatility) or electrical shock. Failure to observe these precautions could result in property damage and personal injury, including death in extreme cases.
ELECTRICAL
This document only applies to 120 volt/60 Hz models. Severe changes in voltage, high or low, can cause damage to the motor and cause premature motor failure. Model numbers and specifications can be obtained by contacting ProTeam.
The vacuum cleaners described in this manual are equipped with a thermal protection cutoff device. This integrated thermal cutoff switch will remove power from the vacuum motor in the event excessively high operating temperatures are detected. This condition may arise as the result of a blocked vacuum passage, or clogged or full filters.
Should a thermal trip take place, immediately turn off the vacuum switch, unplug the cord from the wall outlet, and inspect for a blockage and verify the condition of the filter bag. Replace or empty the filter bag as required. The vacuum will require several minutes to cool down to a safe operating temperature. When this temperature is attained, the thermal switch will reset at any moment and the vacuum will be able to be used in a normal manner.
CORD MANAGEMENT SYSTEM
The cord management system consists of 2 separate components that reside on the switch box: the twist-lock and cord guide. Both of these features, when used in accordance with the instructions in the quick start and owner's manual, act as cord retention and strain relief during operation of the vacuum. The twist-lock ensures the extension cord plug remains firmly seated in the switch box. The cord guide acts as strain relief for the extension cord.
GROUNDING INSTRUCTIONS
THESE VACUUMS MUST BE GROUNDED. If a vacuum should malfunction or stop working, grounding provides a path of least resistance for electrical current, thereby reducing the risk of electrical shock. This unit is equipped with a cord that has an equipment-grounding conductor and grounding plug. The plug must be inserted in an appropriate outlet that is properly installed and grounded in accordance with all local codes and ordinances. Cutting off the ground wire or using a cord that is not equipped with a ground plug will void the warranty on the unit, and ProTeam will accept NO liability associated with the unit.

Improper connection of the equipment-grounding conductor can result in a risk of electrical shock. Check with a qualified electrician or service person if you are unsure that the outlet is properly grounded. Do not modify the plug provided with the vacuum. If it will not fit the outlet, have a proper outlet installed by a qualified electrician.

The vacuum cleaners in this manual are for use on a nominal 120-volt circuit, and have a grounded plug that looks like the plug illustrated in sketch A in Figure AA. A temporary adaptor that looks like the adaptor illustrated in sketches B and C may be used to connect this plug to a 2-pole receptacle as shown in sketch B if a properly grounded outlet is not available. The temporary adaptor should be used only until a properly grounded outlet (sketch A) can be installed by a qualified electrician. The green colored rigid ear, lug, or the like extending from the adaptor must be connected to a permanent ground such as a properly grounded outlet box cover. Whenever the adaptor is used, it must be held in place by a metal screw.
 Note: In Canada, the use of a temporary adaptor is not permitted by the Canadian Electrical Code.
For Canada – This appliance is for use on a nominal 120-volt circuit and has a grounded attachment plug that looks like the plug illustrated in sketch A in Figure AA. Make sure that the vacuums are connected to an outlet having the same configuration as the plug. No adaptor should be used with the vacuums detailed in this manual.
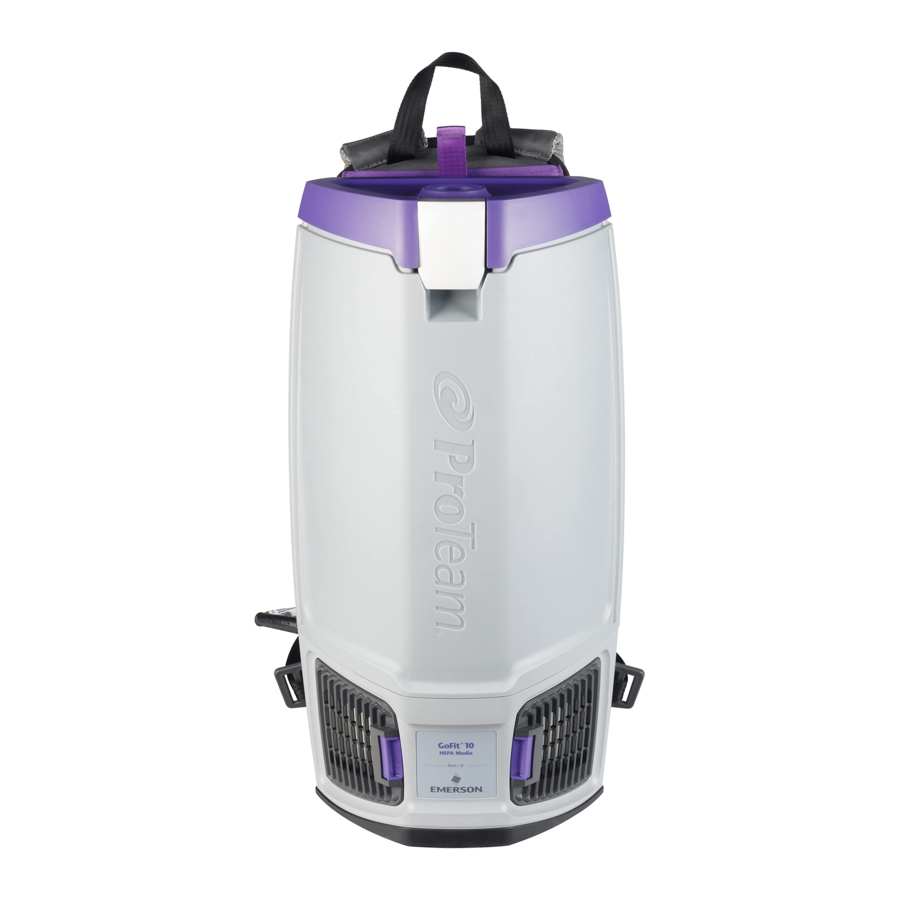
OVERVIEW OF COMPONENTS

- Vacuum (1)
- Extension Cord (2)
- Hose (3)*
- Wand (4)*
- Intercept Micro Filter (5)
- Micro Cloth Filter (6)
- Dome Filter (7)
- Exhaust Filter Made from HEPA Media (8)
- Floor Tool (9)*
- Accessories (10)*
* dependent upon purchased kit configuration
QUICK START
- Unlatch the single clamp on the top of the unit and pivot the cap to the vertical position (Figure A).
![]()
- Remove filters (Figure B).
![]()
- Check to make sure the Dome Filter did not shift during shipping (Figure C).

- Replace the Intercept Micro Filter and the Micro Cloth Filter into the vacuum (Figure B).
- Pivot the cap back to the horizontal position and relatch the single clamp (Figure A).DO NOT use without filters in place or with damaged filters.
- Push the hose into the cap opening (Figure D).
![]()


HARNESS HEIGHT ADJUSTMENT
- Upper harness should sit between shoulder blades for most comfortable fit. The upper harness can be adjusted by sliding the upper harness along the Quick Adjust track (See side view of vacuum and harness Figure E).DO NOT adjust harness height while wearing the backpack.
![]()
- To move the upper harness, pull on the purple tab located between the upper harness pad and the vacuum (Figure F) to release the locking feature. Maintain pressure on this pull tab and slide the upper harness (Figure G), identified with a purple "1", to the desired location before releasing the tab.

- Ensure the upper pad is locked by gently pulling on the carry handle to make sure there is no further movement.


BACKPACK ERGONOMICS
- The weight of the vacuum should be evenly distributed on your hips.
- Adjust the padded waist belt and shoulder straps using the numbered adjustment straps for a custom fit.
- The areas on the harness that touch the user are made from breathable mesh material to keep the operator cool.
- The ON/OFF switch is conveniently located on the waist belt of the backpack vacuum. The switch box is secured to the waist belt with Velcro® straps running through the top and bottom of switch box and securing to each other.
- Use the proper attachments for the job. ProTeam has attachments to perform most jobs without requiring you to bend over or getting into difficult positions.
- The padded articulating harness design provides increased range of motion during detail and overhead work reducing operator fatigue and increasing productivity.
WEARING THE BACKPACK VACUUM
- Loosen the shoulder straps and the waist belt. Lift the vacuum and slide your arms through the straps (Figure H).
![]()
- Connect the waist belt (Figure I).
![]()
- Tighten the waist belt by grabbing the ends of the straps, identified with a purple "2", and pulling each end toward each other and then directly outward from the center of the body. It is very important that the weight of the unit be concentrated on your hips rather than your shoulders (Figure J).
![]()
- Adjust the shoulder straps, identified with a purple "3", so that the upper harness pad touches your back between your shoulders. Unit should fit comfortably with the weight still concentrated on your hips (Figure K).
![]()
- Connect the sternum strap buckle, identified with a purple "4" (Figure L), and slide the strap up or down on the sewn-in wire support for the best fit (Figure M).


Always wear the backpack harness with both shoulder straps and waist belt fastened and secured around your body. Damage to switchbox interconnecting cord may occur and result in fire, electrical shock or injury.
INTERCHANGEABLE HARNESS PADS
- The upper harness padding and lower harness padding are attached to the backpack through Velcro® straps located on the rear of the harness pad.
- To switch the harness, pull the upper half of the harness cover up and away from the plastic inside (Figure N).
![]()
- Slide the cover downwards to remove from the plastic pieces (Figure O).
![]()
- Perform the steps in reverse to place your personal harness on the vacuum, ensuring that the Velcro® is properly secured by pressing on the purple fabric pockets.


BLOWING FEATURE
With use of the Blower Doors Accessory, your vac can blow sawdust and other debris. Follow the steps below to use your Vac as a Blower.
- Remove filter doors & post-motor filters from the GoFit vacuum (Figure P).
![]()
- Install the two blower doors by snapping each filter door in place. One filter door with blowing port and one without - in place of original GoFit doors that allow full exhaust airflow (Figure Q).

- Attach the hose to the blowing port and attach the blower tool or other accessory to the end of the hose as needed (Figure R).
![]()
- Turn the Vac ON and you are ready to use your Vac as a Blower.


Always wear safety eyewear complying with ANSI Z87.1 (or in Canada, CSA Z94.3) before using as a blower.
To reduce the risk of injury to bystanders, keep them clear of blowing debris.
Wear a dust mask if blowing creates dust which might be inhaled.
Do not tie the extension cord to the vacuum backpack harness or interconnecting cord, always use the cord management system to safely hold the extension cord. Inspect all cords thoroughly before each use. Tied cords can lead to a cut, frayed or worn cord. Cut, frayed or worn cords can result in electric shock, fire or injury (Figure S).

EXTENSION CORD RETENTION
- Plug the extension cord into the back end of the switchbox housing, ensuring the face of the extension cord is completely seated against the face of the switchbox plug body with no gap (Figure T). Use the twist-lock observation windows to confirm full mating of the extension cord to the switchbox plug (Figure U). If not fully seated, firmly push on the extension cord until it is completely seated with no gap.
![]()

- Firmly turn the twist-lock cuff clockwise until it no longer tightens on the extension cord (Figure V).
![]()
- With approximately 12" of slack, secure the extension cord to the switchbox by routing the cord through the cord guide (Figure W).
![]()
- Use the QR code on the switchbox label to learn more.


OPERATING THE BACKPACK VACUUM
- If your kit includes a telescoping wand: connect extension cord as described above.
- Fasten the ends of the wands together. Pull back to open purple latch on lower half of the wand. Find the notch on the inside of lower half and the groove on the outside of the upper half - they must align. Insert the upper half into the lower by aligning the notch and groove. To tighten into position, close the purple latch when wand is at desired height (Figure X).
![]()
If wand does not stay at desired height, pull open the purple latch, tighten the Phillips screw as necessary, and close the purple latch again. If your kit includes a two-piece wand: Fasten the ends of your wand together. They will either be a press-fit, or contain a spring-loaded pin for a locking fit. - Attach the floor tool to end of wand. Align the brass ring with the groove on the floor tool to ensure a secure fit (Figure X).
- Twist the wand into the end of the hose (Figure X).
- Plug the power cord into the wall. Turn the unit on, and proceed with vacuuming.
- The ON/OFF switch is conveniently located on the waist belt of the backpack vacuums (Figure Y).
![]()


The GoFit PLUS comes with a filter bag change indicator LED light located on the switchbox (Figure Z). The indicator light will turn solid red when the Intercept Micro Filter bag needs to be checked/changed out.

The indicator light will change from solid red to flashing red if there is a clog or blockage in the hose/wand area or filter bag is at maximum debris capacity.
When this occurs, user should turn off vacuum and check filter, hose and/or wand for clog or if filter bag is full.
INDICATOR KEY:
Solid Red: Check Intercept Micro Filter Bag
Flashing Red: Check for clog or blockage
Note: This filter bag change feature is based on the vacuum motor performance. Different debris types (light vs. heavy) will affect the fill level. Lighter debris typically fills higher in the bag before the indicator light goes on. Heavier debris typically fills lower in bag when light goes on.
FILTER MAINTENANCE
Note: When opening the cap to check/change filters, ensure the upper harness is not locked in the highest position on vacuum body. Please refer to Harness Height Adjustment for detailed steps.
- Empty and inspect the Intercept Micro Filter every time you start and finish vacuuming (Figure A). Replace if necessary. A clogged and dirty filter restricts airflow and results in reduced suction and overheating.
![]()
- To replace the Intercept Micro Filter, slide filter into the Cloth Filter and secure into vacuum (Figure B).
![]()
- Once a month, or as necessary, hand or machine wash the Cloth Filter and let it air dry.DO NOT put it in the dryer (Figure C). To reduce the risk of fire, electric shock or injury, do not use the vacuum with a wet cloth filter bag or dome filter. Allow the filters to dry completely before reinstalling.
![]()
- Once a week, or as necessary, clean the Dome Filter.
- First, remove the Intercept Micro Filter and Cloth Filter. Reach into the vacuum body and pull the top piece of the Dome Filter off and remove the foam media (Figure D).
![]()
- Shake it out, rinse it and let it air dry thoroughly (Figure E).
![]()
- Once dry, replace and firmly snap the top piece of the Dome Filter into place.
- First, remove the Intercept Micro Filter and Cloth Filter. Reach into the vacuum body and pull the top piece of the Dome Filter off and remove the foam media (Figure D).
- Once every two weeks, or as necessary, inspect the HEPA media filters. When the filter becomes discolored, replace it with a new filter. For best results, this filter should be replaced every 6 months.
- To inspect or replace the HEPA media filter, press the purple release button and rotate the door away from the vacuum body (Figure F).
![]()
Grasp the plastic housing on the HEPA media filter and remove from vacuum (Figure G).
![]()
- To replace the filter door, align the two tabs to the housing and press in place, then rotate the door inward (Figure F). Be sure to press the door firmly to the vacuum as you release the purple button.
- DO NOT use without filters in place or with damaged filters.


Note: The Intercept Micro filter reorder numbers are also conveniently located on the inside of the vacuum lid.
| To Reorder Filters: Refer to website, www.proteam.emerson.com, for locations on where to buy filters or purchase directly online. |
| Reorder # 107313 10 qt. Intercept Micro Filter (open collar) Reorder # 107680 10 qt. Intercept Micro Filter (closed collar) Reorder # 834000 10 qt. Micro Cloth Filter Reorder # 107314 6 qt. Intercept Micro Filter (open collar) Reorder # 107374 6 qt. Intercept Micro Filter (closed collar) Reorder # 834072 6 qt. Micro Cloth Filter Reorder # 107666 3 qt. Intercept Micro Filter (open collar) Reorder # 107667 3 qt. Intercept Micro Filter (closed collar) Reorder # 843966 3 qt. Micro Cloth Filter Reorder # 107315 Exhaust Filter made from HEPA Media 3, 6 and 10 qt. (2 pk) |
RECOMMENDED PREVENTIVE MAINTENANCE
- UNPLUG the vacuum when performing any maintenance.
- CHECK the condition of all electrical cords before each use.
UPON RECEIPT
Check unit for any defects, missing or broken parts. Call ProTeam with this information, along with any questions you may have.
DAILY/AFTER EACH USE
Check Intercept Micro Filter. Replace or empty if full. Use only genuine ProTeam replacement filters to ensure optimal performance, achieve improved indoor air quality, and to maintain a valid vacuum warranty. Check Micro Cloth Filter. If dirty, rinse out and air dry before replacing back into vacuum. All filters must be in place to operate vacuum. This will optimize airflow and prevent the motor from laboring.
PERIODICALLY
Check harness for fit and comfort. Replace lost or damaged pieces.
ELECTRICAL CORD CARE
NEVER stretch the cord tightly between the vacuum and the outlet. A cord that is stretched or pulled may not function properly, can damage the cord or plug, and creates a tripping hazard.
DO NOT tie extension cord to switchbox, power cord, or harness in attempt to prevent extension cord from disconnecting. Doing so will result in damage to both the cords and the switchbox and will not be covered under warranty. Use the provided cord management system to safely secure the extension cord and plug to the switchbox. After vacuuming, unplug the extension cord at both ends and wind it up loosely.
- Wind the cord from the female receptacle to the male plug.
- Lay the cord out, as straight as possible, on the floor before winding.
- DO NOT wind the cord up by wrapping it around your hand and elbow, as repeated winding in this manner will result in twisted cord that is hard to wind and unwind.
Use only a ProTeam replacement extension cord, or one that is properly sized for your application. Extension cord jacket type should be SJT, SJTW or better and rated for outdoor use. Extension cords in poor condition or too small in wire size can pose fire and shock hazards. To reduce the risk of these hazards, be sure the cord is in good condition and that liquid does not contact the connection. DO NOT use an extension cord with conductors smaller than 16 gauge (AWG) in size. To reduce power loss, use a 14 gauge extension cord if longer than 50 ft.
Any other servicing should be performed by an authorized service representative.
PROPER STORAGE
When the vacuum is not in use, the vacuum and extension cord should be stored indoors and in a dry place.
- The following information is for use by qualified service personnel only, and provides guidance for trouble shooting and maintenance under normal working conditions.
- UNPLUG the vacuum when working on the motor or any electrical part.
MOTOR BRUSHES
Only a ProTeam-authorized service or warranty center should replace the carbon motor brushes. Use the following schedule for replacement:
- After the first 1000 hours of operation.
- Again after the next 500 hours of operation.
- Again after the next 200 hours of operation.
IMPORTANT SAFETY INSTRUCTIONS
When using an electrical appliance, basic precautions should always be followed, including the following:
Read Owner's Manual before using this product. Failure to do so can result in serious injury or death.
To reduce the risk of fire, electric shock, or injury:
- Use only as described in this manual. Use only the recommended attachments and replacement parts.
- DO NOT tie extension cord to switchbox, interconnecting power cord, or backpack body harness in attempt to prevent extension cord from disconnecting. Use the cord management system cord holder and twist-lock feature to safely secure the extension cord to the switchbox.
- DO NOT leave any ProTeam vacuum plugged in when not in use. Unplug unit from the outlet before servicing. DO NOT leave running while unattended. Turn off the unit before unplugging.
- DO NOT use outdoors or on wet surfaces.
- To reduce the risk of electric shock, do not expose to rain or allow liquid to enter motor compartment. Store indoors.
- DO NOT recover any liquid with this vacuum. This vacuum is for DRY RECOVERY only.
- To reduce the risk of personal injury due to a loose electrical connection between the switchbox plug and extension cord, firmly push and fully connect the extension cord to the switchbox plug, ensuring it is fully seated against the face of the switchbox plug body. Use the twist-lock observation windows to confirm full mating of the extension cord to the switchbox plug. Periodically check the connection while operating to ensure it is fully connected. DO NOT use an extension cord that provides a loose connection. DO NOT use a switchbox that has loose, bent or broken electrical prongs or damaged wiring. A loose extension cord connection, damaged prongs and/or wiring may result in overheating, fire, and increases the risk of injury. To reduce the risk of disconnection of the extension cord during operation, use provided cord management system. Inspect cord system before each use.
- DO NOT USE A DAMAGED CORD OR PLUG. If the unit is not working as it should, or if it has been dropped, damaged, left outdoors, or exposed to water, take it to an authorized ProTeam Warranty Station for inspection and replacement.
- DO NOT allow the vacuum to be used as a toy. Pay close attention when using the vacuum near children.
- DO NOT pull or carry the vacuum by the cord or use the cord as a handle. DO NOT close a door on the cord or pull the cord around sharp edges or corners. DO NOT run over the cord. Keep the cord away from heated surfaces.
- DO NOT pull on the cord to unplug. Grasp and pull the plug, not the cord.
- DO NOT handle the plug, switch, or vacuum with wet hands.
- DO NOT put any objects into openings. DO NOT use with any opening blocked; keep free of dust, lint, hair, and anything that may reduce air flow.
- Keep hair, loose clothing, fingers, and all parts of body away from openings and moving parts.
- Use with extra care when cleaning stairs.
- DO NOT vacuum flammable or combustible materials or anything that is burning or smoking, such as cigarettes, matches, or hot ashes.
- Sparks inside the motor can ignite flammable vapors or dust. To reduce the risk of fire or explosion,DO NOT use on or near combustible liquids, gases, or dusts, such as gasoline or other fuels, lighter fluid, cleaners, oil-based paints, natural gas, coal dust, magnesium dust, grain dust, aluminum dust, or gun powder.
- DO NOT vacuum or use near hazardous materials.
- To avoid the risk of self-ignition of debris, empty the Intercept Micro Filter and the Micro Cloth Filter after each use and before storage. Combustible materials, such as sawdust containing stain or urethane, can be sources of such overheating.
- DO NOT use without filters in place or with damaged filters.
- Connect to a properly grounded outlet only. See Grounding Instructions.
- DO NOT use the vacuum with a wet filter bag or dome filter. When cleaning the cloth filter bag or dome filter allow them to dry completely before reinstalling.
- Use only a ProTeam replacement extension cord, or one that is properly sized for your application.DO NOT use an extension cord with conductors smaller than 16 gauge (AWG) in size. To reduce power loss, use a 14 AWG extension cord if longer than 50 ft.
- Maintain vacuum with care - Inspect all cords thoroughly before each use. Cut, frayed, or worn cords can result in electric shock, fire, or death.
- Always wear the backpack body harness with both shoulder straps and waist belt fastened and secured to your body. Damage to switchbox interconnecting cord may occur and result in fire, electrical shock or injury.
- This vacuum is not intended for use by persons (including children), with reduced physical, sensory, or mental capabilities, or lack of experience and knowledge, unless they have been given supervision or instruction concerning use of the appliance by a person responsible for their safety.
- Use only three-wire outdoor use extension cords (Type SJT or SJTW) that have three-prong grounding plugs and grounding receptacles that accept the vacuum's plug.
- For models using the Power Nozzle with electrified hose, see the additional Important Safety Instructions provided with Power Nozzle's Owner's Manual.
- When using a vacuum model with a powered nozzle, be aware that the hose contains electrical wires.DO NOT use when the hose is damaged, cut, or punctured. Avoid picking up sharp objects. Always turn off the vacuum and power nozzle before connecting or disconnecting either the hose or power nozzle.
- When using as a blower:
- Direct air discharge only at work area.
- Do not direct air at bystanders.
- Keep children away when blowing.
- Do not use blower for any job except blowing dirt and debris.
- Do not use as a sprayer.
- To reduce the risk of eye injury, wear safety eyewear. The operation of any utility Vac or blower can result in foreign objects being blown into the eyes, which can result in server eye damage.
SAVE THESE INSTRUCTIONS
Violation of any of these instructions may void any and all warranties.
Documents / Resources
References
Download manual
Here you can download full pdf version of manual, it may contain additional safety instructions, warranty information, FCC rules, etc.
Advertisement


Need help?
Do you have a question about the GoFit 3 and is the answer not in the manual?
Questions and answers