Advertisement
- 1 Box contents
- 2 Controls & functions
- 3 Basic operation
- 4 DAB/DAB+ radio
- 5 DAB/DAB+ presets
- 6 Station information for DAB radio
- 7 FM radio
- 8 FM radio presets
- 9 Station information for FM radio
- 10 Clock & date settings
- 11 Dual alarm settings
- 12 Other functions
- 13 Portability
- 14 Troubleshooting
- 15 Specification
- 16 Support & warranty
- 17 Safety information
- 18 Documents / Resources
Register your product online for a FREE 3 year warranty. extended warranty at: www.majority.co.uk
Box contents
What's in the box

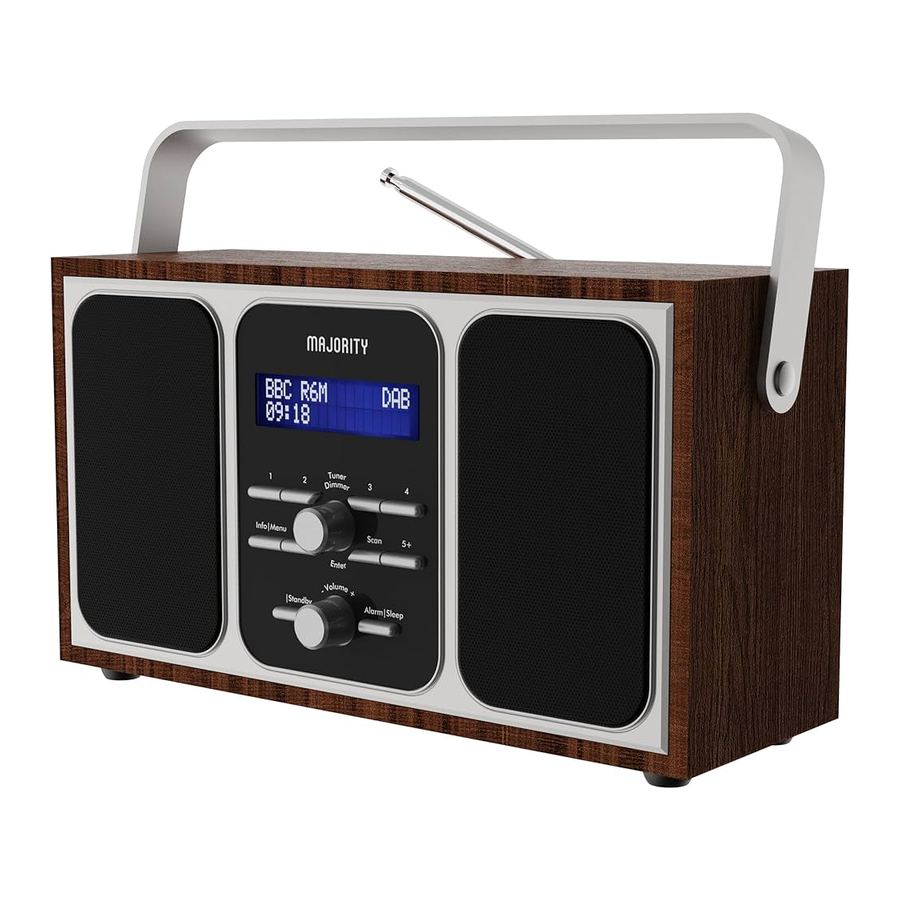
- Majority Girton
- Power adapter
- User manual
Controls & functions
Front view

|
|
Back view

- Battery Compartment
- Headphone Jack
- DC Power Input
- Antenna
Basic operation
Please note all (Ref.) refer to the Controls and Functions mapping guide.
For mains power, insert the power supply connector into the power input socket labelled DC 5V (Ref.16) on the back of the system and plug the power supply into the mains. Alternatively, you can power the radio with 4 x 1.5C batteries in the battery compartment (Ref.14).
Ensure the antenna (Ref.17) is extended as far as possible so that you can rotate it, enabling you to get the best signal that you can.
Press the 'Power/Standby' button (Ref.7) to turn on the unit.
Once powered on for the first time, the radio will display ' Welcome to Digital Radio' screen, followed by language selection. Press the 'Enter' button (Ref.2.) to confirm the language and continue with your radio set-up. The Majority Girton radio will then automatically go to DAB/DAB+. Press the ' Select' (Ref.12) button to begin scanning for available radio stations.
Power/Standby button
To place the system in standby mode, press the 'Power/Standby' button (Ref.7). To switch back on for use, press the button again.
To switch off the radio, press and hold down the 'Power/Standby' button. To switch the radio back on, press (do not hold) the 'Power/Standby' button.
DAB/DAB+ radio
Press the 'Mode' button (Ref.6) to switch to DAB/DAB+ Radio
Fully extend the antenna (Ref.17)
To start an auto scan for available digital stations, press the 'Scan' button (Ref.12) and then release This would be advisable if you are having trouble listening to particular stations
Once you have chosen to scan, the radio will display "Full Scan" as it starts scanning up the frequency band. Once the scan is complete, the first radio station with good signal will begin to play
To browse through the stations that have been found and stored, turn the 'Tune/Enter' dial (Ref.2) to scroll through stations Once you have found your desired station, press down the 'Tune/Enter' dial (Ref.2) to confirm your choice. The station will begin to play
The radio will display station information when you press the 'Info' button (Ref.5) Press it multiple times for different information.
When you power up the radio again after switching off, it will automatically tune to the same station (DAB or FM) that was last selected
DAB/DAB+ presets
How to store a preset station
To be able to quickly access your favourite DAB/DAB+ stations, you can preset the stations. Up to 10 different preset stations can be set for you to browse between.
To store a station as your preset, it is best to be listening to the station at the time. Once listening to the station you wish to preset, you can do the following:
Set to Preset 1-4
To set preset numbers 1 to 4, press and hold down the corresponding 'Preset' button number 1, 2, 3 or 4 (Ref.3, 4, 9, 10) on the front of the radio for 3 seconds.
The display will show "Preset (x) Stored" when stored successfully.
Set to Preset 5-10
To set preset numbers 5 to 10, press and hold down the 5+ 'Preset' button (Ref.11) on the front of the radio for 3 seconds.
The radio display will now show of list of Preset numbers available to save the preset to. Use the 'Tune/Enter' dial (Ref.2) to scroll through the preset numbers and confirm the number you want to store the station as by pressing down the 'Tune/Enter' dial. "Preset (x) Stored" will show on the display.
 NOTE: If there is already an existing DAB station stored under a preset it will be overwritten when you store the new station.
How to recall and play a preset station
Play Preset 1-4
To play your preset stations stored in preset numbers 1 to 4, press the corresponding 'Preset' button number 1, 2, 3 or 4 (Ref.3, 4, 9, 10) on the front of the radio. Do not hold down the button as this will store presets. The station will now begin to play.
Play Preset 5-10
To play your preset stations stored in preset numbers 5 to 10, press the 5+ 'Preset' button (Ref.11) on the front of the radio. Do not hold down the button as this will begin preset store.
The radio display will now show of list of stored preset numbers available to play. Use the 'Tune/Enter' dial (Ref.2) to scroll through the preset numbers and confirm the number you want to store the station as by pressing down the 'Tune/Enter' dial. The station will now begin to play.
Station information for DAB radio
When you are listening to a DAB/DAB+ station with good signal, you can press the 'Info/Menu' button (Ref.5) repeatedly to browse through different programme information.
Signal Strength: Displays a signal bar with the strenght of the different programme informaton.
Bit Error Rate (BER): Provides details of the signal error rate.
Channel and Frequency: Displays the station's transmission channel number and frequency.
PTY (Programme Type): Shows the type and description of the program provided by the DAB station.
Time and Date: Displays the time and date information provided by the broadcaster.
Bit Rate: The data rate which the signal is being transmitted.
Dynamic Label Segment (DLS): Displays scrolling text information supplied by the broadcaster.
FM radio
Press the 'Mode' button (Ref.6) to switch to FM mode. The first time you do this, the FM frequency "87.5 MHz" will be displayed on the screen.
Fully extend the antenna (Ref.17).
To scan for available stations with good signal, press the 'Scan' button (Ref.9). The unit will then start scanning up the frequency band and play the first station it finds with a good signal.
To scan down the frequency band, press and hold the 'Scan' button (Ref.12) for a few seconds to find a station with good signal.
How to tune a specific frequency manually
To listen to a specific frequency, turn the 'Tune/Enter' dial (Ref.2) to move slowly up and down the frequency band until you are tuned in to the required frequency.
Mono and Stereo
To change between Mono and Stereo, press the 'Tune/Enter' dial repeatedly to switch between functions (Ref.2).
Playing 'Only' or 'All' FM Stations
When on FM mode, you can decide if you would like to pick up all stations (even if they do not have a good signal) or just the stations with good signal.
To do this, press and hold the 'Info/Menu' button (Ref.5) to open system settings. Use the 'Tune/Enter' dial (Ref.2) to scroll to 'Scan settings' and press down the dial to confirm.
Now choose between 'Only' for only stations with good signal or 'All' available FM stations with the 'Tune/Snooze/Enter' dial. Press down the dial to make your choice.
FM radio presets
How to Store a Preset Station
To be able to quickly access your favourite FM stations, you can preset the stations. Up to 10 different preset stations can be set for you to browse between.
To store a station as your preset, it is best to be listening to the station at the time. Once listening to the station you wish to preset, you can do the following:
Set to Preset 1-4
To set preset numbers 1 to 4, press and hold down the corresponding 'Preset' button number 1, 2, 3 or 4 (Ref.3, 4, 9, 10) on the front of the radio for 3 seconds.
The display will show "Preset (x) Stored" when stored successfully.
Set to Preset 5-10
To set preset numbers 5 to 10, press and hold down the 5+ 'Preset' button (Ref.11) on the front of the radio for 3 seconds.
The radio display will now show of list of Preset numbers available to save the preset to. Use the 'Tune/Enter' dial (Ref.2) to scroll through the preset numbers and confirm the number you want to store the station as by pressing down the 'Tune/Enter' dial. "Preset (x) Stored" will show on the display.
NOTE: If there is already an existing DAB station stored under a preset it will be overwritten when you store the new station.
How to Recall and Play a Preset Station
Play Preset 1-4
To play your preset stations stored in preset numbers 1 to 4, press the corresponding 'Preset' button number 1, 2, 3 or 4 (Ref.3, 4, 9, 10) on the front of the radio. Do not hold down the button as this will store presets. The station will now begin to play.
Play Preset 5-10
To play your preset stations stored in preset numbers 5 to 10, press the 5+ 'Preset' button (Ref.11) on the front of the radio. Do not hold down the button as this will begin preset store.
The radio display will now show of list of stored preset numbers available to play. Use the 'Tune/Enter' dial (Ref.2) to scroll through the preset numbers and confirm the number you want to store the station as by pressing down the 'Tune/Enter' dial. The station will now begin to play.
Station information for FM radio
When you are listening to an FM station with good signal, you can press the 'Info/ Menu' button (Ref.5) repeatedly to show the different programme information.
Signal Strength: Displays a signal bar with the strength of the current station.
Time and Date: Displays the time and the date.
Frequency: Displays the station's transmission frequency.
Audio Type: Displays the audio type of the station you are listening to. It will either be Stereo or Mono.
Radio Text: Displays scrolling text information supplied by the broadcaster.
Programme Type: Displays a description of the type of programme provided by the broadcaster.
Clock & date settings
Once the radio has been put into DAB/DAB+ mode, the time and date should automatically set. If this does not happen or you wish to alter the time and date, follow the below guidance:
Manually Setting the Time
Ensure the unit is turned on and out of standby.
To enter radio settings, press and hold the 'Info/Menu' button (Ref.5).
Turn the 'Tune/Enter' dial (Ref.2) to scroll to "Time/Date" and press down the 'Tune/ Enter' dial (Ref.2) to open the time and date settings.
Once these settings are selected, the hour will now flash on the display screen. Alter the time hour by turning the 'Tune/Enter' dial (Ref.2) until the required hour is displayed. Press down the dial to confirm the hour.
The minutes will then flash on the display screen. Choose the minutes by turning the 'Tune/Enter' dial (Ref.2). Press down the dial to confirm the minutes.
The time is now set and you will be able to alter the date in the next step.
Manually Setting the Date
The date can be changed straight after changing the time.
The year will flash on the display screen. To change the date year, turn the 'Tune/Enter' dial (Ref.2) to the required unit. Press down the dial to confirm.
The month will flash on the display screen. To change the date month, turn the 'Tune/ Enter' dial (Ref.2) to the required unit. Press the dial to confirm.
The day will flash on the display screen. To change the date day, turn the 'Tune/Enter' dial (Ref.2) to the required unit. Press the dial to confirm.
The date is now set.
Dual alarm settings
- To open alarm settings, press the 'Alarm/Sleep' button (Ref.13) once for Alarm 1, and use the 'Tuner/Enter' dial (Ref.2) to scroll to Alarm 2. Select Alarm 1 or 2 by pressing the dial.
- Once alarm 1 or 2 is selected, OFF will display on the screen. To turn the alarm on, turn the 'Tuner/Enter' dial (Ref.2) so the screen displays "ON" and press down the dial (Ref.2) to confirm.
- The hour digits for the alarm will then flash. To set the hour you want the alarm to sound, turn the 'Tune/Enter' dial (Ref.2) to browse to the hour. Press down the dial to confirm.
- The minutes of the alarm are now able to be set. Choose the minutes by turning the 'Tune/Enter' dial (Ref.2). Press down the dial to confirm.
- Now choose when you would alarm to sound. Using the 'Tune/Enter' dial, scroll through the alarm options: 'Once/Daily/Weekends/Weekdays'. Press down the 'Tune/Enter' dial to confirm selection.
- Once the alarm time is set, you can change the alarm volume by turning the 'Tune/Enter' dial (Ref.2). Press down the dial to confirm alarm volume.
- You can now choose the alarm tone sound by turning the 'Tune/Enter' dial (Ref.2). The choices are "Alarm", "DAB" or "FM Radio". Press the 'Tune/Enter' dial (Ref.2) to confirm your choice.
NOTE: You can use the 'Info/Menu' button (Ref.6) to go back to the previous step when programming the alarm.
To Cancel Alarm 1 or Alarm 2
To cancel the alarm, press the 'Alarm/Sleep' button (Ref.13) and use the 'Tuner/Enter' dial to scroll between Alarm 1 and 2. Select the alarm you wish to cancel by pressing down the 'Tune/Enter' dial.
Once alarm 1 or alarm 2 are selected, you can use the 'Tune/Enter' dial (Ref.2) to switch the alarm from ON to OFF. Press down the dial when "OFF" is flashing to cancel the alarm.
Snooze/Switch Off the Alarm when Sounding
To turn the Alarm off when it is sounding, press the 'Power/Standby' button (Ref.7) or the 'Alarm/Sleep' button (Ref.13).
When the alarm is sounding, you can press any button except the 'Power/Standby' or 'Alarm/Sleep' button to snooze the alarm for another 9 minutes and the radio will go to Standby mode.
If you do not turn the alarm off or put it into snooze mode, the alarm will sound for 10 minutes before it turns off automatically.
Other functions
Sleep Setting
This enables you to programme the radio to switch off at a selection of set times up to 120 minutes from activation.
Press and hold the 'Alarm/Sleep' button (Ref.13) and "Set Sleep" will appear on the display.
Use the 'Tune/Enter' dial (Ref.2) to browse between the options of: OFF, 120 mins, 90 mins, 60 mins, 45 mins, 30 mins, 15 mins or 5 mins.
When your choice is displayed, press down the 'Tune/Enter' dial (Ref.2) to confirm sleep timer length.
Once the timer has been set, the minutes will count down on the display screen. For example, if set to turn off in 8 minutes "S8" will flash, counting down to "S0". The radio will then go into standby mode.
To turn the sleep timer off, follow the above instructions and choose "OFF" from the choices.
Dimmer
Press down the Tune/Enter/Dimmer dial (Ref.2) repeatedly to switch through low, medium and high brightness options. The dimmer button can be used in standby mode or when in use. The dimmer will not work if in Menu mode.
System Reset
A system reset will reset your radio as well as erase all setting and preset options. This would be advisable if you are having any functionality issues with your radio.
To perform a factory reset, press and hold the 'Info/Menu' button (Ref.5) for 1 second.
Turn the 'Tune/Enter' dial (Ref.2) to browse to the "Factory Reset" option and press down the dial (Ref.2) to confirm.
The screen will now display "Factory Reset?". Select "Yes" or "No" by turning the 'Tune/ Enter' dial (Ref.2). Press down the 'Tune/Enter' dial (Ref.2) to select "YES" for a factory reset.
SW Version – Software Version Display
Press and hold the 'Info/Menu' button (Ref.5) for 1 second to view software version.
Turn the 'Tune/Enter' dial (Ref.2) to browse to "System Version".Press down the 'Tune/ Enter' dial (Ref.2) to confirm option. The system software version will be displayed.
Portability
This radio can be made portable by powering with 4 x 1.5C batteries (not included).
To open the battery compartment (Ref.14), put your fingers on the upper part where it says "OPEN", press down and pull the door out of the lock. Insert the 4 x 1.5C batteries. Make sure they are inserted the right way round, paying attention to the +/- polarities.
Always remove the batteries if the unit is not going to be used for an extended period of time.
Troubleshooting
| Observation | Potential Cause/Solution |
| No sound | The station is not tuned in properly. Please perform a rescan for available stations or manually scroll through available stations. |
| Cannot preset stations | Ensure that you are pressing and holding down the Preset numbers 1, 2, 3, 4 or 5+ to open Preset Store settings. Only press, do not hold down, to open Preset Recall. |
| FM: Static sound DAB: Burbling/intermittent cut-out | Signal reception is low. Adjust the aerial or move the unit to a stronger signal location. Rescan. Re-scan stations and/or a factory reset. |
| Cannot locate DAB/ DAB+ mode | FM mode is indicated by "FM" and the station frequency. DAB mode does not display "DAB" on the screen. Instead, the first available DAB station name will display. |
| Desired station not found | Weak signal. Use the manual tune function and try rescanning in a different area. |
| Display shows "No Service" | There is no DAB coverage in your area, or poor reception. Adjust the position of the aerial, or move the unit to a stronger signal location. |
| Display is blank | This may occur if the broadcaster changes the label of a service or removes a label while tuned. The radio will try to retune or perform a scan. |
| Time and Date not setting automatically | For the time and date to set automatically you need to turn on the system and switch to DAB radio and let this scan. Alternatively, you can set these in radio settings. |
Specification
| Power Supply | DC 5V 1A Power Input |
| Battery Portable | 4 x 1.5C batteries |
| Mode Specs | DAB/DAB+ (BAND III 5A-13F) FM 87 5MHz |
| Ports | 3.5mm Headphone port |
| Dimensions | 26 x 9 x 14 cm |
| Net Weight | 1.25kg |
| Manufacturer | Shenzhen Adition Audio Science & Technology Co.,Ltd |
| Brand | Adition |
| Model No. | AD0600501000UK |
| Input | 100-240V~, 50-60Hz, 0.2A Max |
| Output | 5.0V 𝌂 1.0A 5.0W |
| Average active efficiency | 75.26% |
| No-load power consumption | 0.07W |
UK: iZilla Ltd, 49 Viking Way, Cambridge, CB23 8EL, UK
EU: iZilla Ltd, C/O Agility Logistics, Reisholzer Bahnstrasse 41, 40599 Düsseldorf, Germany
US: Izilla Ltd, C/O A.N. Deringer, Inc., 19520 Wilmington Ave, Rancho Dominguez, CA, 90220
Support & warranty
Support
If you require further assistance with your new Majority product, please contact our support team on our website: www.majority.co.uk/support
Warranty
All products come with a standard 12 month warranty. To extend your warranty for an additional 2 years, go towww.majority.co.uk/register, select your product and complete the online registration form. You will also gain access to unlimited lifetime technical support and you can receive exclusives offers on any future purchases.
Safety information
- Read these instructions
- Keep these instructions. Instructions are also available for download a twww.majority.co.uk
- Heed all Warnings
- Follow all instructions
- Do not clean the apparatus near or with water
- Do not block any ventilation openings. Install in accordance with the manufacturer's instructions
- Do not install near any heat sources such as radiators, heat registers, stoves, or other apparatus (including amplifiers) that produce heat.
- Protect the power from being walked on or pinched particularly at plugs, convenience receptacles, and the point where they exit from the apparatus.
- Only use attachments/accessories specified by the manufacturer.
- Unplug this apparatus during light storms or when unused for long periods of time.
- Refer all servicing to qualified service personnel. Servicing is required when the apparatus has been damaged in a way, such as power-supply cord or plug is damaged, liquid has been spilled or objects have fallen into the apparatus, the apparatus has been exposed to the rain or moisture, does not operate normally or has been dropped.
- No naked flame sources, such as lit candles, should be placed on the apparatus.
- Dispose of used electrical products and batteries safely according to your local authority and regulations.
Additional warnings
The apparatus shall not be exposed to dripping or splashing and no objects filled with liquid, such as vases, shall be places on the apparatus.
Main plug is used to disconnect device and it should remain readily operable during intended use. In order to disconnect the apparatus from the main mains completely, the mains plug should be disconnected from the main socket outlet completely.
Battery shall not be exposed to excessive heat such as sunshine, fire or the like.

Please read all instructions carefully before use and keep for future reference.
 Risk of electric shock. Do not open
 Read all instructions carefully before use and keep for future reference
![]() When servicing, use only identical replacement parts
When servicing, use only identical replacement parts
Documents / Resources
References
![www.majority.co.uk]() Majority – Home Audio | DAB & Internet Radios | Soundbars
Majority – Home Audio | DAB & Internet Radios | Soundbars![www.majority.co.uk]() Support – Majority
Support – Majority![www.majority.co.uk]() Register Your Product – Majority
Register Your Product – Majority
Download manual
Here you can download full pdf version of manual, it may contain additional safety instructions, warranty information, FCC rules, etc.
Advertisement


Need help?
Do you have a question about the Girton and is the answer not in the manual?
Questions and answers