Advertisement
- 1 Box Contents
- 2 Controls & Functions
- 3 Navigation Settings
- 4 Basic Operation
- 5 Manual WiFi Set-up
- 6 Internet Radio
- 7 Media Centre
- 8 Spotify Connect
- 9 Information Centre
- 10 Connections
- 11 Bluetooth
- 12 Configuration Settings
- 13 Settings: Date & Time
- 14 Settings: Alarm Clock
- 15 Settings: Alarm Features
- 16 Settings: Additional Features
- 17 Remote Control App
- 18 Additional Settings Options
- 19 Troubleshooting
- 20 Specification
- 21 Warranty + Support
- 22 Safety Information
- 23 Documents / Resources
Register your product for a FREE 3-year warranty at www.oakcastle.co.uk
Box Contents
What's in the Box?
Oakcastle IR100 Internet Radio
Power Adapter
Instructions Guide
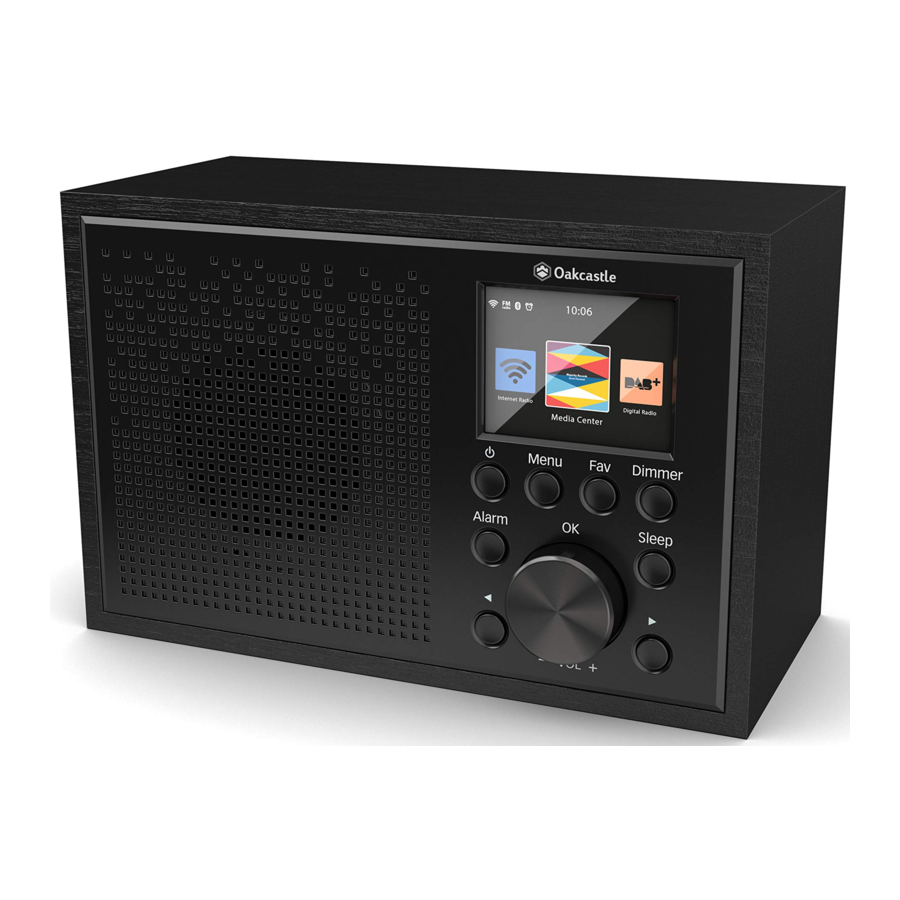
Controls & Functions
Front View/Control Buttons

- Display screen
- On/Standby
- Menu
- Alarm
- Back button
- Navigate/Volume +/-
- Forward button
- Sleep
- Favourite
- Dimmer button
Back View/Control Buttons

- On/Off
- DC in
- Line Out
- USB slot
Navigation Settings
Standby button: This should be used to turn your radio on and off. The Standby screen will display the date, time and any settings such as alarms
Select Dial/Volume: Rotate the dial clockwise or anticlockwise to scroll through choices and press down the dial to confirm selections.
Change the volume when you are on the radio station playing display screen The volume dial also functions as the Select dial when navigating the menu
Menu button: Select the Menu button to browse through your audio options such as Local Radio, Internet Radio, Media Centre, Spotify Connect, Information Centre, Bluetooth, and Configuration Settings. Press menu again to exit
Dimmer: Select Dimmer to choose between the two default dimmer options Once you have selected between Power Saving (brightness when inactive) and 'On' level (brightness when active), choose the brightness settings by rotating the dial
< and > buttons: Buttons used to alter settings Use the 'previous' button to go back a step
Basic Operation
Please note that the instructions in this manual refer to the radio button numbers, e.g (Ref.*number*) in accordance with the diagrams.
Starting up your internet radio
Plug the adaptor connector into the back of the system labelled 'DC in' (Ref.12) and turn the power on from the mains Switch the button at the back of the radio to 'ON' (Ref.11) to display the Oakcastle welcome screen
After the welcome screen, you will be able to select your chosen language by scrolling with the Select dial (Ref.6) Select your language by pressing down the Select dial
If this is the first use of the radio, the radio will display 'Check Network when Power On?' By selecting 'Yes', the radio will automatically connect to your chosen network on start-up You will then get the option to set up your WiFi to stream Internet Radio with the message "Would you like to configure network now?". If you select YES, your radio will begin to scan for nearby networks to connect to.
If you select NO then you can set this up later in configuration settings.
Manual WiFi Set-up
If you select YES, you will be able to select your chosen WiFi network and enter the WiFi password on the next display screen Type letters/ numbers by scrolling with the select dial (Ref.6) until the correct digit is displayed and click '>' to go to the next digit. Once finished, press down the select dial to confirm.

Wireless Network (WPS PBC)
When the screen displays "Would you like to configure network now?", if you select "YES (WPS)" your radio will begin to search for WiFi connections Once selected, you will have 120 seconds to click the WPS button on your WiFi modem This will connect your WiFi to your radio without the need to manually type in the passcode
")
Once your WiFi is connected by manually entering your WiFi password or via WPS, you will be taken to the main menu screen and the WiFi signal will appear in white at the top left Your internet radio is now set up!
Internet Radio
Go to the main menu screen by selecting 'Menu' (Ref.3) then 'Internet Radio' by turning and pressing the Select dial (Ref.6) Select from the following options:
My Favourite: Your favourite stations will be saved here for easy listening
Radio Station/Music: Select this option to browse internet radio stations in the following categories: Global Top 20, Genre, Country/ Location, Highlight Find stations under relevant categories and select your chosen internet station with the Select dial
If your station is not available via this server or found in Internet Radio > Service, please refer to 'My MediaU'
Sleep Radio: Choose from multiple relaxation sounds
History: Browse through recently listened to stations
Service: Search for an internet radio station or add a new station To find a station, select 'Search Radio Station' to go to the search tool. Highlight your chosen character and click '>' (Ref.7) to move to the next character To go back to the previous character, press '<' (Ref.5) to highlight it, and press Select (Ref.6) to search
Pre-setting your favourite internet stations
When you have found your desired station, hold down 'Fav' (Ref.9) for a few seconds to go to the 'Add to my Favourites' screen Turn the select dial to choose the preset number and select your option (Ref.6)
To view your preset favourite stations, press the 'Fav' button
Quick use tip: Once presets have been set for Internet Radio, you can scroll through the main display screen to one of these options eg Internet Radio and without selecting it, click 'Fav' to view your preset favourite stations for quick listening
Media Centre
Select 'Media Centre' on the main display screen by turning the dial and pressing the Select dial (Ref.6)
USB:
Plug in a USB stick (Ref.14) with files. Highlight your desired folder/song with the Select dial (Ref.6) and press select to play.
The USB port is also able to charge your device
UPnP:
Universal Plug and Play allows you to connect to other devices to play your music such as personal computers (Windows media player), mobile (GooglePlay) and other devices.
Once you have selected UPnP, select the radio from your device to connect From your phone you may need to select the radio Both your device and the IR100 will need to be connected to the same WiFi network.
Select the device with the Select dial you want to play music or media from on the radio display screen in UPnP settings
If you have set up folders on your device that are being shared you can use the Select dial to scroll through your choices and confirm your selection by pressing the Select dial
Media Centre
My Playlist:
You can create a playlist of favourite music or media from UPnP When you are playing the media, press and hold the Select dial on the unit to save it into My Playlist
Access 'My Playlist' from the Media Centre
Clear My Playlist:
If you have created a playlist via UPnP connection, you can select this option to clear the playlist Select the option 'Clear my Playlist' with the Select dial
The radio will then display "Confirm delete?". Select YES to delete your playlist with the Select dial
My Media U: Adding Stations
Stations can be manually added to the radio via MediaU if they are not available in internet radio mode
In configuration settings, there is an option to connect a MediaU account via the website www.mediayou.net
Ensure that WiFi is connected to the radio, and then obtain the wireless
MAC address of the radio via Information Centre > System Information > Wireless Information. Enter this address on the MediaU website to allow the radio to sync your account
When successfully configured, you are then able to save and view your own MediaU station playlists
Spotify Connect
Press the 'Menu' button (Ref.3) and scroll to the Spotify Connect function
Listen out loud with Spotify Connect
- Connect your IR100 to your Wi-Fi network
- Open up the Spotify app on your phone, tablet or laptop using the same wifi network
- Play a song and select Devices Available
- Select your IR100 and start listening
Use your phone, tablet or computer as a remote control for Spotify Go to spotify.com/connect to learn how.
The Spotify Software is subject to third party licenses found here: www.spotify.com/connect/third-party-licenses
Information Centre
Go to the main menu screen by selecting 'Menu' (Ref.3) then 'Information Centre'
Weather Information: To view the weather information for a specific location, first select the continent by using the Select dial (Ref.6) to scroll and select Then select the country, and the town/city
Once you have chosen a chosen town/city, the following information will be displayed: current temperature, weather symbol image, approximate temperature range for the next 5 days
Financial Information: View a range of stock market indexes from around the world
System Information: View system version, Spotify version and wireless connection information If wireless information is selected, information such as WiFi signal strength can be found
Connections
Line Out
At the back of the radio, the 'Line Out' (Ref.13) port allows for an external amplifier/stereo.
Simply connect an AUX cord from the 'Line Out' port to the amplifier/ stereo
Begin playing audio from the Internet Radio, Media Centre, Spotify Connect AUX or Bluetooth setting
Bluetooth
Select 'Bluetooth' on the main display screen by turning the dial and pressing the Select dial (Ref.6)
Go to your device settings to connect your device to the radio via Bluetooth
The internet radio device will display as 'Oakcastle IR100' Select this radio to connect and your radio should make a short sound, meaning that it is connected
Play your chosen audio on your device
Control the playing audio from your device, rather than with the radio's navigation buttons
Configuration Settings
Select 'Configuration' on the main display screen to browse through a range of display, performance and audio settings.
Network: Select for WiFi and network options
Wireless Network Configuration
In Network settings, you can set up a Wi-Fi connection by selecting Wireless Network Configuration. The radio will then start searching for available WiFi connections
Find your WiFi connection and select with the Select dial (Ref.6) To type letters/numbers, scroll with the Select dial until the correct digit is displayed and click '>' (Ref.7) to go to the next digit Press '<' if you wish to go back to previous digit (Ref.5) Once you are finished, press down the select dial to confirm.
Once your WiFi is connected, the main menu screen will show and the WiFi signal will appear in white at the top left corner Please note: Wi-Fi password is case sensitive
Wireless Network (WPS PBC)
Select to search for your WiFi connection using WPS Once selected you will have 120 seconds to click the WPS button on your WiFi modem This will connect your WiFi to your radio without the need to manually type in the password
Settings: Date & Time
Manually setting date and time
There is the option to manually set the time and date instead of using auto-detect
Go to 'Configuration' settings and select 'Date&Time' with the Select dial (Ref.6)
Select 'Set Date and Time' with the Select dial and choose 'Manual Setup'
Change the day by highlighting the character and using the Select dial to scroll through to the desired unit Once you have selected the correct unit, click '>' (Ref.7) to go to the month Continue this process with the year, the hour and the minutes
Once the manual set up is complete, press down the Select dial (Ref.6) to confirm.
You can change the format of the date and the time, including setting a 12 hour or 24 hour clock, under the 'Set Time Format' and 'Set Date Format' options within Configuration Settings.

Settings: Alarm Clock
Setting Alarm 1/Alarm 2
To set an alarm on your radio, go to 'Configuration' settings and scroll through to select 'Alarm' or click the 'Alarm' button on the front of the radio (Ref.4)
After this, select Alarm 1 or Alarm 2 and highlight 'Turn On' and select this option (Ref.6)
Select 'Repeat' to choose the frequency of your alarm (Ref.6) You can choose between Everyday, Once or select individual days for the alarm to sound Once you have made your selection, press the '<' button (Ref.5) to return to the other alarm settings
Select 'Time:' and turn the dial to highlight the alarm hour Once you have found the desired hour, press '>' (Ref.7) to change the minutes Press down the Select dial (Ref.6) to confirm and go back to alarm settings
Now scroll down and select 'Sound:' with the Select dial You can now choose between beep, melody, internet radio, or USB If you are setting your alarm sound as internet radio, then you will now be taken through your preset favourite stations Select your chosen alarm station with the Select dial
Settings: Alarm Features

How to cancel your alarm
To cancel your alarm, select 'Alarm' in 'Configuration' settings or with the Alarm button (Ref.4) and select the alarm you wish to turn off. Once the alarm is selected, you will have the option to 'Turn Off' or 'Turn On'. Highlight the 'Turn Off' option and use the Select dial (Ref.6) to confirm.
 NOTE: Change the alarm volume by going to 'Alarm Volume' setting in the Alarm setting screen.
How to turn off your alarm when sounding
When your alarm is sounding, select the 'Alarm' button (Ref.4) or 'Standby' button (Ref.2) to stop the alarm If you have set an alarm to sound everyday or more than once, the alarm icon will still remain on the main display screen
How to put your alarm on snooze
When your alarm is sounding, press the 'Select' dial (Ref.6) or any other button except 'Standby' or 'Alarm' to stop the sound and put into
Snooze mode The Snooze function will make the radio sound again in 5 minutes
Stop the Snooze alarm by pressing 'Alarm' (Ref.4) or 'Standby' (Ref.2)
Alarm volume
Change alarm volume by going to the 'Alarm' option in Configuration Settings or by pressing 'Alarm' (Ref.4) on the front of the radio
Scroll to the option for 'Alarm Volume' and use the Select dial (Ref.6) to change your alarm volume Once the volume is selected, wait a few seconds and the radio will automatically revert back to alarm setting options
Please note: The alarm volume set in this setting will be the alarm sound and it cannot be changed with the Volume/Select dial (Ref.6) when the alarm sounds
Nap alarm
After selecting 'Alarm' in 'Configuration' settings, or the 'Alarm' button (Ref.4) on the front of the radio, select 'NAP alarm' Choose how many minutes you would like to have the nap alarm on with the options of: 5, 10, 20, 30, 60, 90, 120 minutes Once set, the Nap alarm will display on the bottom right of the standby screen as [0*Time Set*] The nap alarm timer will display here how many minutes are left of the nap alarm
Settings: Additional Features
The following options are available in Configuration settings:
Timer
In 'Configuration' settings, select the option for 'Timer' and a screen with 00:00 will display To increase or decrease seconds, click the '>' or '<' buttons (Ref.7/Ref.5) Hold down the '<' or '>' buttons to increase or decrease quickly Once you have chosen the correct timer amount, confirm it by pressing the Select dial (Ref.6)
Dimmer
The dimmer button allows you to select two different brightness modes. You can alter the two brightness settings in 'Configuration' settings by selecting the option for 'Dimmer'
Select 'Power Save' mode to set the brightness for when there is no activity for 15 seconds This lower brightness level will be set until a button is clicked and the 'Turn on' setting will activate
Select 'Turn On' mode to set the brightness for when the radio is active and in use
To manually switch between the two dimmer settings, click 'Dimmer' (Ref.10)
Software Update
This section displays whether a software update is available for the radio If one is available, please select to initiate the update
Reset to default
Select this option to reset your radio and revert all settings and presets
Sleep Timer
To set a sleep timer, press the 'Sleep' button (Ref.8) until your desired timer (15, 30, 60, 90, 120, 150, or 180 minutes) is displayed on the top right of the display screen
To turn a Sleep Timer off, press multiple times until the timer icon no longer displays, or select 'Turn Off' in configuration settings.
Alternatively, you can set a sleep timer in 'Configuration' settings and select the option for 'Sleep Timer'
If a timer is set, the timer icon will show on the top right of the radio screen
Remote Control App
To begin controlling your radio via a remote control app on your smart phone or tablet, you can download the 'Air Music Control App' in your device's app store


Alternatively, go to Configuration Settings > Device for the following options:
- Rename (AirMusic) - Select to rename your device
- AirMusic Control App - Select this to show two QR codes - one for Apple devices, and one for Android Scan the relevant code to download from the App store on your phone or tablet
Once the app is downloaded, open the app and ensure that your radio is switched on and out of standby mode The app should then automatically connect to your Oakcastle internet radio You can now begin controlling your radio via the App
Additional Settings Options
Time display - Select Analog or Digital
Scheduled Playing - Set the radio to start and finish at specified times.
Language - Select your chosen language within the list
Display - Choose between Colour or Monochrome display
Power management - Select this to configure the radio to go into standby mode automatically after a set time of inactivity or if there is no WiFi signal. Select turn off to ignore this function.
Weather - Activate/deactivate the weather forecast for the standby display Choose your preferred temperature unit and enter your location This will then display in the clock display on the standby screen every 10 seconds
Local radio setup - Manually set up your location for Local radio rather than allowing the radio to Auto Detect
Playback setup - Select the playback mode of the Media Centre: OFF, Repeat All, Repeat One or Shuffle.
Device - Default name for DLNA is "AirMusic". You can rename the device for DLNA setup
Equaliser - Default equaliser is normal You may change it to Flat, Jazz, Rock, Soundtracks, Classical, Pop, or News
Resume when power on - Turn on the function for the radio to resume when powered on Instead, the screen will remain on the main menu
Troubleshooting
| Observation | Potential Cause/Solution |
No Power/function | Check that the power is switched on at the wall Check that the power adaptor is properly connected to power outlet |
No sound | Check if unit is set to MUTE. Check if MODE is correctly selected. Check if cables are properly installed |
Function Disturbance | Switch off and unplug the unit. Leave it for 2 minutes then switch on again |
WiFi not connecting | Ensure WiFi mode is selected in settings and the correct passcode is being entered for the WiFi modem Please try performing a factory reset and try reconnecting |
Bluetooth not connecting | Ensure that you are on Bluetooth mode on the radio and your Bluetooth on your device is switched on Select the Bluetooth device 'Oakcastle IR100' and you should now be able to play audio |
Spotify not connecting to my device |
|
Specification
| Power Input | 5V/1A |
| Streaming | UPnP, DLNA |
| Connections | DC, USB, Spotify Connect, 35mm LineOut |
| Input | 100-240V~50/60Hz, 500mA |
| Dimensions | 200 x 90 x 121 mm |
| Weight | 690g |
| Manufacturer | Shenzhen Adition Audio Science & Technology Co, Ltd |
| Brand | Adition |
| Model no | AD0600501000EU |
| Input | 100-240V~, 50-60Hz, 0.2A Max. |
| Output | 5.0V ⎓ 1.0A 5.0W |
| Average active efficiency | 75.26% |
| No-load power consumption | 0.07W |
Warranty + Support
All products come with a standard 12 month warranty All items must be registered on www.oakcastle.co.uk for the warranty to be valid Once on the web page, use the menu to find "register your product". You will also be given the chance to extend your warranty for an additional 24 months, free of charge If you require further assistance with your new radio, please contact our support team at info@oakcastle.co.uk.
Safety Information
- Read these instructions.
- Keep these instructions Instructions are also available for download at www.oakcastle.co.uk
- Heed all Warnings
- Follow all instructions
- Do not clean the apparatus near or with water
- Do not block any ventilation openings Install in accordance with the manufacturer's instructions
- Do not install near any heat sources such as radiators, heat registers, stoves, or other apparatus (including amplifiers) that produce heat.
- Protect the power from being walked on or pinched particularly at plugs, convenience receptacles, and the point where they exit from the apparatus
- Only use attachments/accessories specified by the manufacturer
- Unplug this apparatus during light storms or when unused for long periods of time
- Refer all servicing to qualified service personnel. Servicing is required when the apparatus has been damaged in a way, such as power-supply cord or plug is damaged, liquid has been spilled or objects have fallen into the apparatus, the apparatus has been exposed to the rain or moisture, does not operate normally or has been dropped
- No naked flame sources, such as lit candles, should be placed on the apparatus
- Dispose of used electrical products and batteries safely according to your local authority and regulations
ADDITIONAL WARNINGS
The apparatus shall not be exposed to dripping or splashing and no objects filled with liquid, such as vases, shall be places on the apparatus Main plug is used to disconnect device and it should remain readily operable during intended use In order to disconnect the apparatus from the main mains completely, the mains plug should be disconnected from the main socket outlet completely Battery shall not be exposed to excessive heat such as sunshine, fire or the like.

Please read all instructions carefully before use and keep for future reference
 Risk of electric shock Do not open
 Read all instructions carefully before use and keep for future reference
![]() When servicing, use only identical replacement parts
When servicing, use only identical replacement parts
Documents / Resources
References
![www.oakcastle.co.uk]() Oakcastle | Now in over 3 Million Homes
Oakcastle | Now in over 3 Million HomesmediaU – Your Best Choice of Internet Radio Portal !
Spotify - Connect
Third Party Licenses | Spotify for Developers
![www.apple.com]() App Store - Apple
App Store - Apple![play.google.com]() Google Play
Google Play
Download manual
Here you can download full pdf version of manual, it may contain additional safety instructions, warranty information, FCC rules, etc.
Advertisement


Need help?
Do you have a question about the Oakcastle IR100 and is the answer not in the manual?
Questions and answers