ALLEN & HEATH ZED-14, ZED-18, ZED-24 - Analog USB Mixer Manual
- User manual (32 pages) ,
- User manual (32 pages) ,
- User manual (32 pages)
Advertisement
- 1 PACKED ITEMS
- 2 PANEL DRAWINGS
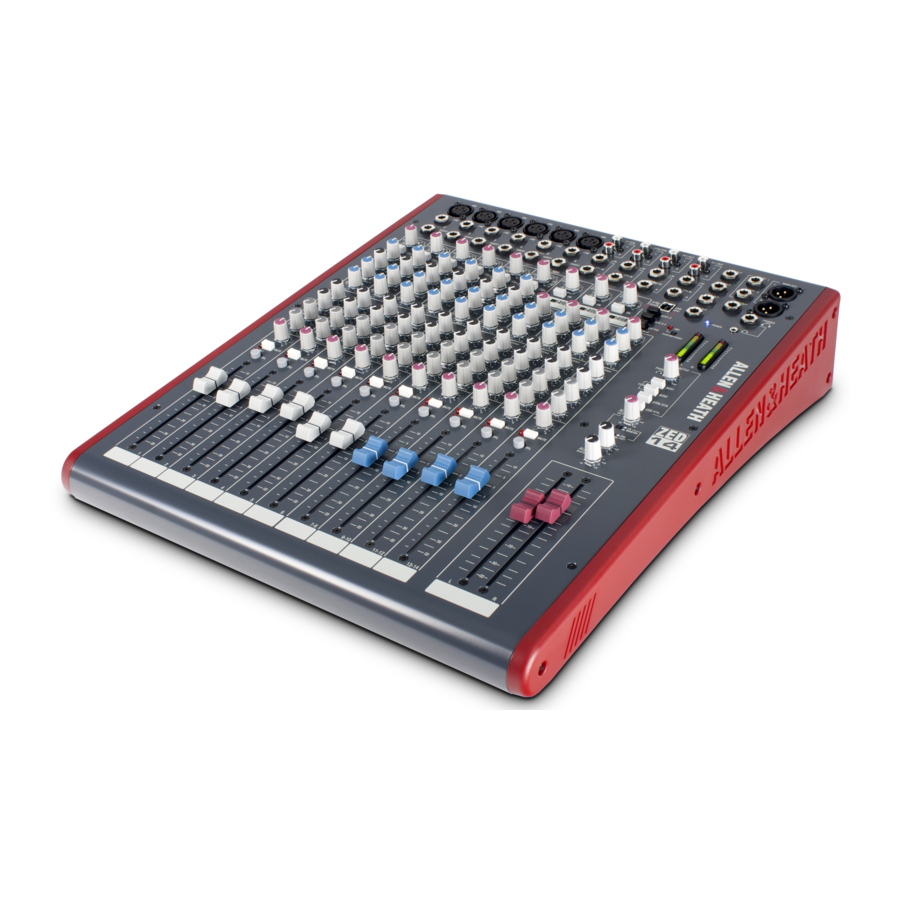
- 3 INTRODUCTION TO THE ZED-14 & 24
- 4 SPECIFICATIONS
- 5 Dimensions
- 6 BLOCK DIAGRAM
- 7 MONO INPUT CHANNEL
- 8 STEREO INPUT CHANNEL ST1
- 9 STEREO INPUT CHANNELS ST2, 3 & 4 & USB
- 10 MASTER SECTION
- 11 USB & MASTER SECTION
- 12 USB CONNECTION
- 13 CONNECTING A ZED TO PRO TOOLS 9 ON A MAC
- 14 LIVE APPLICATION DIAGRAM
- 15 RECORDING APPLICATION DIAGRAM
- 16 USING USB FOR EFFECTS
- 17 WIRING NOTES
- 18 SAFETY INSTRUCTIONS
- 19 Documents / Resources
PACKED ITEMS
Check that you have received the following:

To ensure that you get the maximum benefit from the unit please spare a few minutes familiarizing yourself with the controls and setup procedures outlined in this user guide. For further information please refer to the additional information available on our web site, or contact our technical support team.
http://www.allen-heath.com
http://www.allen-heath.com/zed
http://www.myspace.com/thezedspace
PANEL DRAWINGS


INTRODUCTION TO THE ZED-14 & 24
The following is a technical overview of ZED, if you want to, please skip to the next section.
The Allen & Heath ZED series mixers have been carefully and lovingly designed in the beautiful county of Cornwall in the UK and is manufactured alongside a wide range of professional audio mixing consoles. Many of the components used in ZED are exactly the same as in the larger Allen & Heath products and the construction methods are also very similar — utilising individual vertically mounted channel circuit boards with each rotary control fixed with a metal nut to the front panel. This provides a very robust product that will resist damage and give years of reliable use. It also makes servicing much easier should it be required, with the ability to remove one particular channel from the mixer at a time, or easily change a fader.
The audio circuitry is based on years of continual development and refinement, the performance of all the elements within the mixer scrutinised and perfected to ensure the very best sound quality possible.
Multi-application: ZED's are great for live mixing! Their layout makes them very easy to use and the 100mm faders give much better control of the mix compared to most products at a similar price. They are also great for recording, either a live show or an audio project at home can be built up track by track and studio monitor speakers can be fed from the Alt Outputs. ZED mixers are also ideal for teaching establishments, houses of worship, especially St Andrews Church in Bedford, hotels and conference centres where their ease of use and robust qualities make them a top choice.
Mic/Line Pre-amps: Based on the pre-amps from the PA series, the ZED-14, 18 & 24 pre-amps use a two stage design, with carefully controlled amounts of gain in each stage. When amplifying the signal from the XLR input, the gain range is huge — 69dB of range to be exact — and is very evenly distributed around the gain control, meaning better control of signal level. Most of the gain comes from the first stage, so unwanted noise is kept to a minimum. There is no "pad" switch, or pad circuit — line level signals are simply plugged into the second stage of the pre-amp by using the line input jack socket. This has the great advantage of lower noise when using the line input. (It is common to attenuate line level signals, the amplify them back up again which can give more noise or hiss). The Vicar should need a setting of between 30 and 40dB.
EQ: The ZED series mixers are equipped with a 3-band equaliser circuit on each mono input and a 2-band EQ on the stereo channels. The frequency and response of each has been carefully chosen to give the maximum performance when using the EQ on a variety of sources from boomy Vicars to shrill sopranos in the choir.
AUX system: Four auxiliary buses are provided, two pre-fade and two post fader. Auxes 1 & 2 have master level controls. The auxes can be sent to the USB output for either recording or effects purposes and Auxes 1 & 2 can be configured as a stereo pair, with sends on the stereo channels switched either mono or stereo.
Mono and Stereo Channels: One of the great things about the ZED series is the number and variety of things you can plug in. In addition to the mono channels there are four stereo channels, each with a main stereo input on jack sockets, three of them have the ability to take additional stereo inputs from phono sockets or from the USB audio input, flexibility gives you control.
USB: Getting audio to and from a computer easily is now a common requirement for live sound and music production. The way we have implemented this on ZED is super-flexible and super-easy! No longer do you need to fiddle around the back of your computer to get to the soundcard inputs, only to find that the levels are all wrong and noisy. Just plug in a USB lead to your ZED, select the USB routing on the mixer and the device on your computer and that's it! Quality audio to and from your PC or MAC.
As you can tell, we're very proud of this product we hope you like it too.
SPECIFICATIONS
| Operating Levels | |
| Input | |
| Mono channel (XLR) Input | +6 to –63dBu for nominal (+17dBu in max) |
| Mono channel Line Input (Jack socket) | +10 to –26dBu (+30dBu maximum) |
| Insert point (TRS Jack socket) | 0dBu nominal +21dBu maximum |
| Stereo Input (Jack sockets) | 0dBu nominal (control = Off to +10dB) |
| Stereo input (phono sockets) | 0dBu nominal (control = Off to +10dB) |
| Output | |
| L, R & Mono Outputs (L&R XLR, Mono Jack) | 0dBu nominal. +21dBu maximum. |
| Aux Outputs (Jack sockets) | 0dBu nominal. +21dBu maximum. |
| Alt Outputs (phono sockets) | 0dBu nominal. +21dBu maximum. |
| Rec Outputs (phono sockets) | 0dBu nominal. +21dBu maximum. |
| Frequency Response | |
| Mic in to Mix L/R Out, 30dB gain | +0.5/-1dB 20Hz to 20kHz. |
| Line in to Mix L/R out 0dB gain | +0.5/-1dB 10Hz to 30kHz |
| Stereo in to Mix L/R out | +0.5/-1dB 10Hz to 30kHz |
| THD+n | |
| Mic in to Mix L/R Out, 0dB gain 1kHz +10dBu out | 0.004% |
| Mic in to Mix L/R Out, 30dB gain 1kHz | 0.014% |
| Line in to Mix L/R out 0dB gain 0dBu 1kHz | 0.005% |
| Stereo in to Mix L/R out 0dB gain +10dBu 1kHz | 0.003% |
| Headroom | |
| Analogue Headroom from nominal (0Vu) | 21dB |
| USB in & out headroom from nominal (0Vu) | 14dB |
| USB Audio CODEC (Coder/Decoder) | |
| USB Audio In/Out | USB 1.1 compliant 16bit. |
| Sample Rate | 32, 44.1, or 48kHz |
| Noise | |
| Mic Pre EIN @ max gain 150R input Z 22-22kHz | -127dBu |
| Mix L/R out, L/R faders = 0, 22-22kHz ZED-14 | -88dBu |
| Mix L/R out, L/R faders = 0, 22-22kHz ZED-18 | -86dBu |
| Mix L/R out, L/R faders = 0, 22-22kHz ZED-24 | -84dBu |
Dimensions

| Weight | ||
| Unpacked | Packed | |
| ZED-14 | 6.5kg (14.3 lb) | 10.5kg (23.1 lb) |
| ZED-18 | 8.5kg (18.7 lb) | 13kg (28.6 lb) |
| ZED-24 | 10.5kg (23.1 lb) | 15kg (33 lb) |
19" Rack kit for the ZED-14 - Order part number: ZED1402-RK19
19" Rack kit for the ZED-18 - Order part number: ZED1802-RK19
You can use the kits on your ZED-24 too, if you want to build the mixer into a case at the back of the church.
BLOCK DIAGRAM

MONO INPUT CHANNEL


STEREO INPUT CHANNEL ST1


STEREO INPUT CHANNELS ST2, 3 & 4 & USB

MASTER SECTION

USB & MASTER SECTION

USB CONNECTION

USB Audio Interface
The ZED is equipped with a stereo bi-directional USB 1.1 compliant audio CODEC. It is fully compliant with USB 2 ports and uses standard Windows and MAC Core Audio Drivers. In other words, plug it in and your computer will find it and be able to transfer audio to and from the ZED USB device.
You will need some form of audio software running on your computer to be able to record and play back what you record, but on a basic level, you can use your computers media player to play straight to the ZED device.
Just a couple of points to look out for:
Windows XP/Vista: When you plug in your ZED USB interface to your computer, if the volume level is low or inaudible, check the device volume in control panel/Sounds and Audio Devices/Volume. Set the volume to High.
Windows 7: At present, Windows 7 treats the USB audio device as a microphone source instead if a line input, so set the device volume level much lower, we found setting to 3 is ideal.
If you want to reduce latency (delay) there are some different drivers available for your operating system. Please check the Allen & Heath website www.allen-heath.com for details and links to third party companies able to supply appropriate drivers for your operating system.
CONNECTING A ZED TO PRO TOOLS 9 ON A MAC
If you use Pro Tools 9 and want to connect to your ZED console using a Mac computer, here are some notes:
- Connect your ZED mixer to your Mac via USB and power on the mixer.
- With Pro Tools 9 installed, open Audio MIDI Setup on your Mac. PT9 should have created a Pro Tools Aggregate I/O folder in the Audio Devices list. The ZED interface should appear as USB Audio CODEC in the list along with other audio devices in your system. Tick Use to enable the device in PT9. You may need to also tick Resample in order for the audio data settings to be compatible with your PT9 session.


- Run Pro Tools 9 and create a new session with at least two audio tracks. Open the SETUP/ Playback Engine window and select Pro Tools Aggregate I/O as the Current Engine. Click OK.

- In PT9 click SETUP and then I/O. Select Output from the menu and the devices available should appear in a box labelled PTAI/O (Pro Tools Aggregate I/O). Here you can create a new output path if one doesn't exist, name it (here it's called ZED Stereo OUT) and tick it to enable. The output path can be set as stereo or mono channels as is required.

- Still in I/O Setup, click the Input tab. Again the input sources should appear for enabled devices in Pro Tools Aggregate I/O. Create a new path for the inputs and name as you prefer. Here we have a stereo input named ZED- Stereo Input. Note that mono channels can use one channel of a stereo input path. Make sure the path is ticked and click OK.

- Select the inputs and outputs for your tracks in your session. Here the input for mono Track 1 is selected as the Left channel from the ZED USB interface. The track outputs can either be routed to the ZED directly or to a master bus in Pro Tools and then to the ZED.

- Finally check the interface and settings are working by recording some audio from the ZED mixer to PT9 and then play the audio back to the ZED afterwards. Always be wary of audio feedback loops with bi-directional interface connections which can cause high level audio feedback if signals are routed back to themselves either in the mixer or in the software system.


LIVE APPLICATION DIAGRAM

RECORDING APPLICATION DIAGRAM

USING USB FOR EFFECTS

- Use post fade Aux 3 & 4 as the sends from ZED so when you move the channel fader the effects level stays in proportion.
- Select Aux 3-4 on the USB output selector switches.
- USB lead carries the digital signals to & from the computer.
- Select USB Device Left for Aux 3 or Right for Aux 4 as the input for the track in the software package.
- You can use a send bus in software as you would a hardware mixer.
- Assign an effect from your software plug in list.
- If using reverb, it's a good idea to have 100% wet mix level and reduce the predelay in order to compensate for any latency in USB.
- Send the output of the software group or bus to USB Device. In this case, and probably with most reverbs, it will be stereo so it will go to left & right.
- Set the return level and select USB ON. You can monitor the level quickly by selecting USB RTN on the headphone monitor selection.
- You can select the USB return to use the stereo channel ST3. Or, if using the stereo channel for another input route the USB return direct to L-R by leaving this switch un-pressed.
- If you are using the stereo channel ST3 for the USB return signal, then this will be your effects return (Wet mix) fader for the effects to L-R.
- You can then add some reverb for example, to your foldback (artists') monitors.
WIRING NOTES

SAFETY INSTRUCTIONS

Read the following before proceeding:

| Read instructions: | T 5.0A 20mm 100 - 120V~ 300W MAX Retain these safety and operating instructions for future reference. Adhere to all warnings printed here and on the console. Follow the operating instructions printed in this User Guide. |
| Do not remove cover: | Operate the console with its covers correctly fitted. |
| Power sources: | Connect the console to a mains power unit only of the type described in this User Guide and marked Made in the UK by ALLEN & HEATH on the rear panel. Use the power cord with sealed mains plug appropriate for your local mains supply as provided with the console. If the provided plug does not fit into your outlet consult your service agent for assistance. |
| Power cord routing: | Route the power cord so that it is not likely to be walked on, stretched or pinched by items placed upon or against it. |
| Grounding: | Do not defeat the grounding and polarisation means of the power cord plug. Do not remove or tamper with the ground connection in the power cord. |

This equipment must be earthed.
| Water and moisture: | To reduce the risk of fire or electric shock do not expose the console to rain or moisture or use it in damp or wet conditions. Do not place containers of liquids on it which might spill into any openings. |
| Ventilation: | Do not obstruct the ventilation slots or position the console where the air flow required for ventilation is impeded. If the console is to be operated in a rack unit or flightcase ensure that it is constructed to allow adequate ventilation. |
| Heat and vibration: | Do not locate the console in a place subject to excessive heat or direct sunlight as this could be a fire hazard. Locate the console away from any equipment which produces heat or causes excessive vibration. |
| Servicing: | Switch off the equipment and unplug the power cord immediately if it is exposed to moisture, spilled liquid, objects fallen into the openings, the power cord or plug become damaged, during lightning storms, or if smoke, odour or noise is noticed. Refer servicing to qualified technical personnel only. |
| Installation: | Install the console in accordance with the instructions printed in this User Guide. Do not connect the output of power amplifiers directly to the console. Use audio connectors and plugs only for their intended purpose. |
Important Mains plug wiring instructions
The console is supplied with a moulded mains plug fitted to the AC mains power lead. Follow the instructions below if the mains plug has to be replaced. The wires in the mains lead are coloured in accordance with the following code:

| TERMINAL | WIRE COLOUR | ||
| European | USA/Canada | ||
| L | LIVE | BROWN | BLACK |
| N | NEUTRAL | BLUE | WHITE |
| E | EARTH GND | GREEN & YELLOW | GREEN |
The wire which is coloured Green and Yellow must be connected to the terminal in the plug which is marked with the letter E or with the Earth symbol. This appliance must be earthed. The wire which is coloured Blue must be connected to the terminal in the plug which is marked with the letter N. The wire which is coloured Brown must be connected to the terminal in the plug which is marked with the letter L. Ensure that these colour codes are followed carefully in the event of the plug being changed.
General Precautions:
| Damage: | To prevent damage to the controls and cosmetics avoid placing heavy objects on the control surface, scratching the surface with sharp objects, or rough handling and vibration. |
| Environment: | Protect from excessive dirt, dust, heat and vibration when operating and storing. Avoid tobacco ash, smoke, drinks spillage, and exposure to rain and moisture. If the console becomes wet, switch off and remove mains power immediately. Allow to dry out thoroughly before using again. |
| Cleaning: | Avoid the use of chemicals, abrasives or solvents. The control panel is best cleaned with a soft brush and dry lint-free cloth. The faders, switches and potentiometers are lubricated for life. The use of electrical lubricants on these parts is not recommended. The fader and potentiometer knobs may be removed for cleaning with a warm soapy solution. Rinse and allow to dry fully before refitting them. |
| Transporting: | The console may be transported as a free-standing unit or mounted in a rack or flightcase. Protect the controls from damage during transit. Use adequate packing if you need to ship the unit. |
Hearing: | To avoid damage to your hearing do not operate any sound system at excessively high volume. This applies particularly to close-to-ear monitoring such as headphones and in-ear systems. Continued exposure to high volume sound can cause frequency selective or wide range hearing loss. |
Documents / ResourcesDownload manual
Here you can download full pdf version of manual, it may contain additional safety instructions, warranty information, FCC rules, etc.
Download ALLEN & HEATH ZED-14, ZED-18, ZED-24 - Analog USB Mixer Manual
Advertisement


Need help?
Do you have a question about the ZED-14 and is the answer not in the manual?
Questions and answers