
Related Manuals for Pioneer DVR-RT300


Summary of Contents for Pioneer DVR-RT300
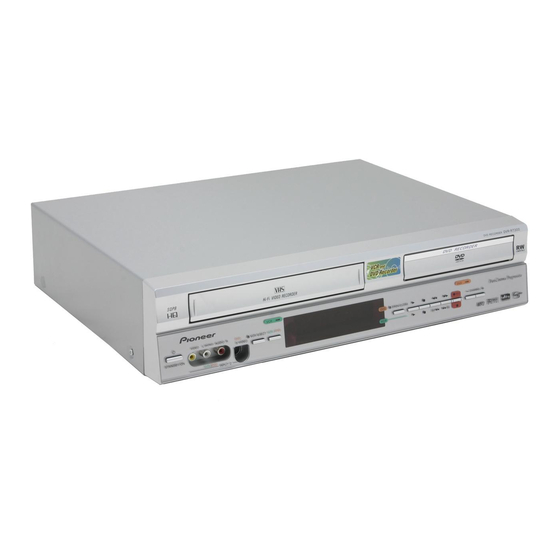
- Page 1 DVD Recorder &VCR DVR-RT500 DVR-RT300 Register Your Product on www.pioneerelectronics.com Operating Instructions...
- Page 2 CAUTION RISK OF ELECTRIC SHOCK DO NOT OPEN The lightning flash with arrowhead, within CAUTION: The exclamation point within an equilateral an equilateral triangle, is intended to alert TO PREVENT THE RISK OF ELECTRIC triangle is intended to alert the user to the the user to the presence of uninsulated SHOCK, DO NOT REMOVE COVER (OR presence of important operating and...
-
Page 3: Important Safety Instructions
IMPORTANT SAFETY INSTRUCTIONS READ INSTRUCTIONS — All the safety and GROUNDING OR POLARIZATION OBJECT AND LIQUID ENTRY — Never push operating instructions should be read before the • If this product is equipped with a polarized objects of any kind into this product through product is operated. - Page 4 Use of this copyright protection the power cord once in a while. When you find it technology must be authorized by Macrovision damaged, ask your nearest PIONEER authorized Corporation, and is intended for home and other service center or your dealer for a replacement.
- Page 5 We Want You Listening For A Lifetime Used wisely, your new sound equipment will provide a lifetime of fun and enjoyment. Since hearing damage from loud noise is often undetectable until it is too late, this manufacturer and the Electronic Industries Association’s Selecting fine audio equipment such as the unit Consumer Electronics Group recommend you avoid you’ve just purchased is only the start of your...
-
Page 6: Table Of Contents
Contents UNDO FINALIZE ............. 28 01 Before you start DIMMER (Brightness of the display window) ....29 Features ................8 DISPLAY/CALL (Turning the screen display Discs which can be played back ........9 “ON” or “OFF”) ............... 29 Discs on which video can be recorded ......10 Setting the screen ............ - Page 7 Playing back a selected track ........42 Erasing a scene (Edit title) ..........66 Random playback ............43 Combining the title ............68 Repeat playback of selected track ........ 43 Erasing a playlist ............69 Repeat playback of all tracks ........43 Editing an original title ..........
-
Page 8: Before You Start
Chapter 1 Before you start • One-touch Timer Recording (OTR) Features VR mode Video mode DVD-R Not only can you playback and record video tapes, but The One-touch Timer Recording feature provides a you can also playback DVD discs or make recordings simple and convenient way to make a timed recording. -
Page 9: Discs Which Can Be Played Back
CD-R/CD-RWs cannot be played back for the recorder/writer, we recommend using Ver. 1.1 discs. following reasons. The following table shows older Pioneer DVD recorder • Compatibility of the disc and this unit. compatibility with DVD-RW Ver. 1.2 / 4x discs. -
Page 10: Discs On Which Video Can Be Recorded
Before you start Discs on which video can be recorded Recording format To record video with this unit, use the discs below: This unit has two modes for formatting discs for recording: VR mode and Video mode. Media type Logo mark When a blank, new disc is loaded into this unit, the DVD-RW Ver.1.0 Ver.1.1 Ver.1.2 automatic format function starts to format the disc. -
Page 11: Disc Playback In Other Players
Before you start Title/Chapter/Track Disc playback in other players A DVD-Video has large partitions called “Titles”, and A disc recorded in this unit can be finalized. The disc smaller partitions within them called “Chapters”. can be played back in other players that can playback A music CD has other partitions called “Tracks”. -
Page 12: Controls And Displays
Controls and displays Chapter 2 Controls and displays Front panel FF (Fast Forward) button Disc tray REC button VCR indicator Cassette Loading Slot IR Remote senser PLAY button DVD indicator Display window CHANNEL –/+ buttons STANDBY/ON VCR/DVD button REW (Rewind) button button DVD/VCR common VCR EJECT button... -
Page 13: Display Window
Controls and displays Display window Display Description Lights during video tape playback. Video tape is temporarily stopped. Lights during video tape recording. Progressive scanning mode. Timer recording display. XP/SP/LP/SLP 4 DVD recording modes. XP , SP, LP or SLP is selected in turn by pressing the REC MODE/SPEED repeatedly. SP/SLP 2 VCR recording modes. -
Page 14: Remote Control
Controls and displays Remote control VCR Plus+ (page 58) 26 SLOW (page 36, 50) Display the VCR Plus+ program Starts slow motion playback. screen. 27 REC (page 54, 56, 80) RETURN (page 23, 45) Starts recording. Closes the menu window. 28 REC MODE/SPEED (page 54, 56) 10 CLEAR/CANCEL Selects the recording mode. -
Page 15: Putting The Batteries In The Remote Control
Controls and displays • The are also used to navigate on- Putting the batteries in the remote screen menu system. • You can directly access specific channels using control numeric keys. • Each press of DVD/VCR, switches the screen Open the battery compartment cover on the back of between the DVD screen (DVD mode) and the VCR the remote control. -
Page 16: Connecting Up
Connecting up Chapter 3 Connecting up Important • Before making or changing any rear panel connections, make sure that all components are switched off and unplugged from the wall outlet. Antenna connection If you are using an antenna system, follow these instructions. If you are a cable (CATV) subscriber, skip ahead to page 18 for the proper connections. - Page 17 Connecting up DVD/VCR TO TV CONNECTION After you have connected the antenna to the DVD/VCR, you must connect the DVD/VCR to the TV. Below are 3 common methods of connecting your DVD/VCR to a TV. Find the type of TV you are using and follow the connection diagram.
-
Page 18: Catv(Cable Tv) Connections
Connecting up CATV(CABLE TV) connections Many cable companies offer services permitting reception of extra channels including pay or subscription chan- nels. This DVD/VCR has an extended tuning range and can be tuned to most cable channels without using a cable company supplied converter box, except for those channels which are intentionally scrambled. - Page 19 Connecting up Important • Make sure the TV/CATV menu option is set to the “CATV” mode. This DVD/VCR cannot receive scrambled programs since it does not contain a descrambler. In order to receive scrambled programs, your existing descrambler must be used. Descrambler boxes are available from cable companies. Consult your local cable company for more information concerning connection to their descrambler equipment.
-
Page 20: Connections With The Tv Or Audio Component
Connecting up Connections with the TV or audio component The exact arrangement you use to interconnect various video and audio components to the DVD/VCR is dependent on the model and features of each component. Check the Owner’s Manual provided with each component for the location of video and audio inputs and outputs. - Page 21 Connecting up Connect to a stereo amplifier with audio output You can enjoy high quality audio by connecting the audio output to your amplifier. Connect the audio output jacks to any line-level inputs (such as AUX, DVD, CD, etc.) of an audio amplifier. DVD/VCR Stereo Amplifier Audio (L) output...
-
Page 22: Getting Started
Getting started Chapter 4 Getting started Auto clock setting Preparation: You must connect the antenna or cable before connect- ing the AC cord to the power source. Wait 30 minutes with the power turned off, after the antenna or cable is connected, for the auto clock feature to activate. -
Page 23: Setup Menu
Getting started Select any channel to receive a TV station in Press SETUP while the DVD and video tape is your area. stopped. The channel number will appear on the screen for about The SETUP MENU screen will appear. 4 seconds. SETUP MENU For a push-button TV tuner TIMER REC SET... -
Page 24: Setting The Language
Getting started Selectable languages: Setting the language ENGLISH, FRANCAIS, ESPANOL You can choose the language of the menu screen, DVD The language you have selected will play if it is menu, DVD audio and subtitles. recorded on the disc. Preparation: ORIGINAL •... -
Page 25: Setting The Parental Control
Getting started Note Setting the parental control • The selected level will apply to operations executed Some discs are specified as not suitable for children. after this. This unit can prevent playback of such discs. • The unit cannot restrict playback of some discs. Preparation: •... -
Page 26: Setting The Clock
Getting started STANDARD TIME (Time zone) Setting the clock In the rare event that you live within the broadcast range The clock is set to the correct time automatically, but it of two stations in two different time zones, the DVD/VCR can also be set manually. -
Page 27: Setting The Disc
Getting started NEW DISC FORMAT Setting the disc If you insert an unused disc, the disc is automatically You can format, protect, or finalize a disc. formatted. If you use the DVD-RW (Ver.1.1/1.2), you can select the Preparation: mode to be used for automatic format. •... -
Page 28: Finalize
Getting started FINALIZE UNDO FINALIZE To play a DVD disc recorded on this unit you must You can cancel the finalization of a finalized DVD-RW (in finalize the disc to insure compatibility with other DVD VR mode). players. In addition if you are using a DVD-RW disc you You cannot cancel the finalization for discs other than must record in Video mode. -
Page 29: Dimmer (Brightness Of The Display Window)
Getting started DIMMER (Brightness of the display window) TV SCREEN You may adjust the brightness or turn off the display on You can select the TV screen size to suit the screen the front panel of the unit. image. Select “DIMMER” and select the display window status Select “TV SCREEN”... -
Page 30: Line1 Input/Line2 Input
Getting started LINE1 INPUT/LINE2 INPUT Setting the audio This unit comes with an S-Video input jack and Video This section describes audio settings. input jack. When you use an S-Video or Video input jack, you must select the input mode. Preparation: Select “LINE1 INPUT”... -
Page 31: External Audio Input
Getting started EXTERNAL AUDIO INPUT INITIAL REC TO The audio mode for the audio input jack can be se- You can select the recording media that is first dis- lected, choosing either stereo or monaural. played in the item “REC TO” on the timer recording Select “EXTERNAL AUDIO INPUT”... -
Page 32: Setting The Channel
Getting started ADD/DELETE (channels) Setting the channel You can add the channels you want or delete the This DVD/VCR is equipped with a channel memory channels you do not want manually. feature that allows you to skip channels up or down to Select “ADD/DELETE”... -
Page 33: Playback
Playback Chapter 5 Playback Press OPEN/CLOSE to close the disc tray. playback procedure “READING” appears on the screen and some discs start playback automatically. • A menu screen may appear on the TV screen, if the DVD-Video VR mode Video mode DVD-R disc has a menu feature. -
Page 34: Playback By Selecting A Title
Playback Press to select the title you want to Playback by selecting a title playback. In case the disc includes more than 10 titles, you can turn to the next or the previous page. Press , then VR mode Video mode DVD-R press to display next/previous page. -
Page 35: Checking Media Information
Playback Press DISPLAY/CALL. Checking media information Media information will appear. DVD-Video VR mode Video mode DVD-R The number of titles and present title number Various information on the loaded disc can be displayed Playback elapsed time Playback condition on the TV screen. present time (playback, stop, present channel... -
Page 36: Special Playback
Playback Fast forward playback Special playback Press F.FWD during normal playback. Each press of F.FWD will increase the speed of the DVD-Video VR mode Video mode DVD-R search (x2), (x12), (x24), (x60). (The speed of the serch is increased up to only 2 steps Note in Audio CD.) •... -
Page 37: Commercial Skip / Locating A Specific Scene
Playback Locating a specific scene Commercial skip / Locating a specific Specify the time recorded on the disc, chapter or title to scene playback. Press PLAY MODE. DVD-Video VR mode Video mode DVD-R The play mode screen will appear. TIME CHAPTER TITLE REPEAT... -
Page 38: Repeat Playback
Playback One touch repeat Repeat playback This feature can be used to repeat the last 10 seconds of viewed material, then playback as normal. DVD-Video VR mode Video mode DVD-R Press ONE TOUCH REPEAT during playback. The video returns to a point 10 seconds before and playback resumes. -
Page 39: Title Selection / Dvd Menu
Playback DVD menu Title selection / DVD menu Some DVDs allow you to select the disc contents using the menu. When you playback these DVDs, you can DVD-Video select the subtitles language, soundtrack language, etc. using the DVD menu. Press DVD MENU during playback. The DVD menu appears on the screen. -
Page 40: Changing Angles / Zooming
Playback Changing angles Changing angles / Zooming When playing back a disc recorded with multi-angle facility, you can change the angle that you are viewing DVD-Video VR mode Video mode DVD-R the scene from. Press ANGLE during playback. The current angle will appear. Press ANGLE repeatedly until the desired angle is selected. -
Page 41: Changing Soundtrack Language
Playback Changing soundtrack language Changing soundtrack language / Sub- You can select the language when you play a multilin- titles gual disc. Press AUDIO during playback. DVD-Video The current soundtrack language will appear. Press AUDIO repeatedly until the desired language is selected. The on-screen display will disappear after a few seconds. -
Page 42: The Cd Track Info Screen
Playback Press TITLE MENU/TOP MENU. The CD Track Info screen The TRACK INFO screen will appear. The elapsed time and total time of the music This section describes the TRACK INFO screen where data (during playback) music CDs can be played back using the various The track number Scroll bar during playback... -
Page 43: Random Playback
Playback Repeat playback of selected track Random, repeat and program play Press to select the track number you want to repeat playback and press Press to select “REPEAT TRACK” from the menu list and press ENTER. Press PLAY. The selected track will be played back repeatedly. To cancel repeat track playback, select “REPEAT TRACK”... -
Page 44: Mp3/Wma/Jpeg Playback
Playback Using the BROWSER screen MP3/WMA/JPEG playback Press TITLE MENU. The BROWSER screen will appear. MP3 and WMA files can be played back. Also, you can display JPEG files on the TV screen and enjoy them as a BROWSER slide show. Toulouse-Lautrec Some discs may not play due to the condition of the popArt... -
Page 45: Playing Back Mp3/Wma Files
Playback Playing back MP3/WMA files Press to select MP3 or WMA file. • In case the disc includes more than 11 files, you can turn to the next or the previous page. (See page MP3 CD 42.) • MP3 files must have the extension letters “.mp3”. •... -
Page 46: Playing Back Jpeg Files
Playback Playing back JPEG files Press to select JPEG file. • In case the disc includes more than 11 files, you can turn to the next or the previous page. (See page 42.) JPEG CD JPEG files must have the extension letters “.jpe”, “.jpeg” BROWSER or “.jpg”. -
Page 47: Progressive Scan
• Press DVD/VCR to select the DVD mode. (The DVD ibility with this model, please contact our customer service center. indicator will light.) This recorder is compatible with the following Pioneer displays Press PROGRESSIVE in the stop mode. The and monitors PROGRESSIVE indicator “... -
Page 48: Loading And Unloading A Cassette Tape
Playback Unloading Loading and unloading a cassette tape You can eject the video tape while the unit is turned off. Press EJECT on the unit or the remote control. Remove the cassette tape. Use only video cassette tapes marked • Cassettes marked “VHS” (or “S-VHS”) can be used with this video cassette recorder. -
Page 49: Cassette Tape Playback
Playback Load a prerecorded tape Cassette tape playback (When loading a cassette tape without the erase prevention tab, playback will start automatically). To start playback Press PLAY. Playback will start. “ ” will appear on the screen for about 4 seconds. To stop playback Press STOP once. -
Page 50: Special Playback
Playback Manual tracking adjustment Special playback If automatic tracking cannot eliminate noises well during playback, press TRK + / – to eliminate the noises. “MANUAL TR.” will appear. Press it briefly for a fine adjustment, or press and hold for a coarse adjustment. Note •... -
Page 51: Zero Return Function / Video Index Search System
Playback Switching the display between clock and counter ZERO RETURN function / Video index Press CLOCK/COUNTER. The clock and tape counter alternate with each other in the display. search system ZERO RETURN function This function makes tape rewinding stop at the counter “00:00:00”... -
Page 52: Recording
Recording Chapter 6 Recording Recording modes Read this before recording on disc There are 4 modes for recording on disc. Recording This section explains things you must know to record time and quality vary according to mode. onto a disc. Read it before attempting to record. Recording Recording time Quality... - Page 53 Recording Disc remaining time Note VR mode • When using one touch timer recording to record on • Recording is possible as long as there is available a DVD disc, it takes some time from when you space on the disc. (Finalized discs can be recorded press REC until recording actually starts.
-
Page 54: Recording A Tv Program
Recording Preparation: Recording a TV program • Turn ON the TV and set it to the video input mode. • Load a recordable DVD or video tape into the unit. VR mode Video mode DVD-R • Press DVD/VCR to select the appropriate mode. You can record programs you watch on TV onto video Press REC MODE/SPEED to select the recording tapes or DVDs. - Page 55 Recording Press REC. Recording one program while watching another When recording starts, “ ” appears on the screen for While the unit is recording, press TV/VCR to select the about 4 seconds. TV position. The “VCR” will go off and recording will continue. Select the TV channel you want to watch by using the TV Note channel selector.
-
Page 56: One-Touch Timer Recording (Otr)
Recording Preparation: One-touch Timer Recording (OTR) • Turn ON the TV and set to the video input mode. • Load a recordable DVD or video tape into the unit. • Press DVD/VCR to select the appropriate mode. VR mode Video mode DVD-R The One-touch Timer Recording feature provides a Example:... -
Page 57: Vcr Plus+ Programming System
Recording Press to select “GUIDE CH SET” and press VCR Plus+ ® programming system ENTER. A window appears to set a guide channel number and the corresponding tuner channel number. VR mode Video mode DVD-R What is the VCR Plus+ programming system? SETUP MENU VCR Plus+ system is a timer programming system TIMER REC SET... - Page 58 Recording Setting the timer program using the VCR Plus+ Press to highlight OK, then press ENTER. system VCR Plus+ The VCR Plus+ system simplifies timer recording so PlusCode# 1 2 3 4 5 6 7 8 9 that you just enter a PlusCode number (which you can TYPE ONCE find in your TV listings guide) for the program you want...
-
Page 59: Timer Recording
Recording 7 Press TIMER REC. The timer indicator “ ” will Timer recording appear on the display and the unit stands by for recording. • If the program is DVD recording only, the unit will VR mode Video mode DVD-R change to VCR mode automatically. - Page 60 Recording Press SETUP. ONCE: Recording on the selected “DATE” The SETUP MENU screen will appear. EVERY SUN: Recording every Sun. EVERY MON: Recording every Mon. SETUP MENU EVERY TUE: Recording every Tue. TIMER REC SET SYSTEM SETUP EVERY WED: Recording every Wed. AV SETUP REC SETUP EVERY THU: Recording every Thu.
- Page 61 Recording 10 Press to select “REC MODE” and press In case timer programs-overlap ENTER. Do not overlap timer programs as portions of the The recording modes for the media selected in “REC conflicting programs will be lost. The first recording TO”...
-
Page 62: Stereo Recording And Playback
Recording When a MTS STEREO broadcast is received, the word Stereo recording and playback “STEREO” will appear on the screen and the program can be viewed or recorded in stereo. The Hi-Fi STEREO recording procedure is the same as for normal recordings. The VHS Hi-Fi audio system permits high fidelity recording of MTS STEREO TV broadcasts. -
Page 63: Editing
Editing Chapter 7 Editing Editable items Editing the disc The items that can be edited are different between original title and playlist. For the disc in Video mode, This section explains how to edit the recorded contents only the title name can be edited. on DVD-RWs. -
Page 64: Editing A Playlist
Editing Creating a playlist Editing a playlist VR mode VR mode Press TITLE MENU. You can create and edit the playlist based on the The title menu will appear. original title. TITLE MENU DISC NAME:–––– REC DATE :11/23/2003 Title 1 11/23/2003 08:41AM 006 SLP TIME :08:41AM... -
Page 65: Changing A Title Name
Editing Changing a title name Press ENTER. The keyboard screen will appear. VR mode Use the keyboard screen to enter the title name. Family RETURN Letters Exit Numbers CLEAR < > Back Signs DISPLAY DISPLAY STOP Space bar Caps Press DISPLAY/CALL to return to the title menu. TITLE MENU DISC NAME:––––... -
Page 66: Erasing A Scene (Edit Title)
Editing Erasing a scene (Edit title) Press ENTER. The EDIT TITLE screen appears. VR mode You can erase an unnecessary scene from the created EDIT TITLE playlist. When you erase the scene from the playlist, the scene is not erased from the original title. NAME Family CHAPTER... - Page 67 Editing Press to select “SET END” at the end point of the scene you want to erase and press ENTER. The still image at the end point appears at the right small screen. EDIT TITLE NAME Family CHAPTER 00:15:58 LENGTH 00:15:58/00:30:17 Adjust start Adjust end Finish...
-
Page 68: Combining The Title
Editing Combining the title Press ENTER. Select the title that you want to combine from the title menu. VR mode You can create a playlist by combining the several original titles or playlists. TITLE MENU To combine the titles, it is necessary to create a playlist DISC NAME:––––... -
Page 69: Erasing A Playlist
Editing Erasing a playlist TITLE MENU VR mode DISC NAME:–––– You can erase the created playlist. Even if you erase the REC DATE :12/01/2003 11/23/2003 08:41AM 006 SLP TIME :06:52PM playlist, the original title will not be erased. 11/25/2003 10:03PM 011 SP LENGTH :00:30:07 11/29/2003 11:30AM 009 SP... -
Page 70: Editing An Original Title
Editing Adding a chapter mark Editing an original title VR mode VR mode You can add a chapter mark to the original title. You In VR mode, you can edit various items, whereas in can add up to 999 chapter marks to one disc, and up to Video mode, you can edit the title names only. - Page 71 Editing At the point in the scene you want to add the chapter mark, press ENTER. The playback is paused and the position of the added chapter mark appears green. ADD CHAPTER MARK NAME 11/23/2003 08:41 AM CHAPTER LENGTH 00:03:08/00:30:17 The added chapter mark If you want to continue to add chapter marks, repeat step 5.
-
Page 72: Combining Chapters
Editing Combining chapters Press SKIP + or SKIP - to select the chapter marks to be erased. VR mode Press ENTER. By erasing the added chapter marks, the chapters can The chapter marks are erased and 2 chapters are be combined. combined into 1 chapter. -
Page 73: Erasing A Scene (Edit Title)
Editing Erasing a scene (Edit title) Press TITLE MENU to display the title menu. Select the original title where a scene you want VR mode to erase is included. You can erase an unnecessary scene from the original • Press to select the original title. -
Page 74: Erasing An Original Title
Editing Erasing an original title Press TITLE MENU to display the title menu. Select the original title you want to erase. VR mode • Press to select the original title. You can erase an original title. Erasing the title deletes •... -
Page 75: Changing A Disc Name
Editing Changing a disc name Changing a disc name Press TITLE MENU to display the title menu. VR mode Video mode DVD-R • Press to select “DISC NAME”. You can change a disc name from the title menu. • Press to display the editing menu. -
Page 76: Using The Keyboard Screen
Editing Using the keyboard screen Inputting characters There are two methods for inputting characters. VR mode Video mode DVD-R This section explains the function of the keyboard Character input 1 screen and how to input characters. The disc name and Press to select the character to be the title name can be changed using the keyboard... - Page 77 Editing Erasing a character Selecting between uppercase and lowercase letters You can erase the input character. You can select either uppercase or lowercase letters when modifying your titles, using the keyboard screen with the “Letters” tab. Erasing method 1 Press STOP. Press to select “Back”.
-
Page 78: Dubbing
Dubbing Chapter 8 Dubbing Press REC MODE/SPEED and select the recording Dubbing a tape onto a disc mode. • When REC MODE/SPEED is pressed each time, “SP”, “LP”, “SLP” or “XP” is selected in this order. VR mode Video mode DVD-R •... -
Page 79: Dubbing A Disc Onto A Tape
Dubbing Preparation: Dubbing a disc onto a tape • Turn ON the TV and set to the video input mode. • Load a source disc and a video tape for recording. VR mode Video mode DVD-R • Confirm the remaining tape for recording before You can record both video and audio from a disc to a operation. -
Page 80: Dubbing Using Other Equipment
Dubbing When a video is recorded using this unit Dubbing using other equipment Preparation: VR mode Video mode DVD-R • Turn ON the TV and set the unit to the video input mode. You can connect another VCR or camcorder for •... -
Page 81: Additional Information
Additional information Chapter 9 Additional information Language code list Enter the appropriate code number for the initial settings “DVD MENU”, “AUDIO” and/or “SUBTITLE” (see page 24). Language(Lamguage code letter), Language Code Abkhazian, 1112 Danish, 1411 Italian, 1930 Norwegian, 2425 Swedish, 2932 Afar, 1111 Dutch, 2422 Japanese , 2011... -
Page 82: Glossary
Additional information Glossary DTS stands for Digital Theater System. DTS is a A-B Repeat Playback surround system different from Dolby Digital that has Playback that repeats between two set points, A and B. become a popular surround sound format for movies. "DTS"... - Page 83 Additional information Video mode Acronym for Public Broadcast System. The PBS This recording format is compatible with commercially channel transmits data for auto clock setting. available DVD players. playlist VR mode User-created titles based on each original title. This recording format is the basic DVD-RW recording format, and lets you enjoy the various editing functions available with this unit.
-
Page 84: Error/Warning Message List
Additional information Error/Warning message list ERROR/WARNING CAUSE POSSIBLE SOLUTIONS PAGE MESSAGE Power ON SYSTEM ERROR The power was shut down with- Wait until the message disap- PLEASE WAIT out completing the termination pears. process due to a power failure or disconnection of the AC cord plug. - Page 85 Additional information ERROR/WARNING CAUSE POSSIBLE SOLUTIONS PAGE MESSAGE CANNOT RECORD Recording was attempted on a You cannot record a copy pro- PROTECTED IMAGE copy protected video. tected video. RECORDING INTERUPTED The video was changed to a copy- You cannot record a copy pro- PROTECTED IMAGE guard format in recording.
-
Page 86: Troubleshooting
Sometimes the trouble may lie in another component. Investigate the other components and electrical appliances being used. If the trouble cannot be rectified even after checking the points below, ask your nearest Pioneer authorized service center or your dealer to carry out repair work. Note •... - Page 87 Additional information SYMPTOMS POSSIBLE SOLUTIONS PAGE A disc recorded using this recorder • Check that the disc is finalized. cannot be played back in other • Some DVD players will not play even if the disc has been finalized. 10, 28 players.
-
Page 88: Handling Discs
Use of shaped discs is not recommended scratches can still result in a disc becoming unusable. for this product. Pioneer disclaims all liability arising in Should a disc become marked with fingerprints, dust, connection with the use of shaped discs. -
Page 89: Video Head Cleaning
Additional information Video head cleaning Hints on installation We want you to enjoy using this unit for years to come, Video head clogging so please bear in mind the following points when The video heads are the means by which the DVD/VCR reads choosing a suitable location for it: the picture from the tape during playback. -
Page 90: Specifications
Additional information Audio characteristics Specifications frequency response ........DVD: 4Hz - 22kHz CD: 4Hz - 20kHz S/N Ratio ................90dB GENERAL Harmonic distortion ........... Less than 1% Power supply ............. AC 120V 60Hz Wow and flutter ........Less than 0.01% Wrms Power consumption ........ - Page 91 253 Alexandra Road, #04-01, Singapore 159936 TEL: 656-472-1111 PIONEER ELECTRONICS AUSTRALIA PTY. LTD. 178-184 Boundary Road, Braeside, Victoria 3195, Australia, TEL: (03) 9586-6300 PIONEER ELECTRONICS DE MEXICO S.A. DE C.V. Blvd.Manuel Avila Camacho 138 10 piso Col.Lomas de Chapultepec, Mexico,D.F. 11000 TEL: 55-9178-4270 K002E Printed in Thailand <VRB1351-B>...
Need help?
Do you have a question about the DVR-RT300 and is the answer not in the manual?
Questions and answers