Table of Contents
Advertisement
Advertisement
Table of Contents

Related Manuals for Pioneer DVR-RT500


Summary of Contents for Pioneer DVR-RT500
- Page 1 VRB1351A_EN_01_05 04.6.14, 10:25 AM...
- Page 2 CAUTION RISK OF ELECTRIC SHOCK DO NOT OPEN The lightning flash with arrowhead, within CAUTION: The exclamation point within an equilateral an equilateral triangle, is intended to alert TO PREVENT THE RISK OF ELECTRIC triangle is intended to alert the user to the the user to the presence of uninsulated SHOCK, DO NOT REMOVE COVER (OR presence of important operating and...
- Page 3 IMPORTANT SAFETY INSTRUCTIONS READ INSTRUCTIONS — All the safety and GROUNDING OR POLARIZATION OBJECT AND LIQUID ENTRY — Never push operating instructions should be read before the • If this product is equipped with a polarized objects of any kind into this product through product is operated.
- Page 4 Use of this copyright protection the power cord once in a while. When you find it technology must be authorized by Macrovision damaged, ask your nearest PIONEER authorized Corporation, and is intended for home and other service center or your dealer for a replacement.
- Page 5 We Want You Listening For A Lifetime Used wisely, your new sound equipment will provide a lifetime of fun and enjoyment. Since hearing damage from loud noise is often undetectable until it is too late, this manufacturer and the Electronic Industries Association’s Selecting fine audio equipment such as the unit Consumer Electronics Group recommend you avoid you’ve just purchased is only the start of your...
-
Page 6: Table Of Contents
Contents Setting the screen ............29 01 Before you start TV SCREEN ..............29 Features ................8 STILL MODE ..............29 Discs / content format playback compatibility ....9 LINE1 INPUT / LINE2 INPUT ......... 30 Setting the image quality ..........30 BRIGHTNESS .............. - Page 7 Playing back programs ..........43 Changing a title name ........... 65 Playing back track by specifying the time ....43 Erasing a scene (Edit title) ..........66 MP3/WMA/JPEG playback ..........44 Combining the title ............68 Using the BROWSER screen ........44 Erasing a playlist ............
-
Page 8: Before You Start
Chapter 1 Before you start • One-touch Timer Recording (OTR) Features VR mode Video mode DVD-R Not only can you playback and record video tapes, but The One-touch Timer Recording feature provides a you can also playback DVD discs or make recordings simple and convenient way to make a timed recording. -
Page 9: Discs / Content Format Playback Compatibility
Discs recorded in packet write mode (UDF format) are recorder/writer, we recommend using Ver. 1.1 discs. not compatible with this recorder. The following table shows older Pioneer DVD recorder Check the DVD-R/RW or CD-R/RW software disc boxes compatibility with DVD-RW Ver. 1.2 / 4x discs. - Page 10 CPRM compatible device. Operating DVD-Video Note that Pioneer cannot guarantee that discs • Some operations od DVD-Video may be prohibited recorded using this recorder will play on other by the manufacturer, or some operation methods or players.
-
Page 11: Control And Displays
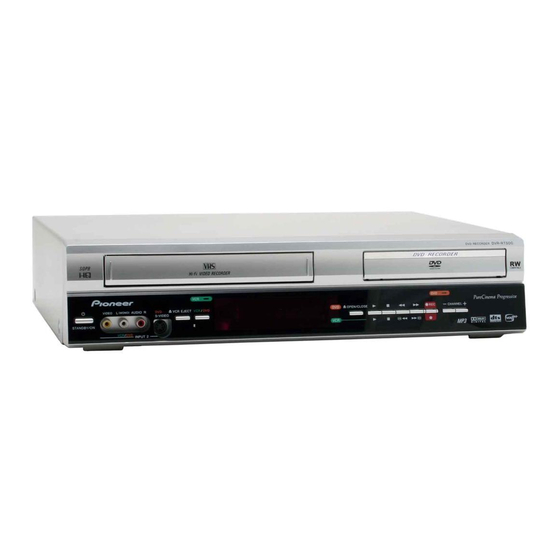
Controls and displays Chapter 2 Controls and displays Front panel FF (Fast Forward) button Disc tray REC button VCR indicator Cassette Loading Slot PLAY button DVD indicator Display window CHANNEL –/+ button STANDBY/ON VCR/DVD button REW (Rewind) button button AUDIO (L/R)/VIDEO VCR EJECT button STOP button IN (INPUT 2) jacks... -
Page 12: Display Window
Controls and displays Display window Display Description Lights during video tape playback. Video tape is temporarily stopped. Lights during video tape recording. Progressive scanning mode. Timer recording display. XP/SP/LP/SLP 4 DVD recording modes. XP , SP, LP or SLP is selected in turn by pressing the REC MODE/SPEED repeatedly. SP/SLP 2 VCR recording modes. -
Page 13: Remote Control
Controls and displays Note • Some discs may not playback correctly, or chapter number, playback time, etc may not be displayed. Remote control RETURN (page 23, 45) 28 REC MODE/SPEED (page 54, 56) Closes the menu window. Selects the recording mode. 10 CLEAR/CANCEL 29 DUBBING (page 78) Cancels input data in the setting... -
Page 14: Putting The Batteries In The Remote Control
Controls and displays Putting the batteries in the remote Using the remote control control Keep in mind the following when using the remote control: Open the battery compartment cover on the back of • Make sure that there are no obstacles between the the remote control. -
Page 15: Power Source
Controls and displays Power Source TO USE AC POWER SOURCE Use the AC polarized line cord provided for operation on AC. Insert the AC cord plug into a standard 120V 60Hz polarized AC outlet. Note • Never connect the AC line cord plug to other than the specified voltage (120V 60Hz). -
Page 16: Connecting Up
Connecting up Chapter 3 Connecting up Important • Before making or changing any rear panel connections, make sure that all components are switched off and unplugged from the wall outlet. Antenna connection If you are using an antenna system, follow these instructions. If you are a cable (CATV) subscriber, skip ahead to page 18 for the proper connections. - Page 17 Connecting up DVD/VCR TO TV CONNECTION After you have connected the antenna to the DVD/VCR, you must connect the DVD/VCR to the TV. Below are 3 common methods of connecting your DVD/VCR to a TV. Find the type of TV you are using and follow the connection diagram.
-
Page 18: Catv(Cable Tv) Connections
Connecting up CATV(CABLE TV) connections Many cable companies offer services permitting reception of extra channels including pay or subscription chan- nels. This DVD/VCR has an extended tuning range and can be tuned to most cable channels without using a cable company supplied converter box, except for those channels which are intentionally scrambled. - Page 19 Connecting up Important • Make sure the TV/CATV menu option is set to the “CATV” mode. This DVD/VCR cannot receive scrambled programs since it does not contain a descrambler. In order to receive scrambled programs, your existing descrambler must be used. Descrambler boxes are available from cable companies. Consult your local cable company for more information concerning connection to their descrambler equipment.
-
Page 20: Connections With The Tv Or Audio Component
Connecting up Connections with the TV or audio component The exact arrangement you use to interconnect various video and audio components to the DVD/VCR is dependent on the model and features of each component. Check the Owner’s Manual provided with each component for the location of video and audio inputs and outputs. - Page 21 Connecting up Connect to a stereo amplifier with audio output You can enjoy high quality audio by connecting the audio output to your amplifier. Connect the audio output jacks to any line-level inputs (such as AUX, DVD, CD, etc.) of an audio amplifier. DVD/VCR Stereo Amplifier Audio (L) output...
-
Page 22: Getting Started
Getting started Chapter 4 Getting started Auto clock setting Preparation: You must connect the antenna or cable before connect- ing the AC cord to the power source. Wait 30 minutes with the power turned off, after the antenna or cable is connected, for the auto clock feature to activate. -
Page 23: Setup Menu
Getting started Select any channel to receive a TV station in Press to select the desired menu and your area. press ENTER. The channel number will appear on the screen for about The submenu screen of the selected menu will appear. 4 seconds. -
Page 24: Setting The Language
Getting started Selectable languages: Setting the language ENGLISH, FRANCAIS, ESPANOL You can choose the language of the menu screen, DVD The language you have selected will play if it is menu, DVD audio and subtitles. recorded on the disc. Preparation: ORIGINAL •... -
Page 25: Setting The Parental Control
Getting started Note Setting the parental control • The selected level will apply to operations executed Some discs are specified as not suitable for children. after this. This unit can prevent playback of such discs. • The unit cannot restrict playback of some discs. Preparation: •... -
Page 26: Setting The Clock
Getting started STANDARD TIME (Time zone) Setting the clock In the rare event that you live within the broadcast range The clock is set to the correct time automatically, but it of two stations in two different time zones, the DVD/VCR can also be set manually. -
Page 27: Setting The Disc
Getting started NEW DISC FORMAT Setting the disc If you insert an unused disc, the disc is automatically You can format, protect, or finalize a disc. formatted. If you use the DVD-RW (Ver.1.1 or later), you can select Preparation: the mode to be used for automatic format. •... -
Page 28: Finalize
Getting started FINALIZE UNDO FINALIZE To play a DVD disc recorded on this unit you must You can cancel the finalization of a finalized DVD-RW (in finalize the disc to insure compatibility with other DVD VR mode). players. In addition if you are using a DVD-RW disc you You cannot cancel the finalization for discs other than must record in Video mode. -
Page 29: Dimmer (Brightness Of The Display Window)
Getting started DIMMER (Brightness of the display window) TV SCREEN You may adjust the brightness or turn off the display on You can select the TV screen size to suit the screen the front panel of the unit. image. Select “DIMMER” and select the display window status Select “TV SCREEN”... -
Page 30: Line1 Input/Line2 Input
Getting started LINE1 INPUT/LINE2 INPUT Setting the audio This unit comes with an S-Video input jack and Video This section describes audio settings. input jack. When you use an S-Video or Video input jack, you must select the input mode. Preparation: Select “LINE1 INPUT”... -
Page 31: External Audio Input
Getting started EXTERNAL AUDIO INPUT INITIAL REC TO The audio mode for the audio input jack can be se- You can select the recording media that is first dis- lected, choosing either stereo or monaural. played in the item “REC TO” on the timer recording Select “EXTERNAL AUDIO INPUT”... -
Page 32: Setting The Channel
Getting started ADD/DELETE (channels) Setting the channel You can add the channels you want or delete the This DVD/VCR is equipped with a channel memory channels you do not want manually. feature that allows you to skip channels up or down to Select “ADD/DELETE”... -
Page 33: Playback
Playback Chapter 5 Playback Press PLAY to start playback. playback procedure Press STOP to end playback. • The DVD/VCR memorizes the stopped point, DVD-Video VR mode Video mode DVD-R depending on the disc. “ ” appears on the screen for approx. 4 seconds. “ ” keeps blinking in the display until the playback is stopped completely. -
Page 34: Playback By Selecting A Title
Playback Press TITLE MENU. Playback by selecting a title The title menu will appear. VR mode Video mode DVD-R Playlist Thumbnail image When playing back a recorded disc, you can display the Original titles Recording information title menu and select the title to be played back. TITLE MENU Note DISC NAME:––––... -
Page 35: Checking Media Information
Playback Press DISPLAY/CALL. Checking media information Media information will appear. DVD-Video VR mode Video mode DVD-R The number of titles and present title number Various information on the loaded disc can be displayed Playback elapsed time Playback condition on the TV screen. present time (playback, stop, present channel... -
Page 36: Special Playback
Playback Fast forward playback Special playback Press F.FWD during normal playback. Each press of F.FWD will increase the speed of the DVD-Video VR mode Video mode DVD-R search (x2), (x12), (x24), (x60). (The speed of the serch is increased up to only 2 steps Note in Audio CD.) •... -
Page 37: Commercial Skip / Locating A Specific Scene
Playback Commercial skip Commercial skip / Locating a specific Use this function to skip commercials while you scene playback. Press CM SKIP during playback. DVD-Video VR mode Video mode DVD-R The time jumps to a point approximately 30 seconds later and playback resumes. Note •... -
Page 38: Repeat Playback
Playback Note Repeat playback • If the time from the title top is less than 10 seconds DVD-Video VR mode Video mode DVD-R when ONE TOUCH REPEAT is pressed, the title top is repeated and then the video is played back. •... -
Page 39: Title Selection / Dvd Menu
Playback desired title. Title selection / DVD menu Press TITLE MENU/TOP MENU during playback. The title menu appears on the screen. DVD-Video • Press TITLE MENU/TOP MENU again to resume playback at the scene when you pressed TITLE MENU/TOP MENU. Press to select the desired title. -
Page 40: Changing Angles / Zooming
Playback Changing angles Changing angles / Zooming When playing back a disc recorded with multi-angle facility, you can change the angle that you are viewing DVD-Video VR mode Video mode DVD-R the scene from. Press ANGLE during playback. The current angle will appear. Press ANGLE repeatedly until the desired angle is selected.
Need help?
Do you have a question about the DVR-RT500 and is the answer not in the manual?
Questions and answers