Table of Contents
Advertisement
Quick Links
Advertisement
Table of Contents

Subscribe to Our Youtube Channel
Related Manuals for NanoEnTek EVE HT


Summary of Contents for NanoEnTek EVE HT
- Page 2 Fax: +1-781-790-5649 The information in this user manual is described as accurately as possible. Firmware and software changes and updates may change without prior consent or notification. Copyright © 2022 NanoEntek, Inc. All right reserved. Published in Korea Document number:...
-
Page 3: Table Of Contents
Table of Contents Introduction General Description ..........................5 Components ............................6 Product Description Front View…………… .......................... 7 Upper Side View ..........................7 Left Side View ............................8 Installation Environmental Requirements ....................... 9 Powering on and Installation ......................10 Instrument Settings ..........................12 Recommanded Actions ........................ - Page 4 ……………………………………………………………………………………....…..…44 Warnings …..……………………………………………………………………………….…….45 Technical Support...
-
Page 5: General Description
General HT is an automated multi-cell counter designed to count number of cells and measure viability of cells using trypan blue exclusion method. EVE Description uses automated image acquisition and proprietary image analysis method to quantify cell numbers and viabilities. HT requires only 20 μL of samples to run measurements. -
Page 6: Components
Components HT is shipped with the following components. Upon receiving the instrument, please check that all items listed below are included in the shipment. If any of the items are missing or damaged, contact your local distributor or sales@nanoentek.com. -
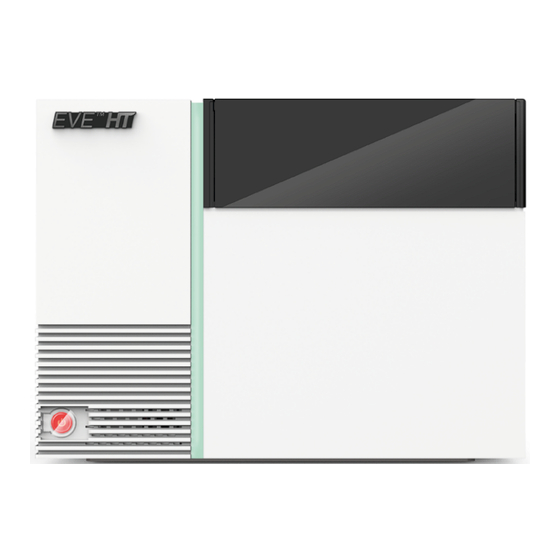
Page 7: Front View
Front View Front view showing various parts of EVE Part name Description Power button Powering on/off Door Instrument door Upper Side Upper side view showing various parts of EVE View Part name Description LED indicator Product status display Plate holder Holder for plate when inserted/ejected... -
Page 8: Left Side View
Left Side Left side view showing various parts of EVE View Part name Description Main power Connection port for electrical outlet PC connection ports Connection ports for PC... -
Page 9: Environmental Requirements
Environmental CAUTION ≤ Requirements At low temperature ( 10 °C), allow the instrument to warm up for 10 minutes at ambient temperature before use. To ensure correct operation and stable performance, install EVE HT in a proper location by complying with the followings: •... -
Page 10: Powering On And Installation
HT main software. CAUTION If the error code occurs during the program initializing process, turn off the instrument and the PC. Repeat Step 4 and 5 above. If the same error message appears repeatedly, contact your local distributor or sales@nanoentek.com. - Page 11 6. Log in from the login screen. (default ID/PW: adam/0000)
-
Page 12: Instrument Settings
Press ‘SETTING’ from the startup screen. The setting menu allows you to Instrument set up the followings. Settings 1. Click ‘Calibration’ to calibrate the instrument image background level. a) Sample preparation ① Mix 20 μL of culture media and 20 μL of trypan blue thoroughly. ②... - Page 13 Instrument 4. Set the Counting parameter. Settings It is highly recommended that users use default counting parameters. However, depending on cell types and media conditions, one may need to adjust these counting parameters. ① Sensitivity level As this level gets lowers, it becomes easier to remove the effects of debris. <...
- Page 14 ③ Viability level Instrument As this level gets higher, marginally dark objects won’t be counted as dead Settings cells. <Viability level 2> <Viability level 7> 5. Update to install new software or firmware as they become available. ① Connect the USB with the update file to computer. ②...
-
Page 15: Recommanded Actions
Recommended To obtain the best results, follow these recommendations: Actions Sample 1. Wear protective gloves while handling samples. 2. For accurate results, ensure that samples are well mixed. 3. Also, allow loaded samples to settle for 2 minutes before Focus setting. -
Page 16: Quality Control
Quality This is for quality control using QC plate. Follow the instruction below only if necessary. Control 1. Prepare the QC plate. QC Plate Preparation 2. Open the EVE HT door. 3. Push the plate holder cap to open up the plate holder. 4. - Page 17 Quality 5. Close the plate holder first then the door. Control QC Plate Preparation CAUTION Make sure the door and plate holder are properly closed. Select menu 1. Click the ‘Measure tap’. 2. Click the ‘QC’. 3. Click the ‘Slide’. Well setting 1.
-
Page 18: Counting Qc Plate
Focus example Quality Good focus Control ▶ Objects have clear boundaries Counting QC Plate Bad focus ▶ Objects have blurry boundaries. 2. Click ‘Check’ button to check live and dead cells at the current focus location. 3. When you are satisfied, click ‘Set Focus’ and ‘Apply’ button. 4. -
Page 19: Bead Preparation
Quality This is for quality control using Bead Solution. Follow the instruction below only if necessary. Control 1. Let the Bead Solution come to room temperature for up to 10 minutes Bead before use. 2. Shake bottle vigorously or vortex briefly for 5 seconds before use. Preparation 3. - Page 20 5. Load 20 μL of mixture into each channel of EVE HT Counting plate. Quality Control Bead Preparation Correct and incorrect example of loaded sample Correct Incorrect 6. Open the EVE HT door. 7. Push the plate holder cap to open up the plate holder. 8.
-
Page 21: Bead Counting
Quality Select menu 1. Click the ‘Measure tap’. Control 2. Click the ‘QC’. 3. Click the ‘Bead’. Bead Lot setting Counting * The last lot used will be automatically applied. Creating new lot 1. Click ‘Lot Setting’ button followed by ‘New’ button. 2. - Page 22 Quality Focus setting Control 1. Adjust the focus using the focus buttons. Fine focus: Hold ‘Shift’ or ‘Control’ button and scroll the mouse Bead wheel for adjustment. Counting Focus example Good focus ▶ Beads have a uniformly dark color throughout the beads with no bright centers.
- Page 23 Quality Data Analysis Control The result should be within the range on the label of the QC bead bottle. (e.g. 8.0E+05 ~ 1.2E+06/mL) Bead Counting...
-
Page 24: Sample Test Sample Preparation
Sample Test Instruction is provided in this chapter for preparing the sample using EVE HT trypan blue stain and disposable EVE HT Counting Plate. Sample 1. Prepare cell suspensions either in growth media or PBS Preparation 2. Thoroughly mix the cell pellet by vortexing. 3. - Page 25 7. Load 20 μL of sample mixture into the EVE Sample Test HT Counting plate. Sample Preparation ☞ NOTE HT can analyze cell concentrations of 1 x 10 to 1x 10 cells/mL. Correct and incorrect example of loaded sample Correct Incorrect 8.
- Page 26 9. Insert the EVE HT Counting plate loaded with sample into the plate Sample Test holder. Sample Preparation 10. Close the plate holder first then the door. CAUTION Allow sample to settle for ‘2 minutes’ after inserting the EVE Counting Plate into the instrument. CAUTION Make sure to put the plate all the way in when inserting the plate.
-
Page 27: Quick Count
Sample Test Quick Count * Only images currently viewed can be counted. 1. Click the ‘Insert’ button. 2. After finish the insert the plate, click the sample loaded well. 3. Set the focus following the focus guide. 4. Adjust the focus using the ‘focus’ buttons. ... - Page 28 Sample Test ▶ Live cells with dark centers are counted as the dead cells. Quick Count 5. Check the counting parameter. 6. Click the ‘Count’ button. 7. The results are displayed on the Quick Count section from the Data menu.
-
Page 29: Measure
Sample Test This section provides procedures and tips for cell counting using EVE Measure Measure menu 1. Click ‘Measure’ menu. 2. For project type, select ‘Cell’ and enter ‘Project name’. 3. Select ‘Cell type’ and enter ‘Sample name’. Cell type Make the new cell type. - Page 30 Sample Test Use the previous Well setting. Well setting format Measure User can edit the well setting in excel file. ᆞ Export 1. Click the ‘right’ button of the mouse in the Well Setting window. 2. Click the ‘Format’ or ‘Export’ and enter the file name and pathway. ᆞ...
-
Page 31: Data
Data Data menu allows users to review the raw data including counting results and images from each well. Reviewing, editing, saving and exporting the data can be done. Data menu (Well graph) Data menu (Plate graph) - Page 32 Data Data list When counting is complete, all the information is automatically stored in the data list. This list can be sorted by either date or name. Quick Count Data list taken from the Quick menu. Data list taken from the QC mode (Project type). Cell Data list taken from the Cell mode (Project type).
- Page 33 Data Users can edit the following functions through the captured image: ㆍCircle on/off ㆍNavigation on/off ㆍImage editing: 1. Right-click on the circle to go to menu. Right-click and drag images for multiple selection. 2. Click live, dead or debris. 3. Click ‘Save’ button to apply or ‘Reset’ button to cancel.
-
Page 34: Approval
Approval The list shows data that can be requested for approval. Requestable 1. Select the data to get approve. 2. Click the ‘Request’ button. 3. Select an approver to request approval. 4. Click the ‘Apply’ button. The requesting data are displayed. It is possible to ‘Cancel’... -
Page 35: User
User User management ᆞNew user registration. 1. Enter the user ID and PW. 2. Click the ‘User privilege Setting’. 3. Set the User privilege in each menu. • User and Supervisor default setting can be changed. Set the privilege and click the save button. 4. -
Page 36: Maintenance And Cleaning
Maintenance Clean the surface of EVE HT with a damp cloth. and Cleaning The EVE HT does not need regular maintenance. To troubleshoot problems with the instrument, contact technical support. Do not perform any repairs or service on EVE HT to avoid damaging the instrument. -
Page 37: Troubleshooting
Trouble Inaccurate result Shooting 1. Low and high results ㆍEVE HT is designed to read samples from 1 × 10 cells/mL to 1 × 10 cells/mL. ㆍIf your sample is out of this range, you may need to dilute the sample or add more cells and read the sample again. -
Page 38: Error Message
Make sure put the plate all the way in. Please close the cover to use the Close the cover of plate holder. Please close the door to use the Close the door completely. If the same error message appears repeatedly, contact your local distributor or sales@nanoentek.com. -
Page 39: Warranty
2. Repair or modification done by anyone other than NanoEntek or an authorized agent. 3. Damage caused by substituting alternative parts. 4. Use of fittings or spare parts supplied by anyone other than NanoEntek. 5. Damage caused by accident or misuse. 6. Damage caused by disaster. -
Page 40: Technical Specifications
Technical Specifications Measuring range 1 x 10 ~ 1 x 10 cells/mL Analysis time < 3 minutes / 48 tests Light Bright Number of channel 5 ~ 80 μm Cell size 21 CFR Part 11 Available Operation System Windows 10 Size (W x D x H) 586 mm (W) x 498 mm (D) x 458 mm (H) Weight... -
Page 41: Ordering Information
Ordering Cat. No. Description Contents information Main device (1 pc) A High-throughput EVE HT Desktop & monitor (1 set) multi-cell counter Multi-pipette (1 pc) 48 tests/kit Counting plate EVH-020 HT Counting kit (20 pcs, 48 tests per plate) Mix well plate (20 pcs) -
Page 42: Safety Precautions
Safety Review and follow the safety instructions below: Precautions • Do not install the instrument in a humid place such as a greenhouse or an incubator to avoid a danger of electric shock. If water or other material enters the instrument, the adaptor, or power inlet, disconnect the power cord and contact a service person. -
Page 43: Explanation Of Safety Symbols
Explanation of The following symbols are found on the medical device and this document. Always use the instrument in the safest possible manner. Safety Symbols Symbol Meaning Caution & Warning Protective earth (Ground) Power On/Off The moving parts symbol indicates areas of the medical device in which moving parts can cause injuries. - Page 44 Warnings 1. After using this medical device, please turn off the main power. If not, it may cause malfunction or lifetime reduction of medical device. 2. When turning off the medical device, make sure to lock the device by pressing ‘Lock’ button. If not, it may cause mechanical problem(s) or error message will appear during the device booting.
-
Page 45: Technical Support
Technical Visit our Website at www.nanoentek.com for: Support • Technical resources, including manuals, FAQs, etc. • Technical support contact information • Additional product information and special offers For more information or technical assistance, please call or email. NanoEntek, Inc. 851-14, Seohae-ro, Paltan-myeon, Hwaseong-si,... - Page 46 NESMU-EVEHT-001E (V.0.2) NanoEntek, Inc. 851-14, Seohae-ro, Paltan-myeon, Hwaseong-si, Gyeonggi-do, 18531, Korea Tel: +82-2-6220-7940 Fax:+82-2-6220-7999 NanoEntek America, Inc. 220 Bear Hill Road, Suite 102, Waltham, MA 02451, USA Tel: +1-781-472-2558 Fax:+1-781-790-5649 Email sales@nanoentek.com Website www.nanoentek.com...
Need help?
Do you have a question about the EVE HT and is the answer not in the manual?
Questions and answers